Categories
Featured How To Info

Operation Sindoor Live: How To Map Real-Time Action, Track Live Updates On Smartphones

Key Highlights

  • Operation Sindoor launched by Indian Army
  • Targets terrorist infrastructure in Pakistan occupied Kashmir and Pakistan
  • For live updates only trusted media publishers should be followed
  • Live mapping can be done on smartphones
  • Satellite tools can be used for tracking live updates

Post the heinous attack on tourists claiming multiple lives in Kashmir, Indian army launched its strategic move to hit terrorists hard. Called Operation Sindoor, the war announced against terrorists targets all the their important infrastructures. And amidst all the rising tensions across the India-Pakistan border, specifically Kashmir, staying updated with Operation Sindoor certainly is more important now. And what if tell you there are ways that can help you get the live ground report of the Operation Sindoor and future actions. In this article, we tell you how to make full use of of your smartphone not to just stay updated with the latest news related to Indo-Pak tensions, but also the tricks to map all the action live on your device.

For the tech geeks, stay updated with the latest cutting-edge gadgets in the market, exclusive tech updates, gadget reviews, and more right on your phone’s screen. Join Giznext’s WhatsApp channel and receive the industry-first tech updates.

Also Read: Level Up Your Mobile Gaming:Top 5 Efficient Methods To Enhance Smartphone Battery Life, Performance

Operation Sindoor: Army’s Strategy Targeting Terrorists

Operation Sindoor is being carried out to counter the terror attack by the infiltrators on April 22 in Pahalgam. This attack killed several Indians and even a Nepali citizen along with an officer serving in the Indian Navy. Pakistan-based terror organisation LeT (Lashkar-e-Taiba) is said to be the brains behind these recent attacks in Jammu & Kashmir.

At the moment, the Indian Government is being tight-lipped across the strategies being developed to improve border security and curb all the menace created by the terror organisations. Instead a sense of panic has been created after the announcements of nationwide mock drills today, i.e., May 7, 2025. The tension is definitely flaring and getting development on your smartphone that too from trusted sources is more than necessary.

Also Read: Travelling Overseas? Here’s How To Activate International UPI On Gpay, PhonePe For Payments Abroad

Mapping Operation Sindoor Live Updates: Apps And Satellite Imagery

Apps For Live Tracking War Updates

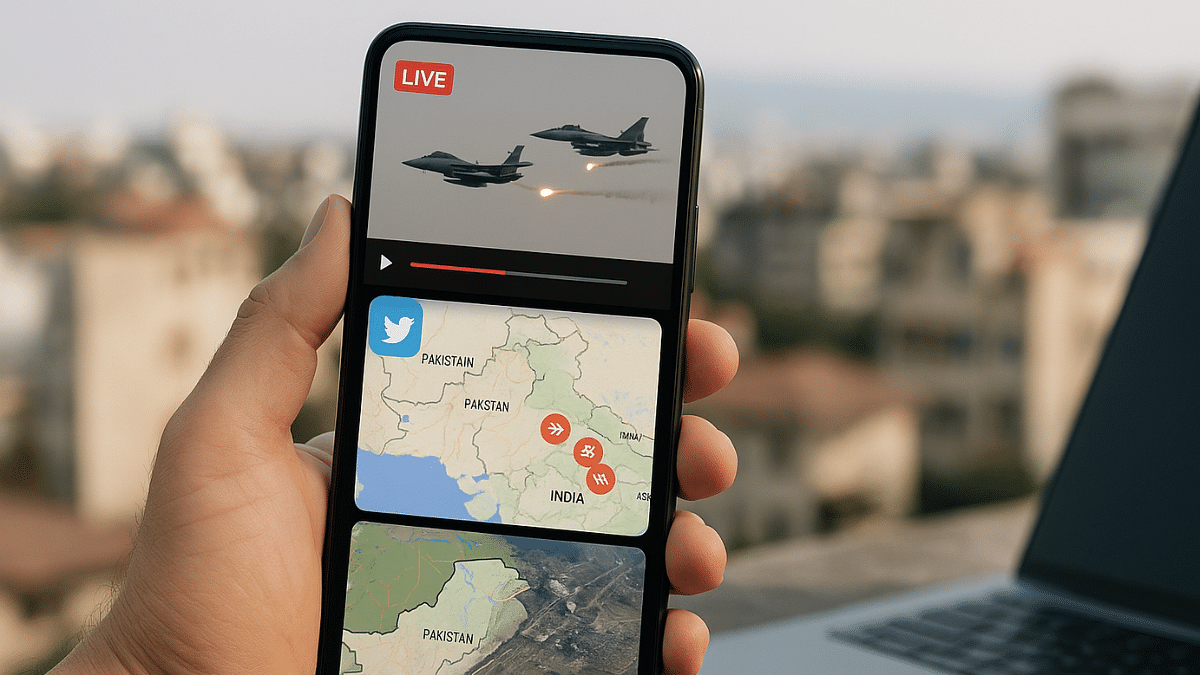
Well, there isn’t any war declared yet but the rising tensions between both the countries can create a similar situation. Interactive Maps-based apps can help with real-time updates related to nationwide conflicts. These apps are also capable of providing updates in real-time for global conflicts. Otherwise, stick to trusted channels and accounts social media apps such as Twitter and Telegram.

  • Liveuamap: If you want an interactive-app for crucial news and reports of any conflicted region, this is the app you should install on your devices. Liveuamap app is available to download on both Android and iOS and can provide region-wise live and fresh updates for war and other conflicts.
  • Telegram and X: Both Telegram and X (previously Twitter) are the apt source for all the latest updates related to Operation Sindoor and other counters that India plans to take against Pakistan and terror groups. But ensure, you also rely on trusted media accounts and channels for the same.

Also Read: Realme Unveils 10,000mAh Slim Concept Phone

Setup Real Time Alerts

Use dedicated news apps or Google to get real time alerts for the Operation Sindoor and other such missions being carried out by the Indian government and the army.

Create Google Alerts: Use Google Alerts to create emergency alerts for Operation Sindoor. You can also use other keywords for the same.

Third Party News Apps: Official news apps such as The Hindu, The Guardian, Al-Jazeera, can be used for real time alerts. Ensure you don’t trust any random news website or media and stick to mainstream platforms for the same.

Categories
Featured How To Mobile

Level Up Your Mobile Gaming:Top 5 Efficient Methods To Enhance Smartphone Battery Life, Performance

Key Highlights

  • Smartphone battery can deplete fast with prolonged gaming
  • Smart management helps improving battery life
  • Basic tweaks can help with battery management in smartphones

Mobile gaming has a set a new benchmark and now OEMs are coming in with highly potent gaming smartphones. The craze is real with mobile gaming and its not stopping anytime soon. Mobile gamers are known to push their smartphone’s hardware to the extreme limits while engaged in prolonged gaming sessions. This makes it necessary to look out for ways to optimise a smartphone’s battery life for a steady and stable performance. If you are into extreme mobile gaming and are worried about your smartphones battery life, this guide will be your saviour. Take a look below at the top 5 efficient ways to optimize your smartphone’s battery performance and its overall life.

For the tech geeks, stay updated with the latest cutting-edge gadgets in the market, exclusive tech updates, gadget reviews, and more right on your phone’s screen. Join Giznext’s WhatsApp channel and receive the industry-first tech updates.

Also Read: Summer 2025 Hacks: Use This Basic Air Conditioner Timer Feature With/ Without Remote To Save Electricity Bills

1. Keep A Check For Smartphone/ Battery Overheating

Frequent smartphone overheating can lead to depleted battery health. If your smartphone is overheated, try to stop your gaming session and wait for the device to cool down. Simple tricks such as avoiding charging while gaming or using a case while gaming can also help with heat management.

  • Avoid using a TPU or any other case while gaming
  • Avoid plugging-in a charger while gaming
  • Playing games in a cool room helps too

Also Read: WhatsApp In-App Language Translation Feature In Works: Update

2. Display And Network Tweaks Helps

When you play a mobile game in high resolution or using 5G network, expect a faster drainage rate. Tweaking these settings can help with battery management and its overall performance.

  • Screen Brightness: Switch to lower screen brightness and disable the auto brightness mode. It is an efficient trick to cut down on excessive battery drain.
  • Screen Resolution Settings: Try playing FPS and other graphic-extensive games at a lower screen resolution of UHD or FHD.
  • Screen Refresh Rate Settings: Switch down to 60Hz instead of 90Hz or higher refresh rate
  • Haptics Feedback Settings: Helps with lower battery consumption when disabled.
  • Network/ Connectivity Settings: Use Wi-Fi instead of mobile data for stable connections and lower battery drainage.

Also Read: UPI Refund Scam In India: What’s This New Digital Scam? How You Should Stay Safe?

3. Game Setting/ Gaming Modes Adjustments

If you have one of those gaming Android smartphones chances are there will be a built-in gaming or performance modes. Tuning these integrated gaming engines can help with boosting battery life and health collectively.

  • Performance Mode: Instead of enabling the High-performance mode, stick to medium or low settings. This can be done occasionally to maintain an optimum battery health.

Also Read: Apple AirPods Maintenance Guide: How To Check And Update AirPods, AirPods Pro Firmware Version

4. Limit Background Apps And Tools

This is one of the best tricks to get the maximum juice out of your smartphone’s battery be it while gaming or general usage. Besides enhancing the battery life, limiting background apps will ensure smoother gameplay and better performance delivery. Close any unused app before starting your next game and feel the difference.

Also Read: Facebook Tips And Tricks: How To Save And Download Facebook Live Videos Before Deletion

5. Battery Optimisation

Power Settings: Some of the high-res gaming titles comes with a Balanced or Battery saver mode. Switching these settings on ensures battery life remains unaffected despite heavy game play.

Charging Percentage: Another crucial factor determining smartphone battery life. Charging and draining battery from 100 to 0 can have an impact in a longer run. Instead stick to the 20- 80 percent charging range for your smartphone in daily run.

Also Read: Top 5 Effective Tips To Click High-Resolution Low Light Photos Using Smartphone Camera

Categories
Apps Featured How To

UPI Refund Scam In India: What’s This New Digital Scam? How You Should Stay Safe?

Key Highlights

  • UPI refund fraud is the new online scam in India
  • Targets UPI users
  • Often money gets deducted from users account in pretext of refunds

UPI adoption has been rapid over the last few years, with the Indian masses shifting towards the digital payments services. We definitely have seen a boom in the digital transactions and the surge in UPI app usage across the country. This certainly has also paved in way for cybercriminals to scam innocents robbing them off their hard earned money. Digital scams have certainly become more common with the imposters coming out with new ways each time for such frauds. UPI refund is another scam which is being reported nowadays where criminals send fake messages and create emergencies citing wrong fund transfers and asking a refund for the same. In this guide, we break down this new UPI refund scam and the tips to avoid falling in such traps.

For the tech geeks, stay updated with the latest cutting-edge gadgets in the market, exclusive tech updates, gadget reviews, and more right on your phone’s screen. Join Giznext’s WhatsApp channel and receive the industry-first tech updates.

Also Read: Travelling Overseas? Here’s How To Activate International UPI On Gpay, PhonePe For Payments Abroad

UPI Refund Scam Breakdown: How It Works?

As is the case with most of the digital scams, cybercriminals use modern tactics involving UPI app for frauds. Scammers tricks UPI users into believing that money has been sent accidentally to their account for which they need a refund. A sense of emergency is being created to transfer the money back which essentially is the scam. Let’s take a look at how this UPI scam is carried out:

  • Money Transfer: This is a deliberate move where the scammer will send a small amount of money to your UPI or bank account. It could also be a SMS stating amount credited to your account which likely will be fake.
  • The Initial Contact: This is the first stage where the imposter sends you message or tries to contact you citing accidental money transfer yo your account. It could be a standard phone or WhatsApp call.
  • Emotional Tactics: The scammer will then persuade the victim under emotional baggage and request for money refund.
  • UPI Refund Request: You might also receive money transfer (refund) request on your UPI app from the fraudster. In some cases, you might be shared a QR code scanner for fund transfer.
  • Final Scam: If you approve the UPI refund request then sadly you have fallen a victim to the UPI refund scam.

Also Read: EPFO Quick PF Withdrawal Via UPI Apps, ATMs Becoming Reality Soon? Transaction Limit, Eligibility Criteria

How to Stay Safe From UPI Refund Scams

To stay safe from such UPI and other digital scam, follow the do’s and the dont’s listed below:

The Do’s

  • Verify message and sender authenticity: Make use of caller ID platforms or your contacts to verify the sender. This can help you stay vigilant of such scams.
  • Enable UPI Message Alerts: Ensure you have enabled notifications and SMS/ message alert feature enabled for all UPI apps. In case of transactions including money receiving and transfers, you’ll be notified directly.
  • Verify and cross-check UPI requests: Never approve any random UPI request. All requests should be verified even for the smallest of transactions.
  • No authorisation required for refunds: Remember, none of the shopping, food delivery, and similar apps will ask for authorisation, OTPs, etc., for refunds. Make sure you report such requests. Hence, never approve UPI refund or payment requests from strangers.

The Don’ts

  • Scan QR Codes: Never scam random QR codes. Specifically, if you are lured in to receive a refund or free money.
  • Accept Payment/ Refund Request: Never approve any payment or refund related requests uyou receive without any prior information on your UPI apps. If you receive any SMS or WhatsApp messages with similar links avoid clicking them.
  • Share UPI PIN: Ensure you don’t share your UPI pin with any random person or official. It could be a scammer disguised as a professional.
  • Click messages containing links from unknown sources: If you recieve any message from unknown number containing promotional or some banking links, never click on them. It could give attackers access of your device and accounts.

Categories
Accessories Featured How To

Apple AirPods Maintenance Guide: How To Check And Update AirPods, AirPods Pro Firmware Version

Key Highlights

  • Apple AirPods, AirPods pro firmware update enhances performance
  • Released as OTA
  • Manual steps can be performed to check and update AirPods firmware

Apple is consistent with releasing OTA updates for its mobile devices and gadgets to boost overall performance and security. While OS updates are common for iPhones, iPads, and MacBooks, they also are for rolled out to smart accessories including the Apple Watch and Air Pods TWS. For the latter, it’s rather less talked about with most of you likely being unaware of any firmware rollout for AirPods and AirPods Pro. That wouldn’t be the case going forward. In this guide, we are making it easier for you to check and update your AirPods/ AirPods Pro firmware easily with just a few taps.

For the tech geeks, stay updated with the latest cutting-edge gadgets in the market, exclusive tech updates, gadget reviews, and more right on your phone’s screen. Join Giznext’s WhatsApp channel and receive the industry-first tech updates.

Also Read: Instagram Edits: New Standalone Editing Insta Tool? 10 Easy Steps To Use!

Steps To Check AirPods, AirPods Pro Firmware Version

Step 1: Pair your AirPods with your iPhone

Step 2: Go to the Settings menu on your iPhone

Step 3: Navigate to the Bluetooth Settings

Step 4: Tap on the “i” icon placed next to the AirPod’s name

Step 5: Now, head to the About section where the firmware version will be listed.

Also Read: Summer 2025 Hacks: Use This Basic Air Conditioner Timer Feature With/ Without Remote To Save Electricity Bills

Steps To Update Apple AirPods Firmware To The Latest Version

Step 1: Check the iPhone or iPad’s iOS version. Update it if required to proceed to the next step.

Step 2: Connect your iPhone or iPad or Mac to Wi-Fi and then make sure the AirPods are within range of the device.

Step 3: Pair the AirPods with the iPhone/ iPad/ or Mac.

Step 4: Keep the AirPods in the charging case and ensure the lid is shut.

Step 5: Connect the AirPods’ charging case to a power source

Step 6: Now, wait for at least 30 minutes for the firmware update to be installed

Step 7: Open the charging case and re-pair the AirPods with the iPhone/ iPad or any other compatible device you want.

Step 8: Do verify the firmware version by following the procedure mentioned above

Also Read: WhatsApp Advanced Chat Privacy: How To Add Extra Safety Layer For WhatsApp Chats?

Apple AirPods, AirPods Pro Firmware Update: Why Is It Important?

Apple AirPods and AirPods Pro firmware update are crucial and it is advised that you install the updates once available. All such firmware updates released for AirPods, AirPods Pro, or AirPods Max ensure these TWS earbuds functions properly and the bugs (if any) are fixed. Overall, the firmware updates enhances the AirPods performance by improving the connectivity, optimising battery life, and refine sound output.

Categories
Apps Featured How To

Need Emergency Funds? Here’s How To Apply For Personal Loan Via Google Pay

Key Highlights

  • Google introduces personal loan services for GPay
  • Will help with emergency fund
  • Minimum personal loan amount one can apply for is up to Rs. 30,000

Google Pay is the amongst the most secure UPI apps available for Android and iOS users in India. From making daily payments to monthly bills, Gpay allows it all with just a few taps. GPay is being consistently upgraded to be more than just a basic UPI app that can help users send or receive money. Features like split bills, bank transfer to self and others makes it more user-friendly. But now, Google has introduced a new feature that sets Google Pay apart from the rest in the UPI race. GPY users will now be able to apply for personal loas directly via the app.

For the tech geeks, stay updated with the latest cutting-edge gadgets in the market, exclusive tech updates, gadget reviews, and more right on your phone’s screen. Join Giznext’s WhatsApp channel and receive the industry-first tech updates.

Also Read: GPay Payment Split: Get Done With Hassle Free Bills/ Payment Splits On Android, iOS

Google Pay Personal Loan Feature: Total Loan Amount

Google Pay has released a new personal loan feature for its users. If you are using Google Pay app for UPI services, you can also make use of the personal finance feature. This is something that can be helpful in situations where you need funds for medical or other emergencies.

Coming to the loan services and amount, all the Google Pay users will be able to apply for personal loan services using the app itself. No additional paper work or standing on long queues in a bank would be required to apply for personal loan when using GPay app. Instead, all can be done with just a few taps. This will be an entirely digital process like UPI where customers will be eligible for up to Rs. 10,00,000 or personal loan.

  • Minimum personal loan amount limit: Rs. 30,000
  • Maximum personal loan amount limit: Rs. 40,000
  • Eligibility Criteria: Will depend on the user’s financial profile

If you are wondering about the re-payment of the loan, then you’ll be glad to know that Google Pay is offering flexibility with payments where one can select the timeline for loan repayment. A minimum EMI amount of up to Rs. 2,000 will be applicable for the basic loan amount of Rs. 30,000.

Also Read: Enhance WhatsApp Privacy: How To Blur Images On WhatsApp Mobile, Desktop App

Eligibility Criteria, And Application Process

  • Customer should have a steady source of income (could be self-employment or a jon)
  • Customer should be at least 21 years for personal loan application
  • Bank account should be linked to Google Pay
  • KYC verification should be complete while applying for the loan

Below are the steps to apply for personal loan using Google Pay

Step 1: Open Google Pay app

Step 2: Navigate to the “Manage Your Money” tab

Step 3: Locate the “Personal Loan” feature and tap on it

Step 4: Enter your personal details including source of income

Step 5: Now, upload your KYC documents such PAN and Aadhaar

Step 6: Sign the document digitally

Step 7: Once all the above steps are completed and the loan is approved, the amount will be credited to the linked bank account.

Categories
Apps Featured How To

Facebook Tips And Tricks: How To Save And Download Facebook Live Videos Before Deletion

Key Highlights

  • Facebook Live videos now gets removed automatically after 30 days
  • Move comes as a part of updated storage policy
  • Bulk download policy available for multiple videos

Earlier in February this year, Facebook revised its storage policy guidelines for its platform. One direct impact was the stopping of live video storage on Facebook for unlimited period. After introducing a 90-day grace period to download old live videos library, Facebook has now announced a new timeline of 30 days. If you are frequently going live on Facebook and have a large database of old live videos, you should save it offline or download it. In this guide, we share the steps to do so.

For the tech geeks, stay updated with the latest cutting-edge gadgets in the market, exclusive tech updates, gadget reviews, and more right on your phone’s screen. Join Giznext’s WhatsApp channel and receive the industry-first tech updates.

Also Read: Instagram Edits: New Standalone Editing Insta Tool? 10 Easy Steps To Use!

How To Download Facebook Live Videos Before 30 Days Deletion Timeline (Single Videos)

Step 1: Open Facebook mobile app

Step 2: Visit the Activity centre

Step 3: Locate “Your Live Videos” option

Step 4: Move to Videos or Live tab on your profile, page, or Meta Business suite

Step 5: Locate the video and tap on it for full screen mode

Step 6: Now, tap on the three dots to download the video

Also Read: WhatsApp In-App Language Translation Feature In Works: Update

How To Download Facebook Live Videos In Bulk

Step 1: Open Facebook app and tap the notofication for storage policy update to enter into the download flow.

Step 2: Click on “Download Live videos” option

Step 3: Confirm the file download location (smartphone/ tablet, laptop/ pc).

Step 4: Select th date range for the live videos that will be downloaded on the selected device

Step 5: Click “Create File”

Categories
Apps Featured How To

Instagram Edits: New Standalone Editing Insta Tool? 10 Easy Steps To Use!

Key Highlights

  • Instagram launches standalone editing app called Edits
  • Introduced for both Android and iOS platforms
  • Allows editing videos for reels and more directly

Instagram has emerged as one of the most used platforms for social media engagement. It is one of those multimedia sharing apps where when can get as creative as they can with photo and video uploads. And to provide a consistent and diverse experience, new updates frequently makes way to this social media platform. A new feature rather a standalone app has now been introduced by Instagram that brings along a whole range of comprehensive editing tools for video/ photo editing and also monitoring performance of the uploaded content. What is this latest Instagram Edits app and how can you utilise it as a editing tool and a performance analyser simultaneously. We explain in this article:

For the tech geeks, stay updated with the latest cutting-edge gadgets in the market, exclusive tech updates, gadget reviews, and more right on your phone’s screen. Join Giznext’s WhatsApp channel and receive the industry-first tech updates.

Also Read: How To Use Instagram’s New Song Lyrics Feature In Reels: A Step-By-Step Guide

What Is Instagram’s Edit App?

Instagram Edits is the latest Meta-developed app that has been designed to help content creators to improve their quality of content being uploaded on the platform. This AI-backed app brings along a host of features ranging from AI-backgrounds, green screen, sound and visual effects pre-set, and more.

Instagram Edits will also allow users to remove background from a video and replace it with another in real time. Besides using pre-recorded footages from the gallery, Instagram Edits allows recording directly via the app where the videos can be recorded to up to 4K resolution@60fps. Edits currently supports shooting and recording videos of up to 10 mins.

Also Read: Instagram Top Hacks: How To Enable or Disable Sensitive Content From Home Feed

How To Download And Use Instagram Edits On Android and iOS

Step 1: Open Google Play Store or Apple App store on your smartphones

Step 2: Enter Instagram Edits in the search bar and tap on Install

Step 3: Open the Instagram Edits app

Step 4: Use your existing Instagram user ID and password to log-in

Step 5: To start a new project, tap on “+” icon.

Step 6: You can either import an existing video or image for the gallery or start a new recording. Tap on the capture icon for the latter.

Step 7: Toggle between the different lenses and apply if you want while recording a new clip

Step 8: Now, edit the video using AI-backgrounds, filters. You can also merge clips, use transition effects, add music, etc.

Step 9: Once done, tap on Export.

Step 10: You can share this edited video directly on Instagram and Facebook without switching the app.

Categories
Apps Featured How To

Want Free Delivery And Streaming? Here’s How To Join Amazon Prime On Mobile

Key Highlights

  • Sign up for Prime easily on your phone
  • Enjoy a 30-day free trial
  • Plans start at Rs. 299 per month

Are you someone who loves online shopping, binge-watching movies, or hunting for the best deals and discounts? If yes, then an Amazon Prime membership is something you should definitely consider. There are many benefits to Prime, including free delivery, Prime Video, and exclusive offers. Signing up is simple and quick, regardless of whether you’re using a desktop computer or a smartphone. To help you get started right now, here is a simple, step-by-step guide.

Also Read | How To Cancel Amazon Prime Subscription: See All Step Here

How To Install Amazon Prime On Your Smartphone

Signing up using your mobile is super simple. Just follow these steps:

Step 1: Open your mobile browser and go to Amazon Prime Page. This is where you’ll begin your Prime journey.

Step 2: Don’t have an Amazon account yet? Tap “Create Account”.

Step 3: Enter your password, name, and phone number. To get an OTP, tap “Verify mobile number.”

Step 4: If you’re an existing Amazon user, skip the account creation and simply log in with your details.

Step 5: Choose “Try Prime Free” after tapping the three-line menu.

Step 6: Press the “Start your 30-day free trial” button.

Step 7: Choose your Prime plan, confirm your billing and shipping details.

Step 8: You will be charged automatically when the trial period is up. If necessary, cancel at any moment.

For a better and faster shopping experience, download the Amazon app from your play store/ app store. It makes browsing, tracking, and shopping much easier.

Amazon Prime Membership Plans In India

Plan TypePrice
MonthlyRs. 299
3-Month PlanRs. 599
Annual PlanRs. 1,499

Also Read | Stay Safe While Shopping Online: Five Easy Tips To Avoid Getting Scammed

Why Prime Is Worth It

  • Many items come with free one- or two-day delivery
  • Special access to Prime-only offers and Lightning Deals
  • Prime Video and Prime Music streaming is unlimited
  • Prime Reading and gaming benefits

Whether you’re shopping, streaming, or saving, Prime has something for everyone.

For the tech geeks, stay updated with the latest cutting-edge gadgets in the market, exclusive tech updates, gadget reviews, and more right on your phone’s screen. Join Giznext’s WhatsApp channel and receive the industry-first tech updates.

Categories
Featured How To

Top 5 Effective Methods To Book Cheapest Flight Tickets In India In 2025

Key Highlights

  • Flight fares have become competitive in India
  • Dynamic pricing allows selecting cheaper flight tickets
  • Third-part apps for flight price comparison and booking available
  • Flexibility with travelling dates helps getting flight tickets at cheaper rates

India has witnessed a rapid growth in the domestic as well international air travel. And certainly, the demand for cheaper flight tickets is higher than ever. This has led to a competitive market for the flight operators in India where customers are being offered different schemes to avail cheaper air fares for both domestic as well international travels. Be it for your next business meeting or a vacation, you can book flights at much lower rates if you know the right tricks. Here in this guide, we are listing down the ways with which you can purchase flights tickets at cheaper rates than usual.

For the tech geeks, stay updated with the latest cutting-edge gadgets in the market, exclusive tech updates, gadget reviews, and more right on your phone’s screen. Join Giznext’s WhatsApp channel and receive the industry-first tech updates.

Also Read: Hate Standing In Long Queues: Here’s How To Book Indian Railways Platform Ticket Online

Method 1: Advance Booking Is The Best Trick

Booking air tickets in advance can help you get maximum benefits. And you don’t have to wait for any special festive season or other discount deals. Booking made mid-week also tends be be cheaper compared to weekend or week’s start.

  • Try making reservations within an average span of 6- 8 weeks prior your travel date
  • Book tickets for Tuesdays or Wednesdays as they are cheaper compared to the rest of the week

Also Read: Smart Travel Guide: How To Apply For And Get Indian Railways Ticket Refund Via IRCTC

Method 2: Flexibility With Travel Dates And Airport Location Helps

If you are flexible with your travel dates, you might find a better deal on your air tickets. Also, flight arrival and departure timings if selected appropriately can help you bag cheaper flight tickets for your next travel. Also, opting for nearby airports can work sometime.

  • Check for air fare pricing for different dates using flight ticket comparison sites and apps
  • Consider flying via Red-eye flights (ones that operate early morning or late night)
  • Skip you travel during peak season including festivals, school vacations, etc. Ticket prices can go higher in such scenarios.
  • Check connecting flight prices and compare rates for other nearby airports

Also Read: DigiYatra Tips And Tricks: How To Add Flight Boarding Pass For Hassle Free Travel

Method 3: Check And Book Flight Tickets Via Flight Comparison Websites And Apps

There are multiple such platforms online that compares flight tickets and also allows booking in advance. There are a bunch of popular travel websites and apps such as MakeMyTrip, Ixigo, GoIbibo, etc. that can help you compare flight ticket prices and make the reservations at cheaper rates. Google Flights, Skyscanner are other popular platforms for the same.

Also Read: Vacation Planning Guide: 5 Effective Ways To Make Use Of AI For Travel Planning In 2025

Method 4: Skip Add-Ons Or Upgrades

You can opt-out of any add-ons to cut down on the higher flight ticket costs. Making bookings via low-cost carriers such as IndiGo airlines and Air India Express can also do the trick.

  • Avoid taking extra add-ons such as seat upgrade, travel insurance, and meals (if it’s a short flight).
  • Try carrying light luggage to avoid additional check-in luggage fees

Also Read: List Of Best Instagram Hashtags For Travellers

Method 5: Use Coupon Codes, Reward Points/ Air Miles, etc.

This is another solid trick that bets you get cheaper air tickets. Often airlines announces discounts on ticket prices to boost sale. Try taking advantage of such promotional offers. Also, most of the airlines provide reward points or air miles to frequent travellers which can be used to book cheaper flight tickets.

Categories
Apps Featured How To

Exam Results: How To Check CBSE, ICSC, ISC, UPMSP Exam Results Via Digilocker App

Key Highlights

  • Digilocker is authorized app for personal ID and document storage
  • Is available on Android and iOS platforms
  • School and university exams can be checked online

Digilocker is the safest platform to keep all crucial identity documents. Authorised by the government of India, this mobile app allows storing personal IDs (Aadhaar card, driving licence), vehicle documents, etc. Digilocker is also offering services to check and download school and university results. And with the exam result season kickstarting, Digilocker is the safest bet to verify and download results directly from the issuing organisation/ authority. Be it class 10th and 12th CBSE or ICSE or ISC or UPMSP board results, you can easily see your exam results and also download it for future use.

For the tech geeks, stay updated with the latest cutting-edge gadgets in the market, exclusive tech updates, gadget reviews, and more right on your phone’s screen. Join Giznext’s WhatsApp channel and receive the industry-first tech updates.

Also Read: IRCTC Helicopter Reservations Begin For Char Dham Kedarnath Yatra 2025: Ticket Prices, How To Book

How To Check And Download Any Exam Result Using Digilocker Mobile App

Step 1: Download and install Digilocker app. You can download this app on both Android and iOS platforms.

Step 2: You can also access its desktop version by visiting www.digilocker.gov.in

Step 3: Login using valid credentials or register if you are a first time user.

Step 4: Scroll down on the hompage to the ‘Documents your might need’ section. Look for your ‘Class marksheet’. You will get multiple options for different exam results such as SSC, HSC, Class X, etc.

Step 5: Select the board of examination.

Step 6: Alternatively, tap on search and directly type in CBSE, ICSE, ICS or other board exam result.

Step 7: Enter student’s name, roll number, and year of exam.

Step 8: Tap on Get Document option

Step 9: The exam result with authorised signature will be issued which you can download as a PDF on your device.

Step 10: Get the print of the result if required