Categories
Featured How To Smart Watch

Apple Watch Tips And Tricks: How To Use Maps And Find Emergency Services On Apple Watch

Key Highlights

  • Navigation services can be used on Apple Maps
  • One can locate nearby services including emergency
  • Locations can be searched manually as well as via voice commands

Apple is not just known for its flagship grade iPhone smartphone series but also other consumer tech gadgets such as tablets, laptops, TVs. The company has also curated a strong portfolio with the smart wearables in the last few years. Apple Watch is amongst the top selling smart watch lineup which also happens to be most tech-advanced.

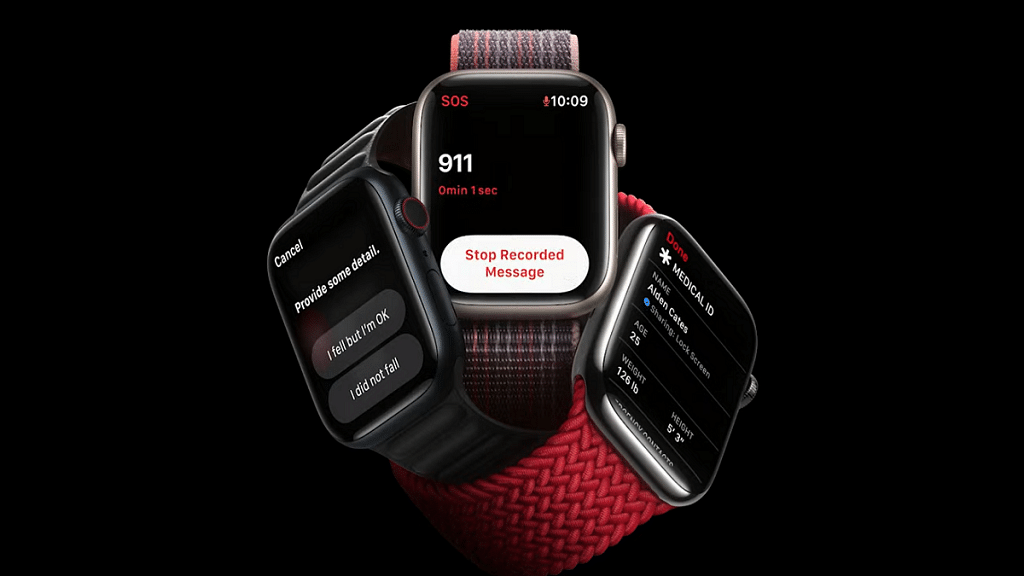
With Apple Watch series smartwatches, you can keep a tab of time and also health on-the-go. Apart from this, Apple Watch series has also become capable of providing navigational services at a glance and with just a few taps, you can find nearby locations including emergency services using Apple Watch. What’s the trick to setup and use navigational services or Maps app on Apple Watch? Take a look at the steps below:

For the tech geeks, stay updated with the latest cutting-edge gadgets in the market, exclusive tech updates, gadget reviews, and more right on your phone’s screen. Join Giznext’s WhatsApp channel and receive the industry-first tech updates.

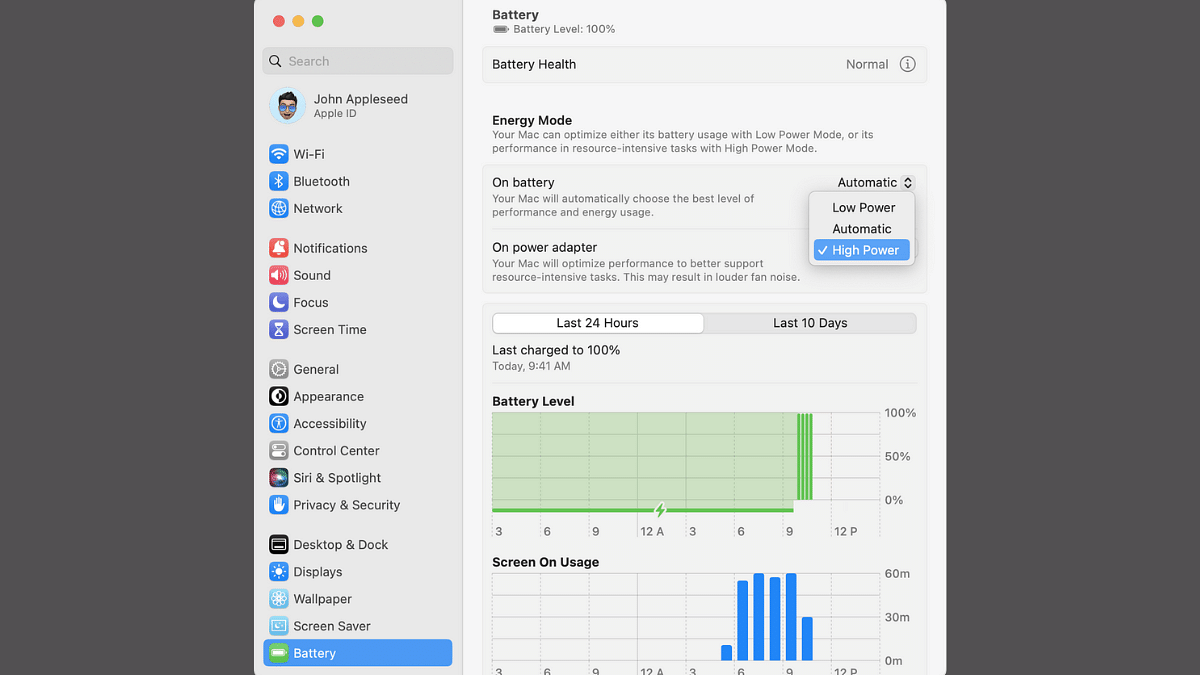
Also Read: MacBook Performance Boost: How To Use High Power Mode On Apple MacBook

Steps To Use Maps App On Apple Smartwatch

Step 1: On your Apple Watch, scroll through the list of available apps and select Maps app.

Step 2: Click on the Search menu (Viewfinder icon)

Step 3: Now, either tap on the Audio (microphone) icon or the scribble to enter the destination

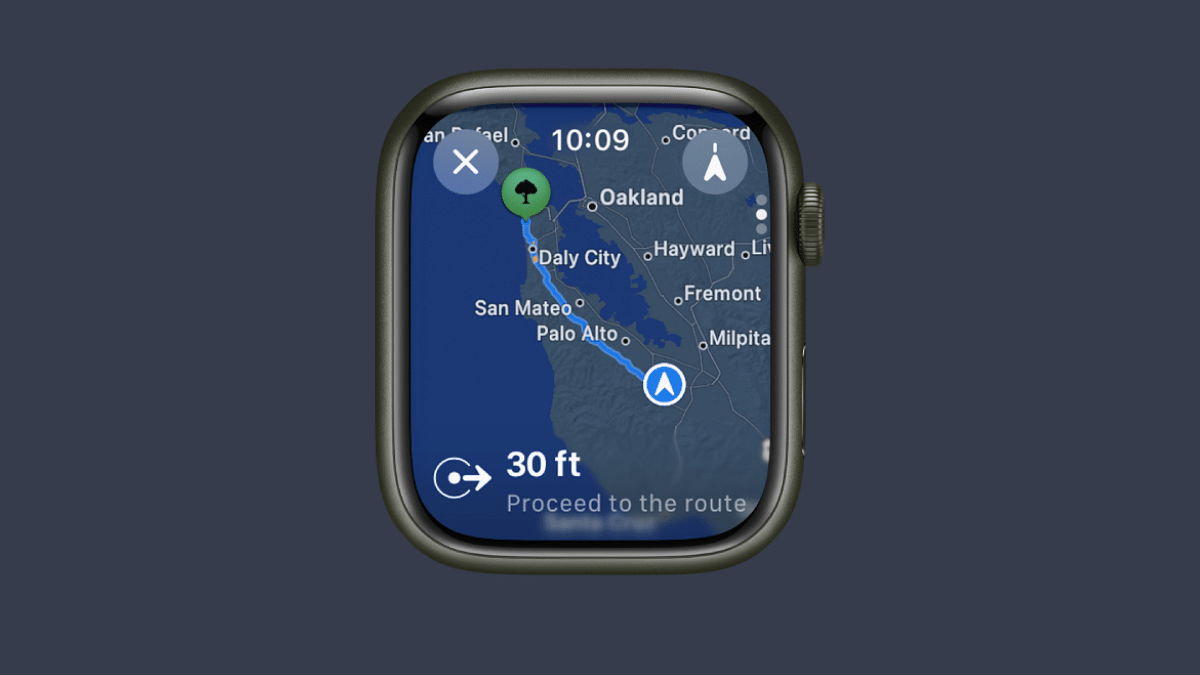
Step 4: The directions will be then displayed on your Apple smartwatch

Also Read: Want To Use Your Photos As Smartwatch Face? Here’s How To

How To Use Apple Smartwatch To Find Nearby And Emergency Services

Step 1: Launch the Maps application once again on your Apple Watch smartwatch

Step 2: Hit the search tab and select the Search places icon

Step 3: Now, select the location category that you wish to find such as nearby restaurants, parking, and emergency services.

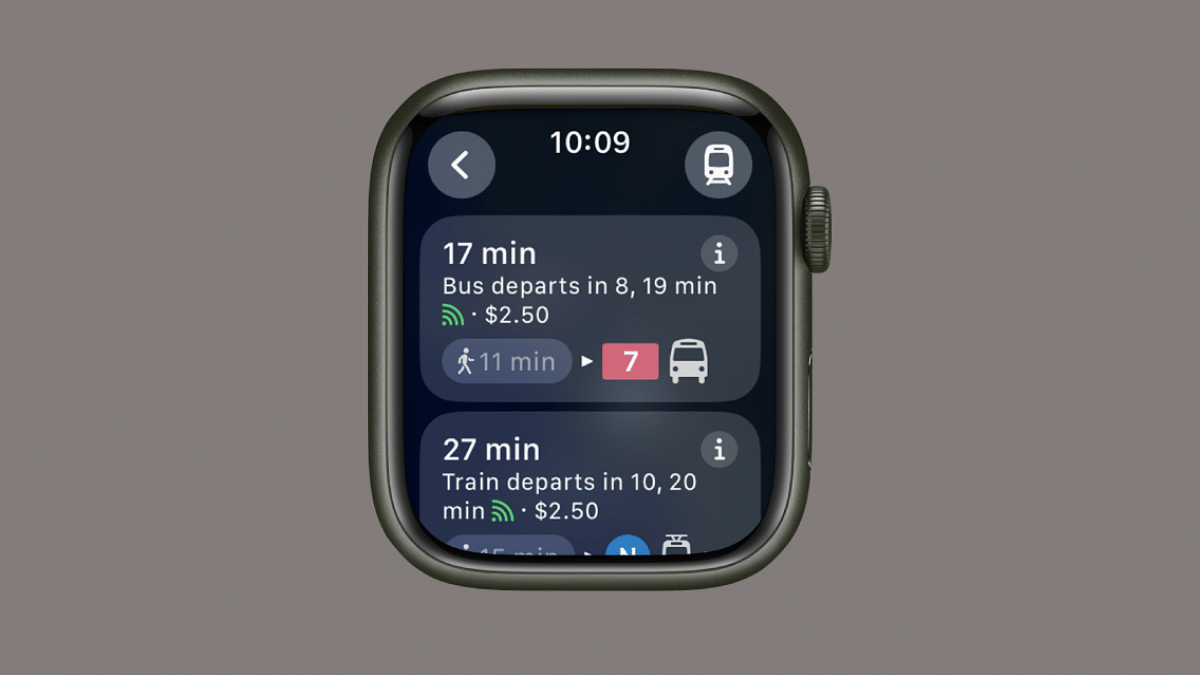
Step 4: Now, use the Digital Crown on your Apple smartwatch to scroll through the list of available options.

Step 5: You cab also tap on one of the options that pop up on the screen. To get its information, just rotate the digital crown.

Categories
Featured How To Mobile

Made by Google 2024: How To Tune In And What To Expect?

Key Highlights

  • Made by Google event is on August 13
  • Google is expected to release new lineup of Pixel series
  • You can watch livestream on Google’s official YouTube handle

The annual Made by Google event is just days away. It is all set to happen on Tuesday (August 13) at 10:30 PM IST. This year’s event promises to be an exciting one with potential releases for new devices and announcements. Here’s how you can watch the livestream and what you can expect.

Also Read | Pixel 9 Series Updated Camera Specs Leaked: Expected Price, More Specs

How To Watch ‘Made by Google 2024’ Event Live

Step 1: Visit the official YouTube handle of Made by Google.

Step 2: Go to the video ‘#MadeByGoogle ‘24: Keynote’ ​​and note the scheduled start time.

Step 3: Click the ‘Notify me’ button so you don’t miss the event.

Step 4: Make sure that you are using a device that supports video streaming, such as a laptop, smartphone, or tablet.

Step 5: Once the livestream starts, you can watch the event in real-time.

Also Read | Google Pixel 9 Takes Inspiration From iPhone, Might Add Key Emergency Feature

Made by Google 2024: What To Expect?

  • Pixel 9 Series: Google is expected to come up with Pixel 9, Pixel 9 Pro and Pixel 9 Pro XL. These smartphones will be powered by Tensor G4 chipset. The new Pixel 9 Pro Fold is also expected to be unveiled later than the other models.
  • Pixel Buds Pro 2: The new Pixel Buds Pro 2 is expected to feature a new design, improved ANC and a bigger battery. They will be available in Charcoal, Porcelain, Aloe and Hot Pink.
  • Pixel Watch 3: The Pixel Watch 3 may be unveiled in 41mm and 45mm sizes, featuring 2,000 nits bright OLED screens, thinner bezels and improved battery life.
  • Android 15: Two new AI features and improvements will be added, namely ‘Stealth Identity Lock’ and ‘Private Location’. Additionally, it will improve fraud detection and automatic app archiving.
  • New AI Features: One can expect new upgrades to Google’s Gemini AI chatbot in addition to new AI features like ‘Add Me’ for group photos and ‘Pixel Screenshots’ for searchable phone activities.

For the tech geeks, stay updated with the latest cutting-edge gadgets in the market, exclusive tech updates, gadget reviews, and more right on your phone’s screen. Join Giznext’s WhatsApp channel and receive the industry-first tech updates.

Categories
Featured How To

How To Take Down Deepfake Content From Google Search? Follow These Simple Steps

Key Highlights

  • Taking down non-consensual deepfake content can be stressful
  • Google offers a simple way to protect your online presence
  • You just need to provide accurate and detailed information

In this digital era, deepfake content has become more common because to the development of AI. This can be used maliciously in compromised situations to create a person’s fake photos or videos. In an effort to solve this problem, Google offers a tool that lets users ask for non-consensual deepfake content to be removed from search results.

Also Read | Android Devices To Get Google’s ‘School Time’ Feature For Better Study Habits

How To Remove Non-consensual Deepfake Content

What to do if you find yourself in a situation where such content has been created and shared without your consent? Well, don’t worry. Here is a step-by-step guide on how to get such content removed from Google’s search results.

Step 1: Open the Google online form for content removal to get the process started. You can search for it directly on Google.

Step 2: You will then see several options to choose from once you are on the form. To address the deepfake content, look for the one that says ‘Content contains nudity or sexual material’.

Step 3: You need to select your country of residence to make sure that the form processes your request correctly. Google offers forms that are customized to each country. You will be sent to a localized form if you live in a certain nation, such as India.

Step 4: Provide the required information, including your name and email address. Also, mention if you are completing this form on behalf of someone else or for yourself. You can attach a screenshot of the URL from where you found the deepfake content, and a reason for the removal of the content.

Also Read | Google To Offer Dark Web Monitoring Service Free: Here’s How To Activate

Step 5: Then, you will be prompted to digitally sign the form. Verify all the details one more time before submitting. Google will review your request after you complete the form, and if it is approved, it will take down the content from its search results.

For the tech geeks, stay updated with the latest cutting-edge gadgets in the market, exclusive tech updates, gadget reviews, and more right on your phone’s screen. Join Giznext’s WhatsApp channel and receive the industry-first tech updates.

Categories
Featured How To Laptop

MacBook Performance Boost: How To Use High Power Mode On Apple MacBook

Key Highlights

  • Apple MacBook comes with a High Power Model
  • Allows performance enhancements for various tasks
  • Steps to enable High Power Mode listed below

Apple MacBook series is amongst the top performance-oriented laptops available in the market. Both MacBook Air and MacBook Pro notebooks have emerged as the first choice for creative and professional users globally. The ultra slim form factor and the ability to handle even the most extensive of computing tasks have made Apple MacBook popular amongst the consumers.

Apple has been following a trend of bringing in more powerful iterations of MacBook laptops each year integrated with the latest M series chipset. While every new generation of Apple MacBook gets more powerful, Apple additionally provides a feature that can help you with further performance refinements you get with these laptops. Called High Power Mode, the performance-enhancement feature is made available to all MacBook Pro models (MacBook Pro 14-inch and 16-inch) which you can enable to get better speeds and reliability with overall performance. Unaware of the steps though? Well, he gave got it covered for you. Take a look below:

For the tech geeks, stay updated with the latest cutting-edge gadgets in the market, exclusive tech updates, gadget reviews, and more right on your phone’s screen. Join Giznext’s WhatsApp channel and receive the industry-first tech updates.

Also Read: Want To Use Your Photos As Smartwatch Face? Here’s How To

Steps To Enable High Power Mode In Apple MacBook Pro 14 and 16-inch Laptops

Step 1: Power on your Apple MacBook Pro laptops.

Step 2: You need to ensure the laptop is running on macOS Ventura or higher OS version

Step 3: Tap on the Apple Menu from the top right of the home screen

Step 4: Click on the System Settings option

Step 5: Tap on the Battery settings

Step 6: You will see the “On Battery” or “On power adapter” option. Select it.

Step 8: Tap on the drop down menu next to the Energy Mode icon.

Step 8: Click on the “High Power Mode” option

Categories
Featured How To Smart Watch

Want To Use Your Photos As Smartwatch Face? Here’s How To

Key Highlights

  • Most of smartwatch including Pixel watch comes with own set of watch faces
  • One can use photos as watch face on smartwatch
  • Option available with certain limitations

Android ecosystem has evolved extensively over the last decade. Now, this OS offers compatibility with devices beyond smartphones and tablets. Google has also developed an OS for smartwatches allowing a swift pairing and seamless user experience when connected with smartphones. The smart wearable technology has also witnessed huge advancements in regards to tech and integration of health and safety features. Certainly, smart wearables are the best solution for health monitoring today; specifically for the individuals with a fast paced lifestyle.

Options for customizations with integrated watch faces is one of the best smartwatch features offered across almost every model from different brands. However, you only get to select the built-in watch faces with your smartwatch. While there could be options ranging from 100 watch faces irrespective of the models, it surely is a fun idea to upload your own photos as watch face on your smartwatch.

Thankfully, Google has a solution for the same where in it allows smartwatch users to use photos as watch face. But there’s a small catch to it. What is the catch and the steps to use photos as smartwatch face? Read on below:

For the tech geeks, stay updated with the latest cutting-edge gadgets in the market, exclusive tech updates, gadget reviews, and more right on your phone’s screen. Join Giznext’s WhatsApp channel and receive the industry-first tech updates.

Also Read: Celebrate Independence Day: Here’s How To Join ‘Har Ghar Tiranga’ Campaign

The Catch

Google has made it possible for all smartphone users to set up photos as watch face on smartwatch. But the catch here is this feature is currently available for Google Pixel Watch smartwatch users. Users who own a Pixel Watch can setup photos as watch face. Also, it would be required for the Pixel Watch owners to install the latest version of Pixel Watch app as well as Photos on their smartphones.

Also Read: Emergency Calls Only Error On Your Android Smartphone? How To Fix?

Steps To Add Photos As Watch Face On Google Pixel Smartwatch Using Smartphone

Step 1: Unlock your smartphone and launch the Pixel Watch mobile application

Step 2: Select the ‘Watch Faces’ option

Step 3: Tap on ‘Add new’ option

Step 4: Click on the ‘Photos’ option

Step 5: Now, select the watch face using the photos app.

Step 6: You will get an option to add up to 30 photos. Once all selected tap on the ‘Add’ option.

Step 7: Now, click on the Save option

Also Read: Annoying TV Ads? How To Stop Unwanted Ads On Your Smart TV?

Steps To Add Photos As Watch Face Using Your Smartwatch

Step 1: On your Pixel smartwatch, press and hold the Watch Face option

Step 2: Swipe left on the screen to get more options

Step 3: Click on the ‘Add new’ option

Step 4: Select the ‘Photos’ option

Step 5: Now, click on Edit tab

Step 6: You will get a pop up on the screen with a poropt to launch the Google Photos app on your smartwatch. Tap on it.

Step 7: Now, on the paired smartphone, select all the photos ( up to 30) that you want to add as a watch face.

Step 8: Tap on the Add option on your smartwatch.

Categories
Featured How To

Celebrate Independence Day: Here’s How To Join ‘Har Ghar Tiranga’ Campaign

Key Highlights

  • ‘Har Ghar Tiranga’ campaign is back once again
  • PM urged citizens to change their profile pictures to the Tricolor
  • Citizens can join the campaign by visiting harghartiranga.com

On August 15, India prepares to celebrate its 77th Independence Day. On the occasion, PM Narendra Modi once again called on Indian citizens to participate in the ‘Har Ghar Tiranga’ campaign.

The ‘Har Ghar Tiranga’ campaign was first started in 2022. Now, it has since become an annual event. It encourages people to embrace the tricolor as a symbol of pride, diversity and togetherness. Now in its third phase, the campaign aims to awaken a deep sense of patriotism among Indians by encouraging them to proudly display the national flag in their homes, offices and on social media.

Also Read | 100+ Patriotic Username Ideas For Instagram That Say You Are Proud To Be Indian

Steps To Download Your ‘Har Ghar Tiranga’ Certificate

Joining the ‘Har Ghar Tiranga’ campaign is a simple and meaningful way to show your patriotism. Here’s how you can participate and download your Har Ghar Tiranga certificate:

Step 1: Go to harghartiranga.com and click on ‘Take Pledge’.

Step 2: On the homepage, press ‘Click to participate’ tab. You will be prompted to enter your name, phone number, state, and country.

Step 3: Read the pledge carefully, which states: “I pledge that I will hoist the Tricolor, respect the spirit of our freedom fighters and brave sons, and dedicate myself to the development and progress of India.”

Step 4: Once you’ve taken the pledge, you’ll be redirected to a page where you can upload your selfie with the Tricolor.

Step 5: After submitting your picture, click on ‘generate certificate’ to receive your personalized Har Ghar Tiranga certificate. This will prove your participation in this nationwide campaign.

Also Read | Celebrating Freedom: Best Instagram Captions To Mark 77th Independence Day

A Sea Of Saffron, White, And Green

The Tricolor will fly with pride above Indian homes, offices, and enterprises from August 13 to August 15, 2024. As a result of this collective act of patriotism, the nation will be turned into a vivid sea of saffron, white, and green. This will signifying the strength and solidarity of the Indian people.

For the tech geeks, stay updated with the latest cutting-edge gadgets in the market, exclusive tech updates, gadget reviews, and more right on your phone’s screen. Join Giznext’s WhatsApp channel and receive the industry-first tech updates.

Categories
Featured How To Mobile

Emergency Calls Only Error On Your Android Smartphone? How To Fix?

Key Highlights

  • Emergency calls only error is common for Android users
  • Network issues can be the reason
  • Inactive SIM card could be another reason for this error
  • Manual troubleshooting can fix these errors

Smartphones today play a pivotal role for connectivity be it general telecom or even internet. While user case scenarios with smartphones nowadays is endless, calling and texting still is one of the major functions for which we need this handheld gadget. Both Android and iOS smartphones need a SIM card from a registered telecom brand for calling. And with modern smartphones, audio over the calls is crystal clear. Despite being all advanced, there are scenarios when you might see Emergency Calls Only error on your Android smartphones.

This might happen in areas where there is low network coverage. What if you are in one of those areas which has strong network but still are getting the Emergency Calls Only error? Well, it could be annoying, specifically if you are traveling and are unaware of the neighborhood and surroundings. What should you do in such scenarios to fix the ‘Emergency Calls Only’ error on your smartphone? We have listed the steps with which you can fix this issue. Take a look:

For the tech geeks, stay updated with the latest cutting-edge gadgets in the market, exclusive tech updates, gadget reviews, and more right on your phone’s screen. Join Giznext’s WhatsApp channel and receive the industry-first tech updates.

Also Read: Annoying TV Ads? How To Stop Unwanted Ads On Your Smart TV?

Steps To Fix Emergency Calls Only Error On Android Smartphones

1. Try Rebooting Your Smartphone

This is one of the basic fix that you can try to get rid of the Emergency Calls Only error on your Android smartphone. Just press an hold the power key or power key+ volume up key to reboot your smartphone. Your phone will reset the network during the reboot and the error might get resolved.

2. Try Airplane Mode Setting

Another quick fix for the Emergency Calls Only error on your smartphone is manually enabling and disabling the Airplane mode. Again, this setting will reset the mobile network so that the network reception is back online and the Emergency Calls Only error is removed.

3. Check Your SIM Card Status

Often inactive SIM card can lead to Emergency Calls Only error on your smartphone. Ensure that your SIM card is enabled for it to work properly with calling and messaging. The steps for the same are mentioned below:

  • On your Android smartphone, go to the Settings menu
  • Go to the Mobile network option
  • You will see the SIM cards listed. Tap on the SIM card which is being used for calls and texting
  • Enable the SIM card for the services to be active
  • Enable Data roaming and VoLTE calls as well is the settings are disabled
  • You need to keep the ‘Preferred network type’ Automatic

4. Try Manually Updating Network Provider

If the Emergency Calls Only error persists, you can try with manual network provider selection. To do so, follow the steps mentioned below:

  • Head to the Settings menu on your smartphone
  • Select the Mobile network option
  • Tap on the SIM card whose network preference you need to change
  • Now, go to the Operator setting and disable the Auto-select option
  • You will now be shown the list of available networks from different providers select any one of them
Categories
Featured How To TV

Annoying TV Ads? How To Stop Unwanted Ads On Your Smart TV?

Key Highlights

  • Personalized adds on smart TVs can be annoying
  • Ads show up on different apps installed on the TV
  • Option to disable ads is available

Smart TVs have been a game changer for entertainment buffs. The large screen panel combined with a whole array of modern features such as internet connectivity, compatibility with external wireless peripherals, and third party app download makes the current-generation TVs all advanced. If you own a smart TV, specifically an Android or Google TV, you must be aware of the ads that show up on the home screen every time you switch it on.

Also, while accessing any app, you might come across a whole set of personalized ads curated as per the type of content you consume. While this might be beneficial, it tends to be annoying most of the times. Specifically, when you don’t wish any breaks while watching your favorite show or movie. Disabling or at least controlling the ads to certain extent is still easier with mobile devices such as smartphones and tablets. But how do you do it smart TVs? Well, this is a step-by-step guide that will help with with change and control advertisement settings on your smart TV for a more personalized experience.

For the tech geeks, stay updated with the latest cutting-edge gadgets in the market, exclusive tech updates, gadget reviews, and more right on your phone’s screen. Join Giznext’s WhatsApp channel and receive the industry-first tech updates.

Also Read: Smart TV Storage Crisis? How To Get Additional Storage For Your Smart TV To Install Games, Apps

How To Control Personalized TV Ad Settings And Turn Off Ads

Before we proceed, it is worth adding that every smart TV comes with its own advertising ID. Customers can reset or even delete advertising ID which will help with a personalized ad experience.

Step 1: Power on your smart TV

Step 2: Open the home screen

Step 3: Tap on the Setting menu (gear icon)

Step 4: Select the ‘Device’ option

Step 5: Click on Preferences

Step 6: Select About option

Step 7: Now, click on the Legal information tab

Step 8: Hit the Reset advertising ID option

Step 9: If you wish to delete the adverstising ID, then tap on the D-Pad option twice and then select the change.

Categories
Apps Featured How To

WhatsApp Advanced Privacy Hack: How To Share WhatsApp Profile Without Giving Out Your Mobile Number

Key Highlights

  • WhatsApp is the most advanced messaging app for Android and iOS devices
  • Sharing media files and locations is a provision
  • Enhanced privacy with end-to-end encryption makes it user favorite

WhatsApp is one the most advanced instant messaging application that has been launched for mobile devices. It is available widely for the masses globally using devices that run on Android or iOS ecosystems. Ever since Meta took WhatsApp’s control, we have seen a whole range of features being added to the messaging app. Not just simple texting, with WhatsApp you can even make secure voice and video calls both pf which are end to end encrypted just like the test messages providing a safer environment for personal and private conversations.

Meta has several stringent guidelines for WhatsApp to keep the user data private and safe. The end-to-end encryption for chats and its cloud server os one of the top safety features that you get on this platform. Previously, WhatsApp users couldn’t log into multiple devices with a single account as a part of added security. Likewise, multiple other security features have been introduced to safeguard user data on WhatsApp. However, the general functionality remains the same where you would need to share your personal mobile number to send or receive messages.

At times, you wouldn’t wish to share your contact details with strangers out of security concerns yet need to use WhatsApp messaging services. What can be done when you come across such scenario. Is there any way with which you can share only your WhatsApp profile and not your personal mobile number? The answer is yes and the steps for the same are mentioned below:

For the tech geeks, stay updated with the latest cutting-edge gadgets in the market, exclusive tech updates, gadget reviews, and more right on your phone’s screen. Join Giznext’s WhatsApp channel and receive the industry-first tech updates.

Also Read: Smart TV Storage Crisis? How To Get Additional Storage For Your Smart TV To Install Games, Apps

How To Share WhatsApp Profile For Messaging Without Sharing Mobile Number

Step 1: Open WhatsApp mobile application on your respective devices

Step 2: Tap on the three dots icon on the top left of the app’s homepage

Step 3: Select the Settings menu

Step 4: Now, tap on your profile option

Step 5: You’ll see a QR code option next to your profile. Tap on it.

Step 6: Click on Share to share your WhatsApp profile’s QR scanner.

Step 7: You can directly send your profile’s QR scanner to any contact.

The QR scan code that you will share with your contacts is private and doesn’t disclose any personal information such as mobile number.

Categories
Featured How To Mobile

Disturbed Sleep Cycle? How To Use Bedtime Mode On Your Smartphone For Improved Sleep Cycle

Key Highlights

  • Smart health features now available with smartphones and other modern digital gadgets
  • Mobiles can now be used for sleep cycle tracking
  • Optimizing sleep is possible with bedtime mode
  • Bedtime mode available for both Android and iOS devices

Our modern lifestyle has not just become fast-paced but also pretty hectic. Specifically, if you are a working individual, you would know how difficult it has now become for one to get a sound sleep. Shorter sleep cycles is one of the concerns that is consistently on a rise for individuals. Health professionals have been emphasizing how short sleep can lead to series of adverse health effects.

Thankfully, tech OEMs are now focusing on users health and are bringing in advanced features for measuring health metrics. This helps users to take necessary steps to improve their health by taking different measures for the same. And since, sleep cycle is one of the important aspects that needs to be addressed, smartphone OEMs have thrown in a feature that can help you track and optimize your daily sleep cycle.

A dedicated feature for the same called Bedtime mode can be accessed on the new-generation Android smartphones to keep a check on your sleep cycle. How can you access the bedtime mode on your smartphones for a better and improved sleep? The steps are listed below:

For the tech geeks, stay updated with the latest cutting-edge gadgets in the market, exclusive tech updates, gadget reviews, and more right on your phone’s screen. Join Giznext’s WhatsApp channel and receive the industry-first tech updates.

Also Read: Tech Guide: How To Connect Any OnePlus Smartphone With Apple MacBook

Steps To Enable Bedtime On Android For Improved Sleep Cycle.

Step 1: Unlock your Android smartphone and visit the Settings menu.

Step 2: Go to the Digital Wellbeing section.

Step 3: Scroll down to the Bedtime mode option and tap on it.

Step 4: Toggle on the ‘Do Not Disturb Bedtime mode’ option.

Step 5: Click on ‘Next’ to continue with the customizations.

Step 6: You can either select the “Use a schedule” option where you can set in specific time for the bedtime mode’s activation.

Step 7: You can also opt for the “Turn in while charging” option where the bedtime mode will be activated once the device is plugged in after 9 PM in the night.

Step 8: Once this mode is activated, the app will keep a log of your sleep cycle, sleep quality which will further help you with sleep optimization.