Categories
Accessories Featured How To Laptop

Unable To Connect AirPods With MacBook: How To Fix AirPod And MacBook Pairing Issues?

Key Highlights

  • Apple AirPods offer wide compatibility with a variety of gadgets
  • AirPods compatibility with MacBook is swift
  • Pairing issues if there can be fixed manually

Apple is amongst the top favorites when we speak of consumer tech brands specifically smartphone OEMs with a niche for premium product range. The Apple iPhone series is the world’s most powerful smartphone lineup today so is the MacBook laptop series which is also taking care of the premium end consumers. Besides smartphones and tablets, Apple has also created its expertise with audio products and has been the first in the lot to introduce the concept of truly wireless earbuds with the AirPods.

Apple AirPods offer a wide range of connectivity and can be paired up with mobile devices beyond iOS, PadOS and MacOS. Of course, the pairing is seamless with the Apple devices running on these platforms. While the pairing process of AirPods with iPhone and other Apple products is swift, there could be scenarios when you experience pairing issues with your AirPods and MacBook. What can be done in such situations? Are there any troubleshooting steps that you can perform to connect AirPod with MacBook? We have listed the steps for a quick fix below:

Also Read: Google Play Store Update: How To Download And Update Multiple Apps In One Go

How To Fix AirPods And MacBook Pairing Issues

If you are experiencing connection issues while pairing your AirPod with MacBook, you can perform a few steps for a fix. But before you proceed, ensure the MacBook with which the AirPod is being paired runs on the latest macOS version. You can manually update the OS version and then perform the remaining steps.

Step 1: Power on your Apple MacBook

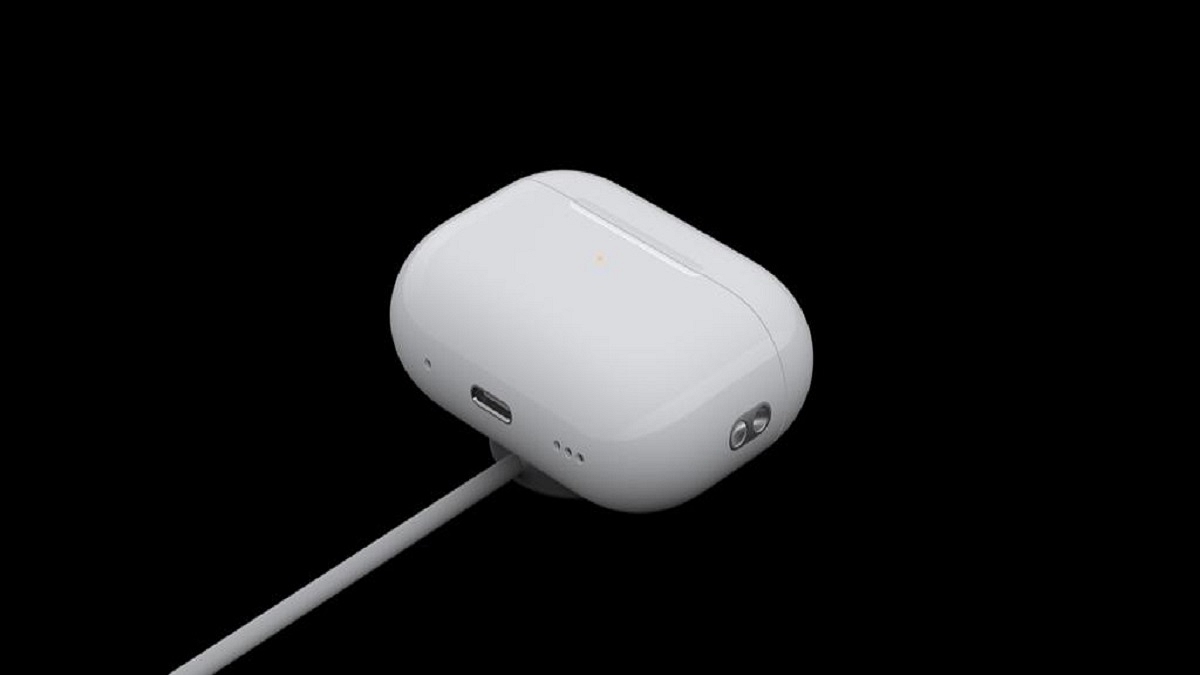
Step 2: Get the AirPods that you need to connect with the MacBook and put them inside the charging case. Ensure both earbuds are getting charged.

Step 3: Now, on your MacBook go to the Apple Menu and select System Settings.

Step 4: Tap on Bluetooth.

Step 5: Select the AirPods as the audio device if the they are already connected to the MacBook.

Step 6: If the AirPods show up as connected but they aren’t working, you will need to remove it from the paired list. Tap on the X to delete the AirPods from the connected devices list.

Step 7: Now, put the earbuds back in the case and close the lid for 15 seconds. Re-open the case’s lid after 15 seconds.

Step 8: You will now need to tap a hold the setup button on your AirPod’s charging case for 10 seconds. Wait for the white LED to flicker which will be an indication for the active pairing status.

Step 9: Bring the charging case with the AirPods inside right next to the MacBook. Make sure the lid is open.

Step 10: Complete the on-screen steps for the pairing.

Step 11: You might need to reset your AirPods if the aforementioned steps don’t fix the pairing issue. And if still the issue persists, you might need a service center visit.

Categories
Apps Featured How To

Google Play Store Update: How To Download And Update Multiple Apps In One Go

Key Highlights

  • Play Store now allows downloading multiple apps at the same time
  • Update your Play Store app to start downloading multiple apps
  • You can also update multiple apps simultaneously

Have you ever been frustrated by the slow process of downloading and updating apps on your Android device? Well now, you will be delighted to know that the Google Play Store has finally introduced a new feature. Until recently, the Play Store allowed only one app to download at a time, making the process really slow especially when installing multiple apps. Now, the Google Play Store has rolled out a new feature that will let you download and install up to three apps simultaneously.

Also Read | Google Play Store Alternatives: Best Android App Store Substitutes For Google Play

How To Download Multiple Apps In Google Play Store

Step 1: Firstly, you have to make sure that your Google Play Store app is updated to the latest version.

Step 2: Now, go to the Play Store for the first app you want to download and open its page.

Step 3: Click on the Install button to start downloading the first app.

Step 4: After that, without waiting for the first download to finish, search for the second app and tap Install. Do the same for a third app.

Step 5: Now, all three apps will download and install simultaneously, saving you time.

This update meaningly reduces waiting time. This is very useful when setting up a new device or refreshing your current one with new apps.

Steps To Update Multiple Apps On Google Play Store

Not only can you can download multiple new apps at once, but you can also update your existing apps simultaneously. Here’s how:

Step 1: Open the Play Store and click on your profile picture in the top right corner.

Step 2: Select My Apps & Games from the menu.

Step 3: In the Updates tab, you will see a list of apps that have pending updates. Simply tap Update All, and the Play Store will update up to three apps at the same time.

Also Read | How To Lock Play Store On Your Android Phones? Ways To Enhance Privacy With Google Play Store

This new feature brings Google Play Store on par with other app stores. This offers user a more efficient and user-friendly experience. Whether you are setting up a new phone or just keeping your apps up-to-date, this update will save you time and hassle.

For the tech geeks, stay updated with the latest cutting-edge gadgets in the market, exclusive tech updates, gadget reviews, and more right on your phone’s screen. Join Giznext’s WhatsApp channel and receive the industry-first tech updates.

Categories
Featured How To Mobile

Android Tips And Tricks: How To Maximize Battery Health And Reduce Battery Drain

Key Highlights

  • Android OS offers battery optimizations
  • Dedicated battery saver mode helps with extra backup
  • Battery drainage can be controlled with different steps

Android OS is currently the most advanced mobile operating system. Developed by Google, Android has been the driving force behind smartphones and tablets and off late is powering new-generation smart TVs, and also automotive in the form of Android Auto. With Android OS, you can get done with a whole range of customizations and optimizations on your smartphones. From display, audio, to performance, Android OS allows optimizing various features on the device.

Battery backup is one such crucial element which can be optimized using the Android OS. In fact, if you own an Android smartphone or tablet, you can keep a check on the battery drain status of your device and can easily fix if there are some issues. What all can you do to maximize the battery backup of your Android device and how can you avoid battery drainage. We have shared the tips and tricks below:

For the tech geeks, stay updated with the latest cutting-edge gadgets in the market, exclusive tech updates, gadget reviews, and more right on your phone’s screen. Join Giznext’s WhatsApp channel and receive the industry-first tech update

Also Read: MG Windsor EV Pre-Bookings Starts In India: Wait! There’s A Catch

Android Battery Saver Tips: What All You Do To Reduce Battery Drain And Extend Its Life?

  • Disable any active screen saver: By turning off any active screen saver, you can get an extended backup on a single charge.
  • Activate Auto Brightness and reduce high brightness levels: The screen brightness levels of your Android smartphone is a determining factor for the battery consumption which when reduced consumes lower power.
  • Restrict apps that consume battery extensively: Mobile apps that drain battery faster when restricted helps with an extended battery life
  • Enable Dark theme: You can activate the Dark theme on your Android devices. With darker app backgrounds, the battery consumption becomes limited.
  • Limit active internet connection usage: By keeping the internet connections deactivated when not in use, the device gets an extended battery life. You can enable directly disable Wi-Fi, Bluetooth, and mobile new when not in use and also activate the airplane mode for the same.
  • Disable GPS and Location services when not required: If you deactivate the GPS and location services, the battery drainage is low. This is another quick setting that you can toggle off for saving battery.
  • Use dedicated power saving mode: This will come in handy when your device is almost out of juice and has only limited battery percentage remaining. Enabling this mode will ensure battery drainage is at the lowest speeds.
  • Avoid keeping the device’s screen active: You need to avoid performing those actions that keeps the screen awake. For instance, if a video playback is going on and the device is not in use, it will drain the battery faster. Hence, it is advised that you keep the phone’s screen locked when not in use without any screen saver or similar apps running in the background.
  • Always use official power adapter: Charging you device with a non-compatible or a different company’s charger can have effect on your device’s battery health. Hence, ensure to use the power adapater that ships with your device.

By using these settings, you can easily keep a check on the battery health of your Android smartphone/ tablet and reduce excessive drain. These steps will also help with improving the battery health overall and extend its life cycle.

Categories
Apps Featured How To

YouTube Music To Apple Music: Here’s How To Transfer Your Playlists With Ease

Key Highlights

  • Transfer your YouTube Music playlists to Apple Music easily
  • Only user-created playlists can be transferred
  • Changes post-transfer won’t sync between platforms

Good news for YouTube Music users. You can now transfer your favorite playlists over to Apple Music. How? The answer is Google’s playlist portability feature. This is a significant step-forward in cross-platform compatibility. It will allow users to seamlessly transition between music streaming services without having to lose their carefully curated collections. This feature is a game-changer, whether you are thinking about switching or just want to check out Apple Music’s offers without having to start from zero.

Also Read | Google To iOS: How To Transfer Google Contacts Directly To iPhone

How To Transform Your Playlists From YouTube Music To Apple Music

The process of transferring your playlists is simple. But before you begin, there are a few things you should consider. Firstly, make sure that your Apple Music subscription is still active. The transfer would not be possible without it. Here are the simple steps that can help you move your playlists:

Step 1: Start by heading over to your Google Account Dashboard.

Step 2: Scroll down to the YouTube section, either under ‘Recently used Google services’ or ‘Other Google services.’ After that, select ‘Transfer Data’ to start the process.

Step 3: You will be prompted to select the specific playlists you want to move. Remember, only playlists you have created personally can be transferred. Saved playlists from other users cannot be copied.

Step 4: Choose Apple Music from the drop-down menu as your destination platform. Click on Continue.

Step 5: To complete the transfer, you must log into your Apple Music account and provide Google Takeout permission. You will receive an email with a link to access your playlists on Apple Music after the process is complete.

Important Details To Remember

Keeping in mind these two crucial points is essential. To start with, this is a one-time transfer. Following the transfer, any changes that you make to your playlists on YouTube Music or Apple Music won’t sync between the services. Additionally, Google suggests using third-party services like Soundiiz or TuneMyMusic if you wish to move your playlists to other music services that do not offer this feature natively.

Also Read | Need To Transfer iPhone Data To Your Laptop? A Step-by-Step Guide On How To Do It

The partnership between Google and Apple is not just one-way. Apple Music users can also transfer their playlists to YouTube Music. The process is similar and involves visiting Apple’s Data and Privacy page and following the on-screen instructions.

For the tech geeks, stay updated with the latest cutting-edge gadgets in the market, exclusive tech updates, gadget reviews, and more right on your phone’s screen. Join Giznext’s WhatsApp channel and receive the industry-first tech updates.

Categories
Apps Featured How To

Stuck On A Tune? Search Songs On YouTube By Humming: Here’s How

Key Highlights

  • Search for songs on YouTube by simply humming
  • Works best with simple, catchy tunes
  • Make sure your app is updated to the latest version

Ever had a tune stuck in your head but unable to remember the words? Well, it can be frustrating, especially when you can’t figure out the song. Usually, you might turn to an app like Shazam to identify the tune. But now, YouTube has made it easier for you. The platform has introduced a new feature that lets you search for a song by simply humming, singing, or whistling it. Let’s get to know how.

Also Read | Looking To Boost Your YouTube Views? Try These Thumbnail Tips

How To Use YouTube’s Song Search Feature

Before you start, make sure your YouTube app is up-to-date. You will need the latest version of the Android YouTube Music app, which is currently 7.02.51. You can update it directly via the Play Store on your Android device.

Step 1: Open the YouTube app on your phone.

Step 2: Look for the search icon at the top right corner of the screen. Tap it to open the search bar.

Step 3: Now, there will be a small microphone icon next to the search bar. Tap on it to begin searching by sound.

Step 4: Now, hum, sing, or whistle the tune that’s stuck in your head. YouTube will listen and try to find the song that matches your melody.

Step 5: YouTube will show you a list of songs that it thinks matches your tune. If it finds the right song, you can tap on it to listen. If not, try humming again.

To use this function, you must enable YouTube to access your microphone. If you’re worried about privacy, you can choose to allow access only while using the app or turn it off after searching. This feature works best with popular, simple, or catchy songs. However, it might struggle with more complex genres. So, keep it simple when using this feature.

Also Read | Learn How To Convert YouTube Videos Into GIFs In Minutes: Three Simple Methods

Conclusion

YouTube’s new feature makes it easy to find songs by humming or whistling. It quite a useful feature for those times when you can’t remember the lyrics but can’t get the melody out of your head. Try it out the next time you have a tune you can’t shake.

For the tech geeks, stay updated with the latest cutting-edge gadgets in the market, exclusive tech updates, gadget reviews, and more right on your phone’s screen. Join Giznext’s WhatsApp channel and receive the industry-first tech updates.

Categories
Apps Featured How To

Instagram New Update: Here’s How You Can Add Music To Your Instagram Profile

Key Highlights

  • New Instagram feature allows adding music to profile
  • One can add 30 seconds of the song clip
  • Feature available on both Android and iOS Instagram app

With Instagram offering numerous opportunities to the content creators, the platform’s popularity have soared high in the last few years. From simply being a photo sharing app, Instagram have now evolved to a full-fledged social media application where you can also consume short videos in the form of Reels. The profile page option on Instagram have also been updated with a plethora of features in the past and new options are being added continuously. The latest feature will allow adding music to a user’s profile which will eventually offer an engaging user experience. What are the steps you need to follow to add music to Instagram profile? Take a look below:

For the tech geeks, stay updated with the latest cutting-edge gadgets in the market, exclusive tech updates, gadget reviews, and more right on your phone’s screen. Join Giznext’s WhatsApp channel and receive the industry-first tech updates.

Also Read: Stay Safe With Uber: Here’s How To Activate Audio Recording For Your Rides

Steps To Add Music/ Songs To Instagram Profile

Step 1: Launch Instagram application on your smartphones or laptop/ PC.

Step 2: From the Profile page, go to the Edit Profile option

Step 3: You will see “Add music to your profile” option. Select it.

Step 4: Now, search the song which you wish to add to the profile. You can also select options from the “For You” section curated by Instagram.

Step 5: Once you have found the music or song, select the clip duration before setting it up on your profile.

Step 6: Do note that Instagram is currently allowing users to set a song only up to 30 seconds. However, you can select the part of the song as per your preference.

Step 7: Click on Save.

Also Read: Google Digital Privacy: How To Create And Setup Google Account Pin

Who All Can Add Music To Instagram Profile?

Instagram is allowing all users on its platform to add music and songs to their profile. Be it a general user or a content creator, the option to add music on profile page is available for all. Also, Instagram mobile app users including Android and iOS will get the access to this feature.

Categories
Apps Featured How To

Stay Safe With Uber: Here’s How To Activate Audio Recording For Your Rides

Key Highlights

  • Uber lets users automatically enable safety settings
  • Riders can now record trips with a tap
  • Recordings are encrypted and accessible only if reported

Whether going for a first date or getting home after a night out with friends, women often have to consider their safety. It should be fun and safe to go out at night. Unfortunately, there are many women who feel unsafe even when walking alone within a mile of their homes. Well, Uber’s safety feature addresses this concern by allowing them to choose up to four safety features. We are here to discuss its one of the four features, that is, Audio Recording. Let’s dive in.

Also Read | How To Share Your Uber Ride Status With Friends And Family: Here Are The Steps

Uber Audio Recording: How This Feature Helps

Uber’s audio recording safety feature allows users to record their trips from pickup to drop-off with just a tap. This feature is quite useful in situations where something might go wrong during a trip. If you feel unsafe, you can access the recording and share it with Uber as part of the incident report. The audio recording feature provides an added layer of security. This offers riders some confidence that they have a record of their journey.

Uber Audio Recording: How To Use

Uber’s audio recording feature is user-friendly and can be set up easily for every trip. Here’s how to enable and use the feature:

Step 1: Once your Uber trip starts, click on the blue shield on the map to access the Safety Toolkit.

Step 2: From the safety toolkit, you have to select the audio recording option.

Step 3: You have to make sure that microphone permissions are granted.

Step 4: Tap start to begin recording your trip.

For future trips, users can simply go into their Safety Toolkit and tap start to record audio.

Also Read | Want To Feel Safer? Here Are Five Top Safety Apps Every Woman Should Know

Privacy And Security

Uber promises that every audio recording is safely and encrypted saved on the user’s device. These recordings are locked that means that neither the driver nor Uber, nor even the passenger, can access them unless an incident is reported. Only then can the user choose to share the recording with Uber. The company also confirmed that these recordings are not shared with third parties and are used solely in order to resolve safety concerns. During a trip, Uber drivers can also choose to record audio.

For the tech geeks, stay updated with the latest cutting-edge gadgets in the market, exclusive tech updates, gadget reviews, and more right on your phone’s screen. Join Giznext’s WhatsApp channel and receive the industry-first tech updates.

Categories
Apps Featured How To

Need Passport Photos Fast? Here’s How To Order Passport-Sized Photos Via Blinkit

Key Highlights

  • Blinkit delivers passport photos in 10 minutes in Delhi and Gurugram
  • Upload a photo, choose prints, and get them at your door
  • Expansion to other cities planned soon

Rushing towards the photo studio at the last moment before your visa appointment is a thing of a past. Now, you can get your passport-sized photos delivered at your doorstep in just 10 minutes. You heard absolutely right! Blinkit, the popular grocery delivery app, has released a new service that could save you time and stress, of course.

At this time, the service is only available in Delhi and Gurugram. However, Blinkit has plans to expand it to other cities across India. The platform is eager to gather customer feedback, which will help improve the service before it rolls out more widely. Keep reading and let’s get to know more.

Also Read | Maximizing Savings: Here’s How To Use Blinkit Promotional Codes

How To Get Passport Photos Via Blinkit

Much like Blinkit’s grocery delivery service, the process of getting the photos delivered at your home is quick and simple. Here are the steps that can help you get your passport photos without stepping out of your home:

Step 1: Open the Blinkit app on your device, and go to the Print Store section.

Step 2: there, you either upload an existing photo or click a new one using your phone.

Step 3: Blinkit will then automatically remove the background and crop your image to the correct passport photo size.

Step 4: Now, you have to choose the number of prints you need, i.e., 8, 16, or 32.

Step 5: After that, place your order. The photos will be delivered to you in a neat and secure envelope.

What makes Blinkit’s new service stand out is its affordability. Traditional photo studios often charge a premium for passport photos, especially when you need them urgently. Blinkit offers this service at a much more reasonable price, ensuring that you don’t have to break the bank for something as simple as passport photos.

Also Read | Top 5 Alternatives To Blinkit For 10-Min Delivery In India 2024

Other Services

Not just delivering passport-sized photos, Blinkit has already been providing another handy service: printing documents on demand. This addition of passport photos to their offerings is a natural extension, catering to the needs of today’s fast-paced, digital lifestyle.

For the tech geeks, stay updated with the latest cutting-edge gadgets in the market, exclusive tech updates, gadget reviews, and more right on your phone’s screen. Join Giznext’s WhatsApp channel and receive the industry-first tech updates.

Categories
Apps Featured How To

Google Digital Privacy: How To Create And Setup Google Account Pin

Key Highlights

  • Google Account PIN can be created for added privacy
  • PIN will be required to access account once activated
  • Google Account PIN can be modified in the later stages after activation

Google is offering a large ecosystem of products and services for the masses ranging from emailing to online streaming, and more. Users can create their personalized Google accounts to get an access to all the services and tools provided by the search giant. As a prominent tech firm, Google has ensured its products and services are protected from the different set of threats online. To further boost the security of a user account, Google allows creating an account PIN which ensure only authorized user has the control of the account and is allowed for further modifications. Adding up a Google Account Pin also ensures that there are no unauthorized purchases and money transfers from one’s account. If you already don’t have the Google Account PIN created, then here are the steps for the same.

Also Read: How To Take Down Deepfake Content From Google Search? Follow These Simple Steps

Steps To Create Google Account Pin

You generally get an option to create a Google Account PIN by default while using different services. If you are making any purchases from Google Play or are transferring money, setting up a Roku box, etc., you will automatically get the pop up to create a PIN. But if you have missed it somehow, follow the steps below:

Step 1: Open any web browser on your laptop or PC

Step 2: Open Google Accounts website

Step 3: Head to the PIN section on your Google account after you have signed in. You can click on this link to directly visit the PIN creation page

Step 4: Tap on the Create PIN option

Step 5: Now, follow the on-screen steps to create your Google Account PIN. Make sure you select a strong PIN for your account.

Step 6: Tap on the Save option.

Also Read: Want To Use Your Photos As Smartwatch Face? Here’s How To

Steps To Change Google Account PIN

Step 1: Launch any web browser and visit Google Account portal

Step 2: Sign in with your registered credentials

Step 3: Go to the security tab

Step 4: Head to the ‘How you sign in to Google’ option

Step 5: Click on Google Account PIN option

Step 6: Select Change PIN setting and enter your new Google Account PIN

Step 7: Tap on Save once done

Categories
Featured How To Laptop

Need Emergency Internet On Your MacBook? How To Use iPhone or iPad To Connect MacBook With Internet?

Key Highlights

  • Internet on Mac can be accessed using an iPhone or iPad
  • Personal hotspot feature on Mac comes handy
  • Both Mac and the iPhone/ iPad needs to be within a range to use personal hotspot

Apple MacBook is amongst the most advanced laptop lineup which is catering to all premium end consumers. Apple has been consistently upgrading the MacBook lineup with industry-leading hardware which has ensured its popularity doesn’t fade away despite the hefty competition in the market. The new-generation MacBook laptops have become more reliable with speeds and overall performance. Internet connectivity as well as usage is faster than ever with all MacBook models. If you already own a MacBook, you must be using it for daily web activities including browsing, downloading files, and also for streaming services.

Pairing the MacBook with an available internet connection is hardly an issue. But what would you do if you need internet for emergency services and don’t have access to any active or safe network? Well, if you have your iPhone or iPad nearby, you can have this situation handled. We are guiding you with the steps that will help you connect your MacBook to internet using an iPhone or an iPad. Take a look at the steps below:

For the tech geeks, stay updated with the latest cutting-edge gadgets in the market, exclusive tech updates, gadget reviews, and more right on your phone’s screen. Join Giznext’s WhatsApp channel and receive the industry-first tech updates.

Also Read: MacBook Performance Boost: How To Use High Power Mode On Apple MacBook

Steps To Use Internet On MacBook Using iPad, iPhone (Wi-Fi Method)

Step 1: Get the MacBook and the iPhone or iPad with which you will initiate the internet connection

Step 2: Ensure both the Mac and the iPad or iPhone are logged in with the same Apple ID

Step 3: From the MacBook settings, click on the Wi-Fi Status icon

Step 4: You need to select your iPhone or the iPad in the next step

Step 5: Use the personal hotspot on the respective iPhone or iPad to get the internet connection activated on your

It is worth adding that the personal hotspot feature must be enabled before you perform the above steps. This will ensure you can get connected to internet on your MacBook swiftly.

Also Read: Want To Use Your Photos As Smartwatch Face? Here’s How To

Steps To Use Internet On MacBook Via iPad, iPhone (USB Method)

Step 1: You will need the USB cable that ships with iPhone or iPad to initiate the connection process

Step 2: Connect both the MacBook with the iPhone or iPad using the data cable

Step 3: You will get a pop up on your iPhone or iPad stating “Trust This Computer”. You need to select the “Trust” option.

Step 4: Once the pairing is done, you can start using internet on your MacBook