Categories
Apps Featured How To

PhonePe UPI Pin Activation Via Aadhaar: Steps To Enable UPI ID Using Aadhaar Number

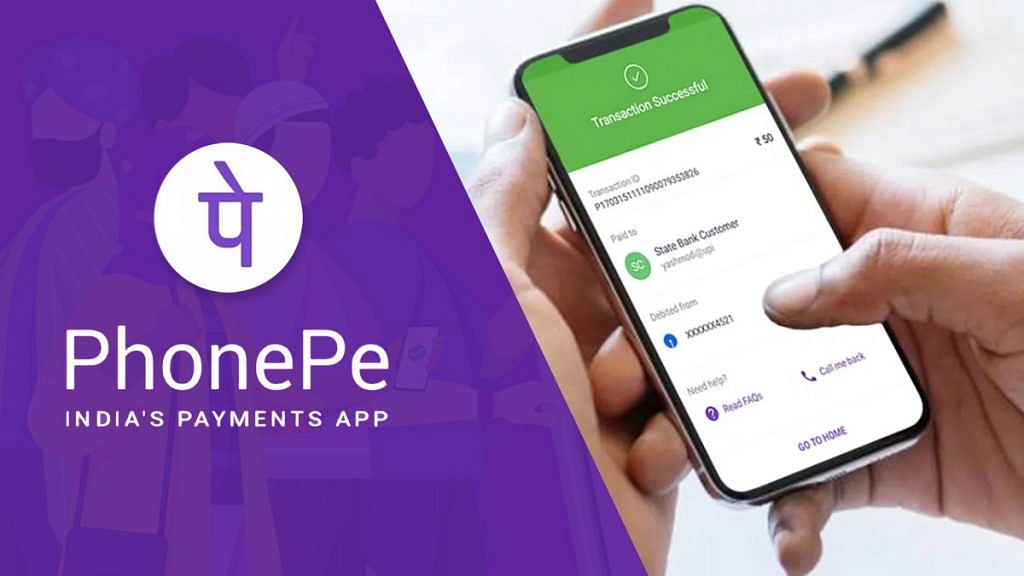
UPI is undeniably the easiest mode of payment in India. Following the boost in digitization across the nation, digital wallet apps such as PhonePe, GPay, and Paytm have also seen a massive surge in the user base. The convenience of making online payments is what driving the audience to use UPI services. These apps are adapting to modern requirements and bringing in new features to make UPI transactions secure and hassle-free. PhonePe just added one such user-friendly option that will allow UPI activation easy and secure.

PhonePe UPI Activation Via Aadhaar: All You Need To Know

PhonePe in the latest development has announced the activation of UPI via Aadhaar. Until now, all of the UPI apps offer a provision to activate UPI via a registered mobile number and an email address. PhonePe has now become the first UPI app in the country to bring this Aadhaar-based UPI activation.

With this feature enabled, it will be easier for the general audience to activate their UPI IDs with proper authentication. The company believes this new feature’s arrival with not only help ease but also expand the UPI ecosystem in the Indian market which further will help improve the digital payments ecosystem.

Additionally, with the launch of this new option, users would not need to add a valid debit card to generate their dedicated six-digit UPI pin. This has been one of the biggest reasons why a major chunk of users who don’t hold any debit card services and are only using a bank account for payments.

With this new option in place, the app will be able to use Aadhar details for e-KYC to generate the six-digit UPI pin for digital payment services. PhonePe has got approvals via designated authorities including UIDAI, RBI, and NPCI to get this system onboard.

PhonePe also clarified that it aims to expand its UPI services beyond the Indian borders and is working closely with NPCI for the same. If you are wondering how can you use Aadhar for UPI activation on PhonePe? Read on the steps below:

How To Activate PhonePe UPI PIN Via Aadhaar

Step 1: Download and install PhonePe application to get started with the UPI pin activation process.

Step 2: During setup., you would need to enter the last six digits of your Aadhar number.

Step 3: You will receive a new UPI Pin activation OTP on the registered mobile number.

Step 4: Confirm the OTP and setup up the new UPI pin.

Categories
Featured How To Mobile

iOS 16.1.1 Arrives With Bug Fixes: Here’s How To Download It On iPhone

Key Highlights

  • Apple has released iOS 16.1.1 for supported iPhone models
  • Apple has released iPadOS 16.1.1 for supported iPad models
  • The latest update brings bug fixes and security updates

Apple has released iOS 16.1.1 and iPadOS 16.1.1 updates for all compatible iPhone and iPad devices. The recently released updates do not add any new features; instead, they fix bugs on the supported devices.

Apple hasn’t given a thorough description of the flaws that iOS 16.1.1 and iPadOS 16.1.1 are aimed to address. The tech giant has stated that these upgrades fix a flaw that may allow a “remote user to trigger unexpected app termination or arbitrary code execution,” according to the release notes.

iOS 16.1.1 Availability

As far as availability is concerned, the iOS 16.1.1 and iPadOS 16.1.1 updates are for iPhone 8 and newer iPhone models, all iPad Pro models, third-generation iPad Air and newer models, iPad fifth generation and newer models, and the fifth-gen iPad Mini and newer models.

Steps To Download iOS 16.1.1 On iPhone

Step 1: Get your iPhone’s Settings app open.

Step 2: Select General Settings by tapping it.

Step 3: Select Software Update from the General Settings option by tapping it. You will then see the most recent software update that is available to you.

Step 4: Select “Download and Install” from the option.

Step 5: There, you will be asked to enter your passcode. Type in your iPhone password.

Step 6: To accept Apple’s terms and conditions, tap on Agree. To make sure of your decision, tap the Agree button one more.

Step 7: To complete the installation procedure, adhere to the on-screen instructions.

It is worth noting that the iOS 16.1.1 update comes roughly two weeks after the company released iOS 16.1 which included a number of new features and changes. This update brought new charging settings that help users reduce their carbon footprint by selectively charging when cleaner power is available.

The update also brought support for the new Matter standard for connecting smart home devices and support for Apple Wallet key-sharing capabilities. It allows a user to securely share keys for cars, hotel rooms, and other items in the Wallet using Messages and messaging apps like WhatsApp.

Categories
Featured How To TV

OnePlus TV HDMI Issue: How To Quickly Fix HDMI Picture Quality And Interface Issue With All OnePlus Smart TVs

OnePlus is one of the biggest smartphone manufacturers across the globe. We have seen the brand launching top-of-the-line handsets equipped with high-end internals including the flagship grade MediaTek and Qualcomm chipsets and premium display and camera features too. In addition to smartphones, the company is also aggressively getting hold of the market in other consumer goods markets.

OnePlus smart TVs are also giving tough competition to most of the premium TVs available in the premium and mid-range segments. The brand has a bunch of TV lineups for all categories of users. Despite an affordable price range, OnePlus smart TVs don’t compromise anyhow with delivering rich audio-video output.

All OnePlus smart TVs have multiple connectivity options. You also get wireless connectivity options with OnePlus smart TVs (both Wi-Fi and Bluetooth). With this, you can not get access to the internet for OTT and streaming platforms but also get the option to add wireless accessories such as remote control or a speaker. All OnePlus smart TVs also offer HDMI port connectivity. Some of the OnePlus smart TVs even offer HDMI (ARC) ports for seamless connectivity.

But have there been any situations where you have experienced issues with HDMI ports and connectivity on your OnePlus smart TVs? If yes, are you aware of the quick fixes of troubleshooting steps to resolve HDMI issues with OnePlus smart TVs? Well, we have listed down all the ways in which you can easily resolve the HDMI interface and abnormal picture quality with OnePlus smart TVs. Read on below:

How To Fix Abnormal HDMI Interface Issue With OnePlus Smart TVs

Step 1: The first step is to unplug and re-plug the HDMI cable connection between the OnePlus TV and the supported device. If this doesn’t resolve the issue move to the next step.

Step 2: On your OnePlus smart TV, open the Settings menu and then click on the More option.

Step 3: Click on Settings and then the Input option. Now, switch the “Signal Format” settings. This should resolve the issue and if not you should try performing the next step.

Step 4: Restart the paired HDMI device and also unplug and replug the TV and reboot. This should resolve the abnormal HDMI issue with your OnePlus smart TV.

How To Resolve HDMI Picture Issues With OnePlus Smart TVs

Step 1: Power off and unplug the OnePlus TV from the power source and reboot after re-plugging.

Step 2: Try connecting the device to another HDMI interface/port.

Step 3: If the picture quality issue persists, try switching the Signal Format settings from the TV.

Step 4: Also, try resetting the default picture settings operations.

Step 5: Restart the connected HDMI device and also reboot the TV to fix the abnormal picture quality issue with the OnePlus smart TV HDMI.

Categories
Featured How To Laptop

Dell PC, Laptop Support: How To Fix Display Issues With Dell Monitors At Home

Dell has become a preferred brand for laptop and PC users in India and global markets. The PC brand has been bringing in good options for performance-oriented users and is proactively releasing new models in different lineups targeting all segments of users. For budget and mid-range consumers demanding high-end performance, the Dell Vostro and Inspiron series offer the best options. Whereas, for high-end consumers and gaming professionals, the Dell XPS and Alienware laptop lineups have suitable models.  

Dell PCs are also all potent and offer a premium-class user experience. What gives Dell an edge over other PC brands in India is the widely available support ecosystem and post-sale services to help users resolve any issue with their laptops and PCs.  Dell also offers remote support services to laptop and PC users to minimize the visits to a nearby service center in case of any issue with the hardware or firmware.

One of the common issues with Dell laptops and PCs that can be easily fixed at home without necessarily heading to an authorized service station is the display issue. This is a random issue where in the screen doesn’t turn on or you see a blank or black screen. In some cases, the images displayed on the Dell laptops and PCs could be distorted and blurry and in other cases, you might see horizontal or vertical lines on the screen.

Also Read: How To Fix Wi-Fi Issues With Windows 11 Laptops And PCs

If you aren’t aware of the quick fixes that can easily help fixing display issues with Dell PCs, you are at the right place. We have listed down the troubleshooting steps to resolve display issues with Dell PCs in this article.

Quick Troubleshooting Steps To Fix And Resolve Display Issues With Dell Monitors

Step 1: The first step would be to check if there is any physical damage on the laptop or PC’s screen. If there is any visible crack, you might have to get the panel replaced. If there is no display breakage, you can move to step 2.

Step 2: Try to plug in the Dell monitor (for PC) to any other wall outlet. Also, do not supply power using a power strip or surge protector to check if the display turns up.

Step 3: If the above step doesn’t work, try bypassing Dell docking station. Connect the Dell PC monitor to the computer using an HDMI, DisplayPort, or USB Type Cm and other supported video cables.

Step 4: Try changing the video source of the Dell monitor using the menu buttons on the monitor. Change the brightness and contrast levels. This should fix the temporary issues with the display configurations.

Step 5: If still you see a black/ black display or blurred images, check the monitor as a stand alone device and see if its working properly.

Step 6: Try downloading or updating the display drivers to the latest version,

Step 7: If the display issue persists, run the Support Assist hardware test for the video card. If there is some issue with the panel and it fails the test, you would need to contact Dell technical support for a permanent fix.

Categories
Apps Featured How To

Get Apple Music Free For Four Months Via Shazam: Here’s How To Get The Deal

Key Highlights

  • Shazam offers Apple Music for free
  • The Apple app for streaming high-quality music is now available for free for four months
  • Users can start the free trial and they won’t be charged until February

Apple Music by Apple Inc is a popular video, music, and audio streaming platform. The company typically offers new customers a complimentary Apple Music subscription for up to three months. You do, however, receive one additional month of free subscription with Shazam.

Shazam just unveiled a new offer in which it will offer free access to Apple Music for four months. If you sign up for Apple Music now, you can listen to it for free until the end of February.

You can take advantage of the offer by scanning the QR code which will take you to a page where you can sign up for a four-month free trial of Apple Music You can also opt out of the subscription anytime at any moment.

Apple Music in India starts at Rs. 49 per month and goes up to Rs. 149 per month. Here are Apple Music’s plans for India:

Voice PlanRs. 49 per month
Student PlanRs. 59 per month
Individual PlanRs. 99 per month
Family PlanRs. 149 per month

How To Grab Free Apple Music Subscription Deal?

Shazam has an offer going on its page. You can access the streaming service for up to four months without paying a dime here by scanning a QR code. All you need to do is follow these simple steps:

Step 1: Go to Shazam’s website on your Apple device. When you arrive, you will see a redeem button (for smartphone) or a QR code (for desktop).

Also Read | How To Find Or Track Lost Apple AirPods Easily: Step By Step Guide

Step 2: Tap or scan THE QR code to redeem the offer. Your device will launch Apple Music.

Step 3: You’ll be required to provide identification proof. To do this, use Face ID by pressing the side button on your smartphone.

Step 4: The service is now available for up to four months without charge. That’s all.

Categories
Apps Featured How To

Want A Male Google Assistant Voice On Android Phone? Here’s How To Enable

Key Highlights

  • From the beginning, Google Assistant defaulted to a female voice
  • Google Assistant also has a male voice that you can set up and use
  • To use Google Assistant male voice, you need to first enable it

On multiple Android devices including Android TV, Chromecast streaming devices, Google’s Nest smart speakers, and more, the voice assistant from Google, also known as Google Assistant, is available. Users can give Google Assistant voice instructions based on their regular activities and the virtual assistant will try to comprehend most of them and respond accordingly.

Google Assistant initially only had a female voice. But in 2017, Google added a male voice and gave it the moniker “second voice.” Google offers a female voice (Voice I) and a male voice (Voice II) for its voice assistant. You must first enable the male voice option in Google Assistant before using it. Follow these steps on your Android phone in order to enable the male voice on Google Assistant.

How To Set Up Male Voice On Google Assistant?

Step 1: You need to open Settings on your Android phone.

Step 2: Scroll down and search for the Google tab. Then, tap on it.

Step 3: After that, scroll down and tap Google App Settings.

Step 4: All of the Google apps’ settings, including those for Google Fit, Play, Contacts, Search, Assistant, and other related apps, should now be visible. Pick ‘Search, Assistant, and Voice’ from the option.

Step 5: Now, continue scrolling until you see Google Assistant at the bottom.

Also Read | Here’s How To Install Google Assistant On JioPhone?

Step 6: Select “Assistant voice & sounds” by tapping on it.

Step 7: You will now see the two available Google Assistant voices. A male voice (in orange) and a female voice (in red).

Step 8: To switch to the male voice, tap the Orange circle. That’s all.

You can change from the default female voice to the male voice just as simply. Changing to the male voice of Google Assistant could provide you with a new experience if you are tired of hearing the female voice.

Categories
Apps Featured How To

Now Hide Your WhatsApp Online Status: Here’s How

Key Highlights

  • You can hide your WhatsApp online status in your Privacy settings
  • Choose to show your Last Seen status only to your contacts or no one
  • You can also prevent certain people from viewing your Last Seen status

WhatsApp has grown to be one of the most widely used forms of communication over time. The platform is used by people all throughout the world, but particularly in India, as their main form of communication. One of the cornerstones on which WhatsApp was built was privacy – end-to-end encryption is one of the first and most important features of the platform it offered. However, WhatsApp has consistently released improvements over the years that increase user security and privacy. The messaging service owned by Meta has a ton of privacy and security-related options.

Previously, WhatsApp had made it possible to disable the “Last Seen” feature. Users can choose to hide from specific contacts or from everyone. And now, with its most recent update, WhatsApp has unveiled a new feature that allows you to hide your online status stamp from contacts. This implies that if you enable it, users of WhatsApp will not be able to see your online status whenever they open the messaging app. This is one of the features that users have been waiting to experience with WhatsApp.

Also Read | WhatsApp Security Code: What Is It? How To Get WhatsApp Security Code Notification On Android, iPhones, And Laptop/ PC?

How To Hide Your WhatsApp Online Status?

Waiting to modify this crucial WhatsApp setting? You can do it right now in a few easy steps. Simply follow these instructions step-by-step to learn how to hide your WhatsApp status:

Step 1: Open WhatsApp on your phone.

Step 2: Click Settings after touching the three dots in the corner to move to the Settings area.

Step 3: After that, tap on Account and select Privacy.

Step 4: Here, you will find the Last Seen and Online.

Step 5: Select the appropriate choice from everyone, my contacts, and my contacts except for nobody under “Who can view my last seen.”

Step 6: Select “Same as last seen” or “everyone” under “Who can see when I’m online.” That’s all.

Categories
Apps Featured How To

Want To Create A New Group For Google Meet Calls? Here’s How To Do It

Key Highlights

  • You can use Google Meet suite features in the new Meet app on your Android or iOS device
  • Users can make unlimited video calls on their phones with no time limit
  • Google Meet app will be available on several platforms including Zoom

Google Meet is a crucial tool for a wide range of people. A meeting can be scheduled online with up to 100 participants for a maximum of 60 minutes by anybody with a Google Account. Google stated earlier this year that Meet features would be incorporated into the Duo app, allowing users to effortlessly schedule video conferences and video chats with an individual or a group.

Duo and Google Meet have been combined to offer a single, free video-calling tool that works with all Google accounts. With just a few easy steps, Google Meet enables you to start a video call and a new group instantly. Here’s how you can do it.

How To Create A New Google Meet Group?

It goes without saying that most people in 2022—whether they are working or not—are short on time. If you don’t already have a Google Meet Group set in place, creating a Google Meet call with a large number of participants can be challenging. Here’s how to start a video call and quickly create a new group under such circumstances:

Step 1: Launch the Google Meet app on your device.

Step 2: Now, click on the “New” button in the bottom right corner.

Step 3: Tap on “Create Group.” Select the contacts that you want to make a part of your group.

Step 4: Now, click on “Next.”

Step 5: Here, you have the option to rename the group, copy the group link, or add new members.

Step 6: When you are ready to start the meeting, tap “Start.”

According to a recent Google Meet update, the app will be available on a number of platforms, including Zoom. With this upgrade, users of Google Meet and Zoom Rooms will be able to join meetings by entering a meeting code or directly from their calendars.

Categories
Featured How To TV

OnePlus TV Sound Issue: How To Fix No Audio Issue With OnePlus Smart TV Speakers

OnePlus is a popular consumer electronics brand that has a wide catalog of smartphones, digital accessories such as audio and smart wearables, and more. The company has also been showing its expertise with smart TVs and filling in the user’s requirements for premium large-screen LED TVs. OnePlus has multiple smart TV lineups that bring in the latest of technological innovations and smart features for a rich viewing experience.

The OnePlus smart TVs offer Wi-Fi and Bluetooth network connectivity as an advanced set of features that helps users to stream videos via OTT platforms and also pair external accessories such as wireless speakers and more. OnePlus also equips all its smart TV lineups with powerful audio systems so that users get the best viewing experience sitting from the comfort of their homes.

We have been sharing quick hacks and troubleshooting steps to resolve issues with OnePlus gadgets including TWS earbuds, smartphones, and smart TVs. Our previous coverage has been around fixing display-related issues with OnePlus smart TVs. In this article, we are listing out the ways in which you can quickly fix issues with the OnePlus TV sound system.

How To Fix OnePlus TV Sound Issues Without Visiting Service Centres

When there is no audio at all from the speakers.

Step 1: If the no audio issue is with a specific app on your OnePlus smart TV, you need to clear the cache data of the app. To do so, open the Settings menu and select the Apps option. Click on the required app and tap on the “Clear Data” option. Go back and check if the audio issue is fixed.

Step 2: Change the HDMI 2 interface and try HDMI 1 or HDMI 3 interface to check if the audio works.

Step 3: If the audio issue is still there, you need to open the Settings option and tap on the Sound option. Select Audio and then set the output to speaker.

Step 4: Unplug the OnePlus TV’s power cord and re-plug. Power on the TV. This should resolve no audio issue with your speakers.  

If for some reason, the speakers still don’t deliver any audio, there are possibilities of a hardware fault. You might have to contact the service centers to get it fixed.

Categories
Apps Featured How To

WhatsApp Security Code: What Is It? How To Get WhatsApp Security Code Notification On Android, iPhones, And Laptop/ PC?

WhatsApp is a league ahead in the instant messaging application race and has found its way into almost every other iPhone or Android handset. Even for laptop and PC users, the web version comes as an option for private messaging. WhatsApp claims to offer one of the most secure platforms for messaging, video/voice calls, and media transfer. The end-to-end ecosystem is what enhances the privacy aspects of this messenger.

WhatsApp provides a dedicated security code to each user that is used to verify the end-to-end encryption with the sent/received calls and messages. A WhatsApp security code comprises a 60-digit number and a QR code.  If you are unaware, the security code can be easily located within the app itself.

As mentioned above, the security codes are unique for each user and you can check your WhatsApp security code on the contact screen. There are instances when you might receive a security change notification on WhatsApp. This could happen if either your or one of your contacts has changed their phone number. Another reason you receive a  WhatsApp security code change notification is the addition or removal of a paired device.

You can easily toggle on WhatsApp security code notifications using your Android or iOS handset and laptop or PC using the WhatsApp Web version. The steps for the same are mentioned below:

Steps To Enable WhatsApp Security Code Notification On Android Phones

Step 1: Launch WhatsApp application and click on the More (three dots) icon on the home screen.

Step 2: Click on the Settings menu.

Step 3: Now, select the Accounts option.

Step 4: Tap on the Security option.

Step 5: Scroll down to the Show security notification option and toggle it on.

How To Enable WhatsApp Security Code Notification On Apple iPhone (All models)

Step 1: From the WhatsApp app’s home page, go to the Settings menu.

Step 2: Select the Account option.

Step 3: Now, click on the Security tab.

Step 4: Enable the WhatsApp Security notification on iPhone.

How To Activate WhatsApp Security Code Notifications On WhatsApp Web

Step 1: Open any web browser on your laptop or PC.

Step 2: Launch the WhatsApp Web application.

Step 3: Go to the Menu option or tap on the downward arrow icon placed above the chat list.

Step 4: Tap on the Settings menu.

Step 5: Click on Security.

Step 6: Now, enable the Security code option for WhatsApp web.