Categories
How To Mobile

Samsung Easy Mode: What Is It And How To Enable It

Key Highlights

  • Samsung Galaxy phones come with the Easy Mode feature
  • The feature simplifies the user interface
  • Easy Mode is perfect for senior citizens or people with vision issues

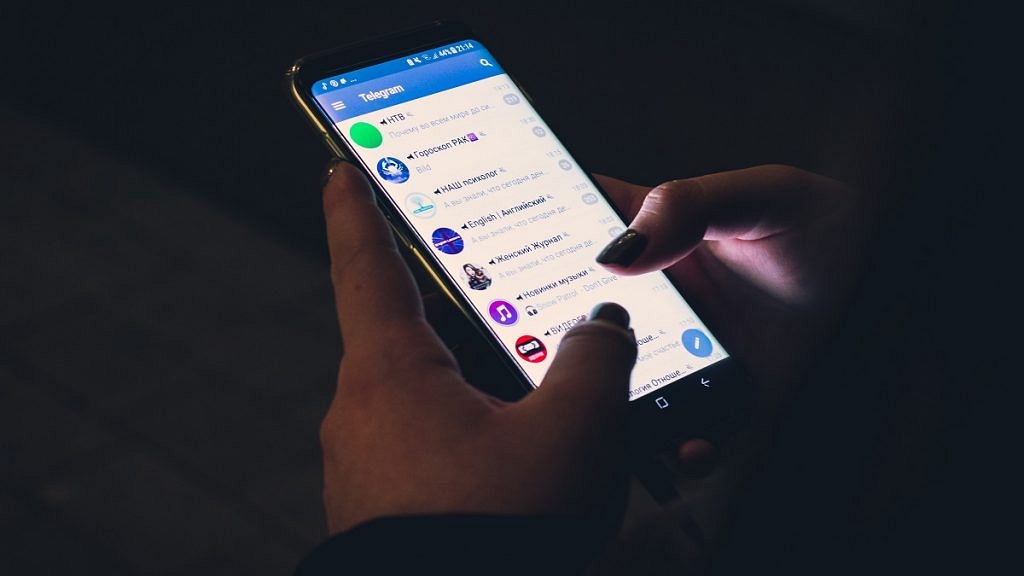
Samsung smartphones use the One UI user interface from the company which is great to look at but not the most user-friendly interface. Samsung smartphones do, however, come with an Easy Mode that provides a simplified user experience. Here’s all you need to know about Easy Mode and how to enable it.

What Is Easy Mode?

Samsung Galaxy smartphones have an option called “Easy Mode” that simplifies the user interface. It removes the Samsung launcher and replaces it with a more user-friendly interface. Easy Mode is perfect for senior citizens or even those with vision issues because it boosts the system-wide font size. This is also a great tool for those who are new to using smartphones.

Easy Mode gives Samsung Galaxy users a simple method to streamline their smartphones and has long been a one-of-a-kind One UI feature. There is less mess and complexity when it is on.

Additionally, Easy Mode makes the contents on the screen larger and adds a high-contrast keyboard for easier reading. Using a longer touch-and-hold delay reduces accidental touches as well.

How To Turn On Samsung Easy Mode?

The Easy Mode can be turned on in the device Settings of the majority of modern Samsung phones. Listed are the steps that can help you turn on Easy Mode on your Samsung phone:

Step 1: To access the display settings menu, enter the Settings menu of your Samsung phone and touch Display.

Step 2: Then, select Easy mode by scrolling down. To activate Easy mode, tap the toggle next to it. The high contrast keyboard theme and the touch and hold delay duration can both be changed in the Easy mode.

Step 3: You will now notice that your home screen has been simplified when you access it. You’ll only find a small number of apps listed. By holding down on an app in the main app list and dragging it to the home screen, you can add more apps to the home screen.

Step 4: To add a single contact for quick access, simply swipe from the left until you locate the page. And you are all done.

Categories
Featured Gaming How To

Want To Play Modern Warfare 2 On Steam Deck? Here’s How

Key Highlights

  • CoD MW2 is available on PC, Xbox, macOS, and PlayStation
  • The game is not available on Steam Deck because SteamOS does not support it
  • You must set up Windows on your device to play Modern Warfare 2 on Steam Deck

The release of Call of Duty: Modern Warfare 2 has Steam Deck users wondering if they can join in the fun by playing the game on it. You already have the game in your library because it is available on Steam. The console’s main purpose is to allow you to carry your Library with you wherever you go. Check out CoD MW2’s compatibility with Steam Deck and any available solutions in this thread.

How You Can Play Modern Warfare 2 On Steam Deck?

One must set up Windows on their mobile phone in order to play Modern Warfare 2 on Steam Deck. You can either completely replace SteamOS on the device with Windows or dual-boot Windows and SteamOS on the Steam Deck. To install Windows on your Steam Deck instead of SteamOS, you need to do the following:

Step 1: To create installation media, download the Windows ISO file to a USB device.

Step 2: Then, turn off the Steam Deck and use a USB Type-C hub or a connector to connect it to the installation media drive.

Step 3: Holding the Volume Down and Power buttons on your Steam Deck while simultaneously pressing and releasing both will launch the boot menu.

Step 4: When you choose EFI USB Device, the Windows Installer is started by the system.

Step 5: Now, verify the language, hit Next, and then select Install Now.

Step 6: If a key is available, enter it on the following screen; otherwise, select “I don’t have a product key.”

Step 7: Tap next after selecting a Windows version until you see an installation window type.

Step 8: Select “Custom: Install Windows only.” Then tap on drive 0 Partition 8 and delete it. Choose Drive 0 Unallocated Space and tap next.

Step 9: Next, follow the on-screen instructions to finish installing Windows on your device.

Unfortunately, Modern Warfare 2 uses the Ricochet anti-cheat tool which is incompatible with operating systems other than Windows. Once your Valve device runs Windows OS, you can install and play Call of Duty: Modern Warfare 2 with ease.

Categories
Featured How To Mobile

Turn On Emergency SOS Feature On Android Phone: Here’s How

Key Highlights

  • Setting up Emergency SOS can be a lifesaver
  • You can add an emergency contact or personal contact number
  • To activate the Emergency SOS feature, press the power button five times

Regardless of its brand or model, your phone is likely to have an emergency SOS option built in. Although you hope you never need it, you should be aware of it just in case.

It only takes a few minutes to set up emergency SOS features but they could save your life. Quickly press the power button five times to dial your emergency contact number after enabling Emergency SOS. This can be changed to a personal contact or set to your local emergency number. The emergency number is 112 in India. It’s one of the most crucial things you can do when configuring a new Android phone.

Having a personal emergency number is beneficial since it alerts your known contacts and enables them to take immediate action. This article will show you how to easily set up the Emergency SOS feature and add emergency contacts to your Android phone. Let’s check it out:

How To Set Up Emergency SOS On Your Android Phone?

Step 1: On your Android phone, go to Settings and select “Safety & emergencies.”

Step 2: Now, turn on “Emergency SOS.”

Step 3: After that, toggle on “Emergency SOS.”

Each phone has a different way of doing this. Both Pixel and stock Android phones will have the aforementioned options. Simply type “SOS” or “Emergency” into the search field to access the feature if you can’t find these alternatives.

Step 4: Once you do this, return to the “Safety & emergency” screen and click on “Emergency contacts.”

Step 5: Tap “Add Contact” and select an emergency number that you wish to add.

As said above, the procedure may be slightly different for you depending on the device you are using. But with Android-based devices, it’s largely the same. The Emergency SOS feature will be active and properly configured once you complete all the stages.

Categories
Featured How To Laptop

How To Fix Bluetooth Pairing Issues With Dell Laptops (All Models)?

Dell is one of the largest players in the laptop and PC market in India and other global markets. The PC manufacturer has designed several popular laptop lineups including Inspiron, Vostro, XPS, and Alienware. The former two have both affordable and premium mid-range laptop models, while the latter two are designed for premium end customers.

Dell laptops are multifunctional and equipped with best-in-class hardware. The vast and easily accessible service support ecosystem has been a primary factor for this brand’s popularity amongst the Indian audience. Dell has both Intel as well AMD-powered laptop models that feature the latest hardware innovations and are performance oriented.

All Dell laptops offer modern connectivity options including Wi-Fi and Bluetooth for wireless connectivity and pairing external accessories. Often there are general connectivity issues reported with both Wi-Fi and Bluetooth networks. We have previously covered the quick troubleshooting steps to fix issues with Wi-Fi internet connectivity while using Dell laptops. In this article, we are sharing the quick steps to resolve issues with Bluetooth in Dell laptops.

How To Quickly Fix Issues With Dell Laptop Bluetooth

Step 1: Check if the Bluetooth adapter of your Dell laptop is toggled on. If not, turn it on.

Step 2: Make sure the wireless device that needs to be paired with the Dell laptop is within range.

Step 3: You might need to change or replace the battery of the Bluetooth device for better connectivity.

Step 4: Restart the Dell laptop. Do save the important data or take a backup.

Step 5: From the control panel, go to the Bluetooth settings.

Step 6: Unpair the device with which you are experiencing connectivity issues.

Step 7: Re-pair the Bluetooth device and the connection should be successful.

Step 8: If the issue persists, open the SupportAssist application on your respective Dell laptops. Optimize the laptop using this application and the issue should be resolved.

Step 9: You will need to run the Bluetooth Adapter hardware test to check for errors.

Step 10: Download and install the latest Bluetooth drivers.

Step 11: The Bluetooth connectivity issue should be fixed. If for some reason, the Bluetooth adapter test fails while using the Support Assist feature, you would need to contact the Dell Technical Support center.

Categories
Accessories Featured How To

How To Connect OnePlus Buds True Wireless Earbuds With Smart TVs and Laptops?

Key Highlights

  • OnePlus Buds uses latest Bluetooth technology for quick connectivity
  • To connect your OnePlus Buds earbuds to your smart TV, read more.
  • You have to turn on Bluetooth on both devices for pairing

OnePlus has been growing its consumer gadgets portfolio with new products proactively. We see new Android smartphones, TWS earbuds, and smart TV launches from the Chinese tech OEM in the global regions and India frequently. OnePlus Buds is the brand’s bet in the affordable TWS earbuds segment.

OnePlus has been leading this race with pocket-friendly yet performance-oriented truly wireless earbuds. All the OnePlus Buds earbuds including the Buds Pro, Buds Z/Z2, and the vanilla Buds offer a rich listening experience. OnePlus has also made numerous upgrades with the new OnePlus Buds models to offer a wider range of connectivity as well as a better soundstage.

Also Read | How To Enable Multipoint And Audio Switch Feature In Pixel Buds TWS Earbuds

All OnePlus Buds variants are equipped with Bluetooth technology for quick connectivity with compatible smartphones and tablets. The OnePlus Buds TWS earbuds can also be paired with laptops and smart TVs. What all steps would you need to perform to connect the OnePlus Buds earbuds with any laptop or smart TV? The steps are listed here:

How To Connect OnePlus Buds Earbuds With Laptops

Step 1: To pair the OnePlus Buds TWS with laptops, go to the control panel first.

Step 2: Scroll to the Bluetooth and other devices options.

Step 3: Tap on the + icon or the Add Bluetooth device option.

Step 4: Now, you would need to put the OnePlus buds earbuds into pairing mode. To do so, press and hold the setup/pairing key. You can locate this key on the charging case.

Step 5: Once the earbuds are in pairing mode, you will see it in the list of available devices on your laptop. Click on the device name to initiate the pairing process.

Step 6: The OnePlus Buds will now be connected to the laptop. You can start playing videos or games and listen to the audio on the OnePlus Buds earbuds.

Also Read | OnePlus Buds Failed To Discover Or Identify? How To Resolve Pairing Issues With OnePlus Buds TWS Earbuds

How To Pair OnePlus Buds TWS with Smart TVs

Step 1: You can connect OnePlus Buds TWS earbuds with TVs that have Bluetooth support.

Step 2: Go to the Settings menu on your respective smart TVs.

Step 3: Go to the pair new device option.

Step 4: Press and hold the pairing key on the OnePlus Buds earbuds.

Step 5: Tap on the earbuds name listed on the TV screen.

Step 6: Accept all permissions on the screen and you are good to go.

Also Read | Five Best Wireless Earbuds Under Rs. 2,000

Categories
Apps Featured How To

Instagram Tips And Tricks: How To Reply To Any Reel Comment With Another Reel Video On Android, iOS

With Instagram, social media usage has seen a substantial boost in the past few years. The Meta-owned messaging platform has become a personal favorite for content creators and not just the general audience. The app started its journey as a photo-sharing platform for the audience but has incorporated multiple other services and features in the last few years.

Besides photo sharing, Instagram also has expanded its capabilities for direct messaging and sharing short format videos called Reels. The latter emerged as one of the best substitutes for TikTok faced a blanket ban in India due to its China links.

Also Read: 100 Best Instagram Boys Name With Alphabets M To Z100 Best Instagram Name Ideas For Graphic Designers

Instagram Reels is now one of the quickest ways for social media influencers to earn fame and also get monetary benefits out of the content they generate. Instagram Reels is a full-fledged service that lets you make short videos with multiple audio-video effects. You can also remix your Instagram Reel video with other Reels to enhance effects.

Also Read: 100+ Best Catchy And Unique Instagram Names For Your Pets

We already have shared the steps with which you can remix your Instagram Reel video and share it with the desired audience. In this article, we are sharing another handy feature with Reel on Instagram that will improve your experience with its usage. Just for reference, Instagram lets you comment on a Reel video with another Reel video.

This improves your user experience with the Reels video option on Instagram. But what all steps would you need to perform in order to reply to a Reel with another Reel? Below is the step-by-step guide:

Also Read: 100+ Best Instagram Names For Boys

How Can You Comment Instagram Reel Video With Another Reel Video

When you share any Reel video on Instagram, you can reply to user comments with a video or a new Reel. When you use this option, the reply or the reel that you are commenting on will be in the form of a sticker with the commenter’s username as well as a profile picture.

Step 1: Launch the Instagram application on your Android smartphone or iPhone.

Step 2: Open the Reel video and then go to the comment to which you wish top reply with another Reel.

Step 3: Now, click on the Record option placed at the bottom left. You will now be able to select the video from the gallery or the camera roll. Additionally, there is also a Green Screen option that lets you record a fresh reel with a different background.

Step 4: Click on the comment sticker with which the background color will change.

Step 5: Tap and hold the sticker and drag to adjust.

Also Read: Instagram Stylish Name And Bio: How To Write Instagram Profile Name And Bio With Stylish And Cool Fonts

Step 6: Click on the Next button.

Step 7: Make the required editing.

Step 8: Tap Next again.

Step 9: Hit the Share button to finish.

Also Read: Need A Cool Instagram Boy Name? Top 100 Instagram Boys Name With Alphabets A To L

Categories
Featured How To Mobile

Here’s How To Use Emergency SOS Via Satellite On Your iPhone 14

Key Highlights

  • iPhone 14 comes with emergency SOS via satellite connection feature
  • Emergency SOS connects your iPhone’s antenna directly to a satellite to contact your emergency service provider
  • This feature is supported on iPhone 14 and iPhone 14 Pro models with iOS 16.1 or later

There are new features in the new iPhone 14 series including eSIM, photography, and emergency SOS through satellite connection. You can signal for assistance from anywhere because this service is available even in remote locations.

But for Emergency SOS, you need either an Apple Watch or an iPhone with WiFi or cellular connectivity that is close by. You will need to choose the emergency service that you need in some nations or regions.

Even though this feature is fantastic, many users are unaware of how Emergency SOS Via Satellite on the iPhone 14 operates. Everything you need to know about emergency SOS via Satellite for the iPhone 14 series is covered in this article. Let’s dive in.

How To Use Emergency SOS Via Satellite On iPhone?

If there is no cellular or WiFi connection when you press and hold the power and volume buttons at the same time to make an emergency call, your Apple iPhone 14 will offer to send an SMS message instead. Here’s how you can use Emergency SOS Via Satellite by following simple steps:

Step 1: Press and hold the volume up and power keys simultaneously until the Emergency SOS slider shows.

Step 2: To contact local emergency services, move the Emergency SOS slider.

Step 3: The regular call should fail and at the top you should see a “No Connection” message. Then tap the “Satellite emergency call” button. Alternatively, you can text 911 or SOS in the Messages app and select Emergency Services.

Step 4: Select “Report Emergency” from the option now.

Step 5: Answer a few questions to describe your situation as accurately as possible.

Step 6: Follow onscreen tips to connect your iPhone to a satellite.

Step 7: Once you’ve established a connection, keep doing as instructed to maintain connection so the message could go through.

Your Medical ID, emergency contacts, responses to an emergency questionnaire, location (including elevation), and the amount of iPhone battery life left will all be shared with emergency responders by Emergency SOS.

Categories
Featured How To TV

Audio Not Playing With Recorded Videos On Realme Phones? Here’s The Fix

Realme has lodged its name in the smartphone industry as a popular budget player. The Chinese OEM started its journey as OPPO’s subsidiary but later established itself as an independent brand. In a short span, Realme has created a challenging ground for other prime players with its smartphone lineups. For the budget audience, the company has the Realme C and the Realme Narzo series, while for the gaming audience it has launched the GT series.

Realme smartphones are known for their all-around performance under budget. All the models for the lineups mentioned above deliver a good experience with general usage and multimedia playback. You can look out for certain models with large and multiple camera sensors if you wish for a premium photography experience. And for high-end gaming, the Realme GT series is to vouch for.

The top-tier Realme phones packed with a potent camera setup also offer multiple-inhouse features for an enhanced photography experience. The Chroma Boost, Night mode, and AI enhancer are some of the best camera features you get with Realme Phones. Video recording is also good with all Relme handsets.

The stabilization factor is also top-notch with Realme phones’ cameras which is why Realme phones are one of the first preferences for budding social media content creators. You also get advanced video recording features such as time-lapse and slow-motion video recording.

While video recording is a premium user experience, a common issue is highlighted by users. We are speaking of the no audio issue with video recording. How can you quickly fix the no audio with videos recorded using a Realme phone’s camera? Read on the troubleshooting steps here:

How To Resolve No Audio Issue With Videos Recorded By Realme Phones

Step 1: The first step is to check the media sound volume. Make sure the media volume is not off.

Step 2: Check the media volume is audible with video playback. Turn up the volume levels to the max.

Step 3: Now, open the recorder on your phone and record any audio. This is to check if the phone’s speakers are working fine. If the volume is playing without any issues, the video you have recorded might have been corrupted.

Step 4: Record a new video and check if the audio is playing fine. If not, try cleaning your speakers and rebooting your phone.

Step 5: After rebooting the handset, play any general video file from the device gallery and see if the audio is playing. If not, the issue could be with your phone’s speaker. You would need to visit the service centre and get the issue fixed.

Categories
How To TV

Want To Set Up Dolby Atmos On Your Apple TV? Here’s How To Do It

Key Highlights

  • Dolby Atmos brings immersive sound effects
  • Apple has one of the largest Dolby Atmos libraries
  • You need to have an audio system that supports Dolby Atmos

You can get an extraordinary TV viewing experience with excellent sound quality with Apple TV, a potent streaming media player. You might already be aware that Apple TV 4K supports Dolby Atmos and Surround Sound, allowing you to enjoy the best audio possible. In fact, Apple TV 4K automatically selects the highest quality audio playback mode based on the capabilities of your home entertainment system. The same must, however, be supported by your home entertainment system.

Also Read | Best Smart TVs In India With 120hz Refresh Rate: Popular Options From LG, Samsung, And More

Requirements

You’ll need:

  • Dolby Atmos-enabled soundbar or A/V receiver
  • Dolby Atmos-enabled speaker setup
  • Apple TV 4K

How To Connect Dolby Atmos System To Apple TV?

If you’re using Dolby Atmos hardware, plug your Apple TV 4K and then connect the hardware to your TV. Listed are simple steps you can follow to connect your Dolby Atmos system to your Apple TV 4k.

Step 1: Connect your Dolby Atmos soundbar or A/V receiver’s HDMI input to the HDMI cord of your Apple TV 4K.

Step 2: Plug a different HDMI cable into the HDMI-ARC or HDMI Out port of your Dolby Atmos soundbar or A/V receiver.

Also Read | Best Android TV With Dolby Atmos To Buy In India

Step 3: The other end of the second HDMI cable should be plugged into your TV.

Step 4: Make sure your Apple TV 4K and Dolby Atmos hardware are plugged into power.

Steps To Check If Dolby Atmos Is Set Up On Apple TV

Once you’ve done setting up the Dolby Atmos on your Apple TV, you can also check if your Apple TV is configured for Dolby Atmos or not. Here’s how to do that:

Step 1: On your Apple TV 4K, open ‘Settings.’

Step 2: Now, open ‘Video and Audio.’

Step 3: After that, tap on ‘Audio Format.’

Step 4: Click ‘Immersive Audio.’ Make sure Dolby Atmos is on.

You might need to adjust the configuration of your sound system if Dolby Atmos isn’t enabled.

Also Read | Want To Ditch Your TV Remote? Here’s How To Setup Google Assistant On Smart TVs For Voice Controls

Categories
Apps Featured How To

Want To Send Secret Messages On Telegram? Here’s A Step-By-Step Guide

Key Highlights

  • Users of the Telegram app can send secret messages
  • People who prefer more secrecy should use Telegram’s secret chats
  • Messages sent through secret chats cannot be forwarded by the recipient to anybody

Have you ever used Telegram? It is a WhatsApp alternative and offers a lot of incredible features. Sending messages, calls, pictures, files, and other things is possible with the app. A secret chat that adds security to the users’ private chats is one of Telegram’s other distinctive and amazing features.

Secret chats are only meant for individuals who want to have secret conversations and all messages will be end-to-end encrypted. The secret messages cannot be forwarded, and once the sender has erased the message, the recipient will receive a notification asking them to do the same. Also Read | How Can You Change Font Style In Telegram: Steps For Android, iOS, Desktop

Sounds intriguing, right? But the secret chats feature is much more than that. Media files on the app can also have self-destruct times set. After they have been viewed or opened by the recipient, you can instruct your messages, images, videos, and files to self-destruct after a specified period of time. The messages will then vanish from your device as well as your friend’s device.

The function is separate from Telegram Clouds. Users can access messages in a secret chat from their original device because it is just device-specific. All messages that feature in secret chat and all media that is included in private cloud chats both have a self-destruct timer.

Also Read | Telegram Now Allow Users To Sign Up Without A SIM Card

Steps To Send Secret Messages On Telegram

Step 1: Open the Telegram app on your mobile.

Step 2: Create your account.

Step 3: By clicking the three dots, you can access the individual chat and the user’s profile you want to contact.

Step 4: Now, select ‘Start Secret Chat’.

It should be noted that Telegram private chats depend on the device. On one of your devices, if you and a friend start a private conversation, only that device will have access to it. All of your secret chats will be lost once you log out. With the same contact, you can make as many different secret chats as you want.

Also Read | Telegram Tips And Tricks: How To Schedule Messages On Telegram Android, iOS App