As the Assistant Editor, Sandeep is generating tech-oriented content and also monitoring the content published on the website. He has over six years of experience in tech journalism and has expertise in product reviews, news articles, listicles, and media campaigns.
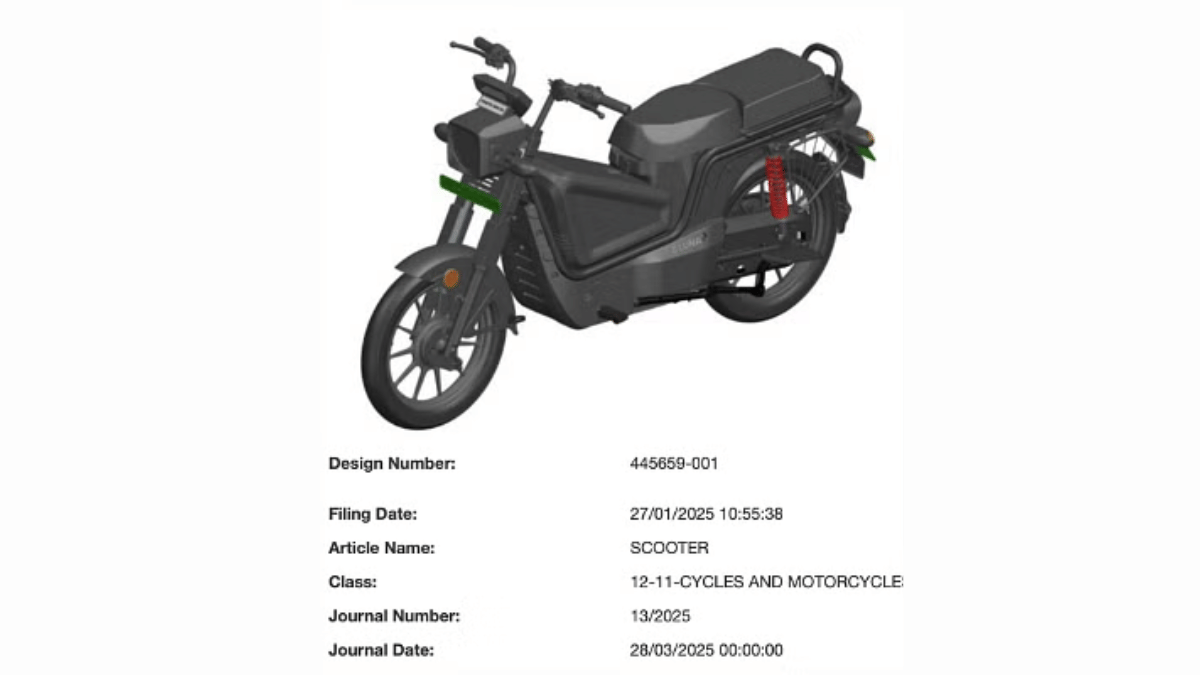
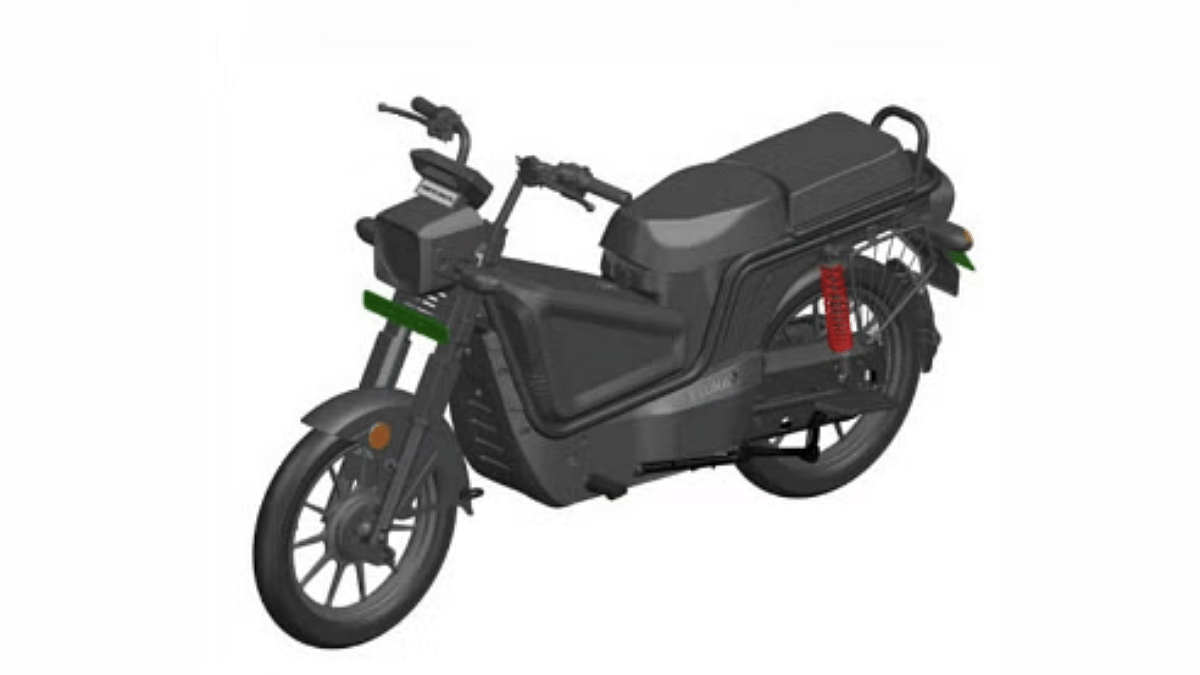
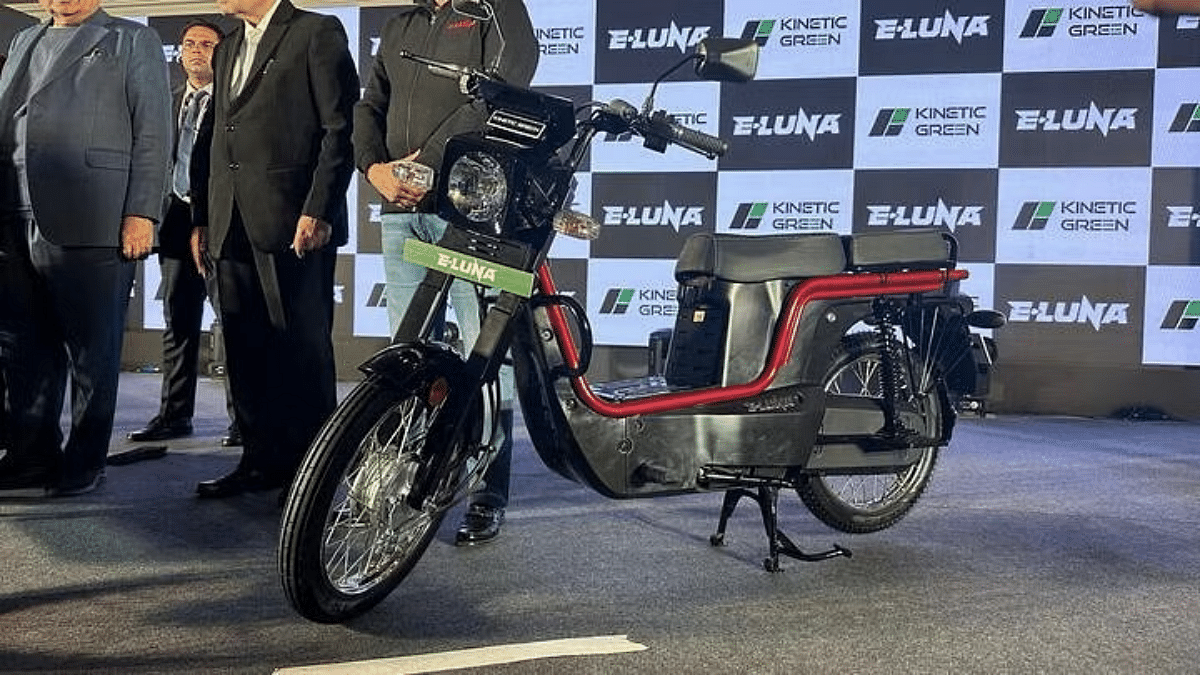
Kinetic Greens after reviving its iconic moped Luna in an all electric avatar have now bagged patent for its updated version. This is the second E2W model which Kinetic Greens could launch soon. Earlier, the company’s family e-scooter model was seen getting tested on the roads. And now, the trademark images of the updated E-Luna model has made its way to web hinting at an imminent launch.
For the tech geeks, stay updated with the latest cutting-edge gadgets in the market, exclusive tech updates, gadget reviews, and more right on your phone’s screen. Join Giznext’s WhatsApp channel and receive the industry-first tech updates.
Kinetic E-Luna’s new model has been patented. The leaked trademarked images hints a revamped design of the electric moped. It appears that Kinetic Greens is trying to adapt to the demands of the modern consumers. The upcoming E-Luna moped is now seen with a new quadrilateral-shaped component with triangular contours mounted on the floor board .
This could be for the swappable battery module or it could be for storage. Details will be clear once the final production-ready design will be shared by Kinetic Greens. It further suggests that Kinetic Green has strategically revised the design of the electric moped to make it practical for both general masses and commercial users.
Kinetic Green has only filed the patent for the new E-Luna and has not shared its powertrain details. However, besides the updated design, Kinetic Green is also likely to emphasise on improving E-Luna’s performance. While the 2 kWh fixed battery drives the current-gen E-Luna, the upcoming model is expected to be equipped with dual swappable battery units. This means we can expect range increase from 110 km per charge to around 200 km per charge. It remains to be seen if the top speed and acceleration is also improved with the latest version.
Could bring back wired headphones with 3.5 mm jack
50m cable teased
Nothing is well known for bringing out-of-the box products and has been the first to introduce smartphones with transparent back. The London-based tech OEM teased a cryptic post hinting revival of the wired earphones category. Revealing the Nothing Ear 3.5 mm via its social media handles, Nothing seems to be aiming for something unique once again? Wired earphones with 50 meter cable length? Sounds impossible right? Well, let’s try to break down the reality.
For the tech geeks, stay updated with the latest cutting-edge gadgets in the market, exclusive tech updates, gadget reviews, and more right on your phone’s screen. Join Giznext’s WhatsApp channel and receive the industry-first tech update.
Nothing via a cryptic post that reads “Get ready to tangle” have teased a new wired earphones called the Nothing Ear (3.5 mm). The snapshot of a 3.5 mm headphone jack makes us believe the teased product could be a wired headphones. Now, this seems to be strange move from Nothing as wired earphones market has reduced substantially over the past few years. It’s the onset of wireless earbuds and neckbands which led to this huge shift.
In another post, Nothing has revealed some more details including a 50 m cable length. This is where it feels Nothing could be pranking users celebrating April Fool’s Day. The earphone’s design bears stark resemblance to the Nothing Ear (Open) which made its debut last year. So, a wired earphones featuring transparent ear loop design combined with 50m cable and 3.5 mm headphone jack is what Nothing is hinting at collectively.
Is It A April Fool’s Day Joke Or A Real Upcoming Launch?
Well, that’s uncertain as of now. As said above, Nothing apparently could be trying to be playful with the audience for the April Fool’s Day. But we can’t also rule out the possibility entirely. There’s still a market for wired earphones fans and if Nothing brings back this product, it definitely will hit the right notes.
Cash withdrawal possible without physical cards at ATM
Smartphones comes to the rescue here
UPI and bank apps used for card-less withdrawals at ATM
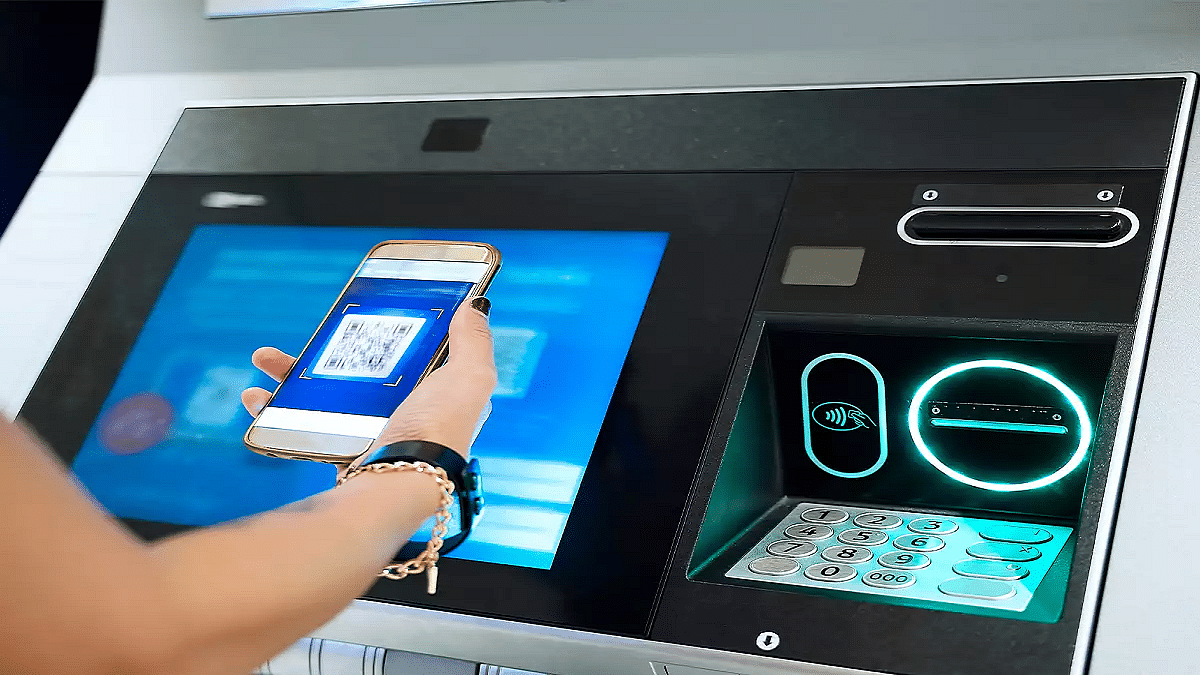
Ever been in a situation where you need to withdraw cash for emergencies and don’t have the ATM card? It’s definitely one of those scary situations that you would wish to avoid. Not any more? Modern day banking have made it easy for account holders to withdraw money from ATM machines without any physical ATM card. All you need now is a smartphone with working internet connection. Here in this guide, we’ll take you through the process of withdrawing money from ATMs with just your smartphones.
The answer is yes. You can now easily withdraw cash from any ATM even if you aren’t carrying a physical debit or credit card. All thanks to the digital banking which now is more secure and making lives easier for the masses. By downloading the bank’s mobile app or via UPI apps, cardless cash withdrawals can be done at the ATMs.
Safety From Scams and Card Thefts – Helps with enhanced safety while money withdrawal by ruling out possibilities of card skimming or thefts at the ATM.
Hassle Free Cash Withdrawal– Cuts down on hassle of carrying physical ATM cards everywhere and helps with withdrawal even if there is no card.
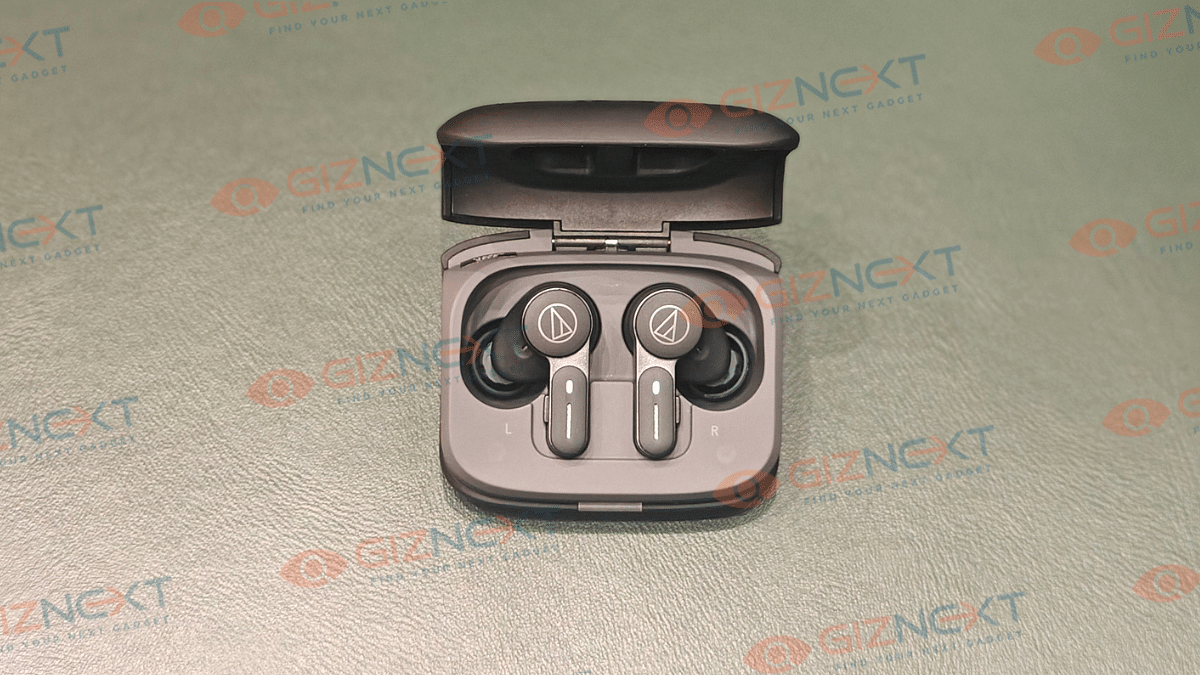
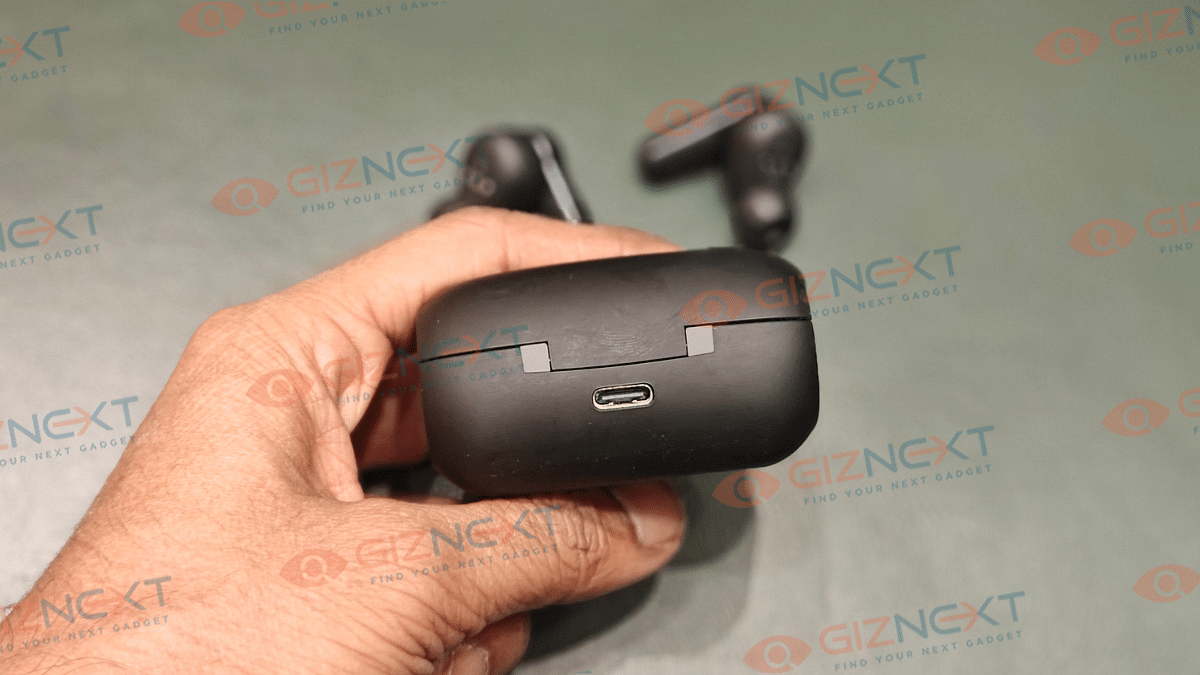
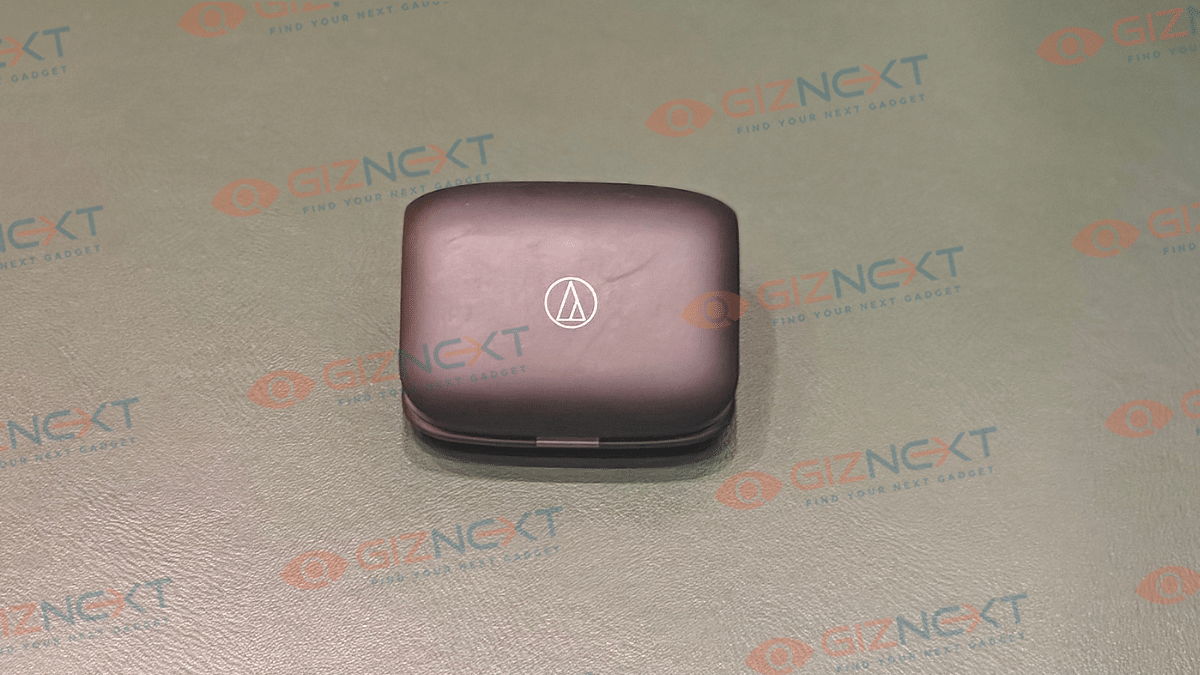
Audio industry has seen a major transformation over the last decade. It isn’t just the music taste, but the gadgets that have also evolved. From wired headphones to speakers to wireless TWS earbuds and home theatres technology advanced has touched every niche in the audio accessories market. And brands are becoming consistent with new launches. It’s like you get to see a new TWS earbud being announced every alternate week. Options are numerous when we intend to buy a new pair that also fits the budget. The premium audio products category is not left behind and pioneers like Sony, Audio-Technica, Bose, and other are bringing in options for all those audiophiles out there. After reviewing the Audio Technica ATH-SQ1TW earbuds, we now have got our hands on the ATH-TWX7 (new premium range TWS ). Featuring an intuitive design with IPX4 certification, powerful dynamic drivers backed by hybrid noise cancellation, these pair seems an ideal pick for the premium consumer segment? We at Giznext have tested this pair and are sharing the comprehensive review below:
For the tech geeks, stay updated with the latest cutting-edge gadgets in the market, exclusive tech updates, gadget reviews, and more right on your phone’s screen. Join Giznext’s WhatsApp channel and receive the industry-first tech update.
From the charging case to the earbuds, Audio-Technica has taken a unique and intuitive approach for the ATH-TWX7. The tapered teardrop shaped charging case easily slides even into the tiny pockets. This design further makes the unit rest at an angle while charging highlighting the brand’s logo. This is different than the conventional upright or flat positioning of the earbuds during charging. A small LED light is placed at the bottom flap that lits up as soon as you open or close the case’s flap and when it’s plugged in for charging/ battery notifications. To top it all the soft matte finish material of the charging case makes it feel more premium.
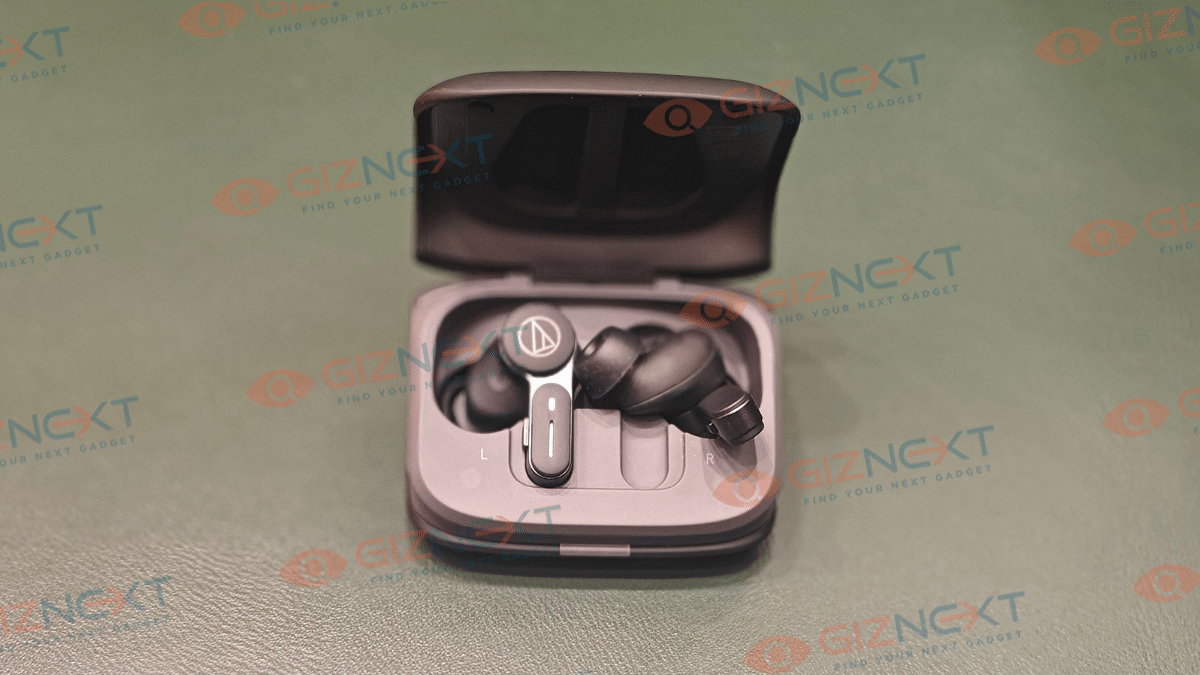
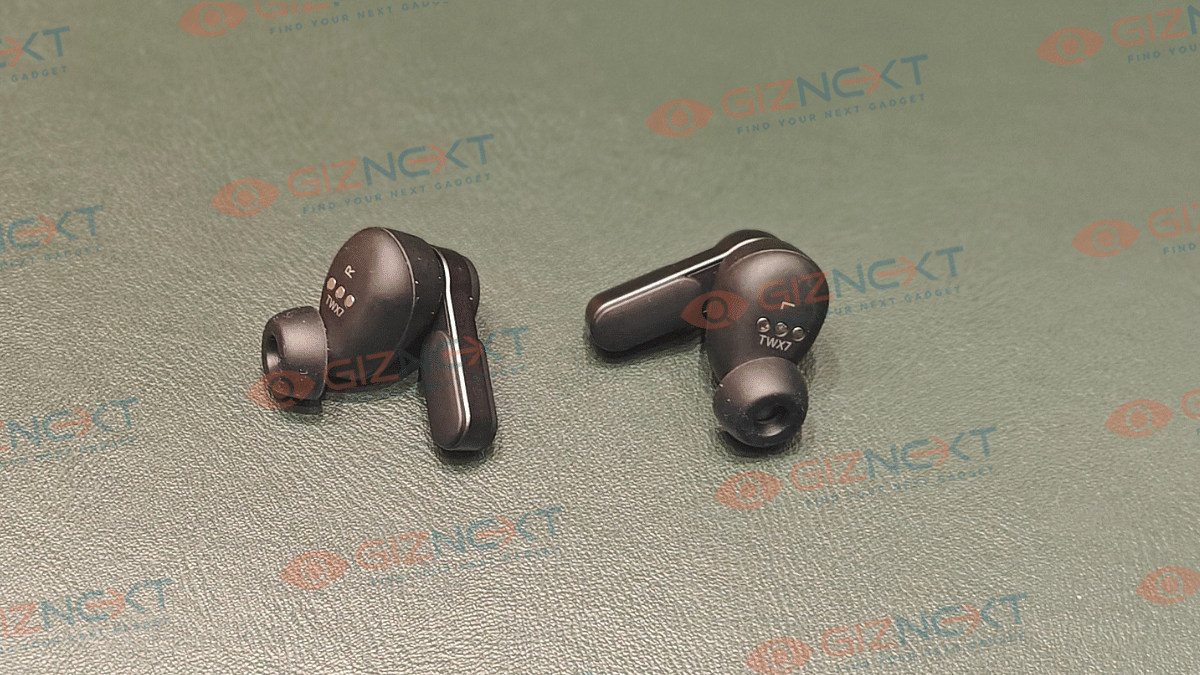
Coming to the earbuds, which sports a stem shaped in-ear design for a snug-fit. Default eartips are good to go out-of-the-box. Besides, the option to change eartips is also there with the additional pairs that ship with the box. You’ll find the earbuds offering a secure fit which makes them apt to wear during outdoor activities or work outs. The IPX4 certification adding dust and sweat resistance is a bonus point for the overall design.
Touch control actions
Left Earbud
Right Earbud
Single press
No action
No action
Double press
Talk-through mode
Talk-through mode
Press and hold
Enable/ disable ANC, Hear through mode
Summon digital voice assistant
Audio Technica ATH-TWX7 TWS Earbuds Key Controls
Controls are handled by the set of physical kets on both earbuds. There are also touch control option which makes the design both modern and practical. Using the physical keys and the touch controls you can enable/ disable ANC, summon voice assistant, answer calls, and adjust volumes, etc. Let’s take a quick look at the functions of both keys an touch controls.
Key control actions
Left Earbud
Right Earbud
Single press
1. Increase volume 2. Answer calls
1. Media Playback controls (Play/ Pause) 2. Answer calls
Audito Technica definitely has some of the best sounding pairs out there in the market. And the ATH-TWX7 doesn’t break that legacy. Integrated inside are the 5.8 mm Dynamic drivers that deliver a frequency response range of 10- 40,000 Hz and 100db/ mW sensitivity.
These earbuds are definitely a treat for audiophiles offering a wide and rich sound stage. While it isn’t most well balanced sounding TWS earbuds in the premium/ mid-range category, it’s thumping bass right out of the box hits the right notes for all music lovers.
The overall sound output by these tiny buds packs ample punch to get you grooving to your favorite tracks. Lows, mids and highs are balanced decently and the combined output gives you that premium listening experience. It easily takes on all genres And if you want to tune up the earbuds as per your listening preferences, the AT Connect app compatibility will help you with all the EQ adjustments and further sound refinements.
Distortions with audio is a least of a concern with this pair even when you tune up to the highest audio levels. This makes it a pleasing experience when listening genres like hard metal, pop and R&B. Besides offering an rich output with music, the ATH-TWX7 will also be a solid companion if you are into binge watching shows and movies or gaming.
With ANC support, the ATH-TWX7 is fully capable of blocking sounds from noisy environments. Combined with the secure fit eartips, the sounds get locked inside your ears leaving you undisturbed during your music playback sessions. Noise cancellation is predominantly constant with least or no variations during its usage.
While the ANC is at par with competitions, the older Bluetooth version is a setback. Instead of the latest versions like the Bluetooth 5.3, the ATH-TWX7 comes with dated Bluetooth 5.1 tech. Though, pairing isn’t a hassle, newer Bluetooth version would have been better for lossless transmission and range efficiency.
That said, it still gets the standard SBC and AAC Bluetooth codec support. Added bonus here is the LDAC codec which further helps with high-quality lossless audio delivery. To enable this feature, you’ll need the compatible A-T connect app installed on your devices. Besides accessing the Bluetooth codec profiles, the A-T connect app offers a host of tuning functionalities such as EQ settings, Low Latency mode, Soundscape, Ambience Control, Talk Through, and Call/ Microphone settings.
Claimed backup figures are up to 6.5 hours (earbuds) with ANC on, whereas without ANC it is said to go up to 7.5 hours. Charging case holds up to 24 hours and 20 hours of additional backup respectively with and without ANC. But if we speak of the real world backup, the earbuds last close to five hours when listeing at an average volume level of 60 to 80 percent. This is with the ANC on. It only goes slightly up without the ANC being active. Now, for a premium earbud this is an average backup. You might need frequent re-charges with this pair which can be a bummer for some of the users.
Audio-Technica has once again proved its expertise in the audio segment with the ATH-TWX7. This pair striking a decent balance in terms of build, sound output and overall usage surely gets the game rolling. But it’s not solely the signature audio and design that decides its success. Battery backup is another factor that comes into consideration where it lacks somewhat compared to alternatives in the market. If you can get past that, the the ATH-TWX7 is worth all the money. Give it shot if you are a hardcore audiophile and are looking for a premium sounding TWS pair.
Multiple features available to enhance payment services
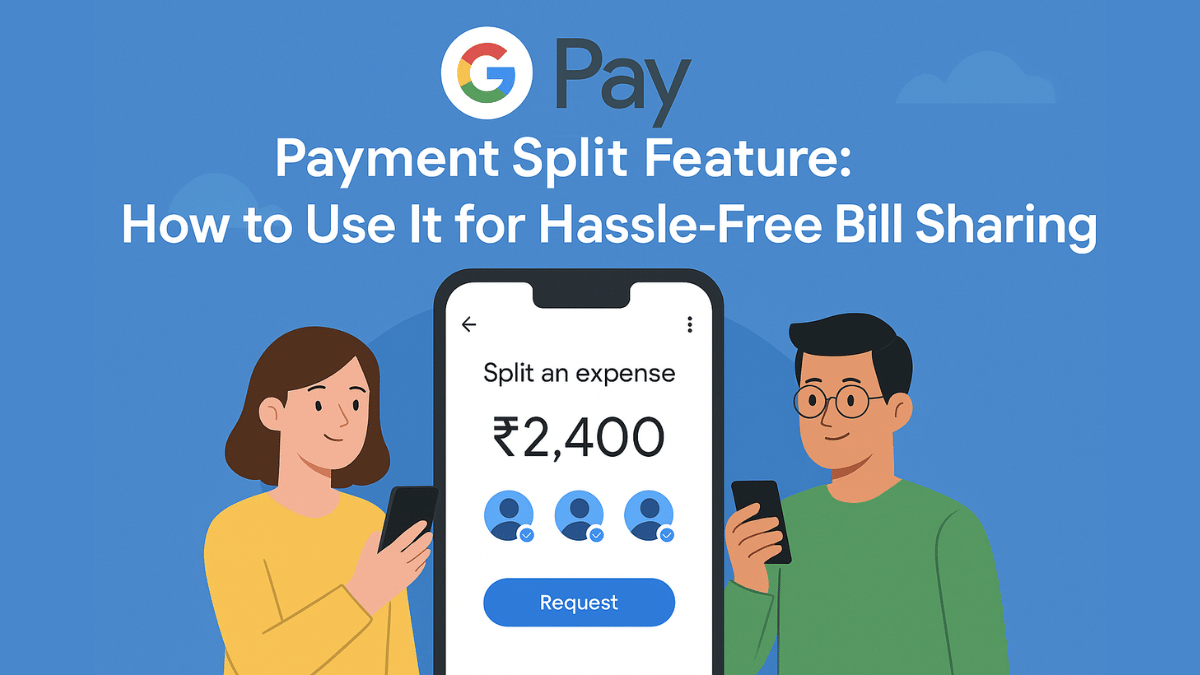
Payment Split feature available for easy bill splits
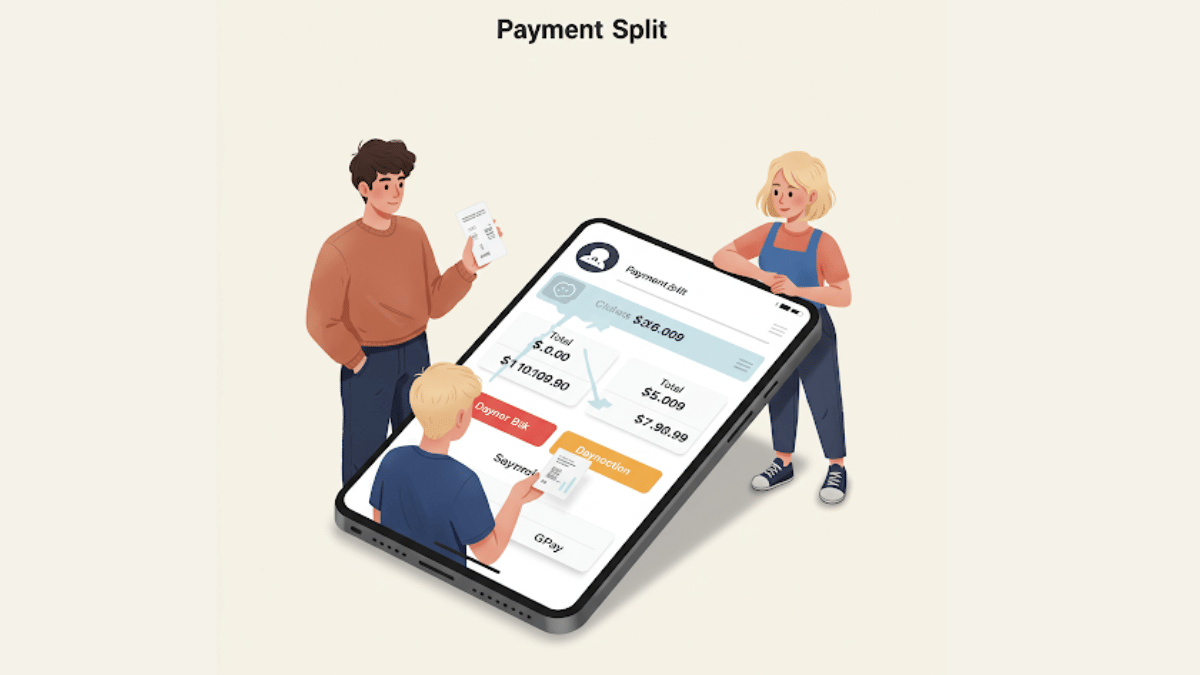
With the arrival of UPI (Unified Payment Interface), India has witnesses a huge shift towards digital payments and money transactions. All you need is a smartphone with active internet connection and a bunch of few UPI apps such as GPay, PhonePe, And Paytm for all digital transactions and payments. Forgetting wallet wouldn’t be a valid excuse if you are out with friends and wish to split bills. But often, it is difficult to keep a track of all the expenses that you have made during a trip and want to share your contribution. While there are dedicated third party apps such as Splitwise that helps you with bill splits, it rather would be easier to keep a track using a UPI app. GPay, the official UPI app from Google also has this feature integrated. So, if you are out dining with your friends or sharing room rent and OTT subscriptions, Google Pay’s Payment Split feature will come to your rescue. Let’s explore the quick ways to access GPay’s payment split feature and use it for hassle free bill payments:
For the tech geeks, stay updated with the latest cutting-edge gadgets in the market, exclusive tech updates, gadget reviews, and more right on your phone’s screen. Join Giznext’s WhatsApp channel and receive the industry-first tech update.
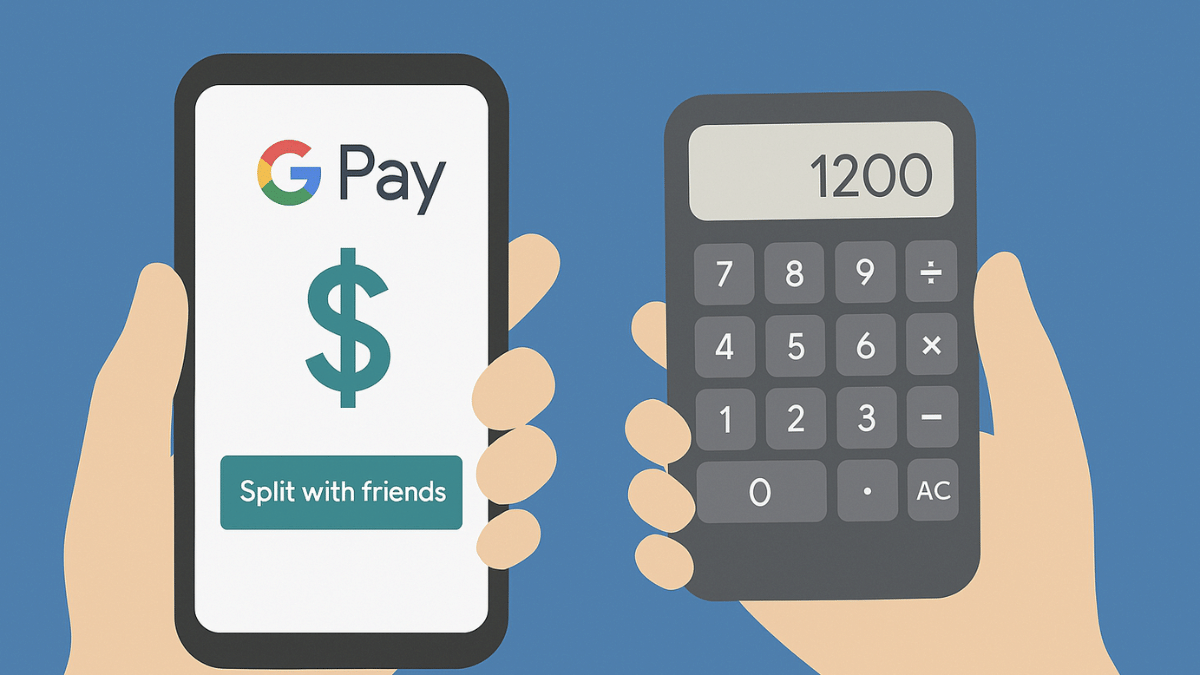
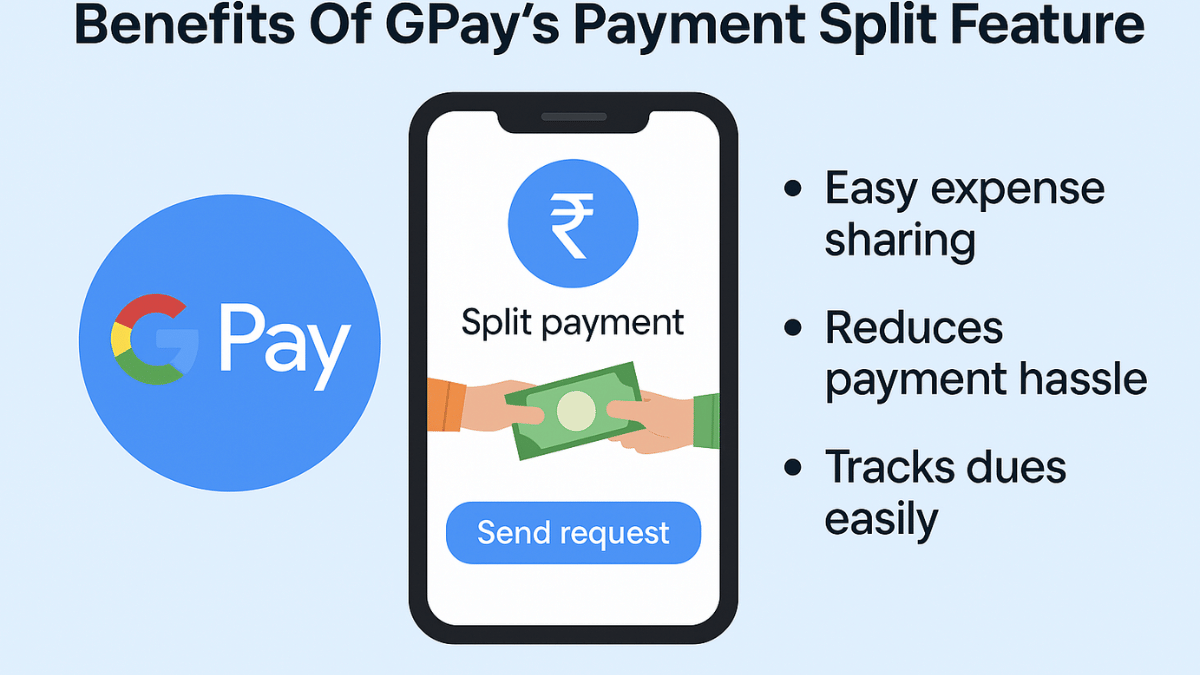
Google Pay Payment Split Feature: Functionality Explained
Google Pay’s Payment Split feature is designed to help users with equal payment splits with friends and families. This features simplifies the entire process of dividing payments between multiple people users directly from the app. It further cuts down on the hassle of manual expense tracking for different contacts. This feature is handy when you are out on a road trip with your friends or are planning to share expenses for room rents, groceries, etc.
Benefits Of GPay’s Payment Split Feature
Send Instant Payment Requests – GPay’s Payment Split feature will allow users to send quick payment request to the contacts with whom you wish to split payment. Just with a single tap, the payment request can be processed.
Allows Hassle Free Group Management – This feature is extremely helpful in managing and splitting expenses even for large group of users. It can easily keep a track of the payments made by the members.
Does Automatic Calculation – Helps with automatic expense calculation and evenly distribution. Users can also make custom changes to the amounts to be paid or received.
Offers Secure Transactions – GPay is a private and secure UPI app. It’s encrypted platforms ensure all the transactions are safe.
Android & iPhone Smartphone Users – GPay is available for both Android and iOS smartphone users. This app can be downloaded via Google Play Store and Apple App Store to access the payment split feature.
Users with an active account on GPay – All the registered GPay users can access the payment split feature on their respective smartphones.
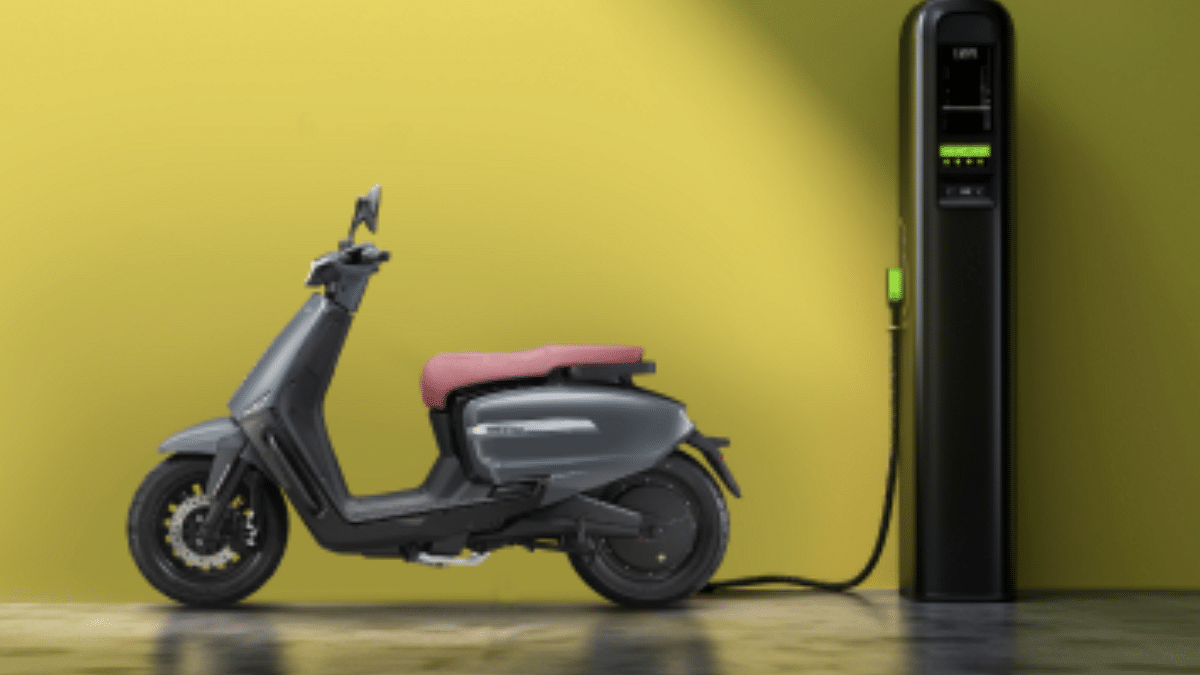
VLF, the Vietnamese EV maker is gearing up for a new e-scooter launch in India. The brand has teased its upcoming electric scooter officially on social media platforms. VLF has ventured into the E2W market in India with the launch of the Tennis e-scooter last year and now could be introducing a more powerful variant of this model. Which is the latest VLF e-scooter teased in India and when is its expected launch? Let’s dive into more details below:
For the tech geeks, stay updated with the latest cutting-edge gadgets in the market, exclusive tech updates, gadget reviews, and more right on your phone’s screen. Join Giznext’s WhatsApp channel and receive the industry-first tech update.
VLF has just teased a new electric scooter for the Indian market. The Vietnamese EV manufacturer has given us a quick glimpse of the upcoming e-scooter model without divulging into much details. It seems that VLF will be launching a sleek and stylish e-scooter model for the masses in India.
The post shared by VLF on Instagram reads ” Something sleek, something bold, something Italian” which hints the modern design the upcoming VLF e-scooter will offer. We can see the Milano Edition badging which suggests it could be an special Edition of the Tennis e-scooter. While VLF remains tight-lipped related to the upcoming e-scooters performance and powertrain features, it has confirmed the date when this new model will be launched. VLF will be launching the new e-scooter tomorrow itself in the country, i.e, April 2, 2025.
VLF currently offers only one e-scooter in India, i.e., the Tennis. As per the rumors, VLF could now be gearing up for a new variant of the Tennis e-scooter in India. There are chances that VLF re-introduces the Tennis as the special edition version featuring 1500W battery or an upgraded variant equipped with a bigger 4,000 W battery pack.
Ghibli Studio art is the latest viral trend on social media
Is legendary Japanese animation studio art introduced by ChatGPT
Available for ChatGPT+ and ChatGPT teams users for free
Third party apps and tools can be used to create Ghibli Style Studio art
We bet, your social media feed must have been flooded with animated images and posts from your friends and contacts. Called, Ghibli Art, it’s the latest sensation on the internet. OpenAI introduced this feature where users can generate the legendary Japanese animation studio-style images of their photos. Studio Ghibli is grabbing all the attention by providing hand-drawn-like visuals and whimsical storytelling of an image. But why has this art form suddenly gone viral online and do you really need ChatGPT to create your own Ghibli studio style art? In this article, we are helping you explore the easiest way with which you can create Ghibli arty style image for free without buying ChatGPT+ or ChatGPT Teams subscriptions.
Ghibli Art has recently gained a massive popularity amongst users on almost every social media platform including Instagram and X (formerly Twitter). The reason this studio art has become popular all of a sudden is the fun way it transforms images to animations. Besides making the images more aesthetically pleasing this feature further brings back nostalgia which is why the sudden rise in its trend
AI Art Generators Takes The Credit: OpenAI made this feature more popular by integrating it into ChatGPT. Users with paid subscription of ChatGPT can access this feature for free. Besides, other AI image generator tools that can create Ghibli-style images have helped with its popularity.
Nostalgia & Aesthetic Appeal: It’s the classic, hand-painted -like re-construction of the scenes which is making masses resonate deeply with childhood memories. The nostalgic appeals is the added bonus for its trend.
Social Media Trens: All of the major social media platforms like Twitter, Instagram, and TikTok are known for pushing the latest trends. The same has been the case with Ghibli Studio art which instantly became the viral trend.
How Can You Create Ghibli Art For Free Using X (Twitter)?
You can easily transform your pictures into stylish Ghibli Style Studio art. You don’t need the paid subscriptions for ChatGPT. Using X (formerly Twitter), you can create Ghibli Style images for free. Read the steps below:
Step 1: Launch X mobile app on
Step 2: From the bottom of the app’s homepage, click on Grok
Step 3: Do note that Grok 3 active model is selected for further process
Step 4: Use the attachment icon (paperclip icon) and upload the image that you want to transform to Studio Ghibli style art.
Step 5: Now, type the command, “Show this image in Ghibli Studio Style Art”.
Step 6: Press enter
Step 7: Wait for the image generation. Once generated, save to to your device gallery or post it on your feed.
Step 8: You can also give further commands to make any adjustments or modifications to the image, background, or overall scenario setting.
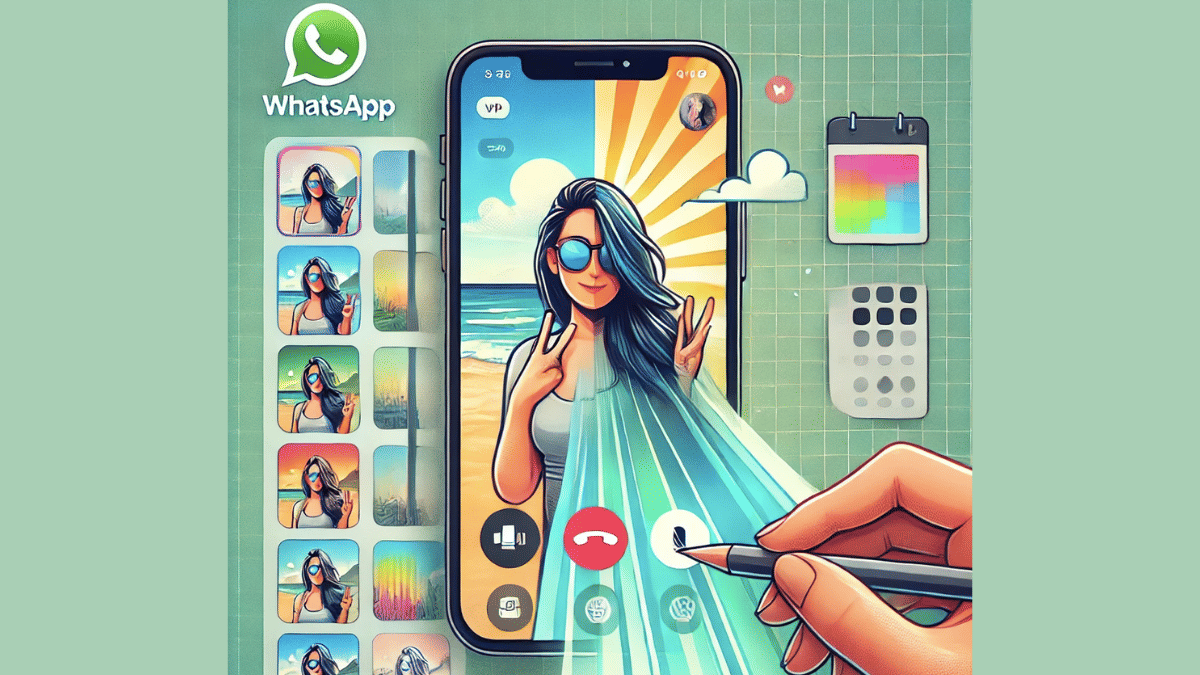
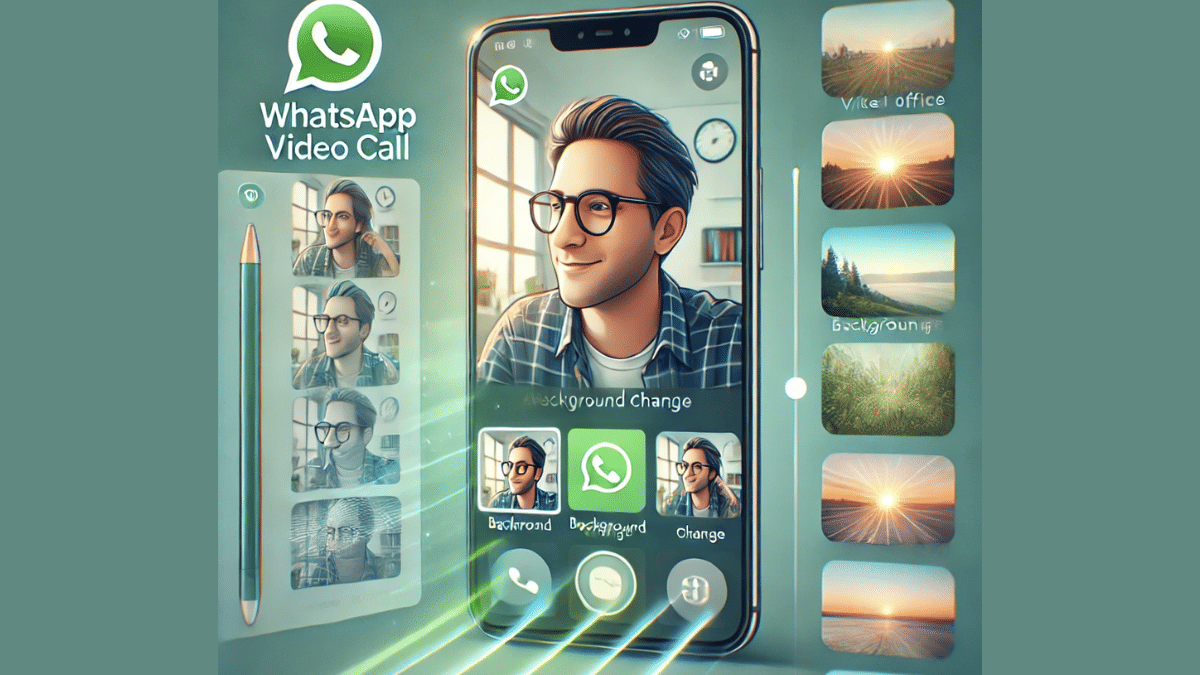
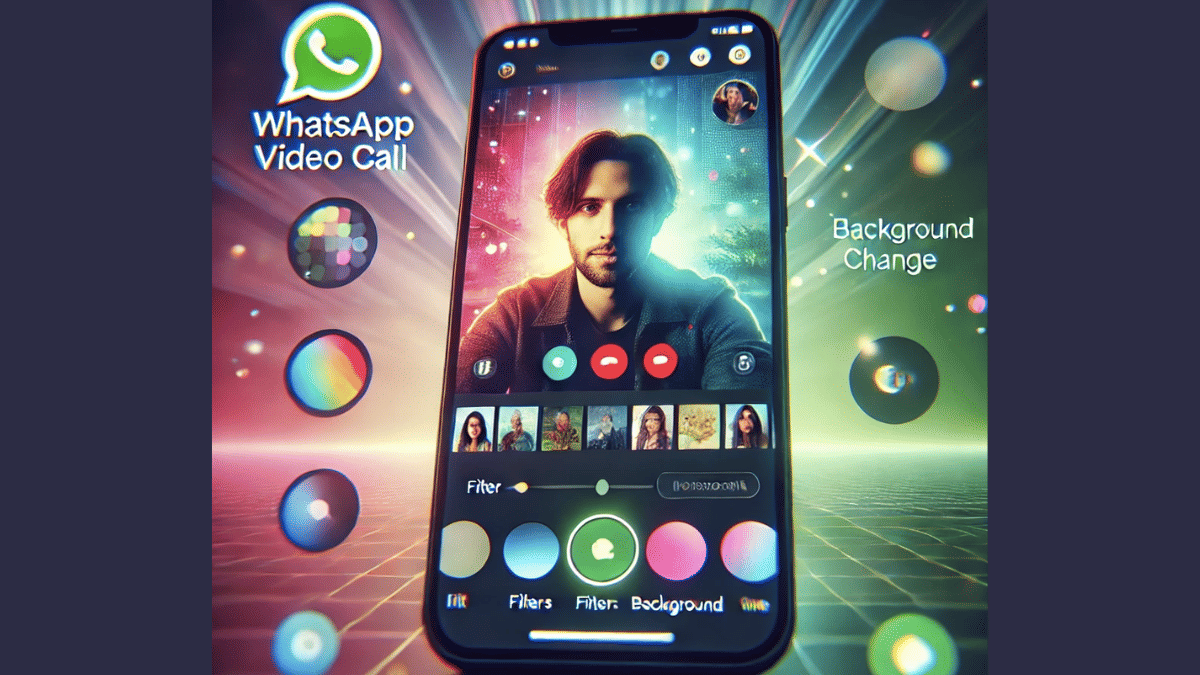
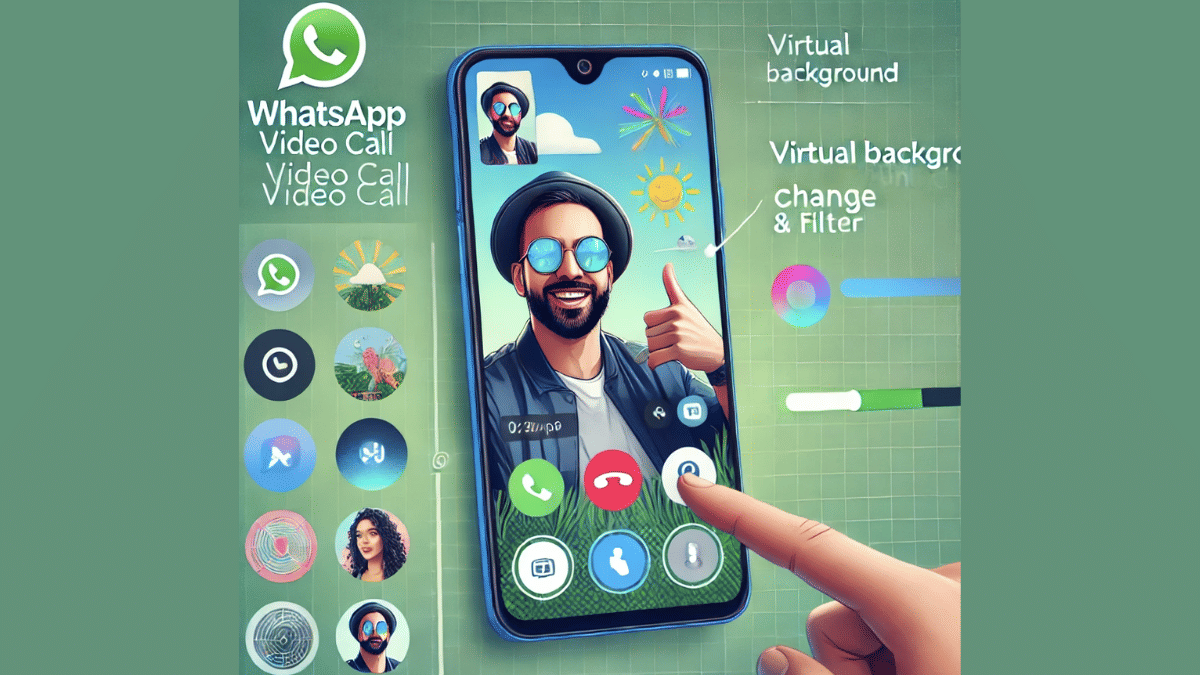
WhatsApp is definitely the go-to mobile app for messaging. And with the introduction of audio and video calls, it has become more popular amongst the masses globally. Being the most secure platform for personal and professional conversations, WhatsApp is undoubtedly offering a premium experience to the Android and iOS users. WhatsApp has introudced several features that enhance the messaging and calling experience on its platform. One of such options which makes video calling more intuitive is the background change and filters. This feature is also beneficial for the working professionals who wish to hide untidy background during an emergency meeting, while for others it adds a touch of fun. So, how can you add filters or change background in WhatsApp video calls? Read on the step-guide here:
For the tech geeks, stay updated with the latest cutting-edge gadgets in the market, exclusive tech updates, gadget reviews, and more right on your phone’s screen. Join Giznext’s WhatsApp channel and receive the industry-first tech update.
This is the option which will help you make video calling more fun. The experience is further refined by the option with which you can refine your skin tones for a cleaner look.
Steps For Android, iOS Users:
Start a Video Call: Open WhatsApp and initiate a video call with any contact.
Access Effects Menu: Tap anywhere on the screen during the ongoing call and select “Effects” or “Filters” icon (appears on the call screen).
Choose a Filter: Now, scroll and find the suitable filter and simply tap on it to apply. Changes will be made real time.
Adjust as Needed: Brightness or contrast levels adjustments can be done to some of the filters. Do so if required.
How to Change Background in WhatsApp Video Calls
For Android & iOS Users:
Start Video Call: Open WhatsApp mobile app and start a video call as you generally do.
Tap on the Background Option: This option appears when you tap anywhere on the screen during the video call.
Select Background TypeFor The Video Call :
Blur – This option will keep the user in focus while blurring the background and surroundings.
Custom Image– This will allow adding a custom photo as the background during WhatsApp video call. You can select any image from the phone’s gallery.
Preset Backgrounds – There are a bunch of preset images which you can select from the WhatsApp’s default images option.
Apply the Background: After selecting the desired background, it will start reflecting in the video call immediately in real time.
Remove or Change Background: If you wish to go back to the default settings or use a different background just go back to the previous settings.
Applications for duplicate aadhaar card can also be done offline
Aadhaar card is validated as the most essential identity document by the government of India. It is mandate for every single citizen to apply for a Aadhaar identification card which can be done via UIDAI (Unique Identification Authority of India). For those who already own an Aadhaar card, loosing it can be a scary situation. If you somehow land in such situation where your Aadhaar card has been misplaced or stolen then you don’t have to panic. Thanks to the digitisation, it is now super easy to apply for a duplicate Aadhaar card online. Let’s dive into the steps below:
For the tech geeks, stay updated with the latest cutting-edge gadgets in the market, exclusive tech updates, gadget reviews, and more right on your phone’s screen. Join Giznext’s WhatsApp channel and receive the industry-first tech update.
1. Retrieve Your Aadhaar Number (If Not Available)
This is the most crucial step to initiate the process of applying a duplicate Aadhaar card. If you already remember your EID (Enrolment ID) or UID (Aadhaar number) then you can simply jump to the step 2.
How To Check Aadhaar UID/ EID On Laptop/ PC
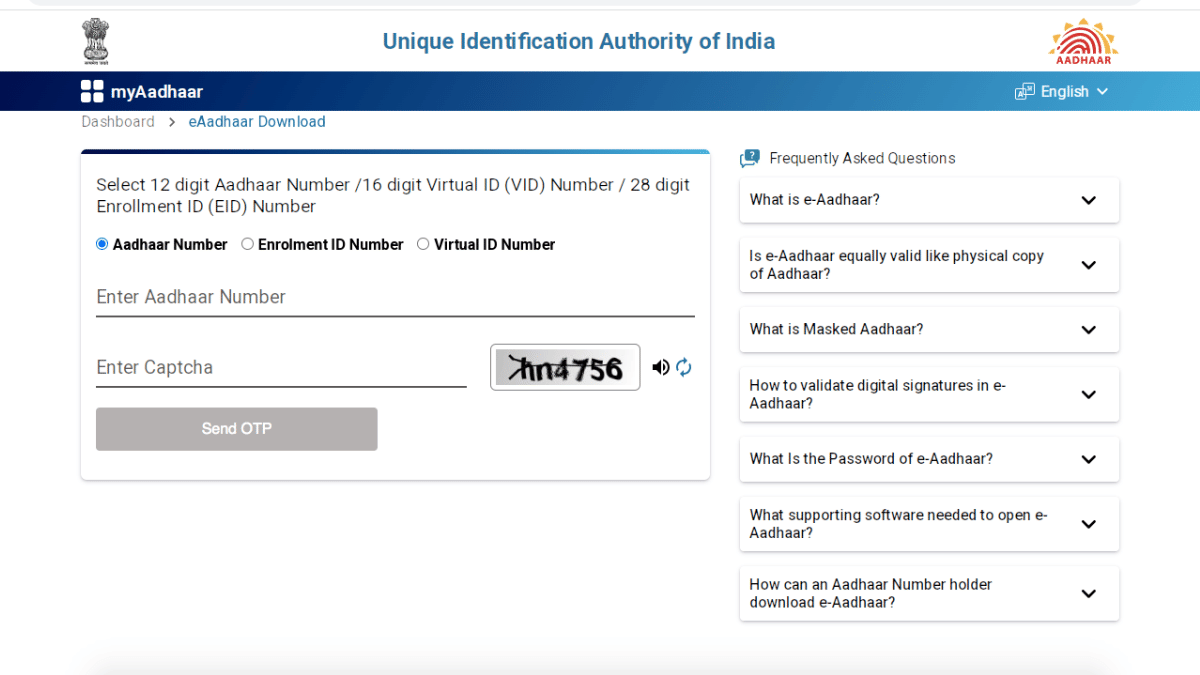
Open any web browser and go to the official UIDAI website (https://uidai.gov.in).
Head to the ‘My Aadhaar’ section.
Tap on the “Retrieve Lost UID/EID”
You will need to enter the registered mobile number or email ID associated with your Aadhaar.
Enter the CAPTCHA for verification
Tap on the “Send OTP” option.
You will receive an OTP on your registered mobile number. Enter it and click submit.
You will receive the Aadhaar number or Enrolment ID on your registered mobile via SMS.
How To Check Aadhaar UID/ EID On Android, iOS
Download an install Umang app via Google Play Store or App store on iOS
Search Aadhaar services
Go to Retrieve EID/ Aadhaar Number section
Select EID or Aadhaar number option
Enter your register mobile number or email address
After completing the captcha verification, tap on Send OTP
Enter the OTP and tap on submit. You will receive the EID/ Aadhaar number on your mobile via an SMS.
2. Order a Reprint of Aadhaar Card/ Duplicate Aadhaar Process
Once you have retrieved the EID or Aadhaar number, it will be become easy for you to apply for a duplicate aadhaar card. You can also request for a reprint which will cost you minimal charges of Rs. 50.
Visit the official UIDAI website once again. Open any browser and search https://uidai.gov.in.
Open ‘My Aadhaar’ section
Tap on “Order Aadhaar Reprint” option. This is the step for printing a duplicate aadhaar card.
You will need to enter the Aadhaar number or Virtual ID.
Confirm and enter the security code
Now, click on the “Send OTP” option.
Verify the OTP that you will receive on the registered mobile number.
A nominal fee of Rs. 50 (including GST and speed post charges) will be charged. Complete the payment.
Once all these steps are performed, the duplicate Aadhaar card will be sent to the registered address via post. Estimated timeline for the same is around 5- 7 working business days.
3. Download e-Aadhaar Card Online For Emergencies
You can always keep a copy of e-Aadhaar card in case of lost or misplaced physical card. The steps for the same are below
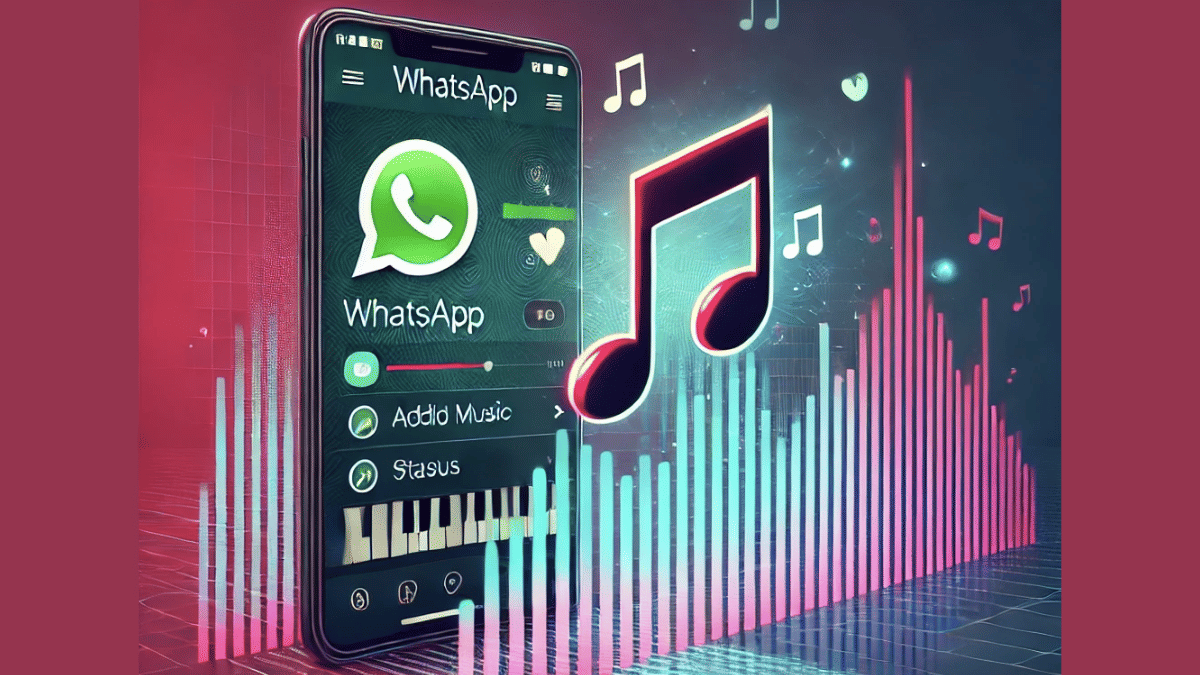
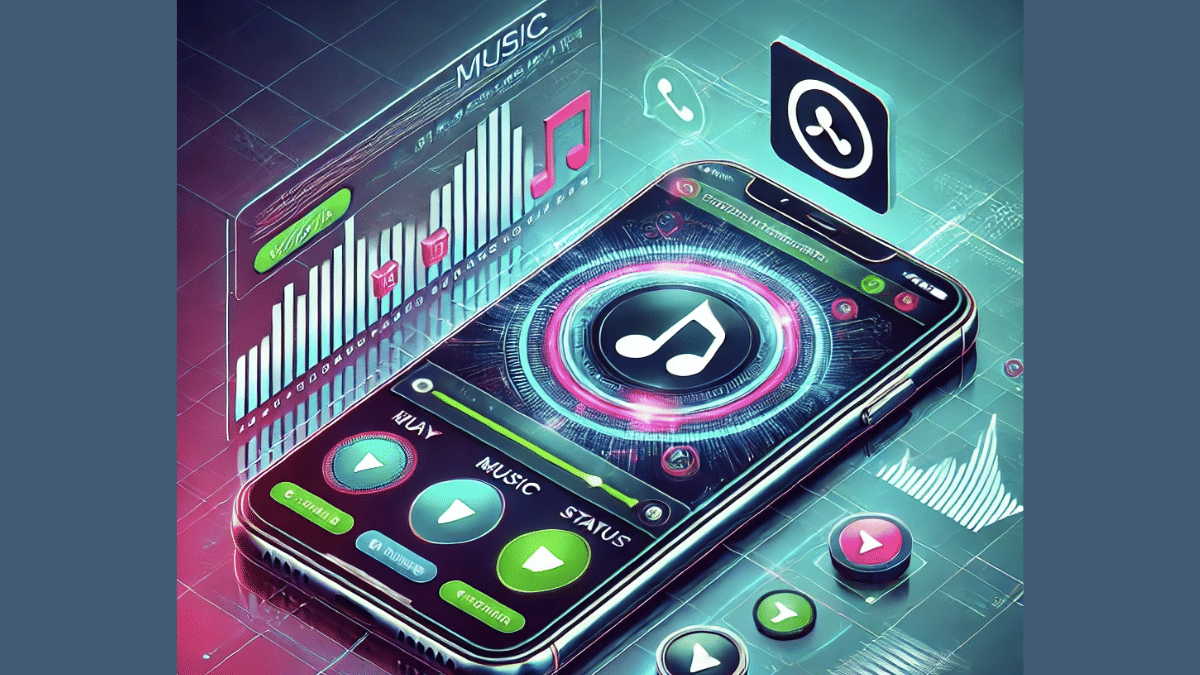
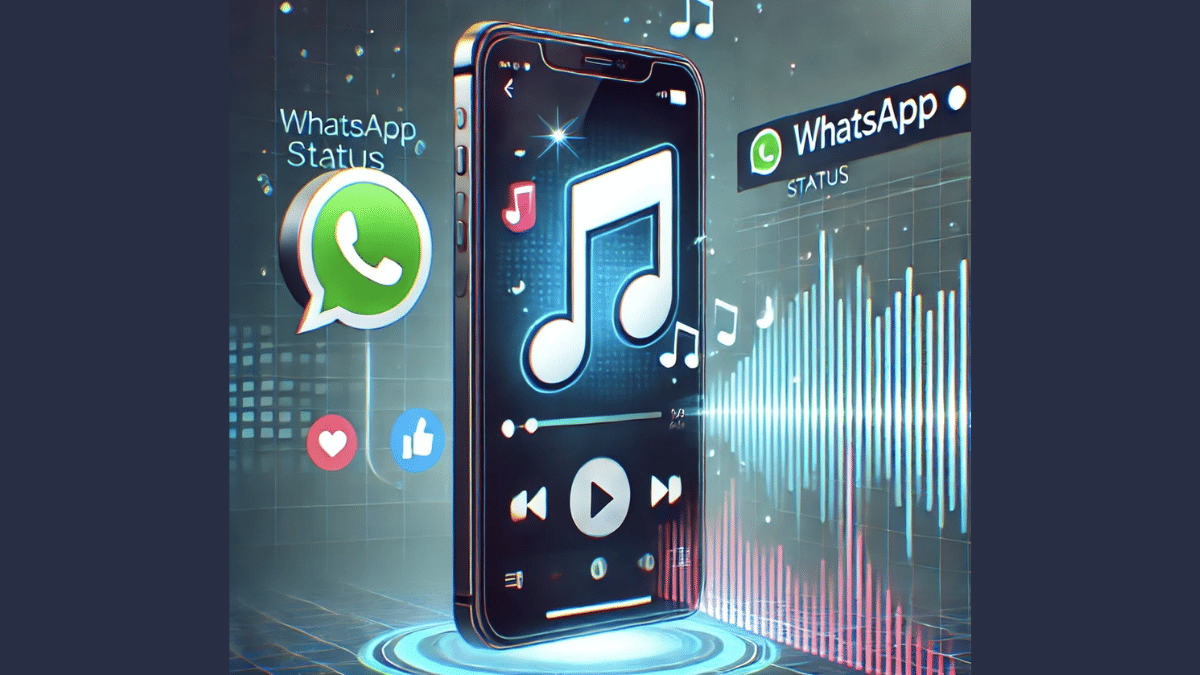
WhatsApp allowing option to add music to status update
Option to add music allowed only with photo and videos uploaded as status
Some regions yet to recieve this update
Both Android and iOS users can access this feature
WhatsApp has been testing multiple features that are designed for improving the personalised chat experience on its platform while keeping privacy as the priority. The instant messaging app has also received numerous features that offer an intuitive experience to the users. One of the such features that WhatsApp was testing at the beginning of this year was the option to add songs and music to status updates. Earlier available as a beta version, this update’s stable version is now rolling out to the masses in a phased manner. Both Android and iOS smartphone users will soon be able to upload their favourite music track with their next status update. We have brought you the step-guide for the same.
For the tech geeks, stay updated with the latest cutting-edge gadgets in the market, exclusive tech updates, gadget reviews, and more right on your phone’s screen. Join Giznext’s WhatsApp channel and receive the industry-first tech update.
It is worth adding that the option to add music to status update is currently accessible in limited markets. Since the stable rollout is underway in a phased manner, users in some regions won’t be able to use this feature. That said, there is another catch to adding music as a status upload. WhatsApp is currently only allowing users to add music in Status uploads for images and videos. There is still no option to add music to the statuses containing texts, GIFs or stickers. Also, your WhatsApp application has to be updated to the latest version. Try checking for any pending updates manually.


