Say hello to Shweta, a tech fan who's hooked on keeping up with all things tech. When she's not exploring the latest gadgets, she's diving into a good book, clicking photos as an amateur photographer, or enjoying classic movies and music. With her love for both tech and creativity, Shweta adds her own touch to tech news in a way that's easy to understand and enjoy.
No doubt, Google Maps is a major discovery. It is one of the most widely used smartphone applications worldwide. The platform lets you find the routes to the places you want to go. You only need an internet connection and the address of the destination.
Google Maps can trace you where you are automatically. It lets you know how long it will take you to get there and can inform you about delays in reaching your destination because of heavy traffic congestion in your route. Additionally, the app enables you to save regularly visited destinations so that all you need to do is choose your destination and Google Maps will begin telling you the route.
Google Maps: How To Drop A Pin?
Dropping a location on the map, saving it, and sharing it with your loved ones is one of the key features that Google Maps provides. The feature is available for iOS, Android, and desktop users. Here are the steps you can follow to drop pin location in Google Maps on your mobile phone and desktop.
Steps To Pin Location In Google Maps From Your Mobile
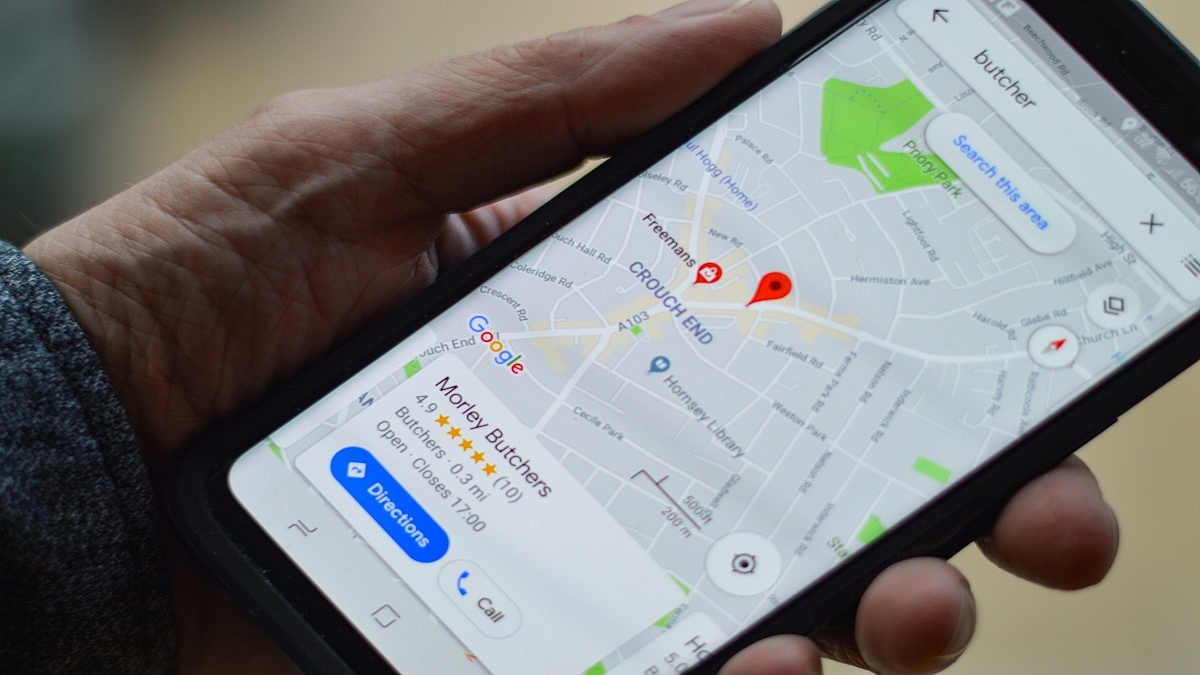
Step 1: Open the Google Maps app.
Step 2: Long press on the desired location, and you will see a red pin on that location now.
Step 3: You will see a bunch of options for that location at the bottom.
Step 4: You can now start navigating by tapping on ‘directions’ and ‘start’.
Users have the choice to ‘share’ and ‘save’ the pin location on other social media channels including WhatsApp.
Steps To Pin Location In Google Maps From Your Desktop
Step 1: Open your browser and log in to your Google account.
Step 2: Navigate to Maps by clicking the Google applications icon.
Step 3: Look for a location using the search bar.
Step 4: Select the pin icon next to the location you wish to save.
‘Favorites’, ‘Want to go’, and ‘Starred Places’ are the three categories in which you can save the pin location. In the app, you can add or remove categories and lists. Users can even select whether these lists are public, private, or shared with other users.
Apple AirTags shipment has increased gradually since 2021
The tech giant wants to see how popular the first one gets
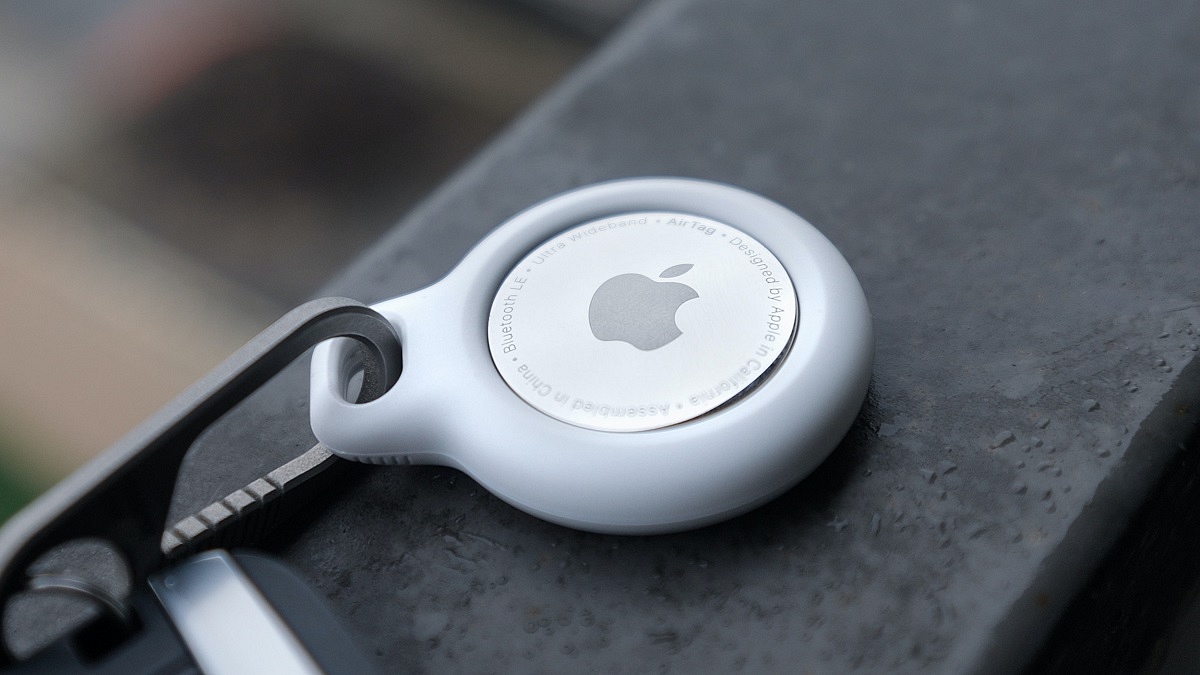
It’s been more than a year since Apple’s first-generation AirTag has been launched. They helped users to keep track of their smartphones, keys, accessories, and bags. However, there hasn’t been much talk about the AirTags recently and some may believe that they have been forgotten.
Now, as per the reports, Apple might roll out the AirTag 2. Popular analyst Ming-Chi Kuo stated that the AirTag shipments have gradually climbed since 2021 and now the company may release its successor.
According to Apple tracker and analyst Ming-Chi Kuo, the Apple AirTag second generation model could be released soon. He shared that the tech giant could develop the second-generation AirTag tracker if the sales remain strong.
According to reports, Apple AirTag shipments have gradually increased since 2021. He stated that AirTag’s shipment estimates for 2021 and 2022 were around 20 million and 25 million units, respectively. What this suggests is that Apple’s nifty product is actually being sold well.
“AirTag, which has not received much attention, has gradually grown in shipments since its release. Shipment estimations of AirTag reach about 20 mn & 35 mn units in 2021 & 2022, respectively. If AirTag shipments continue to grow, I believe Apple will develop the 2nd generation,” the tweet reads.
AirTag, which has not received much attention, has gradually grown in shipments since its release. Shipment estimations of AirTag reach about 20 mn & 35 mn units in 2021 & 2022, respectively. If AirTag shipments continue to grow, I believe Apple will develop the 2nd generation.
Apple AirTag 2nd Generation Model: What To Expect?
For the unversed, Apple AirTag has had its fair share of problems in the past. Thieves have attempted to steal vehicles using the product. AirTags were also used for various evil purposes. Apple may work on anti-tracking and other important features with its second-generation AirTag.
The battery and speaker capabilities of the upcoming AirTag might get improved. We might also see a design change that eliminates the requirement to use the Airtag as a keychain. Instead, we can use it as it is without a loop.
We can expect more details to arrive in the coming months. Furthermore, the existence of Apple AirTag is still unknown and is only speculated about at this time. As the year progresses, Apple may provide us with a hint about the product’s release.
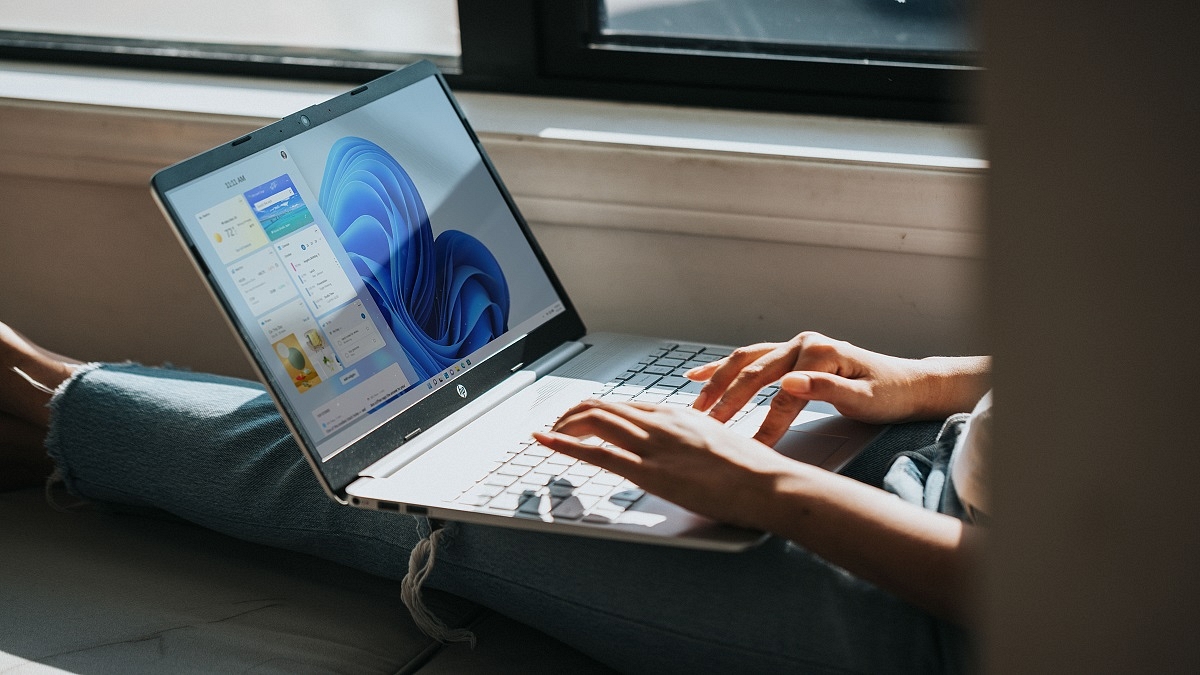
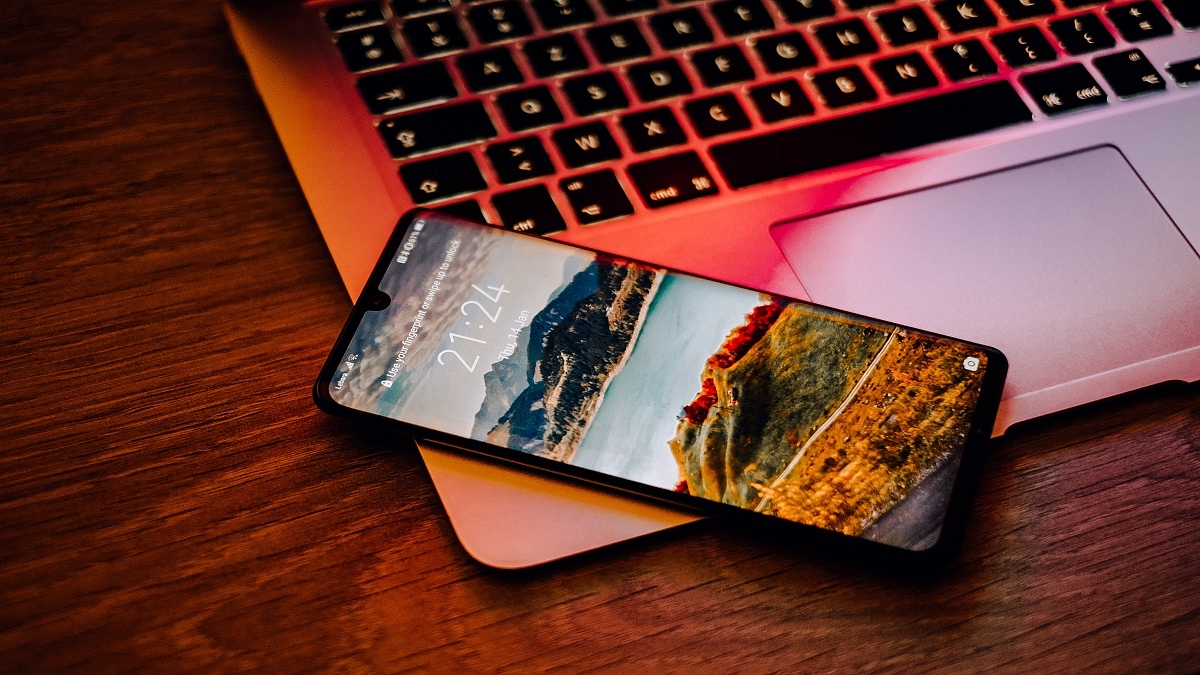
When you start Windows 11, the first thing that will appear once your computer powers up is the Lock Screen. Before you sign in, you will see the splash screen which includes the date, time, notifications, and background image. However, not everyone wants a lock screen every time they boot up their PC. Therefore, if you’re one of those Windows users who doesn’t like the lock screen, you can fully disable it. How? We will find out here.
Steps To Disable The Lock Screen Via Group Policy
Step 1: Launch the Run command on your system by pressing the Window Key + R.
Step 2: Type gpedit.msc and hit the enter key to open the Group Policy Editor.
Step 3: Go to the panel on the left. Navigate to Computer Configuration, then Administrative Templates. Go to the Control Panel and click Personalization.
Step 4: Double-click on the ‘Do not display the lock screen’ option.
Step 5: The option’s detailed settings will be displayed in a new window. By default, the enabled option will be turned on. This means that the lock screen is active.
Step 6: Tap on the Disabled Radio button to disable the lock screen on your system.
Step 7: Click on the Apply button and then OK to finalize the changes.
Step 8: Restart your system. You will see that there is no lock screen and you access the login screen right away.
How To Disable The Lock Screen Using The Registry On Windows 11
Step 1: Hit the Windows key, type ragedit, and click the top result.
Step 2: Once the Registry Editor opens, paste the path ‘Computer\HKEY_LOCAL_MACHINE\SOFTWARE\Policies\Microsoft\Windows’ in the text input area and then hit the enter key.
Step 3: Then, right-click the Windows key and select New > Key, and name it Personalization.
Step 4: Now, right-click the Personalization key you just created and select New > DWORD (32-bit) Value.
Step 5: Hit Enter after naming the DWORD value as NoLockScreen.
Step 6: Double-click on the NoLockScreen value and set the Value Data to 1. Keep the base hexadecimal.
Step 7: To make modifications and restart your system, click OK. The lock screen won’t appear when your computer starts up.
If you followed the instructions correctly when your computer powers up again, the Lock Screen will be skipped and you’ll only see the sign-in screen.
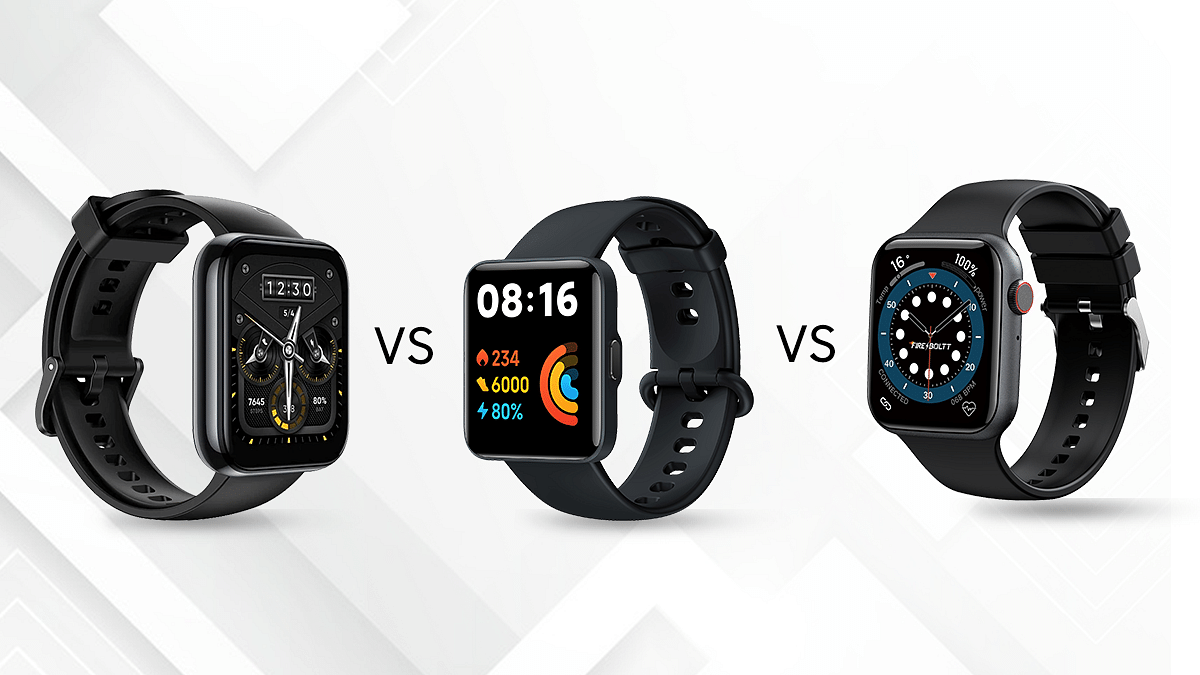
The Redmi Watch 2 Lite is the latest budget smartwatch that comes for Rs. 4,999. Considering the price, it is a direct competitor to the previously launched Realme Watch 2 Pro and Fire-Boltt Ring. These smartwatches share many common features but which one is the best buy? In this article, we are going to compare these smartwatches and how Realme Watch 2 Pro, Redmi Watch 2 Lite, and Fire-Boltt Ring compete against each other. Let’s have a look:
Design And Display
The Realme Watch 2 Pro and the Redmi Watch 2 Lite are made of plastic material. But the Redmi Watch 2 Lite has a rubber build. The Fire-Boltt, on the other hand, has a sturdy metallic build finish. Its square body resembles the Apple Watch in terms of style.
The Realme Watch 2 Pro has a 1.75-inch IPS display. On the other hand, the Redmi Watch 2 Lite sports a 1.55-inch panel, and the Fire-Boltt Rings have a 1.7-inch touch screen.
The Realme Watch 2 Pro has a bigger dial with 2.5D glass on the screen and curved edges. On the other hand, the Redmi Watch 2 features a flat edge design and 2.5D glass. Coming to the Fire-Boltt Ring, it has a 2.5D curved display.
In real-life usage, the display of these watches looks good in terms of colors, brightness, and sharpness. Furthermore, the display of the Realme Watch 2 Pro is bigger, so the icons and texts are bigger for easy access.
Overall, the display of Realme Watch 2 Pro, Redmi Watch 2 Lite, and Fire-Boltt Ring is good enough to use in any condition. But we prefer the Realme Watch 2 Pro’s display because of its big screen size and smoother experience.
Features And Operating System
In terms of health and activity tracking, the Redmi Watch 2 Lite, Realme Watch 2 Pro, and the Fire-Boltt Ring pack all essential features. The Redmi Watch 2 Lite features over 100 sports modes. On the other hand, the Realme Watch 2 Pro has 90 sports modes.
Moving to the Fire-Boltt Rings, it brings a 24×7 heart-rate monitor, a SpO2 sensor for tracking blood oxygen saturation, and a motion sensor for tracking daily activities. The Redmi Watch 2 Lite and the Realme Watch 2 Pro have built-in GPS. The Fire Boltt Ring doesn’t support GPS.
The Redmi Watch 2 Lite and the Realme Watch 2 Pro track better steps, calories, and distance due to more accurate data with GPS. Besides, the Fire-Boltt Rings feature a sleep monitor, various sports modes, and an activity tracker that keeps records of calorie burn, step count, distance, etc.
Coming to the OS, the Realme Watch 2 Pro is an RTOS-based watch. This means you cannot add any additional apps. On the other hand, the Redmi Watch 2 Lite runs Xiaomi’s own software. Moving to the Fire-Boltt Ring, it runs on a proprietary OS that comes with a quick-access honeycomb menu.
Battery And Connectivity
The Redmi Watch 2 Lite boasts a 225mAh battery. On the other hand, the Realme Watch 2 Pro is powered by a 390mAh battery. Besides, the Fire-Boltt Ring delivers a total of 8-days of battery life.
As per the brand’s claims, the Redmi Watch 2 Lite and Realme Watch 2 Pro can provide up to 10 days of backup in ordinary use and two weeks on a single charge, respectively. The circular magnetic charger for the Realme Watch 2 Pro looks premium and has a better build.
On the other hand, Redmi Watch 2 Lite has a POGO pin magnetic charger. The Fire-Boltt Ring is backed by a Lithium-Ion battery that gets juice from a charger dock out of the box. Coming to the connectivity options, Xiaomi’s Redmi Watch 2 Lite has Bluetooth 5.0 and NFC.
The smartwatch is compatible with devices running on Android 6.0+ and iOS 9.0+. Moving to the Realme Watch 2 Pro, you get Bluetooth 5 and it is compatible with Android devices. On the other hand, the Fire-Boltt Rings feature Bluetooth 5 for better range and fast speed. All three smartwatches are compatible with iOS and Android phones.
Price Comparison
The Redmi Watch 2 Lite, Realme Watch 2 Pro, and the Fire Boltt Ring will cost you the same. They are priced at Rs. 4,999 in India. Considering all the things, all three smartwatches give hard competition to each them with the onboard productivity and health features. However, the Realme Watch 2 Pro offers a bigger display experience and better battery life alongside the ability to control other AIoT devices. In our opinion, the Realme Watch 2 Pro makes it a good value for money.
Users can share their current location and expected arrival time on Uber
Users have to add them to Uber’s “Trusted Contacts” section
Uber Users can also share their ride status
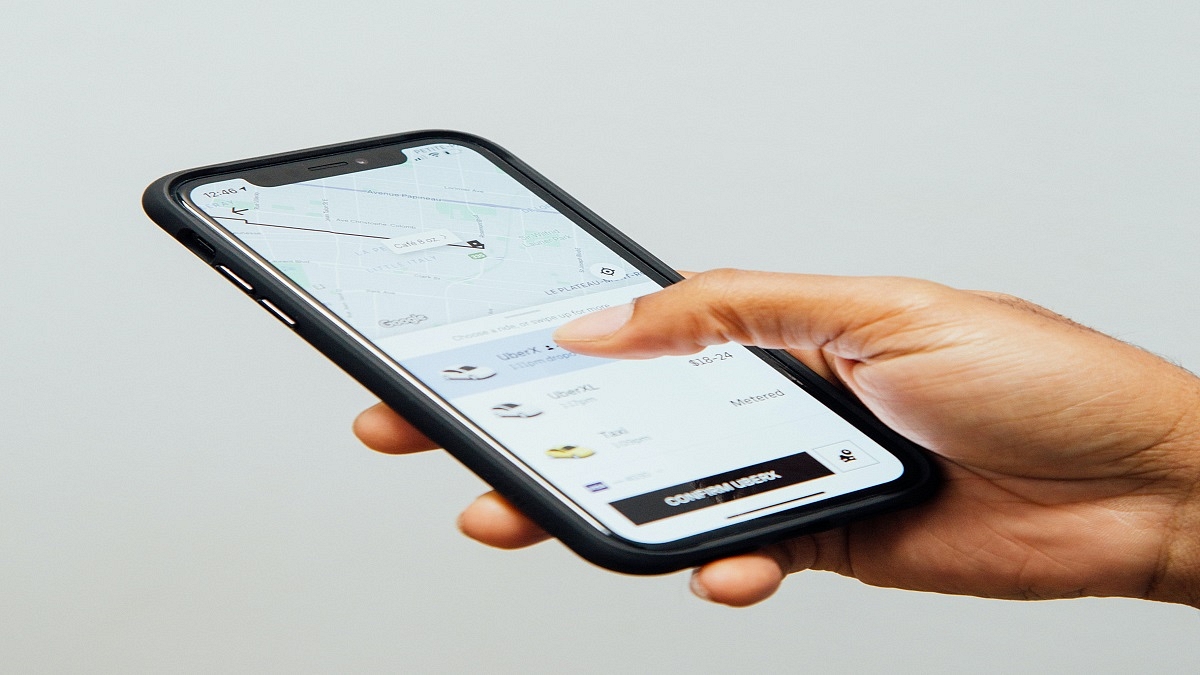
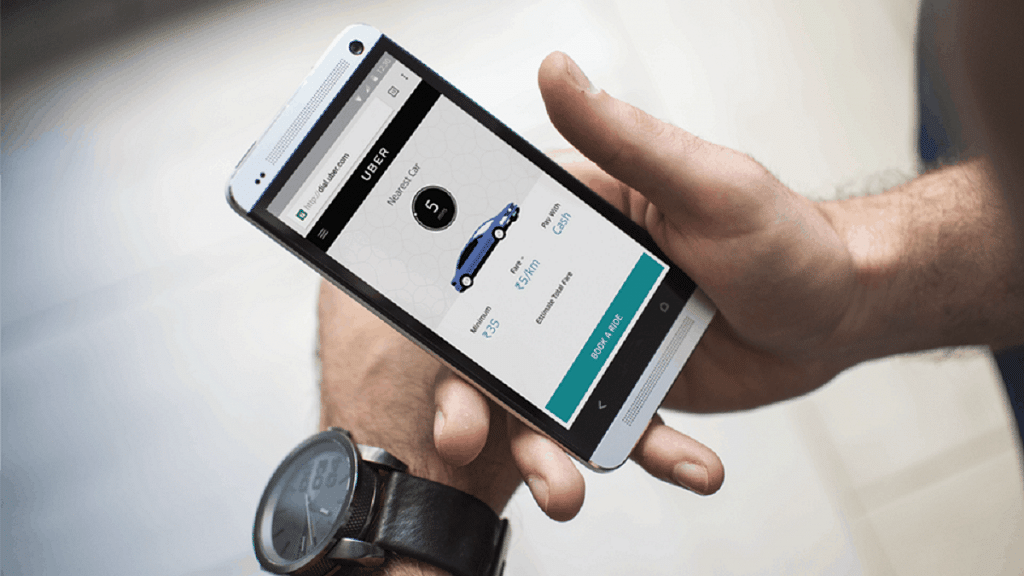
When you are traveling in an Uber to meet relatives or friends, they may want to ask you where you are exactly. On the other hand, there can be circumstances such as when you’re in danger—where you want to alert relatives or friends where you are and where your Uber car is without them having to ask. Well, Uber makes this simple as long as you set it up in advance.
You can share your current location and expected arrival time for journeys with up to five people. You only have to add them to Uber’s “Trusted Contacts” section. By sharing your travel location with trusted contacts, people who are expecting you can know exactly where you are and when you will arrive. Here are the steps you can follow to inform your friends about your Uber travel status:
Step 1: Open the Uber app on your mobile phone and go to ‘Settings’.
Step 2: Click on the ‘Manage Trusted Contacts’.
Step 3: Now tap on the ‘Add Trusted contacts’.
Step 4: Type out the names of these contacts from your contact list.
Step 5: After completing the process, you have three alternatives to choose from: ‘Don’t remind me, I’ll manually share my trips,’ ‘Remind me at night (9 pm to 6 am),’ or ‘Remind me before every journey.’
Step 6: Now every time you are on a ride, you can simply swipe up and tap on ‘Share My Trip’.
Users can also share their ride status by copying a link at the bottom by tapping ‘Send Status’ and pasting it on other apps like WhatsApp, SMS, and more if they haven’t already set up their trusted contacts list or don’t want to.
Regardless of whether they use the Uber app, the receiver will receive real-time location updates along with the driver’s name and car details. If they come across anything questionable, the trusted contacts can contact authorities.
Users can also set them as Uber emergency contacts. So, if an emergency occurs and you can’t get in touch, Uber can contact your emergency contact instead.
For the tech geeks, stay updated with the latest cutting-edge gadgets in the market, exclusive tech updates, gadget reviews, and more right on your phone’s screen. Join Giznext’s WhatsApp channel and receive the industry-first tech updates.
Garena Free Fire has gained a lot of popularity in India particularly in the absence of PUBG Mobile. It has exclusive rewards and in-game items that players look forward to every day. One of the most demanding items in the game has always been Free Fire Redeem codes.
Garena Free Fire is one of the most exciting battle royale games to play. Today, it is one of the most popular games in the world and has a high rating on the Google Play Store. In the game, players can create their own strategies such as landing positions, acquiring weapons and supplies, and engaging in combat with the enemy. Here’s how to redeem the codes to get free FF rewards:
Here Are The Garena Free Fire Max Redeem Codes For Today, June 20, 2022
Garena Free Fire Redeem codes help to unlock resources that are otherwise too hard to get in the game. Also, they get a chance to win exclusive free rewards like vouchers and many more. New redeem codes for 20 June 2022 have been released for the players.
FFA9 UV8X 4H7D
JIMY LVT4 6V2Z
9EHDK5GDEW6DRDM5
DWF3F71VE2D708EK
MV9C Q97L QJOL
FF46 OC2II VYU
JIJY L8T4 6V2Z
FFTQ T5PR MCNX
8F8U Q5XP DKA7
8JKN XUB9 6C9P
FXCV BNNK DSXC
FOKM JNLV CXSD
FF7W 7M0C N44Z
FFA0 E811 YL2D
FFA9 UVHX 4H7D
FFX6 0C4II VYU
FF7W SM7C N44Z
88KN XUB9 6C9P
How To Redeem Garena Free Fire Codes For 20 June 2022
Step 2: Log in to your account using Twitter, Facebook, Google, and Apple IDs.
Step 3: Copy and paste any of the above-listed redeem codes into the text box.
Step 4: Press the confirm button to continue.
You can check the embedded game mail section for the rewards. It might take around 24 hours for the rewards to show up in the game mail section of the players.
Also, note that the Free Fire Redeem Codes have a claim limit. If the redeem code fails, maybe they have been already claimed by too many other players. However, there is always another day for new codes. Check back here every day for Garena Free Fire’s new redeemable codes.
YouTube is a popular video streaming platform with millions of users across the world who watch content on their connected TVs, laptops, desktops, and mobile devices. Apart from online video viewing, the YouTube videos can be downloaded to your device and can be watched when you are not connected to the internet.
Anyone who has access to your device, laptop, tablet, or mobile, and third-party apps that collect information for marketing purposes can get access to your YouTube watch and search history. Due to privacy concerns, the tech giant Google allows users to delete their watch history easily if they want to.
How To Auto Delete Your YouTube Search And Watch History
After a certain amount of time, you can choose to have your YouTube search and watch history deleted automatically. Here’s a step-by-step method to deleting your YouTube history automatically.
Steps To Clear Your YouTube Search And Watch History On The Web
Step1: Go to your Google Account on your PC.
Step 2: Click on ‘Data & Personalization’ on the top left screen.
Step 3: Tap on ‘YouTube History’ under ‘Activity controls’, then click ‘Auto-delete’.
Step 4: Select the auto-delete time frame you want.
Step 5: Now, click ‘Next’ and then ‘Confirm’ to save your auto-delete activity choice.
Step 6: At the bottom right of the pop-up, click on Confirm.
Steps To Delete Your YouTube Search And Watch History On An Android Phone
In order to clear your search or watch YouTube history, listed are the steps you can follow:
The majority of the smartphone markets are dominated by Chinese products
Chinese phones are far less expensive than those made in other nations
There are a handful of phone brands from Korea, Europe, and the US that offer great features
Nowadays, the majority of the smartphone markets are dominated by Chinese products. The Chinese mobile phones are not only good in terms of design, look, and performance, but they are also far less expensive than those made in other nations. However, this does not rule out that there is nothing that is comparable to these Chinese smartphones. While Indian brands may not yet be able to compete, there are a handful of brands from Korea, Europe, and the US that can give them a run for their money. Check out our list if you’re seeking for the best non-Chinese smartphone available in India.
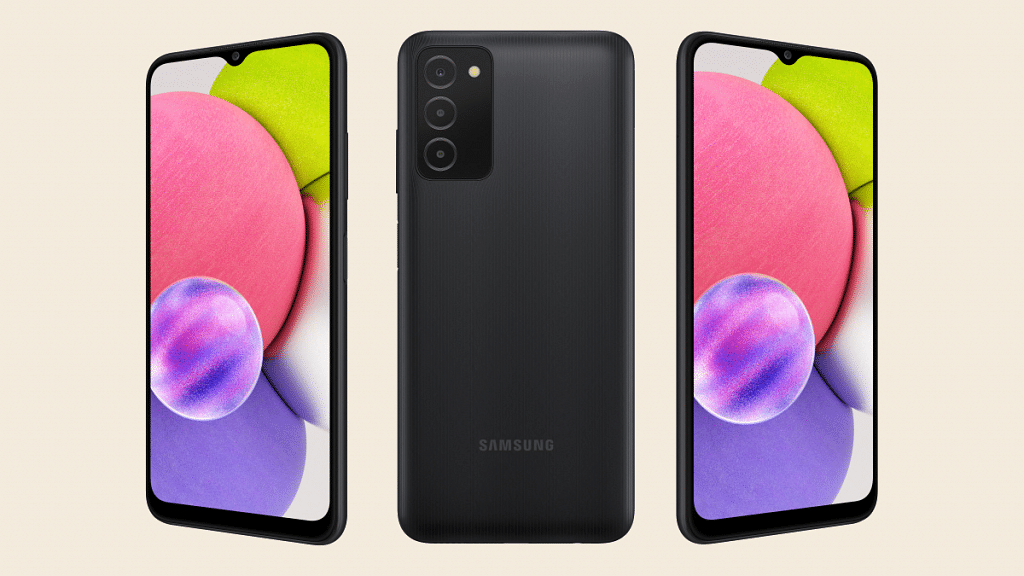
The Samsung Galaxy M31 is a good alternative to the Chinese brands in the popular mid-range segment. It flaunts a massive 6.4-inch AMOLED with FHD+ resolution and Gorilla Glass protection. The device is powered by the 10nm Exynos 9611 SoC. It has 6GB RAM and up to 128GB RAM along with expandable storage. With a 6,000mAh battery, the M31 significantly outperforms the competition in terms of battery life. The price of the Samsung Galaxy M31 is set at Rs. 13,999 in India.
Display
6.4 inches Super AMOLED
Processor
Exynos 9611
RAM
8GB
Camera
64MP + 8MP + 5MP + 5MP
Selfie Camera
32MP
OS
Android 10
Battery
6000 mAh
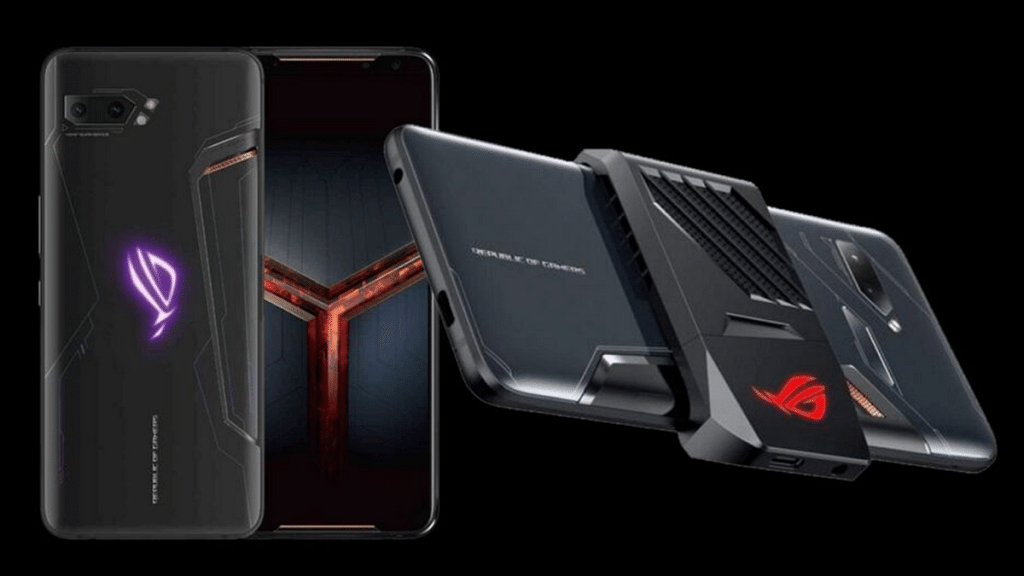
Asus ROG Phone 2
The ROG Phone 2 comes with a 6.59-inch display with a resolution of 1080 x 2340. The smartphone is powered by the 7nm Snapdragon 855 Plus processor. It comes with 6GB of RAM with expandable storage of up to 128GB. You get a dual-camera set-up at the back with 48MP and 13MP sensors. Up front, there is a 24MP camera for selfies and video calls. It has a 6,000mAh battery. The Asus ROG Phone 2 is available for purchase at Rs. 40,999 in India.
Display
6.59 inches AMOLED
Processor
Qualcomm SM8150 Snapdragon 855+
RAM
12GB
Camera
48MP + 13MP
Selfie Camera
24MP
OS
Android 9.0 (Pie)
Battery
6000 mAh
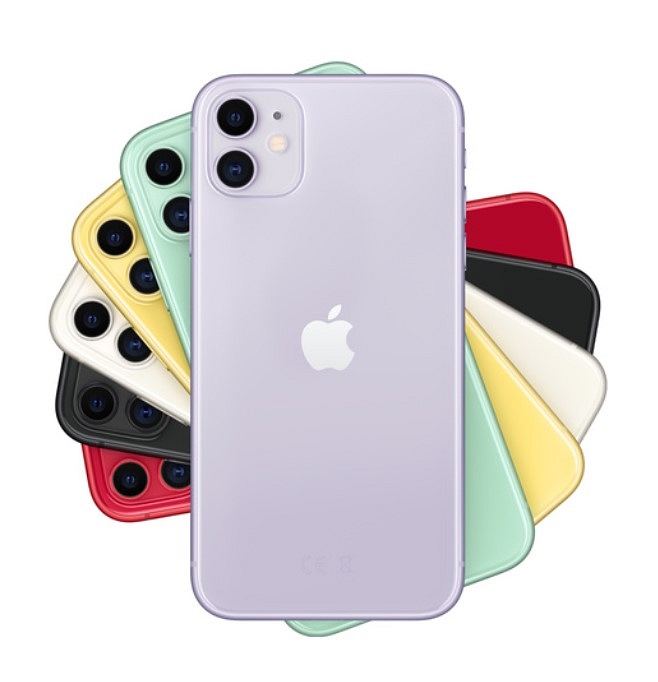
Apple iPhone 11
The iPhone 11 series have the smoothest operating system that is completely different from Android. The device is powered by the A13 Bionic chip with a Neural Engine, combined with a six-core GPU. As for the cameras, the iPhone 11 has two cameras on the back, i.e., a 12MP main wide lens and a 12MP ultrawide lens. It also has a night mode for low-light situations. The Apple iPhone 11 is one of the top-selling non-Chinese smartphones that are available at a starting price of Rs. 49,999 in India.
Display
6.1 inches Liquid Retina IPS LCD
Processor
Apple A13 Bionic
RAM
4GB
Camera
12MP + 12MP
Selfie Camera
12MP
OS
iOS 13
Battery
3110 mAh
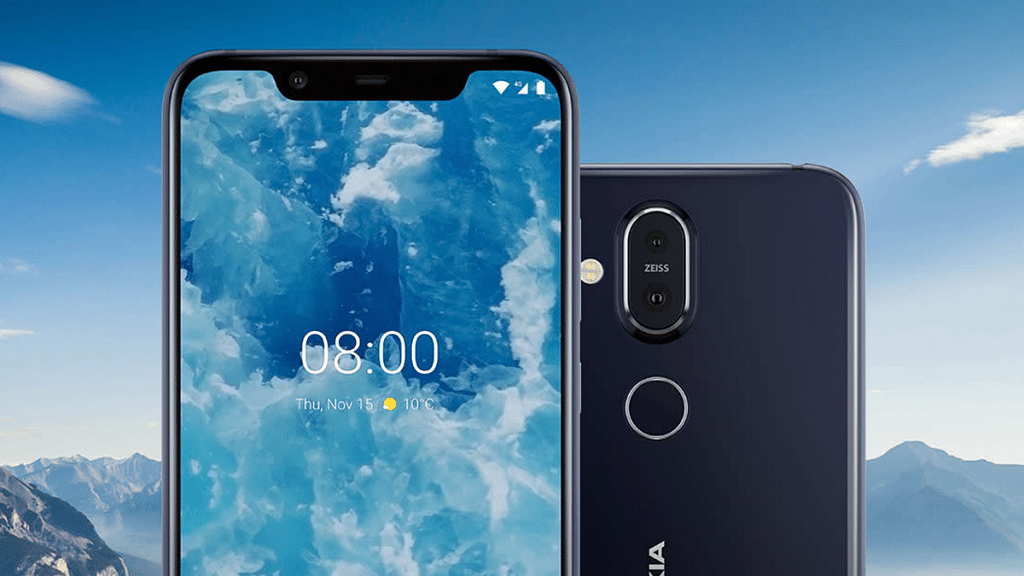
Nokia 8.1
The Nokia 8.1 challenges Chinese stalwarts like the Realme 6 Pro and the Redmi Note 9 Pro Max in almost all segments. It sports an HDR10-certified 6.18-inch LCD display with fullHD+ resolution. The Qualcomm Snapdragon 710 SoC powers the phone. It boasts 128GB of storage and 6GB of RAM. Nokia offers a 12MP primary camera with OIS and a 13MP telephoto lens for the camera, both of which are Zeiss-certified. You can grab the Nokia 8.1 at Rs. 24,990.
Display
6.18 inches IPS LCD
Processor
Qualcomm SDM710 Snapdragon 710 (10 nm)
RAM
6GB
Camera
12MP + 13MP
Selfie Camera
20MP
OS
Android 9.0 (Pie)
Battery
3500 mAh
Google Pixel 6
The Google Pixel 6 comes with a 6.40-inch touchscreen display with a 90 Hz refresh rate. The smartphone is powered by the 2.8GHz octa-core Google Tensor processor. It packs up to 256GB of internal storage as well as 8GB of RAM. A 4,614mAh battery powers the Google Pixel 6 which runs Android 12. The handset can be purchased for under Rs. 50,000 in India.
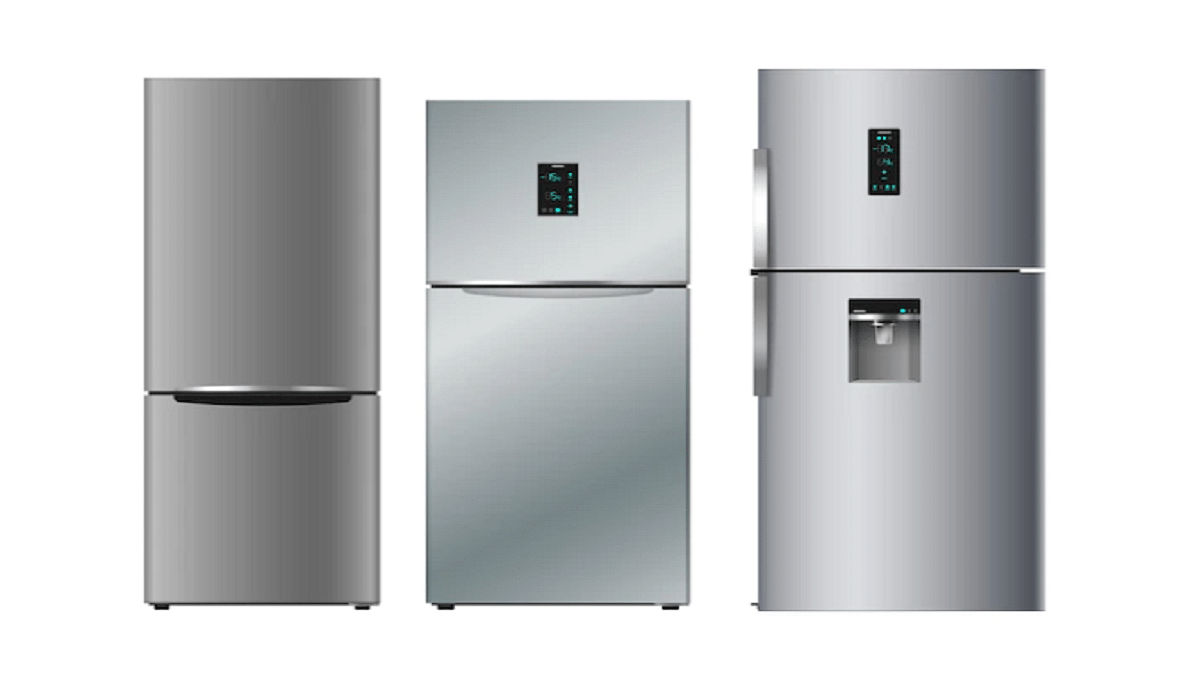
In today’s time, refrigerators have become a necessity rather than a luxury. Double door refrigerators are considered a vital appliance for medium to big size families since they give additional storage capacity. Generally, double-door refrigerators are built to last long and offer flexibility to consume low energy. Their great performance, compact patterns, and strong shelves have earned them a lot of praise. So, if you’re looking for a double-door refrigerator under Rs. 25,000, we’ve put together a list of the best buys available in India.
LG 260L Frost-Free Double Door Refrigerator
The LG double-door refrigerator boasts cutting-edge technology that converts the freezer into a fridge. This allows you more storage room for edibles. The voltage range of 100V- 310V makes the refrigerator work without a stabilizer. Its smart inverter technology allows it to save energy. The timeless tempered glass shelves help you to carry a heavy load. Besides, the refrigerator itself connects with the inverter after a power outage. In India, you can get the LG refrigerator for under Rs. 25,000.
Samsung 253L Frost Free Double Door Refrigerator
The Samsung 253L 2 Star Inverter Frost Free Double Door Refrigerator comes with an auto-frost function for stopping ice build-up. It has a capacity of 253 liters. The refrigerator is available with an energy rating of 2 stars and is versed with spill-proof toughened glass shelves. It is known for its stabilizer-free operation. The Samsung Double Door Refrigerator can be purchased at Rs. 24,390.
Godrej 265L Frost-Free Double Door Refrigerator
This Godrej 265 L 3 Star Inverter Frost-Free Double Door Refrigerator claims to provide you with the best cooling retention with PUF insulation. Its multi-level inverter technology doubles the cooling performance. The refrigerator adjusts the defrost process automatically. Thanks to its PUF insulation, the food stays fresh for a longer time. The Godrej Double Door Refrigerator is available for sale at Rs. 24,990.
Haier 258L Frost-Free Double Door Refrigerator
Next on our list is the Haier 258L Double Door Refrigerator. Its twin inverter technology helps prevent less fluctuation. It has PUF insulation to keep the temperature low and assure cooling. The refrigerator boasts a special 5-in-1 convertible mode that allows it to be used in a variety of ways. It comes with a large basket that keeps fruits and veggies fresh and nutritious. Available with PUF insulation, this double-door refrigerator is available for Rs 23,790.
AmazonBasics Frost Free Double Door Refrigerator
The AmazonBasics Refrigerator ships with a 3-star rating. It consumes 207 units of electricity annually. With a size of 305 liters, this is one of the best budget refrigerators to buy. It also has inverter technology which changes the motor speed and cooling according to loads. The Refrigerator has a deodorizer to eliminate odors in the cooling compartment. A vegetable crisper is also provided with automatic humidity control. The AmazonBasics Double Door Refrigerator will cost you Rs. 26,749.
Amazon has become the go-to online store for billions for just about anything they need to buy online. It has maintained control over the world’s most powerful economic and cultural forces. The company has made its app and web user interfaces user-friendly. One significant aspect of e-commerce is how customers enter/change their contact details and addresses so that their packages can be delivered to them.
How To Change Your Amazon Phone Number
Whether you’ve changed your phone number or simply want to use a different number, changing mobile numbers in your account is a simple process. We’ll help you learn how to do it on both your mobile phone and desktop.
Steps To Change Mobile Number From Your Mobile Phone
Step 1: Open the Amazon app on your mobile phone and log in to your account.
Step 2: In the bottom right corner, click on the three horizontal lines.
Step 3: Go to ‘Your Account’ and open ‘Login & Security.’
Step 4: Sign in again when prompted.
Step 5: Then, you will get an SMS notification that will be sent to your registered mobile number.
Step 6: Click on the link to ‘approve’ or ‘deny’
Step 7: Go back to your Amazon page. Next to the account information, you will see the option to ‘Edit’.
Step 8: Follow the instructions on the screen and ‘Save Changes’.
Step 9: Once it is over, tap on ‘Done’.
Steps To Change Mobile Number From Your Desktop
On your desktop computer, like Windows, Linux, Mac, or Chromebook, use the official Amazon website to change to your phone number.
Step 1: Visit the Amazon website and log in to your account.
Step 2: Click the ‘Accounts and Lists’ section in the top right corner.
Step 3: Go to the ‘Your Account’ page, and choose ‘Login & Security.’
Step 4: Then, tap on the ‘Edit’ option next to ‘Mobile Phone Number’.
Step 5: Enter the new phone number.
Step 6: Hit ‘Save changes’ once done.
From the same ‘Login & Security’ option, you can change your email address, residential address, name, and more. Notably, there is no limit on how many times this information can be updated. You can make changes to personal information as many times as you want. However, the e-commerce platform Amazon only allows one mobile number and email address.