Categories
Apps Featured How To

Amazon Prime Videos ‘Device Limit Reached’ Error: How To Fix In A Few Simple Steps

Key Highlights

  • Amazon Prime videos allows streaming on multiple device
  • Device limit reached is a common error
  • Can be fixed by removing Prime account from unused devices

Amazon Prime Video is soon starting with advertisements on its platform stopping the free access for all the Prime subscribers. The company recently confirmed additional charges to stream ad-free videos on Prime Videos (both app and the desktop versions). Nevertheless, remaining services and features remains the same on Amazon Prime Videos where you get to stream videos using same Prime account on multiple devices. While this is a handy feature for users to access Prime Videos services at different locations and on different devices, there is a common error related to this that can kill the mood for binge watching shows and movies. It’s the ‘Device Limit Reached’ error that commonly affects Prime Video users. And if you are getting this error message frequently and are clueless how you can fix this issue? This guide is what you need to go through. We tell you the easiest way that can help to fix ‘Device Limit Reached’ issue on Prime Videos.

Also Read: Enhance ChatGPT Privacy: How To Delete Individual And Entire Conversation History In ChatGPT

How To Fix ‘Device Limit Reached’ Issue With Amazon Prime Videos

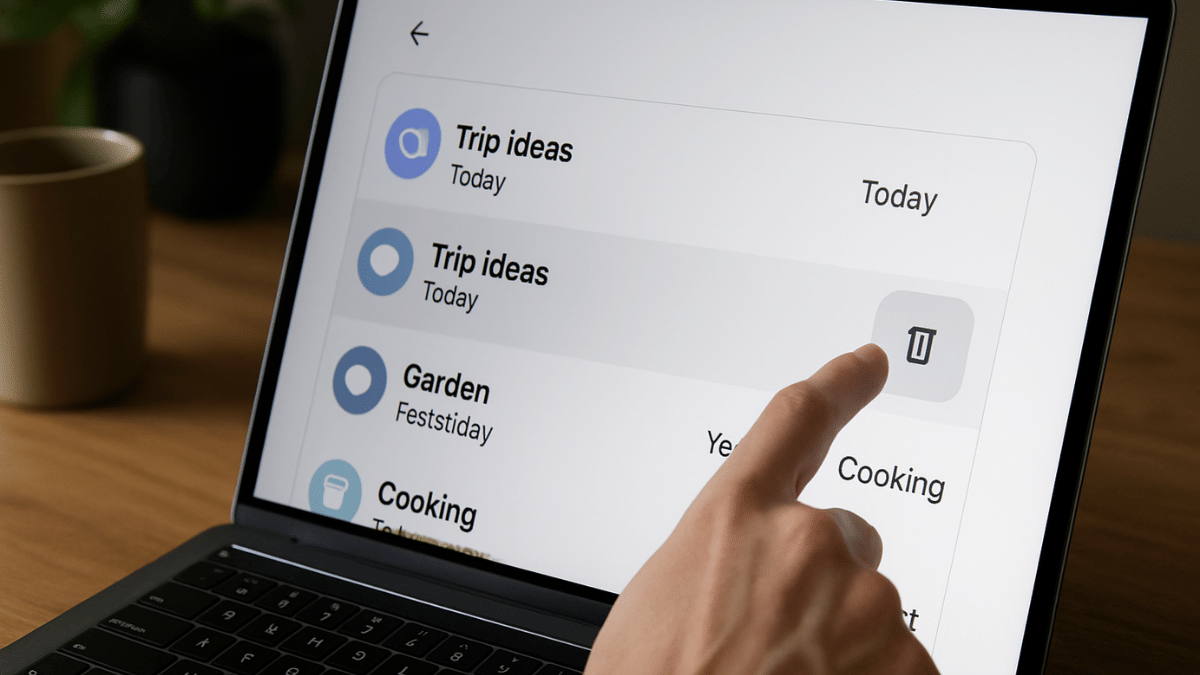
Before we dive into the step-by-step guide, it is essential to understand that this error generally happens when your Prime subscription supports limited devices. Just for reference, there is a limitation as to how many devices you can use to log-in to your Prime Videos account. Deleting them is the only way to fix this error. It is also crucial to know the exact limit of devices that your Prime subscription supports. Note that, upgrading your subscription package can also do the trick if your aren’t already using the premium one.

Step 1: Open Amazon Prime mobile app or website

Step 2: Login with your registered credentials (username/ ID and Password

Step 3: Go to the Account Section

Step 4: Scroll down and find the “Devices” option. Tap on it.

Step 5: Select the Prime Video option

Step 6: You’ll see the list of devices where your Amazon Prime Video account is logged in.

Step 7: Identify the device that is not is use. Once found, select the “Deregister” option.

Also Read: Google Maps Quick Fix Guide: How To Resolve Alternate Route Not Showing On Maps

Amazon Prime Videos Device Limit Details As Per Plans

Prime Video Subscription Plans Device Limit
Prime Video Mobile Edition One mobile device
Prime Lite Only one device (either mobile or TV)
Amazon Prime Up to 5 devices
Categories
Apps Featured How To

Enhance ChatGPT Privacy: How To Delete Individual And Entire Conversation History In ChatGPT

Key Highlights

  • Search and chat history gets stored in ChatGPT log
  • One must delete for enhanced privacy
  • Archives should also be deleted to maintain privacy with ChatGPT

Today’s modern era has made it a necessity to use AI tools. And with technology taking a leap in the AI sector, reliability on AI chatbots and apps such as ChatGPT has increased magnificently. While getting tasks done has become time saving and efficient, there is a bigger concern ongoing with privacy while using AI chatbots. Specifically, if you have been using ChatGPT for sensitive searches and projects. Besides, ChatGPT using your search queries to train itself can get you more worried. So, what can you do to keep your ChatGPT conversations private? Well, the only option remaining is to delete the chat and archives. How to do it? We help you in this guide.

For the tech geeks, stay updated with the latest cutting-edge gadgets in the market, exclusive tech updates, gadget reviews, and more right on your phone’s screen. Join Giznext’s WhatsApp channel and receive the industry-first tech updates.

Also Read: Google Maps Quick Fix Guide: How To Resolve Alternate Route Not Showing On Maps

How To Delete Individual Chats In ChatGPT

Step 1: Open ChatGPT (web version or mobile app)

Step 2: From the left sidebar, move the cursor over the chat or conversation that you want to delete. Tap and hold the individual chat (on mobile app).

Step 3: Tap on the trash bin icon or delete

Step 4: Confirm that you want to delete the chat

Also Read: Google Maps Quick Fix Guide: How To Resolve Alternate Route Not Showing On Maps

How To Delete All ChatGPT Recent And Old Conversations

Step 1: Open ChatGPT on your respective devices

Step 2: Tap on the Profile icon placed at the bottom

Step 3: Tap on Settings option

Step 4: Now, select the Personalization option

Step 5: Click on Memory

Step 6: Tap Delete All

Also Read: Transform Your WhatsApp DP: How To Create AI Profile Image, Group DPs On Android And iOS

Why Deleting ChatGPT Helps?

  • Clears search clutter on the side bar
  • Allows fresh response generation that is not based on previous search and learnings
  • Helps maintaining privacy

Categories
Apps Auto Tech Featured How To

Google Maps Quick Fix Guide: How To Resolve Alternate Route Not Showing On Maps

Key Highlights

  • Google Maps shows alternate routes for different locations
  • App should be updated to fix alternate route not displaying error
  • Other fixes listed below

Imagine driving to an unknown destination only to find the road closed and no alternate being showed on Google Maps. It’s an tricky situation specifically if you are out with your family and you are unaware of the routes. But instead of panicking, trying some quick fixes can help you overcome this situation efficiently and swiftly. This also comes as a saviour in situations where’s hectic traffic can extend your travel period. In this guid, we help you fix the alternate routes not showing on Google Maps error.

For the tech geeks, stay updated with the latest cutting-edge gadgets in the market, exclusive tech updates, gadget reviews, and more right on your phone’s screen. Join Giznext’s WhatsApp channel and receive the industry-first tech updates.

Also Read: Transform Your WhatsApp DP: How To Create AI Profile Image, Group DPs On Android And iOS

Quick Fix Guide To Resolve Google Maps Not Showing Alternate Routes Error

Method 1. Check Internet Connections And Restart App

This is the basic fix that you can perform to fix errors with alternate route display on Google Maps. Check if the internet connection is up and running fine, if not re-connect the phone to internet and check if you are now able to see alternate route options. Re-starting the app after force closing can also do the trick.

Also Read: YouTube Music Hacks: How To Share YT Music Playlists With Others On WhatsApp, Email, Etc

Method 2. Re-Caliber Google Maps

Often Google Maps calibration can go off leading to errors with navigations and directions. Re-calibration is the quick fix that you can apply to resolve the error wit alternate route display on Google Maps. Specifically, if you notice the location dot turned grey instead of blue. Just tap on the location dot followed by the caliber option. Move the phone drawing figure-8 pattern. Doing this will re-caliber the Google Maps app’s direction and will fix any navigational error.

Also Read: Windows PC Getting Unresponsive? Here’s How To Emergency Restart Windows Laptops/ PCs

Method 3: Update And Re-Install Google Maps

This is another classic trick to fix any random functional errors with Android apps. The same can be applied to Google Maps where uninstalling Google Maps and re-installing can fix any basic bugs and errors that have been hampering its performance.

Also Read: Terror Hits Pahalgam & Poonch: How To Enable Emergency Alerts On Your Phone Amid Rising Indo-Pak Tensions

Method 4: Ensure Location Services Are Enabled

When location services are disabled, Maps will not be able to identify and suggest alternate routes for the destination and provide real time traffic analysis. Hence, ensure, you have enabled location services so that Google Maps can function properly and display alternate routes.

Also Read: Your Aadhaar Details Compromised? Here’s How To Instantly Check For Data Leaks, Unauthorized Aadhaar Use

When Does Google Maps Stops Showing Alternate Routes? Common Scenarios

Why Google Maps May Not Show Alternate Routes

Before jumping into the fixes, it’s important to understand what could be causing the issue:

  • Slow/Poor/No internet connection
  • Location services disabled
  • Calibration errors
  • Dated App version
Categories
Apps Featured How To

Transform Your WhatsApp DP: How To Create AI Profile Image, Group DPs On Android And iOS

Key Highlights

  • WhatsApp allows creating profile pic using AI
  • Option available for Android and iOS
  • Group icons can also be created using AI

Meta AI has been a game changer for WhatsApp. The instant messaging platform has become more advanced and smarter with the arrival of AI capabilities. Drafting messages and creating replies using AI, images, and even stickers has made conversations more fun on WhatsApp. And now, WhatsApp will allow users to create profile pictures using AI. This new feature will transform the way you interact with contacts using your DP on WhatsApp. Besides profile pictures, WhastApp is also adding the option to create AI-generate group icons. Interested in knowing the steps? Read on the step-by-step guide below:

For the tech geeks, stay updated with the latest cutting-edge gadgets in the market, exclusive tech updates, gadget reviews, and more right on your phone’s screen. Join Giznext’s WhatsApp channel and receive the industry-first tech updates.

Also Read: YouTube Music Hacks: How To Share YT Music Playlists With Others On WhatsApp, Email, Etc

Steps To Create New WhatsApp DP Using AI On Android (Smartphones and Tablets)

Step 1: Open WhatsApp and navigate to the Settings tab

Step 2: Click on your profile picture

Step 3: Tap on the Edit option.

Step 4: You’ll see a new category AI Images. Select it.

Step 5: Describe what kind of image you would want the AI to create

Step 6: Once the image is created select it (simply tap on it).

Step 7: Click save to set the AI generated image as your profile picture.

Also Read: Windows PC Getting Unresponsive? Here’s How To Emergency Restart Windows Laptops/ PCs

Steps To Create and Upload New AI Profile Images On WhatsApp (iOS Devices)

The steps are identical for creating and uploading WhatsApp images using AI on iOS as Android

Step 1: Launch WhatsApp and navigate to the Settings option

Step 2: Tap on your profile picture and click on the camera icon to upload

Step 3: Select AI image option to create new profile picture

Step 4: Tap on the AI created image to set it as your new DP

Also Read: No More Snooping: How To Get Instant Login Alerts On Instagram And Protect Privacy

How To Create AI-Generated Group Profile Photos On WhatsApp (For both Android and iOS Platforms)

Step 1: Open WhatsApp and go to the group chat whose profile pic you want to update

Step 2: Click on the group’s name followed by the group icon

Step 3: Tap on the Edit option and select AI images option

Step 4: Give description of the image type that you want AI to create

Step 5: Tap and select the AI-created image to upload as new group icon

.

Categories
Apps Featured How To

YouTube Music Hacks: How To Share YT Music Playlists With Others On WhatsApp, Email, Etc

Key Highlights

  • YouTube music is widely used online music player app
  • Allows saving public playlists
  • Playlists can be shared with others via WhatsApp and emails

YouTube has become more than just a standard streaming platform. Over the years, it has evolved as a hub for entertainment and a steady source of income for the masses as well as professionals. For all melomaniacs, YouTube Music is the dedicated space to groove into your favorite music track. With one of the biggest music libraries, YT Music is essentially rising to the top spot competing against the likes of Spotify and Apple Music. We bet, if you are a frequent YT Music user, you would have created your personal library containing all your favorite hits. What better it could be sharing your music with your friends and family. Here in this article, we guide you with the steps to share your favourite YT Music playlist via WhatsApp and email with your loved ones.

For the tech geeks, stay updated with the latest cutting-edge gadgets in the market, exclusive tech updates, gadget reviews, and more right on your phone’s screen. Join Giznext’s WhatsApp channel and receive the industry-first tech updates.

Also Read: Windows PC Getting Unresponsive? Here’s How To Emergency Restart Windows Laptops/ PCs

How To Share YT Music Playlist Via WhatsApp, Emails (For Android And iOS )

Step 1: Launch the YouTube Music app

Step 2: You can also launch the YouTube Music website on a web browser on your Android device (Chrome, Opera, etc)

Step 3: Go to the Library option (at the bottom right)

Step 4: Tap on the three dots (menu) in front of the play list that you want to share. Or press and hold the playlist that you want to share.

Step 5: Click on Share option

Step 6: Select WhatsApp, Facebook, or X (previously twitter) to share the playlist. You can also share it via Bluetooth, SMS, Instagram DM, Gmail, etc.

Step 7: You can also copy the playlist link and share as per convenience.

Also Read: Your Aadhaar Details Compromised? Here’s How To Instantly Check For Data Leaks, Unauthorized Aadhaar Use

Categories
Apps Featured How To

No More Snooping: How To Get Instant Login Alerts On Instagram And Protect Privacy

Key Highlights

  • Instagram offers multiple privacy and safety features
  • Enabling login alerts prevents unwanted access and account controls
  • Feature available for both Android and iOS devices

Instagram remains the dominating app in the social media space. And with constant surge in its user base, this we definitely are getting some of the unique features that keeps us hooked to this platform. And not just entertainment, Instagram has turned out to be one of the best apps for having fun conversations. Besides, Instagram has evolved as created a whole different era of social media influencing giving opportunities to creators and brands reach out a larger audience base boosting their market presence overall. Collectively Instagram is one of those apps that if you are using (as a general user, creator, or for business) then you need all the precautionary measures offered by the platform enabled. Login alert notification is one such feature that you need to enable for advanced privacy. In this guide, we tell you how to enable Instagram login alert notification making your account more private and secure. This will help you know if someone has logged into your Instagram account and if there’s any privacy breach.

Also Read: Instagram Edits: New Standalone Editing Insta Tool? 10 Easy Steps To Use!

How To Activate Login Alerts For Your Instagram Account (Android, iOS)

Step 1: After launching Instagram mobile app, tap on the profile icon from the homepage.

Step 2: Tap on the Menu (three dots) icon

Step 3: Tap on the Accounts Centre option

Step 4: Click on the ‘Password and Security’ option

Step 5: Now, select the Login Alerts option

Step 6: Enable the in-app notifications

Step 7: Ensure Email notification is enabled to Always on. Also, cross check the email address.

Also Read: Operation Sindoor Live: How To Map Real-Time Action, Track Live Updates On Smartphones

How To Check If Some Other User Has Logged Into Your Instagram Account

Step 1: Open Instagram app and tap on the Profile icon

Step 2: Now, click on the Settings tab and head to the Accounts Centre

Step 3: Tap on the ‘Where you’re logged in’ option. Check the list of login devices along with the locations. Make sure there are no unfamiliar device or login location. If there is, your account security might be compromised.

Step 4: Change your password if you believe account security might have been compromised. Otherwise, enable the login alerts using the procedure listed above.

Categories
Apps Featured How To

Tired of Losing Location Screenshots? Google Maps Now Lets You Save Screenshots Directly: Here’s How

Key Highlights

  • Google Maps gets screenshot save feature
  • Helps with finding locations from saved screenshots
  • This feature is Gemini-AI backed

Google Maps is getting is routine update. Now, the navigation app has become more smarter in terms of finding locations and guiding you with the routes, nearby places, and more. Google has introduced a new feature that will allow users to save screenshots directly to Maps app and use the same to find the destination. Let’s dive into more details below:

For the tech geeks, stay updated with the latest cutting-edge gadgets in the market, exclusive tech updates, gadget reviews, and more right on your phone’s screen. Join Giznext’s WhatsApp channel and receive the industry-first tech updates.

Also Read: Google Confirms Maps Timeline Data Deleted Accidentally: Check Steps To Restore Deleted Maps Timeline

Google Maps Screenshot Saving Feature Explained

The screenshot saving feature is introduced for Maps where a user can easily keep a track of all the screenshots grabbed from a travel blog, news article, or social media posts for planning a vacation or trip. Instead of saving that location’s screenshot into your device’s gallery and then going through a whole long log of photos to find the same, you can do it directly into the Maps app. This will not only save extra hassle but make it much convenient for planning travels. Note, This feature is currently released only for iOS users and will likely be made available to Android in the coming months.

Also Read: Terror Hits Pahalgam & Poonch: How To Enable Emergency Alerts On Your Phone Amid Rising Indo-Pak Tensions

How To Use Google Maps Screenshot Saving Feature On iOS

Step 1: Open Google Maps and ensure it’s updated to the latest version

Step 2: Head to the ‘You’ tab at the bottom

Step 3: Once you perform the step 2, a new badge with ‘Try it out’ (with a screenshot list) will be visible. Tap on it.

Step 4: A video will be played explaining how the feature works. There’ll be a provision to try it out along with the video tutorial.

Step 5: Grant the permission to Google Maps to access your device gallery and photos.

Step 6: You’ll see the list of screenshots on Maps along with the suggestions once the scanning is complete

Step 7: Click on the Review tab if you wish to add the screenshot to Google Maps list.

Step 8: Once all the screenshots are saved, you can later see the list directly by tapping on the You tab.

Categories
Apps Featured

WhatsApp Testing Message Summarisation Via Meta AI: Update Coming Soon?

Key Highlights

  • WhatsApp testing new message summarisation feature
  • Spotted in beta build 2.25.12
  • Uses Meta AI to provide a quick summary of messages

WhatsApp is making its messaging platform all advanced with incorporation of Meta AI. On Android and iOS, WhatsApp allows users to make use of Meta AI for image creation, create and draft new messages/ emails, find information related to different topics, etc. And now, a new feature leveraging Meta AI’s capabilities is in tow which will make it much easier to be updated with all the incoming messages. The messaging platform is testing AI summarisation feature which has been spotted in the latest beta build.

For the tech geeks, stay updated with the latest cutting-edge gadgets in the market, exclusive tech updates, gadget reviews, and more right on your phone’s screen. Join Giznext’s WhatsApp channel and receive the industry-first tech updates.

Also Read: WhatsApp Advanced Chat Privacy: How To Add Extra Safety Layer For WhatsApp Chats?

WhatsApp AI Chat Summarisation Feature: Update Available?

WhatsApp is testing a new feature that will provide an AI-based summary of the messages that have been missed. This feature is being tested with the Android beta build 2.25.15.12 and can be dowloaded via Play Store. This feature has been spotted in the testing phase by WABetaInfo and is expected to be made available to the users as a stable version in the coming months.

Also Read: Terror Hits Pahalgam & Poonch: How To Enable Emergency Alerts On Your Phone Amid Rising Indo-Pak Tensions

WhatsApp AI Chat Summarisation: How Will It Work?

Th screenshots shared by WABetaInfo shows how the upcoming AI chat summary feature will work on WhatsApp. It uses Meta AI for summarising long texts. This feature is beneficial when there are multiple unread messages where users will be able to see a se Summarise with Meta AI button option in the chat. Once the users taps on this option, a comprehensive summary of the missed chats will be created allowing user to quickly run through the updates.

The AI message summarisation feature will be available for all chat formats on WhatsApp. This will include all personal and private messages with a single contact or group and even for WhatsApp channels that a user follows.

Also Read: Operation Sindoor Live: How To Map Real-Time Action, Track Live Updates On Smartphones

Privacy Concerns With Message Summary Feature On WhatsApp?

While the AI Message summary feature will be available for all chat formats on WhatsApp, it wouldn’t be functional for the chat Windows where Advanced Chat Privacy feature is enabled. This will make sure the privacy remains intact. Additionally, WhatsApp claims that the messages will be summarised using the Private Processing infrastructure which will ensure no messages or chats are read or stored separately.

Categories
Apps Featured How To

UPI Refund Scam In India: What’s This New Digital Scam? How You Should Stay Safe?

Key Highlights

  • UPI refund fraud is the new online scam in India
  • Targets UPI users
  • Often money gets deducted from users account in pretext of refunds

UPI adoption has been rapid over the last few years, with the Indian masses shifting towards the digital payments services. We definitely have seen a boom in the digital transactions and the surge in UPI app usage across the country. This certainly has also paved in way for cybercriminals to scam innocents robbing them off their hard earned money. Digital scams have certainly become more common with the imposters coming out with new ways each time for such frauds. UPI refund is another scam which is being reported nowadays where criminals send fake messages and create emergencies citing wrong fund transfers and asking a refund for the same. In this guide, we break down this new UPI refund scam and the tips to avoid falling in such traps.

For the tech geeks, stay updated with the latest cutting-edge gadgets in the market, exclusive tech updates, gadget reviews, and more right on your phone’s screen. Join Giznext’s WhatsApp channel and receive the industry-first tech updates.

Also Read: Travelling Overseas? Here’s How To Activate International UPI On Gpay, PhonePe For Payments Abroad

UPI Refund Scam Breakdown: How It Works?

As is the case with most of the digital scams, cybercriminals use modern tactics involving UPI app for frauds. Scammers tricks UPI users into believing that money has been sent accidentally to their account for which they need a refund. A sense of emergency is being created to transfer the money back which essentially is the scam. Let’s take a look at how this UPI scam is carried out:

  • Money Transfer: This is a deliberate move where the scammer will send a small amount of money to your UPI or bank account. It could also be a SMS stating amount credited to your account which likely will be fake.
  • The Initial Contact: This is the first stage where the imposter sends you message or tries to contact you citing accidental money transfer yo your account. It could be a standard phone or WhatsApp call.
  • Emotional Tactics: The scammer will then persuade the victim under emotional baggage and request for money refund.
  • UPI Refund Request: You might also receive money transfer (refund) request on your UPI app from the fraudster. In some cases, you might be shared a QR code scanner for fund transfer.
  • Final Scam: If you approve the UPI refund request then sadly you have fallen a victim to the UPI refund scam.

Also Read: EPFO Quick PF Withdrawal Via UPI Apps, ATMs Becoming Reality Soon? Transaction Limit, Eligibility Criteria

How to Stay Safe From UPI Refund Scams

To stay safe from such UPI and other digital scam, follow the do’s and the dont’s listed below:

The Do’s

  • Verify message and sender authenticity: Make use of caller ID platforms or your contacts to verify the sender. This can help you stay vigilant of such scams.
  • Enable UPI Message Alerts: Ensure you have enabled notifications and SMS/ message alert feature enabled for all UPI apps. In case of transactions including money receiving and transfers, you’ll be notified directly.
  • Verify and cross-check UPI requests: Never approve any random UPI request. All requests should be verified even for the smallest of transactions.
  • No authorisation required for refunds: Remember, none of the shopping, food delivery, and similar apps will ask for authorisation, OTPs, etc., for refunds. Make sure you report such requests. Hence, never approve UPI refund or payment requests from strangers.

The Don’ts

  • Scan QR Codes: Never scam random QR codes. Specifically, if you are lured in to receive a refund or free money.
  • Accept Payment/ Refund Request: Never approve any payment or refund related requests uyou receive without any prior information on your UPI apps. If you receive any SMS or WhatsApp messages with similar links avoid clicking them.
  • Share UPI PIN: Ensure you don’t share your UPI pin with any random person or official. It could be a scammer disguised as a professional.
  • Click messages containing links from unknown sources: If you recieve any message from unknown number containing promotional or some banking links, never click on them. It could give attackers access of your device and accounts.

Categories
Apps Featured How To

Need Emergency Funds? Here’s How To Apply For Personal Loan Via Google Pay

Key Highlights

  • Google introduces personal loan services for GPay
  • Will help with emergency fund
  • Minimum personal loan amount one can apply for is up to Rs. 30,000

Google Pay is the amongst the most secure UPI apps available for Android and iOS users in India. From making daily payments to monthly bills, Gpay allows it all with just a few taps. GPay is being consistently upgraded to be more than just a basic UPI app that can help users send or receive money. Features like split bills, bank transfer to self and others makes it more user-friendly. But now, Google has introduced a new feature that sets Google Pay apart from the rest in the UPI race. GPY users will now be able to apply for personal loas directly via the app.

For the tech geeks, stay updated with the latest cutting-edge gadgets in the market, exclusive tech updates, gadget reviews, and more right on your phone’s screen. Join Giznext’s WhatsApp channel and receive the industry-first tech updates.

Also Read: GPay Payment Split: Get Done With Hassle Free Bills/ Payment Splits On Android, iOS

Google Pay Personal Loan Feature: Total Loan Amount

Google Pay has released a new personal loan feature for its users. If you are using Google Pay app for UPI services, you can also make use of the personal finance feature. This is something that can be helpful in situations where you need funds for medical or other emergencies.

Coming to the loan services and amount, all the Google Pay users will be able to apply for personal loan services using the app itself. No additional paper work or standing on long queues in a bank would be required to apply for personal loan when using GPay app. Instead, all can be done with just a few taps. This will be an entirely digital process like UPI where customers will be eligible for up to Rs. 10,00,000 or personal loan.

  • Minimum personal loan amount limit: Rs. 30,000
  • Maximum personal loan amount limit: Rs. 40,000
  • Eligibility Criteria: Will depend on the user’s financial profile

If you are wondering about the re-payment of the loan, then you’ll be glad to know that Google Pay is offering flexibility with payments where one can select the timeline for loan repayment. A minimum EMI amount of up to Rs. 2,000 will be applicable for the basic loan amount of Rs. 30,000.

Also Read: Enhance WhatsApp Privacy: How To Blur Images On WhatsApp Mobile, Desktop App

Eligibility Criteria, And Application Process

  • Customer should have a steady source of income (could be self-employment or a jon)
  • Customer should be at least 21 years for personal loan application
  • Bank account should be linked to Google Pay
  • KYC verification should be complete while applying for the loan

Below are the steps to apply for personal loan using Google Pay

Step 1: Open Google Pay app

Step 2: Navigate to the “Manage Your Money” tab

Step 3: Locate the “Personal Loan” feature and tap on it

Step 4: Enter your personal details including source of income

Step 5: Now, upload your KYC documents such PAN and Aadhaar

Step 6: Sign the document digitally

Step 7: Once all the above steps are completed and the loan is approved, the amount will be credited to the linked bank account.