Categories
Apps Featured How To

Lost Your Snapchat Streak? Here’s How To Restore It With These Steps

Key Highlights

  • Snapstreak is used to share fun snaps everyday
  • If you miss to send a snap, it will disappear
  • Here’s how you can get it back on Snapchat

Snapchat is a popular and fun messaging app that lets you chat with friends, explore, learn, and view worldwide stories. Users of the app can share and exchange snaps (pictures or videos) that vanish after being viewed. A snap can also be reloaded once per 24 hours.

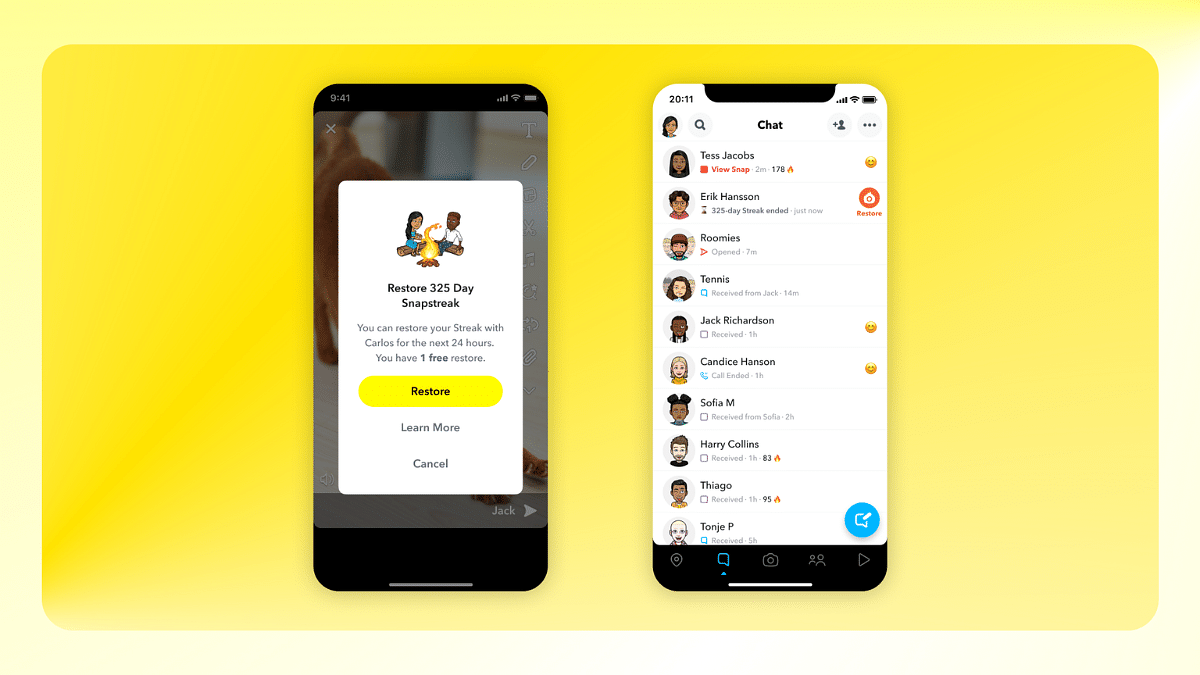
Snapstreaks are created by sharing common photos with your friends that have fun and cool filters, lenses, or other effects applied. Even though Snapchat does offer a warning icon in the shape of an hourglass indicator on the chat reminding you to share a snap, it can disappear if you forgot to send a Snap for 24 hours.

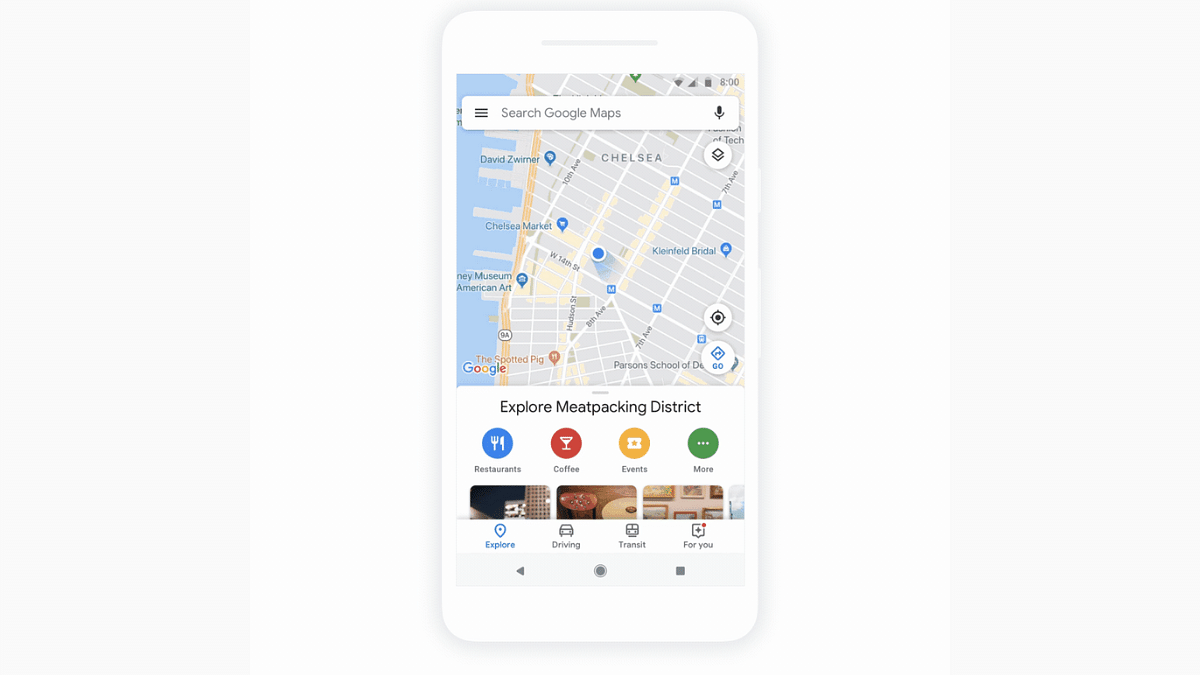
Also Read | Google Maps ‘Explore’ : How To Find Hidden Gems En-route Your Journey

For those who have been routinely sharing images with their friends for hundreds of days, losing the Snapstreak might be very heartbreaking. Contacting Snapchat support may help you regain your Snapstreak if you believe it has ended despite the fact that you didn’t miss any days. A step-by-step tutorial for recovering a lost Snapchat snapstreak is provided below:

Steps To Restore A Lost Snapstreak On Mobile

Step 1: On your mobile phone, open the Snapchat app and click on your profile in the top left corner.

Step 2: Next, select “Settings” from the menu in the top right corner.

Step 3: Select the “I Need Help” option from the “Support” list by scrolling down.

Step 4: Then, select Snapstreaks option.

Step 5: Scroll down and click the “let us know” link (it will be highlighted in blue color).

Step 6: From the list of options, select “I Lost My Snapstreak.”

Step 7: Scroll down now and complete the form.

Step 8: Once finished, choose “Send.”

Also Read | Traveling To India? Here’s How To Pay Like A Local Using UPI One World

Steps To Restore A Lost Snapstreak On PC

Step 1: On your laptop, go to the Snapchat Support Page.

Step 2: Tap on the option ‘Contact Us.’

Step 3: After that, choose the ‘I lost my Snapstreak’ option.

Step 4: Next, you have to scroll down and fill up the form.

Step 5: Then, click on the ‘Send’ button. And you are all done.

For the tech geeks, stay updated with the latest cutting-edge gadgets in the market, exclusive tech updates, gadget reviews, and more right on your phone’s screen. Join Giznext’s WhatsApp channel and receive the industry-first tech updates.

Categories
Apps Featured How To

Worried About Losing Your Bags? Here’s How Apple’s New Feature Can Help

Key Highlights

  • Apple’s new feature helps track lost luggage with AirTags
  • Share a URL showing real-time AirTag location
  • Launches December 2024 with iOS 18.2 update

Losing luggage during travel is one of the most frustrating experiences for flyers. But Apple is introducing a game-changing solution. With its latest iOS 18.2 update, Apple’s Share Item Location feature will make it easier for airlines to locate lost baggage using AirTag trackers. Here’s everything you need to know.

Also Read | Want To Report Accidents And Road Closures On Google Maps? Learn How To Do It

What Is the Share Item Location Feature?

  • Generates a unique URL to share an AirTag’s location, map, and time stamp.
  • Supported airlines can use the shared link to view real-time updates on lost luggage through a web browser.

How Do AirTags Work?

  • AirTags use Bluetooth signals to locate items up to 30 feet indoors.
  • They leverage Apple’s Find My network which includes over two billion devices in order to detect and anonymously report the AirTag’s location.
  • The location is displayed on an interactive map in the Find My app.

How To Set Up Your AirTag

Step 1: Enable Bluetooth, Location Services, and iCloud Keychain on your device.

Step 2: Remove the battery tab and connect it to your iPhone, iPad, or Mac.

Step 3: Name it and add it to the Items tab in the Find My app.

How To Use Share Item Location

Step 1: Open the Find My app and tap on the AirTag name under the ‘Items’ tab.

Step 2: Tap ‘Share Item Location’ under Lost AirTag to generate a URL.

Step 3: Select ‘Share Link’ to send the link via email, text, or another app.

Step 4: Optionally, add contact details for easier identification.

Also Read | How To Download Or Transfer All Facebook Videos And Images Directly To Google Photos

Important Notes

  • The shared URL updates automatically with new location data and expires after seven days.
  • You can disable location sharing as soon as your luggage is found.

Availability

The feature is currently in beta and will officially launch with iOS 18.2 in December 2024. It is compatible with iPhone X or newer, fifth-generation iPads, and Macs with M1 chips or later.

For the tech geeks, stay updated with the latest cutting-edge gadgets in the market, exclusive tech updates, gadget reviews, and more right on your phone’s screen. Join Giznext’s WhatsApp channel and receive the industry-first tech updates.

Categories
Featured How To Mobile

Call Barring On Android And iOS: Here’s How To Enable It To Block Spams/ Scam Calls And Enhance Privacy

Key Highlights

  • Call barring feature allows blocking unwanted calls
  • Calls can be barred for incoming and outgoing calls
  • International call barring can also be activated

Smartphones and modern telecom network have proved to be a blessing in disguise for the modern masses. While these pocket-sized gadgets are making out daily routine more convenient, the bad effects are getting difficult to get rid off. From usage addiction to users getting scammed, smartphone side-effects are definitely ramping up. But thankfully, there are several ways that can help you to stay safe from such adverse affects. And in this article, we will be guiding you with one of the easiest ways to stay protected from potential scammers who take undue advantages by calling and posing as authorities, recruiters, etc. The call barring feature is what comes to rescue here and the steps to activate it are fairly easy too.

Also Read: ChatGPT’s Advanced Voice Mode Lands On The Web: Here’s How To Use

How To Enable Call Barring Manually Using Phone Settings

You can enable the call barring feature on both Android and iOS smartphones. The procedure is almost same which helps you block advertisement and scam calls.

Step 1: Unlock your respective smartphones and launch the dialer app.

Step 2: Locate the menu option (three vertical dots) on the top right of the dialer app

Step 3: You will see the “Settings” option. Tap on it

Step 4: Select the Calling Accounts option

Step 5: Another new settings page will open up with ‘Operator-related Settings’ option. Click on it.

Step 6: Now, tap on the Call barring option. Depending on the phone’s model, this setting could also be mentioned as Call Blocking and other names.

Step 7: You will now see the list of calls that can be barred including “All Incoming Calls”, “Outgoing International”, “Outgoing International Roaming”, “Reject All Incoming Calls”, and “Reject Incoming Calls While Roaming”

Categories
Featured How To

ChatGPT’s Advanced Voice Mode Lands On The Web: Here’s How To Use

Key Highlights

  • Advanced Voice Mode now on web for premium ChatGPT users
  • Enables real-time voice conversations with GPT-4 audio
  • Easy to use with voice icon and microphone controls

There’s good news for ChatGPT users from OpenAI. You can now access its Advanced Voice Mode on web. This feature, which was first introduced in iOS and Android apps, enables users to speak naturally with ChatGPT. Available exclusively for premium subscribers, this update aims to make the interactions more seamless than ever before.

Also Read | ChatGPT Canvas Is Here: Everything You Need To Know

Advanced Voice Mode: What’s New?

  • The feature is now available on web browsers as well as mobile apps.
  • Requires a subscription to ChatGPT Plus, Enterprise, Teams, or Edu plans.
  • Enables real-time voice input and spoken responses. This makes the interactions with ChatGPT feel more human-like.

Advanced Voice Mode: Features

  • Powered by GPT-4 Audio: Uses OpenAI’s latest audio capabilities for smooth voice conversations.
  • Interactive Discussions: Users can engage in discussions not just Q&A.
  • Daily Usage Limits: Voice features are limited daily for all premium users.

How To Start A Voice Conversation On The Web

Step 1: Find the voice icon at the bottom right of the ChatGPT interface.

Step 2: Grant your browser permission to use the microphone when prompted.

Step 3: Once activated, you can see a blue circle in the center of your screen.

Step 4: If using standard voice mode, the circle will appear black instead of blue.

Step 5: Use the microphone icon on the bottom left to mute or unmute.

Step 6: Click the exit icon at the bottom right when finished.

Also Read | ChatGPT Search Quick Hacks: How To Use ChatGPT As Default Search Engine In Google Chrome

What If the Feature Isn’t Available Yet

ChatGPT

You will notice a headphone icon in place of a circle if the feature has not been rolled out to your account. As the rollout progresses, stay tuned for updates from OpenAI.

For the tech geeks, stay updated with the latest cutting-edge gadgets in the market, exclusive tech updates, gadget reviews, and more right on your phone’s screen. Join Giznext’s WhatsApp channel and receive the industry-first tech updates.

Categories
Apps Featured How To

Google Maps ‘Explore’ : How To Find Hidden Gems En-route Your Journey

Key Highlights

  • New Google Maps Explore feature is here
  • Allows finding popular spots during journeys
  • Stops can be added for the popular spots on the way

Google Maps has evolved as one the most strongest mobile apps for navigation. With frequent release of new features, Maps has turned out to be the best app for traveling to new destinations without fears of getting lost on the way. Google has added yet another helpful feature to Maps which will allow users to find popular destinations and spots en route their journey. Called Explore, the new Google Maps feature is available for both Android and iOS users. This new tool helps making the roadtrip journey memorable by suggesting various interesting local stops on the way. From eating joints to scenic routes, the latest Explore feature on Google Maps will definitely make it worth a while during long road trips. If you wish to know the steps to use the Explore feature on Google Maps, read the steps below:

For the tech geeks, stay updated with the latest cutting-edge gadgets in the market, exclusive tech updates, gadget reviews, and more right on your phone’s screen. Join Giznext’s WhatsApp channel and receive the industry-first tech update.

Also Read: Traveling To India? Here’s How To Pay Like A Local Using UPI One World

How To Use Google Maps Explore Feature?

Step 1: Open Google Maps mobile app on your Android or iOS handset

Step 2: Search the destination where you plan to take the roadtrip

Step 3: Click on the “Directions” option

Step 4: Tap on the “Add Stops” menu

Step 5: The list of popular spots will be pinned on the maps. You can tap on these pins to check the top rated restaurants, any historical monuments, and other options that show up.

Step 6: If you wish to know more about these popular stops, tap on the pinned location.

Step 7: To look for further suggestions, simply scroll down to the bottom the app’s homepage. You will be suggested local attractions based on different topics ranging from point of interests to fast food joints to restaurants.

Step 8: You can also select a location from the gallery that will show up at the bottom the Map’s app home screen. Tap on the location to know additional information and details related to the spot.

Categories
Featured How To Laptop Mobile

Zero-Day Vulnerabilities Hit Apple Users: Here’s How To Secure Your Devices

Key Highlights

  • Apple released urgent updates for security flaws
  • Hackers can exploit these to steal data
  • Update devices now to stay secure

Apple just released critical security updates for users of the iPad, iPhone, and Mac. Two serious ‘zero-day’ vulnerabilities that hackers have actively exploited are addressed by these upgrades. These vulnerabilities could allow hackers to take over your device or steal confidential information if they are not fixed. Software updates are essential for your security. What you need know about the vulnerabilities are covered in this post.

Also Read | Password Privacy: How To Create And Remember Strong Passwords

What Are Zero-Day Vulnerabilities?

These are security flaws that are discovered by attackers before the software maker, in this case, Apple. This makes them highly dangerous as they can be exploited without warning.

Who Discovered The Issues?

Google’s Threat Analysis Group, known for investigating cyberattacks, found the flaws. They noted that the vulnerabilities were being actively used in targeted attacks.

What Do The Flaws Target?

The vulnerabilities affect WebKit and JavaScriptCore, software components essential for running web content on Apple devices. WebKit, in particular, is frequently targeted by hackers.

How Could Hackers Exploit This?

By tricking users into visiting malicious websites or opening harmful content, hackers could execute malicious code on the device. This could lead to malware installation or data theft.

Which Devices Are Affected?

The security issues impact:

  • Intel-based Mac computers.
  • iPhones running iOS 17 or older versions.
  • iPads using iPadOS or older software.

Apple has rolled out fixes for all these devices, including older models.

Why Should You Update Immediately?

Delaying updates could leave your device vulnerable to cyberattacks. Here’s why updating is crucial:

  • Protects against malware and hackers.
  • Prevents unauthorized access to private data.
  • Ensures a safer browsing experience.

How To Update Your Device

Follow these steps to secure your Apple devices:

  • For iPhone or iPad: Go to Settings > General > Software Update.
  • For Mac: Open System Preferences > Software Update.
  • Install immediately to close the security gaps.

Also Read | Online Safety: Eight Essential Cybersecurity Tips For Kids

Stay Safe Online

Cyber threats are growing more advanced. However, frequent upgrades might protect your devices from possible damage. Now is a good time to upgrade your iPad, iPhone, or Mac. Don’t risk your safety. Keep your software up to date to stay one step ahead of hackers.

For the tech geeks, stay updated with the latest cutting-edge gadgets in the market, exclusive tech updates, gadget reviews, and more right on your phone’s screen. Join Giznext’s WhatsApp channel and receive the industry-first tech updates.

Categories
Apps Featured How To

Traveling To India? Here’s How To Pay Like A Local Using UPI One World

Key Highlights

  • Make secure payments in India by scanning QR codes
  • Verify, load funds, and track expenses in one app
  • Convert unused balance back before leaving

UPI One World wallet has made exploring India more convenient for international visitors by enabling cash-free, secure, and easy payments. By simply scanning QR codes at merchant locations, this digital wallet eliminates the need for cash or dealing with foreign exchange complexities. Here, we have come up with a step-by-step guide to help you get started with UPI One World and make your travel journey smoother.

Also Read | Streamlining Transactions: How To Generate And Share UPI QR Codes For Payments

Steps To Get Started With UPI One World

Step 1: Start by downloading the UPI One World app on your mobile.

Step 2: Open the app and sign in using your international mobile number.

Step 3: Visit an authorized issuer counter, typically located at airports and other major entry points.

Step 5: Show your passport and current visa in person for verification. This ensures that the wallet can only be accessed by verified travelers.

Step 6: The UPI One World service will be enabled on your international mobile number following document verification. This enables hassle-free transactions by enabling you to load Indian Rupees.

Step 7: You can fund your UPI One World wallet using two main methods:

  • Convert your foreign currency at the issuer counter, with assistance from forex experts.
  • Use an international debit or credit card to load funds directly into your wallet.

Step 8: Use your UPI One World wallet to pay at merchant locations across India.

Also Read | No Card? No Problem: Here’s How To Withdraw Cash From ATMs Via UPI

Step 9: Before leaving India, you can convert any remaining wallet balance back to cash at designated counters.

Alternatively, the unused amount can be transferred back to your original payment source as per foreign exchange regulations.

For the tech geeks, stay updated with the latest cutting-edge gadgets in the market, exclusive tech updates, gadget reviews, and more right on your phone’s screen. Join Giznext’s WhatsApp channel and receive the industry-first tech updates.

Categories
Apps Featured How To

Netflix Moments: What Is It? How To Capture And Share Screenshots?

Key Highlights

  • Netflix mobile app gets new ‘Moments’ feature
  • Allows capturing screenshots of specific scenes from movies and shows
  • Feature currently being rolled out to iOS users
  • Android update in tow

Netflix is amongst the top OTT platforms offering streaming services in India. The premium subscription-based app has a big library hosting thousands of regional and international content for the viewers. Just a while ago, Netflix has released a new feature for the masses allowing something that has been long awaited. The option to capture a screenshot during a video playback. But now, that’s changed with the release of the Moments. What exactly is Netflix Moments and how will it help with grabbing and sharing screenshots of different shows and movies? Read on the details below:

Also Read: For the tech geeks, stay updated with the latest cutting-edge gadgets in the market, exclusive tech updates, gadget reviews, and more right on your phone’s screen. Join Giznext’s WhatsApp channel and receive the industry-first tech update.

Also Read: Instagram Tips And Tricks: How To Improve Message Quality Using Meta AI Voice Conversation

What Exactly Is Netflix Moments?

Netflix Moments is the latest feature that allows capturing screenshots of a specific scene from any movie or video. Just for reference, nit just Netflix, but other popular OTT apps such as Amazon Prime Video, Disney+ Hotstar, and Jio Cinema still don’t support taking screenshots. The primary reason for this is the copyright issues that all these brands try to escape.

However, with the launch of the Moments, Netflix users will be easily able to click screenshots of their favorite scene from any movie or show and share it with friends and families.

Also Read: ChatGPT Search Quick Hacks: How To Use ChatGPT As Default Search Engine In Google Chrome

Who All Can Use Netflix Moments Feature?

Going by the reports online, the Netflix Moments feature is made available to the iOS users at the moment. The company has not yet started rolling out this feature to the Android users. However, the rollout is expected to be done in phased manner reaching the all customers within next few weeks.

Also Read: Annoyed With Unwanted Calls? Here’s How To Block Any Phone Number On Your iPhone

Steps To Use Netflix Moments Feature To Capture Screenshots

Step 1: Open Netflix mobile app and search for the movie or show whose screenshot you wish to share

Step 2: Play the video and move to the dedicated scene that needs to be captured

Step 3: Tap anywhere on the screen during the video playback

Step 4: You’ll see a bunch of options including Moments. Click on it.

Step 5: Once the screenshot is captured, you can share it with your friends and even upload it on social media platforms .

Categories
Featured How To Mobile

Android Tips And Tricks: How To Check And Share Wi-Fi Password

Key Highlights

  • Multiple devices can be connected with a single Wi-Fi network
  • Option to check Wi-Fi password available on Android OS
  • Latest Android OS version offers a simplified process

Android OS is the most potent mobile operating systems powering modern smartphones, tablets, and even other gadgets. With an Android smartphone, you can now get done with endless tasks moving away from basic calling and messaging. Internet connectivity has proved to be the game changer for mobile phones. And thanks to the technology upgrades, faster internet speeds can now be achieved with smartphones when connected to a Wi-Fi or high-speed 4G/ 5G mobile networks. If you wish to know the steps to share or check the Wi-Fi password on your Android smartphone or tablet, then this quick guide is what you need to go through.

For the tech geeks, stay updated with the latest cutting-edge gadgets in the market, exclusive tech updates, gadget reviews, and more right on your phone’s screen. Join Giznext’s WhatsApp channel and receive the industry-first tech update.

Also Read: ChatGPT Search Quick Hacks: How To Use ChatGPT As Default Search Engine In Google Chrome

How To Check And Share Wi-Fi Password Using Any Android Smartphone/ Tablet

To get done with checking Wi-Fi password using any Android smartphone, you need to first ensure the OS version of your device is the latest. The newer Android versions offer a simplified process to check the Wi-Fi internet password.

Step 1: Unlock your Android smartphone and scroll down the notification bar

Step 2: Tap on the Wi-Fi icon. You can also visit the Setting menu and launch the Wi-Fi option

Step 3: If you are already connected to a network, simply tap on the “i” button in front it. Or else, connect to a network first and then hit the “i” tab.

Step 4: You will see three different options, “Disconnect”, “Forget”, and “Share”.

Step 5: Click on Share

Step 6: You will be prompted to unlock the device using fingerprint or pattern/pin passwords.

Step 7: Once the Step 6 is performed, a new tab will open up showing the QR code which any other user can scan on their device to get connected to the same Wi-Fi network.

Step 8: You will also be able to see the Wi-Fi password on the top.

Step 9: Share the Wi-Fi password or the scan code with desired users and you are all set.

Categories
Apps Featured How To

Android Tips And Tricks: How To Change Google Account’s Email Address?

Key Highlights

  • Gmail email address can be updated in later stages
  • Steps can be performed on both mobile and desktop Gmail apps
  • Verification must to change and update an email address

If you are an active internet user, you must be aware that almost all apps and online portals require an email address for registration and activation of different services. In fact, it wouldn’t be wrong to say that an email address is indeed a digital imprint of an individual allowing other users to connect with just a few taps on the screen. While there are multiple email service providers globally, Google is on top with Gmail. Google allows users to setup their own email address while an account is being created. This email ID is what helps others to identify your Google Account directly. Also, you can log into different Google services using the same email address. If for some reason, you would wish to change or update your email address in the future, there is a provision to do so. The steps are mentioned below:

For the tech geeks, stay updated with the latest cutting-edge gadgets in the market, exclusive tech updates, gadget reviews, and more right on your phone’s screen. Join Giznext’s WhatsApp channel and receive the industry-first tech update.

Also Read: ChatGPT Search Quick Hacks: How To Use ChatGPT As Default Search Engine In Google Chrome

How To Change Google Account’s Email Address?

Before you proceed with any steps, you have to ensure that the option to edit or update the email address is available for specified account. The steps for the same are below:

Step 1: Unlock your smartphone (Android) and launch the Settings app

Step 2: Scroll down to the Google menu

Step 3: Tap on ‘Your Name’ and select ‘Manage your Google Account’.

Step 4: Locate the Personal info tab on the top and click on it

Step 5: Now, tap on the “Contact Info” option and then select “Email” option

Step 6: Select the “Google Account email” menu. If this setting is greyed out, it means you won’t be able to change the email address. (only email address ending with @gmail will be allowed to change or update)

Step 7: If this is a work or school email, ask the administrator for the same.

Step 8: Now, click on the Edit (pencil icon) next to the email address

Step 9: Type in the new email address that you wish to update. Ensure the new email address is not already taken by other user.

Step 10: Follow the on-screen steps and wait for verification link on your new email ID.

Step 11: Verify the link to update the new email address for your Google account.