Categories
Accessories Featured How To

Lost PAN Card? Here’s How To Apply For A Duplicate PAN Card Online

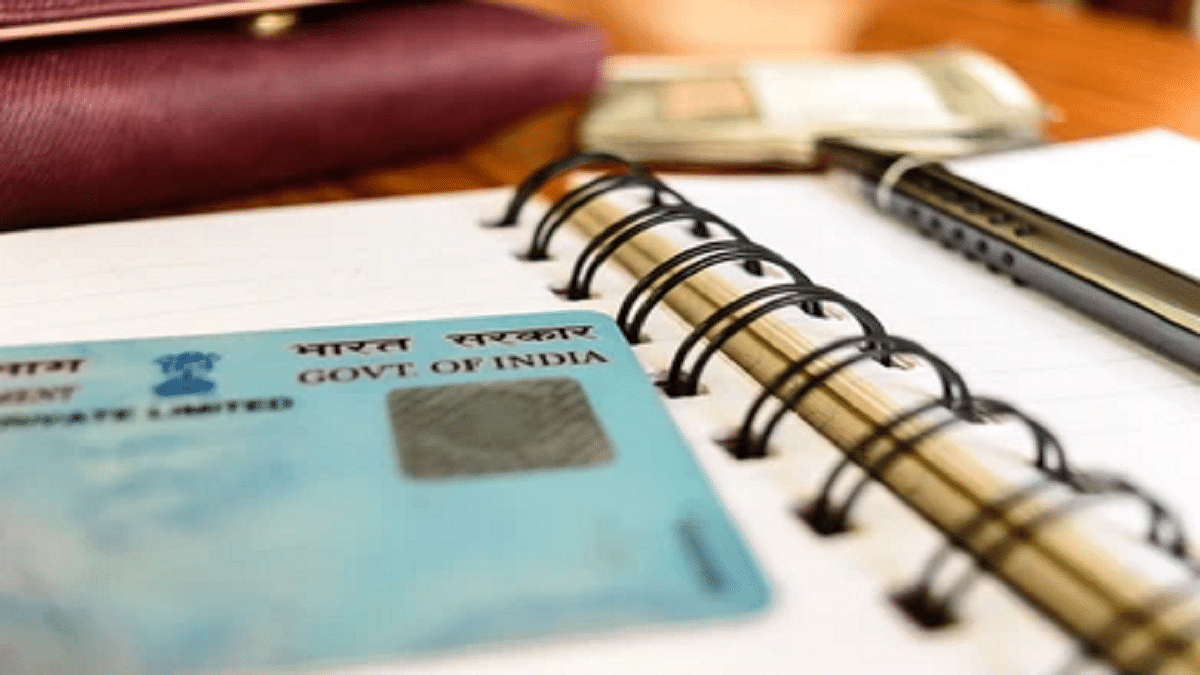
A PAN card is an essential document for every Indian taxpayer, and losing or misplacing one can be highly troublesome. However, cardholders shouldn’t worry much about this circumstance. They can now readily obtain a duplicate PAN card online that performs the same function.

Note that this duplicate document has the same legal status as the original PAN card. Cardholders can easily use this document anywhere without any problems. However, applying for a duplicate PAN card is much easier than applying for a new card. In this post, we are here to help you learn how to apply for a duplicate PAN card. Let’s check it out.

Steps To Apply For A Duplicate PAN Card Online

Step 1: Visit the official website of TIN-NSDL.

Step 2: Select the “Application Type” option under “Apply Online.” Choose the drop-down menu’s selection for “Changes or Correction in Existing PAN Data/Reprint of PAN Card (No Changes in Existing PAN Data)” since you need a duplicate PAN card online.

Step 3: Now, under the “Category” option, from the drop-down menu, you have to choose your PAN card type.

Step 4: After that, provide your name, birthdate, contact information, and PAN in the appropriate boxes. After entering the security code, click “Submit.”

Step 5: Your token number which you will also see on your email ID will appear on the next screen. Take note of this number, then press the “Continue with PAN Application Form” button that appears.

Step 6: You will be sent to the online application form for a duplicate PAN card on the next page.

Step 7: Under the three headings “Personal Details,” “Contact & Other Details,” and “Document Details,” complete each field with precise information. You have the option of submitting digital or paper documents under the first section. Additionally, you can decide whether you want an e-PAN card or a duplicate physical PAN card.

Step 8: Click “Submit” after providing the required information on the online duplicate PAN card application form.

Step 9: You will then be redirected to the payment section where you can finish the procedure using net banking, a debit/credit card, or a demand draft. Thereafter, you will be given an acknowledgment number for future use.

Categories
Apps Featured How To

WhatsApp Privacy: How To Activate Or Deactivate End-To-End Cloud Backup For Google Drive, iCloud On WhatsApp

Whatsapp has become the go-to application for instant messaging for smartphone users globally. Meta (Facebook) acquired WhatsApp a few years ago and since then has been focusing majorly on improving the overall user and messaging experience. But what has been working in favour of WhatsApp right from the initial days is the end-to-end encryption platform that is best suited for personal and private conversations.  

But recently, one of the cybersecurity researchers pointed out a major loophole with WhatsApp’s end-to-end private ecosystem. It was revealed the brand is only proving the end-to-end encryption for the chats and media on the devices. The cloud server where the chat backups are stored doesn’t have this security layer. Soon after, WhatsApp added the end-to-end encryption service to the cloud backup as well. Now, users have the provision to add an extra layer of security to the Google Drive or iCloud backups on WhatsApp.

If you want your messages to stay protected from hacks and other security attacks, it would be wise for you to turn on the end-to-end encryption for the chat backups on Google Drive or iCloud. Since this feature isn’t activated by default, you’d need to toggle on this option manually. If you wish to enhance your WhatsApp security by adding the end-to-end security layer to chat backups, this step-by-step article will be your guide.

How To Turn On End-To-End Encryption Security For Chat Backups On WhatsApp

Just for reference, you can turn on the end-to-end chat encryption for both Google Drive and iCloud on WhatsApp. All you need is a working internet connection and the WhatsApp application installed on your respective Android smartphones or iPhones.

Step 1: Launch the WhatsApp application.

Step 2: Head to the Settings menu.

Step 3: Scroll down to the Chats option.

Step 4: Select the Chat Backup option.

Step 5: Tap End-to-end Encrypted backup.

Step 6: Hit the “Turn On” option.

Step 7: You’ll get prompted on the screen to create a new password or key. Do that.

Step 8: Click on the Create option. Wait for a while for WhatsApp to complete enabling your end-to-end encrypted backup for Google Drive or iCloud. Do note that you won’t be able to restore any backups if you lose WhatsApp chat or even forget the password or key. This is because WhatsApp doesn’t currently have the ability to reset or restore the backup.

How Can You Turn Off End-To-End Encrypted Chat Backup On WhatsApp

Step 1: Open WhatsApp mobile application and go to the Settings menu.

Step 2: Click on Chats and then select the Chat Backup option.

Step 3: Select the End-to-end Encrypted Backup menu.

Step 4: Click on Turn off. You would need to enter the password that you had setup initially.

Step 5: Confirm the changes and tap on Turn off.

Categories
Apps Featured How To

Google Maps Location Sharing Alert Notification: How To Notify Your Contacts Of Your Arrival And Departure Using Maps

Google has released multiple apps and tools for smartphone and PC/laptop users. The brand has introduced services ranging from entertainment to health, lifestyle, and more. Amongst the most commonly used services from Google is Maps. With Google Maps, our lives have become easier with navigation. Traveling to unknown destinations isn’t a hassle or time-consuming process as you don’t have to frequently ask for directions.

Google Maps has also got several facelifts in the last few years and besides an updated UI, the navigation app has also got several new features for an easier commute. And with the Google Maps integration with messaging apps, sharing locations with our family and or friends has also been simplified.

Sharing a location using Google Maps has been made possible via WhatsApp and other messaging applications. With the instant messaging applications, you can share not just share the current but also the live location. Google had recently refined the location sharing feature and now lets users notify their contacts of their arrival and departure details. This advanced location-sharing feature has been released a couple of months back and is compatible with both mobile as well desktop versions of Google Maps.

With this new Location Sharing notification feature, the selected contacts would know of your arrival and departure from specific locations. You can also easily stop these location-sharing notifications once you are at the designated location. But how exactly can you just send notifications for your arrival or departure from the select destination using Google Maps? Read on here for the steps:

How To Setup Or Turn On Location Sharing Notification On Google Maps

Step 1: On your respective Android/ iOS smartphone or tablet launch the Google Maps application.

Step 2: Click on the profile option.

Step 3: Select the Location sharing option.

Step 4: Now, click on the profile of the contact with whom you wish to share the location alert.

Step 5: Tap on the “Notifications” option.

Step 6: Click on Add notification icon.

Step 7: Now, select the “Choose a location” option and then select the address. You can also manually add the location details by clicking on the “+” option.

Step 8: Set the location by dragging the maps and tap on Done.

Step 9: Now, select the duration as to when you want to receive the notification. You will get to select from “Every time they arrive” and “Every time they depart”. Once done, tap on save. It is worth adding that up to five location sharing notification is allowed for each contact who shares the location with you.

Categories
How To Telecom

Reliance Jio 5G Services In October: Here’s How To Find Out If Your Phone Is Compatible Or Not

After emerging as the largest player in the 5G spectrum auction, Reliance Jio is all set to launch a 5G network near Diwali. India’s largest telecom operator Reliance Jio has spent Rs. 88,078 crores on the recently concluded auction. Notably, the telecom operator is also planning to bring 5G smartphones into the affordable segment.

However, the 5G services of the company will be available in Chennai, Delhi, Mumbai, and Kolkata in the next month. The official date of the launch has been announced but is expected to be launched in 2023 nationwide.

“I firmly believe that Digital Freedom is the birth right of every Indian. Therefore, 5G cannot remain an exclusive service, available only to the privileged few, or only to those in our largest cities. To build our Pan-India True 5G network, we have committed a total investment of `2 lakh crore. Jio has prepared an ambitious 5G roll-out plan which will be the fastest in the world,” Mukesh Ambani, RIL chairman, said during his keynote speech.

However, to enjoy 5G services, Reliance Jio users should know whether their phones are compatible with 5G or not.

Step 1: In case you are using an Android phone, you need to the settings section and tap on the Wi-Fi & Network.

Step 2: Click on SIM & Network option. Now, you will see a list of all technologies like 2G/3G/4G/5G in the same section.

5G Connectivity Might Not Offer Services To Budget Phones

Meanwhile, a new report claims that the 5G services will be limited to a few phones under Rs. 12,000. In addition, the report claims that the 4G smartphones will continue to lead in the same segment.

“5G is more of a marketing thing right now and showcasing presence across channels,” Associate Vice President, Devices Research, IDC India, South Asia, and ANZ, Navkendar Singh, was quoted by the Mint. “In fact, 4G models will do well below the ₹12000 price point as it is challenging for firms to bring a 5G device at this price,” he added.

Categories
Apps Featured How To

Recharge Your FASTag On WhatsApp: Here’s How To Do It

Key Highlights

  • WhatsApp users can now recharge FASTag directly from the app
  • IDFC FIRST Bank announced the launch of an integration with WhatsApp payments
  • This service is available on the IDFC FIRST WhatsApp chatbot

Recharging FASTags has become a common occurrence for vehicle owners. Banks are creating novel and simple techniques for including user-friendly payment options. Now, IDFC FIRST Bank and WhatsApp have teamed up to make FASTag recharge on the instant messaging app simple.

Notably, while the service has been introduced by IDFC FIRST bank, only IDFC FIRST users will be able to use it. Users won’t need to close WhatsApp in order to recharge their FASTag thanks to the service. With “payments on WhatsApp,” users of the service will also be able to recharge their phones without logging into another mobile app or a net banking website.

Steps To Recharge Your IDFC First FASTag Via WhatsApp

Step 1: IDFC FIRST Bank customers can get started by simply texting ‘Hi’ to the bank’s official WhatsApp chatbot number +919555555555.

Step 2: Select the recharge option in the WhatsApp chat.

Step 3: Now, you will have to enter the amount and provide an OTP for transaction authentication. A notification verifying the transaction will be sent to you.

This new feature will enable users to pay for their recharge using “payments on WhatsApp” without having to sign into any other mobile app or Netbanking platform. This will make the recharge process easier and faster for millions of the Bank’s FASTag users.

Users can send and receive money from friends on WhatsApp using the UPI by just sending a WhatsApp message. They will need to input a different UPI-PIN for each payment.

Through IDFC FIRST Bank’s WhatsApp banking channel, users can also access over 25 services like savings accounts, credit cards, loans, and FASTag.

The bank has so far distributed nine million FASTags. Thanks to IDFC FIRST Bank, which has a 40 percent market share in the processing of monthly toll values, about 420 toll plazas and 20 parking lots accept payments via FASTag. The Bank is also the biggest parking grabber with a 45 percent market share.

Categories
Featured How To TV

How To Set Up Google Duo On Your Android TV: Follow These Steps

Our lives have become increasingly reliant on video calls, particularly in light of the pandemic. Over time, video conferencing apps have introduced useful features to improve our experience. Google is well known for its continuous advancements and improvements.

The American tech giant previously introduced its Duo calling service for Android TVs. Recently, Google merged Google Meet and Google Duo, two of its video calling applications. With Google Duo, which has been consolidated into a single video calling solution, all Google Meet capabilities are accessible. The Meet app has also been upgraded by Google and made accessible for Android users with a new green symbol and a name change to Meet (original).

With the new Duo-Meet on your Android TV, you can use this app to make and accept individual and group calls. You can access it through the “app drawer” on your TV or add it to your list of favorites because it supports the home screen of Android TV. The Google Play Store will let you download the app to your Android TV. Here we tell you how to download and set up Google Duo on your Android TV. Let’s check it out:

Pre-requisites

You should have the below-mentioned things to successfully set up Google Duo:

  • An Android TV with Android 8.0 Oreo or later
  • If your Android TV or Android TV device does not have a built-in camera or microphone, then you need a USB camera and microphone
  • Stable internet connection

How To Download Google Duo On Android TV?

Step 1: From the Android TV Home screen, scroll to Apps.

Step 2: Open ‘Google Play Store.’

Step 3: At the top of the screen, tap on the search icon.

Step 4: Search Duo.

Step 5: Select Install.

Steps To Set Up Google Duo On Android TV?

Step 1: On your Android TV, open ‘Google Duo.’

Step 2: Log into your account.

Step 3: Choose the grant access option.

Step 4: To complete the setup, follow the on-screen instructions. And you are all done.

Categories
Apps Featured How To

Spending Too Much Time On Instagram? Here’s How To Check The Screen Time And Limit The Usage

Key Highlights

  • Instagram users can track their time spent on the app
  • Check the process here

Instagram, a popular photo and video-sharing app, has a huge fan base. The Meta-owned platform has been used by users all over the world to keep themselves entertained. Instagram users get access to the updates and posts from the people they follow, and the other way around.

However, if your Instagram account is public, anyone can view your posts since they are not just visible to your followers. It is often incredibly entertaining. As a result, there can be times when you navigate through the app’s homepage for several hours without realizing it. Well, Instagram too is worried about how its users use the platform as well. Thus, it released a feature that shows users how much time they are spending using its app.

Read on for information on how to check your Instagram usage if you’re attempting to break an Instagram addiction or simply want to see how much time you are wasting on the platform.

Steps To Know How Much Time You Have Spent On Instagram

Instagram offers a feature to track users’ activity so they can maintain tabs on how much time they spend using the app. The average amount of time spent on Instagram during the previous seven days is visible. How Instagram users can track their usage time is as follows:

Step 1: On your mobile phone, open the Instagram app.

Step 2: Click on your profile or profile picture in the bottom right.

Step 3: Click on the Menu.

Step 4: Tap ‘Your Activity’ and then click on ‘Time’.

By following the above steps, you will be able to see the average time you spent on Instagram in the last week.

How To Set A Reminder To Limit Time Spent On Instagram?

Step 1: Tap on the ‘Profile’ option and click on the three-bar option at the top.

Step 2: After that, tap ‘Your Activity’.

Step 3: Select the time frame for using the app by clicking ‘Set Daily Reminder.’

Step 4: Tap on Set Reminder.

Step 5: Lastly, click on the Ok option. And you are all done.

Categories
Apps Featured How To

Instagram Hacks: How To Hide Your Instagram Stories From Specific Or Multiple Unwanted Users on Android, iOS

Instagram is currently one of the best platforms for social media enthusiasts. This photo-sharing app owned by Meta has multiple user-oriented features most of which were released in the last few years. Amongst the most popular segments or features of Instagram are the Reels and Stories. Instagram has borrowed some of its trending features from its rivals including Snapchat and TikTok. However, over the years Instagram users are making the most of it and flooding the online space with new content.

With the public (if your account isn’t private). Whenever you upload a story on Instagram it is automatically visible to all of your contacts by default. But thanks to the enhanced privacy aspects, you can also block some of the unwanted users from whom you wish to keep your story upload hidden.

Hiding Instagram stories is one of the best ways to keep stalkers at bay. But you should know the right steps to hide your Instagram story from a specific person of contact added to your follower/ following list. How can you do so? Here in this article, we have listed all the steps. Take a look:

How To Hide Instagram Stories From A Specific Person Or Contact

Using Instagram Android/ iOS App

Step 1: Launch the Instagram application on your respective iPhones or Android smartphones.

Step 2: Tap on the profile option. On both Android and iOS, the profile picture icon is located on the bottom right of the app’s homepage.

Step 3: Click on the menu option (three horizontal lines).

Step 4: Tap on the Settings menu (gear icon).

Step 5: Now, select the Privacy tab.

Step 6: Scroll down to the Story option.

Step 7: Go to the Hide Story option.

Step 8: You can select either one or multiple users from whom you wish your Instagram story to be hidden.

Step 9: Tap on the  backword arrow symbol to go back. The list of users blocked from viewng your Instagram status will be updated.

Step 10: You can also update this list after uploading the Story. Just tap on the three vertical dots option in the Instagram story and select the Hide your story option. Click on Hide and you have blocked all unwanted users from viewing your Instagram story post update.

Categories
Featured How To Smart Watch

Lost Your Smartwatch? Here’s How You Can Find Your Lost Wear OS Watch

Key Highlights

  • Find My Device can help you find your lost Wear OS watch
  • The app is on by default when you set up your watch

What can you do if your watch is lost and the battery is slowly dying while the clock is symbolically and somewhat literally ticking away? Fortunately, Google’s Find My Device app allows you to find Android Wear devices if you ever find yourself in that situation. It only functions with Android Wear 2.0 devices, and its usefulness is constrained in the absence of a speaker. You will, however, be prepared the next time your couch swallows your watch.

It turns out that if you know where to look, it’s not that tough, and Google may have only implemented the capability. However, you can miss it if you don’t already know where to look. We are here to help you learn how you can find your lost wear OS Watch.

Also Read: Amazfit GTR Mini Smartwatch With Massive 20 Days Battery Backup Announced: Price, India Availability

How To Find Your Lost Smartwatch?

These techniques are only effective if your watch’s location feature is enabled. You can use features on your phone to locate your watch because your phone and watch are always connected via Bluetooth. This is how you can find your lost or misplaced smartwatch by following these simple steps:

Step 1: Verify your mobile phone is turned on.

Step 2: Make sure your phone’s Bluetooth is turned on and connected to your watch.

Step 3: Make sure your watch and phone are both signed into the same Google account.

Also Read: Working Trick To Use WhatsApp On Smartwatch: Steps To Install WhatsApp On Your Smartwatch

Step 4: Open a browser on your phone, such as Chrome, type android.com/find into the address bar, and then press the enter key.

Step 5: Sign in to the same Google account you use on your watch.

Step 6: If more than one device appears, choose your watch at the top of the screen.

Also Read: Best Smartwatches You Can Buy Under Rs. 500

Where To Get The Find My Device App?

To be able to use your Android phone or tablet to find your Wear OS watch, you can also install the Find My Device app on your Android device from Google Play Store.

Also Read: Smartwatches Under Rs. 2,000: See List Here

Categories
Featured How To Mobile

Lost Or Stolen Mobile: Here’s How You Can Track/ Find, Recover, And Erase Your Lost Mobile Phone

Key Highlights

Lost or stolen mobiles can be tracked easily

You would need to activate Google Find My Feature

Smartphones have gradually become more of a necessity than a luxury. These handheld pocket-sized gadgets have not only shaped modern-day communication but also have opened up vast possibilities with voice and video calling options. When you step out in the market to buy a new smartphone, you have numerous brands as an option. But the ecosystem is widely segregated between Android and iOS.

Smartphone OEMs are focused on not just delivering a premium user experience but also offering a private and secure environment to the users. The brands are lacing their handsets with dedicated physical fingerprint scanners for added privacy in addition to the traditional PIN and password lock. You get smartphones with rear, side, or under display physical fingerprint scanners. But despite every possible security measure, smartphones are still prone to theft. You might have come across stories where mobile snatchers or pickpockets steal smartphones in public transport or crowded spaces.  

Thankfully, smartphone brands are now adding the tracker feature with which you can find your lost mobile. Google’s Find My Phone feature is one such tool that lets you find or locate your lost mobile and also get remote access and erase all data if you think the stored personal data on the phone could be compromised. But the Find my Phone feature isn’t activated by default on your Android smartphones. You would need to perform some manual steps to set it up and use it to find your lost mobile. We have mentioned the ways below:

How To Find You Lost Android Mobile

Steps To Setup Find My Phone Feature On Your Android Phone

Step 1: You first need to install the Google Find My Device application on your smartphone. You can do it via Google Play Store.

Step 2: Sign in to the app using your Gmail email address.

Step 3: You will see the name of the device on which you have set up the Find My Phone feature along with the security options such as Play Sound, Secure device, and Erase device. Once this feature is active, you can follow the steps below to find, lock, and erase your lost mobile phone. Before you start, make sure you are signed in to your Google Account and connected to mobile or WiFi internet.

How To Track, Lock, And Erase Your Lost Mobile Phone

Step 1: Open any web browser and type www.android.com/find.

Step 2: Select the phone which is lost or stolen.

Step 3: You can send a ring notification, lock the device, or erase it.

Step 4: If the device is on, you’ll be able to see its location on the map. The data might not be completely accurate, but you’ll get a rough idea of its whereabouts and where was it seen last.

Step 5: You can tap on the Erase device option if you feel the phone’s data can be compromised by falling into the wrong hands.