Categories
Apps Featured How To

Instagram Business Boost: How To Create And Share Shopping Stickers Via Stories On Instagram

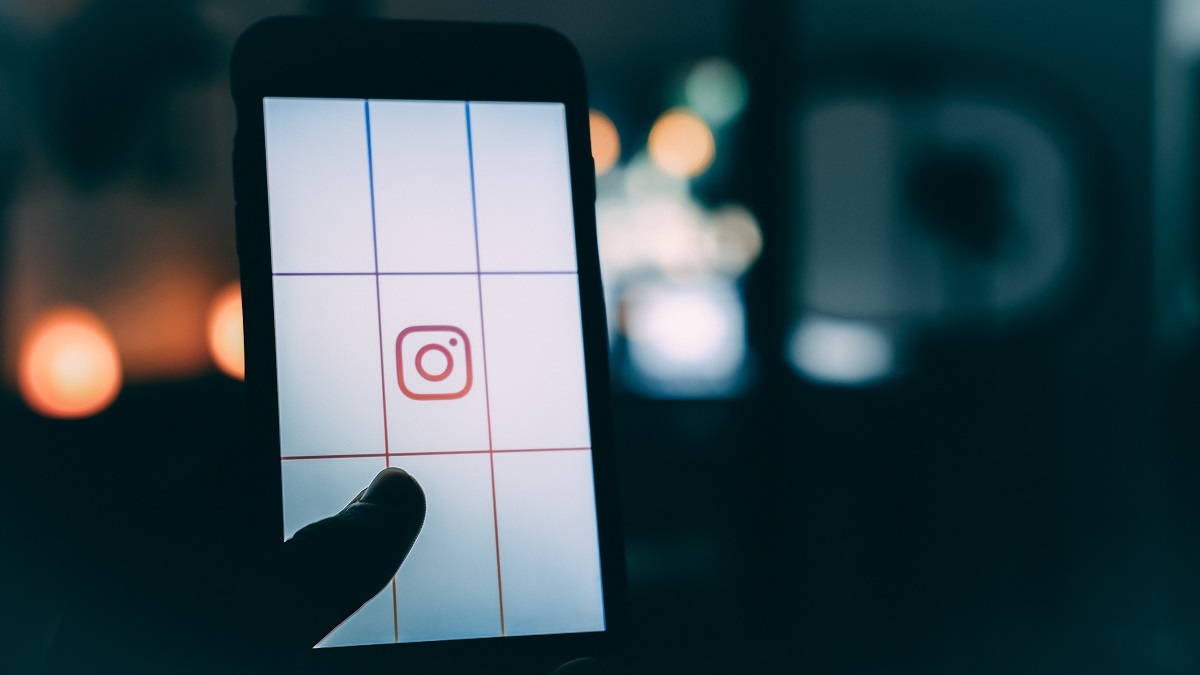
Instagram is offering possibilities beyond just photo sharing now. The social media app is now full-fledged with features such as stories and reels. Direct messaging is also an option with Instagram on Android and iOS. Meta has also opened up business possibilities with Instagram and lets creators and even general users make use of this platform for marketing their products and getting monetary benefits using the app.

To aid with the personal business on Instagram, an option to add stickers has been released. Using this feature, Businesses and shopping partners can easily add any shopping-related sticker to Instagram Stories that will help boost the business. All the business accounts must be approved in order to be set up for Instagram shopping. You will also be able to tag products if you’re a partner with a professional account.

Additionally, the Instagram affiliate creators will be able to share shopping stickers via stories. And also there is a provision to add stickers with additional stickers and upload highlights and videos.

Steps To Add And Share Shopping Stickers To Instagram

Step 1: Click on the add icon and tap on Story.

Step 2: From the gallery, select the product image or the video that needs to be shared via story.

Step 3: From the Sticker tray, select the desired shopping sticker.

Step 4: Now, from the list of your product catalog, select the required collection that you wish to feature in stories.

Step 5: Click on Done.

Step 6: Adjust the placement of the shopping sticker by dragging it across. You can also fiddle with the styling of the shopping sticker.

Step 7: Once done, tap on send. You can select your desired audience.

Step 8: Click Share and the shopping sticker will be shared as a story on Instagram.

Categories
Apps Featured How To

Not Receiving WhatsApp Message Notifications On Google Chrome? Here’s The Fix

WhatsApp has been giving users a premium messaging experience. The messaging application has roped in the latest technology and has also made it possible to make voice and video calls using the same messaging application. The added end-to-end encryption is another benefit that you get with this messaging application.

WhatsApp is just catering to Android or iPhone users. The app is also available for laptop and PC users in the form of WhatsApp web. The company has extended the same features to the desktop version allowing users to experience the same premium experience as the mobile app. You can use the WhatsApp Web version on any web browser available on your laptop or PC. You just have to log in to the WhatsApp web account using Google Chrome, Edge, and other browsers.

Once the account is logged in and you receive a message, a notification will pop up on the Chrome browser just like the mobile apps. But in some cases, WhatsApp message notifications wouldn’t show while you are using the desktop version. Notifications being turned off could be one of the reasons you are not getting notified of incoming messages or calls on WhatsApp web.

Blocked notifications could be another factor. What should you do if you can’t receive notifications on Chrome while using WhatsApp web? Well, this article has all the steps mentioned that will help you resolve this issue with the WhatApp web notification on Google Chrome.

How To Fix No Notification Issue With WhatsApp Web On Google Chrome

You can start by turning on the WhatsApp notifications for the WhatsApp web on Chrome.

Step 1: On the Google Chrome browser visit the WhatsApp web portal and log into your account.

Step 2: Above the chat list, you will see a blue banner which is for activating the desktop notifications. Tap on it. If for some reason the blue banner isn’t visible, you can try refreshing the page.

Step 3: A bunch of steps will be shown on the screen. Follow them to turn on the WhatsApp notification on Google Chrome.

Step 4: You will start receiving WhatsApp notifications after performing all these steps.

If in case, you still aren’t able to receive any notification when a new WhatsApp message arrives on the desktop version, you can try the unblock notification method. The steps are below:

Step 1: Open the WhatsApp web application of Google Chrome and click on the More icon.

Step 2: From there, tap on the Settings option.

Step 3: Go to the Privacy and security tab.

Step 4: Tap on Site Settings.

Step 5: You will now see the Notifications option. Click on it.

Step 6: Check if Ask before sending the (recommended) setting is toggled on. If not, turn it on.

Step 7: If you see the https://web.whatsapp.com in the block list, remove it. To do so, click on the More icon right next to it.

Step 8: Tap on Allow. You will now start receiving WhatsApp message notifications on Chrome.

Categories
Apps Featured How To

Want To Set Up UPI Lite In BHIM App? Here’s How To Do It

Key Highlights

  • UPI Lite feature is allowed in the BHIM app
  • It has a daily transaction limit of Rs. 200
  • Users can save up to Rs. 2,000 in the UPI Lite e-wallet

UPI Lite could be your savior if you’re tired of repeatedly entering your UPI pin for insignificant payments. Shaktikanta Das, governor of the Reserve Bank of India, has introduced a new service for citizens named “UPI Lite.” Users can conduct small transactions up to Rs. 200 in a nearly offline mode without using their UPI pin.

An “on-device” wallet can be used to conduct low-value transactions after this feature is enabled on the BHIM App. It might resemble other wallets that are available in the market. A maximum of Rs. 2,000 can be stored in the wallet at any given time.

It is easy to use UPI Lite. You must first create an e-wallet in the BHIM app. This UPI Lite e-wallet is connected to your bank account. Then you send money to your UPI Lite e-wallet from your associated bank account. Contrary to how things operate in the case of standard UPI transactions, this balance is then used to make transactions without the need for a UPI. Here’s a step-by-step guide for configuring UPI Lite in the BHIM app.

Also Read | Replacing Paytm FasTag? Steps To Get Instant FasTag For Your Car

How To Set Up UPI Lite In BHIM App?

Step 1: On your Android phone or iPhone, download and install the BHIM app.

Step 2: For UPI transactions, sign in to the app and add your bank account.

Step 3: Next, scroll down and click on the UPI Lite banner.

Step 4: Now, click on the ‘Enable Now’ button.

Step 5: Then tap the ‘Enable Now’ option after reading all the details.

Step 6: Here you will be asked to add Rs. 2,000 to your UPI Lite e-wallet. Enter the amount you want to send.

Step 7: Select the bank account to transfer the amount. Then, click the ‘Enable UPI Lite’ button.

Step 8: Type in your UPI PIN. Your UPI Lite e-wallet will be enabled once the amount has been sent.

Also Read | Traveling To India? Here’s How To Pay Like A Local Using UPI One World

As of now, customers of the State Bank of India (SBI), Union Bank of India, Utkarsh Small Finance Bank, Canara Bank, HDFC Bank, Indian Bank, Kotak Mahindra Bank, and Punjab National Bank will only be able to use the UPI Lite payment system.

For the tech geeks, stay updated with the latest cutting-edge gadgets in the market, exclusive tech updates, gadget reviews, and more right on your phone’s screen. Join Giznext’s WhatsApp channel and receive the industry-first tech updates.

Categories
Apps Featured How To

WhatsApp Call Link Feature: How To Create And Send Cal Links Using WhatsApp On Android, iOS

WhatsApp has evolved over the years from just being a simple messaging app and has integrated services for voice as well as video calling. The Meta-owned messaging platform is also rapidly evolving with the technology and offering numerous features for a better messaging and calling experience. Of course, the end-to-end encryption service is the added perk that you get while using WhatsApp messaging app on Android and iOS.

Meta has been spotted testing multiple new features for WhatsApp including the option to create a personalized sticker avatar and the Call Links feature. The latter has been released for the masses allowing them to share links to other contacts to join any group call with a single tap. The Call Link feature is somewhat similar to what you get on the popular online conferencing apps available on the Play Store or the App Store including Google Meet, Microsoft Teams, and also Zoom.

With the WhatsApp Call Link feature, group admins and members will get the option to create a virtual call link and share it with the users who aren’t added to the group. The respective receivers of the WhatsApp Call link would just need to click on the link to join the online conference call.

Notably, the Call Link feature can be used for both voice and video calls. Also, the maximum limit that WhatsApp has set for members joining the  But what are the exact steps to create a new WhatsApp Call Link and share it with any user? We have shared the steps below. Read on:

How To Use WhatsApp Call Link Feature To Invite Users For Voice/ Video Calls

In order to use the call link feature, you would have to first check if it has been added to your WhatsApp. You might have to update the app in order to use all the latest features including the Call Link feature. If this new tool is already present, just follow the steps below:

Step 1: Launch the WhatsApp application and from the home page go to the Call section,

Step 2: An option will be present on the top of the call logs page stating “Create call link”. Click on it.

Step 3: Once the link is created, you can directly share it with groups or solo contacts. Otherwise, simply copy-paste it on the desired window. You can also share it via other messaging applications. The same link will allow users to join both voice and video calls.

Categories
Apps Featured How To

You Can Now Upload Longer 60-Second Stories On Instagram: Here’s How

Key Highlights

  • Instagram users can now post 60-second Stories
  • Until now, there was a time limit of 15-seconds
  • Here’s how you can upload a 60-second Instagram Story

If you sometimes post videos to Instagram Stories, you’ve probably encountered the 15-second restriction. This implies that Instagram will automatically trim the video you upload to your story to a maximum duration of 15 seconds, regardless of its length. Users had to split shorter Stories into 15-second chunks if they wished to upload them because there was a time limit of 15-seconds.

But now, a new feature that will let users publish longer uninterrupted Stories has finally been rolled out globally on the Meta-owned app. A Story that you publish won’t be divided into portions if it is under 60 seconds long. Late last year, the company started testing the modification with select users and has now rolled it out to all users worldwide.

How To Upload The Longer 60-Second Stories On Instagram?

Make sure your Instagram version is updated. Even if you have the auto-update feature enabled on your phone, please check the Instagram app on your Android or iPhone‘s Play Store or App Store, respectively. Following is the step-by-step guide that you can follow to upload a 60-second video on your Instagram Story:

Step 1: Open Instagram on your mobile phone.

Step 2: Now, swipe right to access the camera or click on the Plus sign (+) icon and scroll to Story.

Step 3: To start a video recording, simply tap and hold the circle and record a 60-second video.

Step 4: To add doodles, text, filters, or stickers, use the tools at the top.

Step 5: To post the video to your Story, tap Your Story (or Your Stories) at the bottom of the screen.

Step 6: To view your post, hit ‘Your Story’ at the top of your feed. Tap ‘Highlight’ next to your Story if you wish to keep it after 24 hours.

Additionally, Instagram users don’t have to keep tapping to watch a longer video they don’t want to watch. Now that users have two options for sharing a 60-second video, they can easily share both Stories and Reels.

Categories
Featured How To Mobile

Want Lag Free Calling Experience? Here’s How To Make Calls Using Wi-Fi Networks From Any Mobile

Key Highlights

  • Mobile phones have made communication easier, even in remote areas
  • New smartphones support Wi-Fi calling for better voice call quality
  • Telecom operators are eliminating network dead zones for uninterrupted calls

Mobile phones have made it possible for the general masses to communicate with their distant relatives and peers on the go. Even with the onset of smartphones, the primary usage has been voice calls using mobile networks. Calling is now a premium experience with the new-generation smartphones as you get to make or receive calls even in remote areas where missing networks have been a common scenario until now.

The tech brands and telecom operators are now eventually scrapping out the dead zones on earth where network availability has been zero until now. Smartphone OEMs have also been equipping the new-generation phones with Wi-Fi calling. This new calling feature lets users make or receive calls using Wi-Fi instead of mobile networks from any telecom operator. Most telecom operators now allow smartphone users with the provision to call over a Wi-Fi network for a clear and uninterrupted user experience with voice calls.

Also Read | How to Fix Disconnecting Wifi Networks for Android?

All you need is the latest Android smartphone running on Android 6 or above and a reliable Wi-Fi internet connection. You can easily setup up Wi-Fi calling on your respective Android smartphones that run on the aforementioned OS versions for a rich and premium calling experience. You just need to set up the Wi-Fi calling feature to start making calls using it. Wi-Fi calling can be experienced on smartphones from popular brands such as OnePlus, Samsung, OPPO, Xiaomi, Vivo, Realme, and others. The steps are mentioned below.

Steps To Activate Wi-Fi Calling Feature On Android Smartphones Using Mobile Carriers

Step 1: Launch the Phone application on your respective Android smartphones (running on Android OS 6 or above).

Step 2: Click on the More option. It’s the three dots icon.

Step 3: Tap on the Settings menu.

Step 4: Now, select the Calls option.

Step 5: Scroll down to the Wi-Fi calling feature. If in case, this option is missing from the Settings tab, chances are the mobile operator whose services you are using still doesn’t support this option.

Step 6: For the users who don’t have the Wi-Fi calling feature present, the VoIP (Voice over IP service) is the second option.

Step 7: Just toggle on the Wi-Fi calling or the VoIP feature.

Also Read | Know WiFi Password on Android – Detailed in Simple Steps

How To Place Calls Using Wi-Fi Or VoIP Once Activated

Once the Wi-Fi calling or VoIP feature has been activated, you don’t need to perform any specific steps to place or receive calls over Wi-Fi. Simply, open the dialler app and make a call to any of your contacts and will be connected over Wi-Fi or VoIP.

For the tech geeks, stay updated with the latest cutting-edge gadgets in the market, exclusive tech updates, gadget reviews, and more right on your phone’s screen. Join Giznext’s WhatsApp channel and receive the industry-first tech updates.

Categories
Apps Featured How To

WhatsApp Business Quick Replies: How To Use Quick Replies For Businesses On WhatsApp Android, iOS

WhatsApp messaging service is used by numerous users globally. The app has evolved in the last few years and is offering services to general as well as professional users.  WhatsApp has also released a business app for small and large-scale industries to help customers with their queries instantly. With the WhatsApp Business app, you can also provide different services and resolve issues over chat.

Similar to WhatsApp’s primary messaging app, the business version also has the same set of advanced messaging features that enhances the experience with texting, voice, and video calls. WhatsApp is also proactively dishing out new features via OTA updates. The end-to-end encryption platform is also one of the crucial aspects that improve the messaging experience with business profiles.

One of the useful options that is available with the WhatsApp Business app is quick replies. This messaging feature can help you create shortcuts for a bunch of messages you frequently send the customers. With the WhatsApp Quick Reply feature, you can store up to 50 different text messages or images and videos and use shortcuts for the replies instead of typing the entire message. Below are the steps to add and use the Quick Reply feature for the WhatsApp Business app.

Steps To Add New Quick Replies To WhatsApp Business App

Step 1: Launch the WhatsApp Business app on your iPhone or Android smartphone.

Step 2: Click on the More option (three dots icon).

Step 3: Scroll to the Business tools tab.

Step 4: Tap on the Quick replies option.

Step 5: Click on Add and enter the desired message that you want to store as a Quick reply.

Step 6: Now, select the keyboard shortcut that you want to set as a Quick reply.

Step 7: Hit the Save tab.

How To Send Default Quick Replies Or Automatic Replies On WhatsApp

Step 1: Go to any chat window and type “/” in the message box. You can also click on the Attach (clipper icon).

Step 2: Select the Quick Replies option and then tap on the Use Quick reply as an attachment.

Step 3: Now, select the appropriate quick reply option that will automatically show up in the text box.

Step 4: You can either edit the message or send it directly

Categories
Apps Featured How To

How To Migrate YouTube Channel And Videos To A Different Account

Key Highlights

  • YouTube is the most popular platform for online video streaming and entertainment
  • Users can earn money by creating and sharing videos on YouTube
  • You can create a YouTube channel or move an existing one to a new email account

YouTube can be deemed the best streaming service for online video streaming. Users from all over the world have been using Google’s this video streaming platform for entertainment. Google has also made it possible for the general audience to earn a good sum of money by uploading videos and sharing them with the public.

Also Read | Top YouTube Channels For Exploring Hindu Mythology

If you want to earn money by creating videos on YouTube, you would need to create a channel. The wider popularity and audience reach are one of the best ways to make the most of monetization on YouTube. You can create your YouTube account and a brand channel using a Gmail or supported email address. If in case you already have an existing channel that you wish to move to any other email account, you have the provision to do so. You can move the videos as well to a different account. But what are the steps to migrate your old channel to a new account? Read the steps here.

Steps To Migrate Old YouTube Channel To A New Account

In order to move your old YouTube channel to a new account, you would need to be aware whether the channel is created using a Google or Brand account. If you don’t have the latter, you can create one by following the steps below:

Step 1: Sign in to your YouTube account and head to the channel list.

Step 2: Tap on the Create a channel.

Step 3: You would need to fill in all the necessary details related to your Brand Account.

Step 4: Complete the account verification process.

Step 5: Tap on Create option and your Brand Account will be created.

Also Read | Not Sure What To Watch? YouTube’s Play Something Button Picks For You

How To Move Any Brand Account To A Different Google Account

Step 1: Open the YouTube app and sign in to your Brand Account.

Step 2: Tap on the profile picture option from the app’s home page.

Step 3: Click on the Settings (gear icon).

Step 4: Scroll down to the Account option.

Step 5: Tap on the Add or remove manager tab.

Step 6: You will see the Manage Permissions settings. Click on it. You might be asked to verify your credentials such as password and email address. Complete the process.

Step 7: A new option will show up on the screen called Invite new users. Tap on it.

Step 8: Type the new email address or the Google Account to which you wish to migrate your old channel and its content.  

Step 9: Now, enter the name of the user and the profile’s role in the channel. If you are the primary owner, add your details.

Step 10: Click on Invite.

Step 11. Select Done and then open the new email address. Accept the invitation.

Step 12: After a time period of seven days, you will be able to sign in to the YouTube channel using the new account.

Step 13: Open the Settings menu and head back to the Manage Permissions option.

Step 14: From the drop down arrow, select the primary owner and tap on Transfer option.

For the tech geeks, stay updated with the latest cutting-edge gadgets in the market, exclusive tech updates, gadget reviews, and more right on your phone’s screen. Join Giznext’s WhatsApp channel and receive the industry-first tech updates.

Categories
Apps Featured How To

Instagram Reel: How To Create And Share Instagram Reel Videos Using Templates On Android, iOS

Instagram is currently a fan-favorite app for social media content creators. The photo-sharing app has evolved on a large scale in the last few years; specifically, after coming under Meta (Facebook) umbrella. The company has garnered all the fame ever since it released Reel, a short video feature introduced as a TikTok rival globally.

Instagram has been making improvements with Reels, similar to other in-app features in a bid to make Reels more interactive. Looking at the rising popularity of Reel, Instagram even extended the time limit to up to 90 seconds for recording. Furthermore, the company has also allowed using multiple audio video effects, location tagging, and much more to enhance the quality and for better reach.

Amongst several such provisions is template usage. Instagram has added the option for users to create their version of any Reel video by using a pre-loaded template. For the unaware, the templates feature on Instagram allows creators to remix a reel by adding their own photos and videos while using the same musing and timing from an original Reel.

The templates are not available for all Reel videos specifically the short-length ones. You will be able to use templates only with the Reel videos that comprise at least three clips with music in the background. So if you want to create a new Reel video using a template, this article will guide you with the steps:

How To Create A New Instagram Reel Video Using Available Set Of Templates

Step 1: Open the Instagram app. Note, you can perform these steps on both Android and Apple iPhones.

Step 2: From your profile’s home page, go to the Reel video that you want to remix with the template. Note, you can add templates to the new Reel video that you are creating.

Step 3: Click on the more option (three horizontal/ vertical dots) on the Reel video.

Step 4: Select the Use as template option.

Step 5: In the next step, you will get the option to add the photos or video clips to the Reel video. You will also be able to sort the order in which you wish the images or photos to appear in the video.

Step 6: Click on Done. Now, preview and share your Reel video on your Instagram account.

Categories
Apps How To

Create And Use Your Personalized Instagram Avatar: Here’s How To Do It

Key Highlights

  • You can create your avatar on Instagram
  • The avatars can also be shared on Stories and DMs
  • Here’s a step-by-step guide for the same

With Meta introducing Avatars to their apps, Instagram is one of the places you can use this digital image of yourself. You can create your own avatar to enjoy conversations with your contacts or use it as your profile picture.

You can design your own avatar however you like, choosing your own hairstyle, skin tone, eye color, clothing, and accessories. You can use the same avatar across apps, from Facebook and Messenger to Instagram, even if you sync it in the Accounts Center.

In this post, we focus on Instagram which allows you to not only make your own avatar but also share it in DMs and Stories as a unique creative element of your own. Let’s check out here how to create your own Instagram avatar and share it on Stories and DMs.

How To Create Your Instagram Avatar?

Step 1: Go to the Instagram app and go to your profile by clicking on your profile picture in the bottom right.

Step 2: Then, at the top, click on ‘Edit Profile’ and choose ‘Setting.’

Step 3: Click ‘Create Avatar’ from the Accounts setting and then click on ‘Get Started.’

Step 4: You can customize your avatar here by selecting the skin tone, hairstyle, face color, eye, eyebrow, nose, mouth, facial hair, body, dress, hat, and a variety of other accessories. While creating your avatar, you can tap to see yourself on camera.

Step 5: When you’ve finished customizing your avatar, tap ‘Done’ and select ‘Save Changes’ to keep any changes you’ve made to your avatar.

And it’s done. Your own avatar was made by you. At any time, you can edit your avatar from your profile by selecting Edit Profile, followed by Edit avatar.

How To Share Your Instagram Avatar On Stories?

Step 1: Open the story creation UI and click on the sticker icon.

Step 2: From the list of stickers, you need to choose ‘Avatar’ to access your created avatar.

Step 3: This will display the stickers that were created using your unique avatar. Simply place an avatar from the list and share it like any other sticker.

How To Share Your Instagram Avatar On DMs?

Step 1: Open your Instagram chat box.

Step 2: On the right corner, tap on the sticker icon.

Step 3: Emojis based on your avatar can be viewed by selecting ‘Avatar’. You can tap to send it. That’s all.