Categories
Featured How To Mobile

iOS 16 Features: How To Bypass CAPTCHA Using Automatic Verification Feature On iOS 16 iPhones?

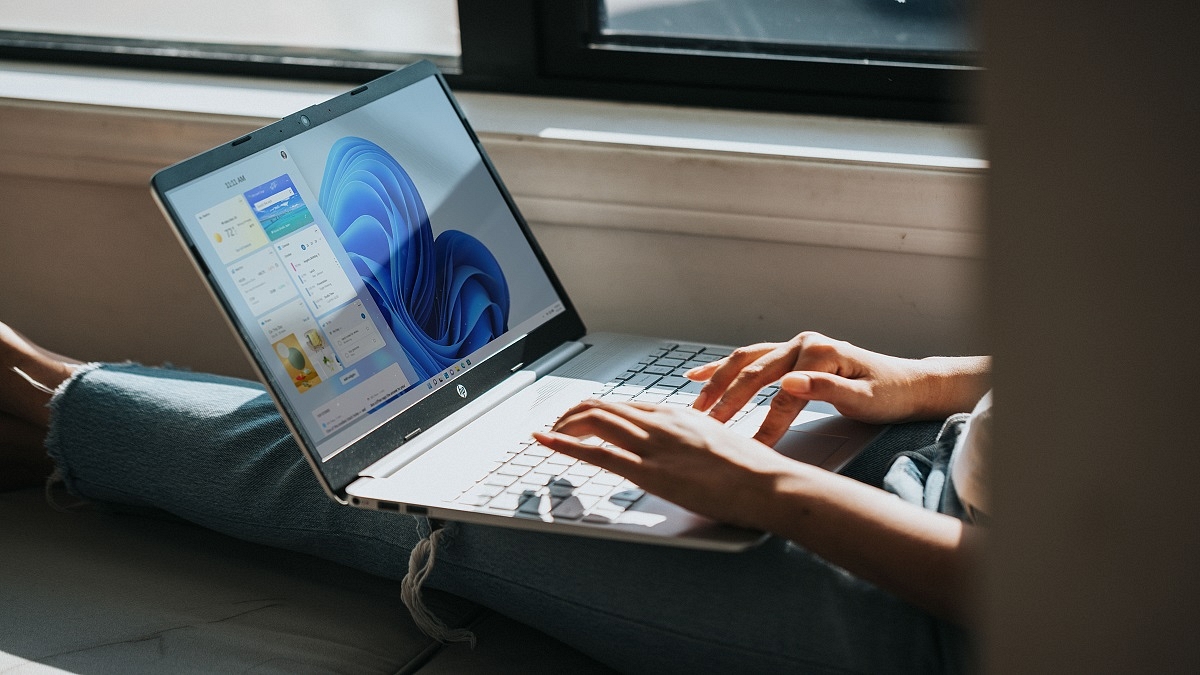
At the WWDC 2022, Apple unveiled the new-generation iOS 16 for iPhones. The latest firmware for the Apple iPhones brings some major overhaul over its predecessor, i.e, the iOS 15, and also brings a horde of new useful features for the users. Apple has already released the iOS 16 beta version for general users as well as developers and the stable version will likely be shipped first with the iPhone 14 series. Amongst the several new features released with the iOS 16 is the Automatic Verification on websites to skip CAPTACHAS.

What Is Automatic Verification Feature On iOS To Bypass Captchas?

With the iOS 16, Apple iPhone users will no longer need to verify captchas or puzzles on any random website. For the unaware, the CAPTCHAs are one of the ways for the websites to distinguish between a human and machine input. In simple terms, it allows websites to keep data phishing attacks and spam at bay.

The Automatic Verification feature introduced with the iOS 16 will allow iPhone users to bypass CAPTCHAs automatically. And there wouldn’t be any requirement of adding any third-party tool for the same. Apple has reportedly collaborated with Cloudfare and Fastly in a bid to develop the private access tokens that essentially helps with bypassing captchas on websites.

The iOS 16 beta version is also said to have this bypass CAPTCHA option. In the stable version, this Automatic Verification Feature will be toggled on by default. However, users can also turn on this setting manually. We have listed down the steps with which you can toggle on the Automatic Verification feature on iOS 16 devices. Take a look:

How To Use Automatic Verification Feature On iOS 16 To Bypass Captchas?

Step 1: On your respective iPhones running on iOS 16 go to the “Settings” menu.

Step 2: Select the Apple ID option from the top of the screen.

Step 3: You will see several options including “Password & Security”. Click on it.

Step 4: Now, scroll down to the bottom of the screen where you will locate the “Automatic Verification” option. Toggle it on to activate this feature. Reboot your handset once so that all the changes can be implemented.

After you perform all the aforementioned steps, your Apple iPhone running on the iOS 16 firmware will automatically start bypassing CAPTCHAs on random websites. You can browse the web to check if this feature is working fine after the settings are modified.  

Categories
Featured How To Laptop

How To Record/ Capture Screen On Windows 11 Laptops And PCs?

Smartphones and tablets are the current generation’s go-to gadgets, but laptops and Pcs are irreplaceable when it comes to high-level professional tasks. And it’s the Windows operating system that is the driving force behind the majority of the laptops or PCs in the market today. Microsoft has released the Windows 11 OS as the newest operating system for supported computing machines.

Screen recording is one of those features which most commonly used across smartphones and even laptops and PCs. But the process is easier for the former, while for the latter the task could be slightly complicated. Microsoft has been simplifying the screen recording process with the newer versions of the Windows OS.

The newly introduced Windows 11 OS also brings along the improved screen grab feature. But how exactly can you record the screen on Windows 11 OS? Do you need any third-party application for the same or is it possible with the built-in tools? Here in this article, we have shared the step-by-step guide that will help you with Windows 11 screen recording.

How To Record Screen Using Windows 11 OS On Laptops And PCs?

Microsoft has added built-in tools that help with screen recording in Windows-powered laptops and PCs. The Redmond giant had released the Xbox Game Bar which you can access on Windows 10 OS as well. However, with Windows 11 there are certain improvements. There are a bunch of widgets that you can find in the Windows game bar. Below are the steps to access it and also use it to record screen on any laptop and PC (running on Windows 11).


Step 1: Open your Windows 11 laptop or PC and go to the screen you wish to record.

Step 2: Press Windows Key+ G to open the Xbox game bar.

Step 3: A new toolbar will pop up on the top of your laptop/ PC’s screen. You’ll see several options. Click on the camera icon to start with the screen recording. Notably, this is the built-in screen capture option.

Step 4: Make sure you have checked all the screen recording settings including the audio. If in case the mic is off you can turn it on manually. The key shortcut for the same is Windows key+ Alt+ M.

Step 5: Once everything is set, you can click on the “Record” option. This will start recording the screen of your laptop or PC.

Step 6: Once you are done with the screen recording, you can click on the “Stop” recording option. The file will be saved on the device memory that you can access later via the “Show all captures” option from the Xbox game bar itself.

Categories
Apps Featured How To

Want To Pin Location In Google Maps? Here Are The Steps

No doubt, Google Maps is a major discovery. It is one of the most widely used smartphone applications worldwide. The platform lets you find the routes to the places you want to go. You only need an internet connection and the address of the destination.

Google Maps can trace you where you are automatically. It lets you know how long it will take you to get there and can inform you about delays in reaching your destination because of heavy traffic congestion in your route. Additionally, the app enables you to save regularly visited destinations so that all you need to do is choose your destination and Google Maps will begin telling you the route.

Google Maps: How To Drop A Pin?

Dropping a location on the map, saving it, and sharing it with your loved ones is one of the key features that Google Maps provides. The feature is available for iOS, Android, and desktop users. Here are the steps you can follow to drop pin location in Google Maps on your mobile phone and desktop.

Steps To Pin Location In Google Maps From Your Mobile

Step 1: Open the Google Maps app.

Step 2: Long press on the desired location, and you will see a red pin on that location now.

Step 3: You will see a bunch of options for that location at the bottom.

Step 4: You can now start navigating by tapping on ‘directions’ and ‘start’.

Users have the choice to ‘share’ and ‘save’ the pin location on other social media channels including WhatsApp.

Steps To Pin Location In Google Maps From Your Desktop

Step 1: Open your browser and log in to your Google account.

Step 2: Navigate to Maps by clicking the Google applications icon.

Step 3: Look for a location using the search bar.

Step 4: Select the pin icon next to the location you wish to save.

‘Favorites’, ‘Want to go’, and ‘Starred Places’ are the three categories in which you can save the pin location. In the app, you can add or remove categories and lists. Users can even select whether these lists are public, private, or shared with other users.

Categories
Apps How To

Discovery Plus: How To Watch On Television, Plans, And More

Discovery started its internet streaming business last year in India. The company has launched its app called Discovery Plus wants to be the number one app for factual entertainment, lifestyle, and more. The one-stop app offers original content, shows related to food, exclusive shows, and more.

The company said that it has 24 million customers as of March 2022. However, if you are looking for ways to watch content on television, then you have to follow these steps.

Here’s How To Watch Discovery Plus On Television

It is worth noting that the app is available on Amazon Fire TV and Roku TV. In addition, you can watch the app access on the Amazon Fire TV, Samsung Smart TV, and LG TV from 2018. Plus, you will get access to Google Chromecast.

Besides, Apple users will get Discovery Plus access on iPhone, iPad, iPod touch, and Apple TV. You will get the browser version on the PC or Mac computer.

Steps Watch Discovery Plus Content On Firestick

Step 1: Go to the home screen on your Fire TV device. Tap on the search section.
Step 2: Check the directional pad and write Discovery Plus. Now, select it from the entire list.
Step 3: Click on the directional keypad and select it. Again tap on the centre button to get the application and now, launch the application.

Steps To Watch Discovery Plus On Roku TV

Step 1: Tap on the home button of the remote. Now, open the channel Store.
Step 2: Type the Discover Plus in the search box and now, purchase the Disney Plus channel as it is a paid channel.
Step 3: Install the channel and enter the Roku account PIN. Now, enter the PIN.

Discovery Plus Plans And Languages In India: Details

Notably, the company is providing two plans in India. The first plan is priced at Rs. 199 per month and Rs. 399 plan for a year in India. Both plans offer one screen.

Moreover, the app is available in several languages, including Hindi, English, Tamil, Telugu, Kannada, Malayalam, and Bangla. In addition, premium subscribers are getting never-seen-before Premium Discovery titles, originals, exclusive, and must-watch documentaries.

Categories
Apps Featured How To

Paytm Hacks: How To Transfer Or Send Paytm Wallet Money To Bank Accounts

UPI and digital wallet apps have seen a major boom in the Indian market ever since the government demonetized old Rs. 1,000 and Rs. 500 currency notes. It has become one of the essential payment modes in the country with more users subscribing to digital wallets each month. Paytm is one of the first UPI apps introduced in India which now has several other competitors such as GPay and PhonePe.

Despite the availability of other popular UPI apps, Paytm is one the most used services, Paytm is still the first choice for many users for its user-friendly UI and advanced set of features that makes digital wallet transactions secure and hassle-free. One of the most useful and common features offered by Paytm is the Paytm Wallet.

This feature essentially allows users to add money to their UPI wallets so that they can make online payments at merchants, receive money via other accounts, and also send money directly to bank accounts. Adding money to Paytm wallets doesn’t cost you any extra charges; neither does sending money via Paytm wallet.

Notably, Paytm users can register their bank accounts with which they can add money to their wallets. Also, if some other contacts are sending you money via Paytm, it will be either received in your wallet or bank account (via UPI). If in case you have some extra amount in your Paytm wallet, you also have the provision to send it to your personal bank account. But what are the steps with which you can send or transfer money from your Paytm wallet to a bank account? Well, we have listed down the steps for the same:

How To Transfer Paytm Wallet Money To Your Personal or Any Other Bank Account

 Step 1: Open the Paytm app on your respective Android and iOS smartphones.

Step 2: Tap on the “Passbook” option from the app’s homepage.

Step 3: Now, select the “Paytm Wallet” option.

Step 4: After completing the above steps, you will need to select “Send Money to bank” option followed by “Transfer”.

Step 5: Enter the amount that you need to transfer from your Paytm wallet to your bank account. Do make sure you have a sufficient balance in your account before you go ahead with the transfer process.

Step 6: You will now need to enter the banking details such as account number and IFSC code. If you already have the banking credentials added select the account.

Step 7: Now, all you need to do is click on “Confirm” to complete the money transfer process from Paytm wallet to your bank account. It is worth adding the same steps can be performed to send money from Paytm wallet to any other bank account using any Android or iOS smartphone running the latest version of Paytm app.

Categories
Featured How To

How To Disable Windows 11 Lock Screen? A Step-By-Step Guide

When you start Windows 11, the first thing that will appear once your computer powers up is the Lock Screen. Before you sign in, you will see the splash screen which includes the date, time, notifications, and background image. However, not everyone wants a lock screen every time they boot up their PC. Therefore, if you’re one of those Windows users who doesn’t like the lock screen, you can fully disable it. How? We will find out here.

Steps To Disable The Lock Screen Via Group Policy

Step 1: Launch the Run command on your system by pressing the Window Key + R.

Step 2: Type gpedit.msc and hit the enter key to open the Group Policy Editor.

Step 3: Go to the panel on the left. Navigate to Computer Configuration, then Administrative Templates. Go to the Control Panel and click Personalization.

Step 4: Double-click on the ‘Do not display the lock screen’ option.

Step 5: The option’s detailed settings will be displayed in a new window. By default, the enabled option will be turned on. This means that the lock screen is active.

Step 6: Tap on the Disabled Radio button to disable the lock screen on your system.

Step 7: Click on the Apply button and then OK to finalize the changes.

Step 8: Restart your system. You will see that there is no lock screen and you access the login screen right away.

How To Disable The Lock Screen Using The Registry On Windows 11

Step 1: Hit the Windows key, type ragedit, and click the top result.

Step 2: Once the Registry Editor opens, paste the path ‘Computer\HKEY_LOCAL_MACHINE\SOFTWARE\Policies\Microsoft\Windows’ in the text input area and then hit the enter key.

Step 3: Then, right-click the Windows key and select New > Key, and name it Personalization.

Step 4: Now, right-click the Personalization key you just created and select New > DWORD (32-bit) Value.

Step 5: Hit Enter after naming the DWORD value as NoLockScreen.

Step 6: Double-click on the NoLockScreen value and set the Value Data to 1. Keep the base hexadecimal.

Step 7: To make modifications and restart your system, click OK. The lock screen won’t appear when your computer starts up.

If you followed the instructions correctly when your computer powers up again, the Lock Screen will be skipped and you’ll only see the sign-in screen.

Categories
Apps Featured How To

WhatsApp Allows Individual Users Mute, Message Other Participants In A Group Call: Here Are The Steps

Highlights

  • WhatsApp new udpate allows individual users mute and message other users in a group chat
  • Feature available for both Android and iOS users

WhatsApp has gradually transitioned into one of the essential models of modern-day communication. WhatsApp has evolved its platform for not just personal but also group conversations. The brand has added a slew of features to both its Android and iOS mobile application in the last few weeks. The company seems to be majorly improving the group chat feature with the new updates. Earlier, the company released manual request approval for the new users in any group chat. Now, the company is making it easy for individual group users to mute other participants. What is this new feature and how can you use it? The steps are mentioned below:

WhatsApp New Update For Group Chats

WhatsApp Android and iOS app is now getting a new feature that will allow users to mute other participants in the group and also text them if they have forgotten to mute their mic. This new option’s availability has been revealed by WhatsApp Chief, Will Cathcart via Twitter.

We have seen multiple scenarios in group calls or meetings conducted via WhatsApp group chat where one or the other member have to continue with their personal chores without muting the mic. A personal phone call or message at times is required to make such users aware of the situation.

In other scenarios, such unmuted accounts can also create an echo during the ongoing calls. But to improve the overall group calling experience, WhatsApp has introduced this new feature wherein individual users will get the right to mute different participants individually. WhatsApp is eventually giving more dynamic control to the individual users in the group.

How To Mute Users Individually In A WhatsApp Group Chat?

Step 1: Open the WhatsApp app on any Android or iOS device. If in case you already are in a group call, follow the steps below.

Step 2: From the user profile tiles in the group, press and hold the user badge whom you want to mute or message.

Step 3: Select the “Mute” option if in case you want to mute the user.

Step 4: If you wish to text the user, select the “Message” option.

That’s all the steps you need to perform to mute or message any group user individually if they somehow have forgotten to mute themselves.

Categories
Apps Featured How To

How To Share Your Uber Ride Status With Friends And Family: Here Are The Steps

Key Highlights

  • Users can share their current location and expected arrival time on Uber
  • Users have to add them to Uber’s “Trusted Contacts” section
  • Uber Users can also share their ride status

When you are traveling in an Uber to meet relatives or friends, they may want to ask you where you are exactly. On the other hand, there can be circumstances such as when you’re in danger—where you want to alert relatives or friends where you are and where your Uber car is without them having to ask. Well, Uber makes this simple as long as you set it up in advance.

You can share your current location and expected arrival time for journeys with up to five people. You only have to add them to Uber’s “Trusted Contacts” section. By sharing your travel location with trusted contacts, people who are expecting you can know exactly where you are and when you will arrive. Here are the steps you can follow to inform your friends about your Uber travel status:

Also Read | Amazon Prime And Uber Partnership: How To Book UberPremier For The Price Of UberGo

How To Set Up ‘Trusted Contacts’ On Uber?

Step 1: Open the Uber app on your mobile phone and go to ‘Settings’.

Step 2: Click on the ‘Manage Trusted Contacts’.  

Step 3: Now tap on the ‘Add Trusted contacts’.

Step 4: Type out the names of these contacts from your contact list.

Step 5: After completing the process, you have three alternatives to choose from: ‘Don’t remind me, I’ll manually share my trips,’ ‘Remind me at night (9 pm to 6 am),’ or ‘Remind me before every journey.’

Step 6: Now every time you are on a ride, you can simply swipe up and tap on ‘Share My Trip’.

Users can also share their ride status by copying a link at the bottom by tapping ‘Send Status’ and pasting it on other apps like WhatsApp, SMS, and more if they haven’t already set up their trusted contacts list or don’t want to.

Regardless of whether they use the Uber app, the receiver will receive real-time location updates along with the driver’s name and car details. If they come across anything questionable, the trusted contacts can contact authorities.

Users can also set them as Uber emergency contacts. So, if an emergency occurs and you can’t get in touch, Uber can contact your emergency contact instead.

For the tech geeks, stay updated with the latest cutting-edge gadgets in the market, exclusive tech updates, gadget reviews, and more right on your phone’s screen. Join Giznext’s WhatsApp channel and receive the industry-first tech updates.

Also Read | Book An Uber Ride Using WhatsApp: Follow These Steps

Categories
Apps Featured How To

Here’s How To Auto-Delete Your YouTube History: A Step-By-Step Guide

YouTube is a popular video streaming platform with millions of users across the world who watch content on their connected TVs, laptops, desktops, and mobile devices. Apart from online video viewing, the YouTube videos can be downloaded to your device and can be watched when you are not connected to the internet.

Anyone who has access to your device, laptop, tablet, or mobile, and third-party apps that collect information for marketing purposes can get access to your YouTube watch and search history. Due to privacy concerns, the tech giant Google allows users to delete their watch history easily if they want to.

How To Auto Delete Your YouTube Search And Watch History

After a certain amount of time, you can choose to have your YouTube search and watch history deleted automatically. Here’s a step-by-step method to deleting your YouTube history automatically.

Steps To Clear Your YouTube Search And Watch History On The Web

Step1: Go to your Google Account on your PC.

Step 2: Click on ‘Data & Personalization’ on the top left screen.

Step 3: Tap on ‘YouTube History’ under ‘Activity controls’, then click ‘Auto-delete’.

Step 4: Select the auto-delete time frame you want.

Step 5: Now, click ‘Next’ and then ‘Confirm’ to save your auto-delete activity choice.

Step 6: At the bottom right of the pop-up, click on Confirm.

Steps To Delete Your YouTube Search And Watch History On An Android Phone

In order to clear your search or watch YouTube history, listed are the steps you can follow:

Step 1: Open the YouTube app on your Android Phone.

Step 2: Tap on the ‘Library’ option located in the bottom right corner.

Step 3: Choose ‘History’ and then in the top right corner, click on the vertical three dots.

Step 4: Now, select ‘History Settings’.

Step 5: You can now choose to ‘clear watch history’ or ‘clear search history’ now.

Steps To Clear Your YouTube Search And Watch History On TV, Media Streaming Box, Or Game Console

Step 1: Open YouTube on your device.

Step 2: Go to ‘Settings’ in the menu option.

Step 3: Select ‘clear search history.’

Now, the videos are permanently deleted from your YouTube account’s watch and search history.

Categories
Apps Featured How To Tech Gadgets

WhatsApp New Update: How To Hide Last Seen, Profile Photo, Status From Select Contacts

WhatsApp is the most downloaded instant messaging application that is available for download on Android and iOS smartphones and also for laptop and PC users. Privacy is one of the most crucial aspects of its popularity amongst consumers. Specifically, the end-to-end encryption service is what makes it reliable for personal and professional conversations. WhatsApp has released several new features in recent times and has also been testing on several others simultaneously. One of such security features that the company has been working on and has finally released after all the wait is the Status and Last Seen hide option from select contacts. Here are the steps to hide WhatsApp Status from select contacts:

WhatsApp New Update Improves Status, Last Seen Privacy

WhatsApp had introduced the Status option a long back and has improved the security aspects over the last few years. Until now the app only had the provision to hide status uploads from “My Contacts”, “Everyone”, and “Nobody”. However, users have been asking for the option to hide status as well as last seen from individual users.

WhatsApp took to its official Twitter handle to announce the availability of this long-awaited privacy feature. Following the latest update, a new option will be visible in the privacy section when you restrict someone from viewing your Status uploads of last seen.

Once you try to modify the privacy settings, you will be able to the new option, i.e., “My Contacts except”. It is worth adding that not just the Status or Last Seen, this privacy option is also made available for profile photos. Below is the step-by-step guide to hide WhatsApp last seen, profile photo, and Status uploads from select unwanted friends or contacts:

How Can We Hide WhatsApp Last Seen, Profile Photo, Status From Select Users?

Step 1: Open WhatsApp mobile application.

Step 2: Click on the three dots from the top right of the app’s homepage.

Step 3: Select Settings.

Step 4: Click on the Accounts option on the next page and then select Privacy.

Step 5: Now, select the option that you wish to hide from the unwanted friends, i.e., “Last Seen”, Profile Photo”, “Status”, and “About”.

Step 6: You will now need to tap on the “My Contacts Except” option to hide your WhatsApp last seen, profile photo, and status from selective users.