Key Highlights
- Most laptops come with Windows 10 and follow a similar setup process
- Doing the setup right helps avoid future security and performance issues
- Just follow the steps in order, and it’s simpler than you might think
It may be both thrilling and terrifying to set up a brand-new laptop. However, it’s pretty simple. Most laptops now on the market have Windows 10 installed. Although it can vary depending on the brand, the setup process is generally the same. You’ll avoid security issues and other troubles in the future by doing everything correctly and in the appropriate order the first time. Here is everything you require to set up your new laptop or PC.
Also Read | Top 5 Effective Ways To Protect Laptop From Overheating
Unbox Your Laptop And Plug It In
To get started, open the box and plug in the original power adapter and cables. It could take some time to set up the laptop, so make sure you have enough power to keep it running. On the majority of the most recent laptops, rectangular Type-A connectors have been replaced by USB-C connections. In this situation, just plug the charger into your device’s Type-C connector.
Turn On Your Laptop

Press the power button. On some models, it could be on the right side of the computer or at the upper right corner. Nevertheless, it might be located somewhere else.
The Welcome screen will appear when you first boot up, and Cortana, Microsoft’s virtual assistant, will offer you a voice walkthrough. On some laptop models, she’ll ask you questions, and you can reply with your voice (but keep in mind that this will not work on many laptops). You can adjust the level by clicking the speaker icon at the bottom of the screen if you want to mute her voice.
How To Set Up Your Windows Laptop
Step 1: Select your country or region and then click Yes.
Step 2: Select your keyboard layout. On the ‘Want to add a second keyboard layout screen’, click ‘Skip’.
Step 3: Connect to a Wi-Fi network. Enter your password and click Next. Choose ‘I don’t have internet’ if you don’t currently have a connection to the internet.
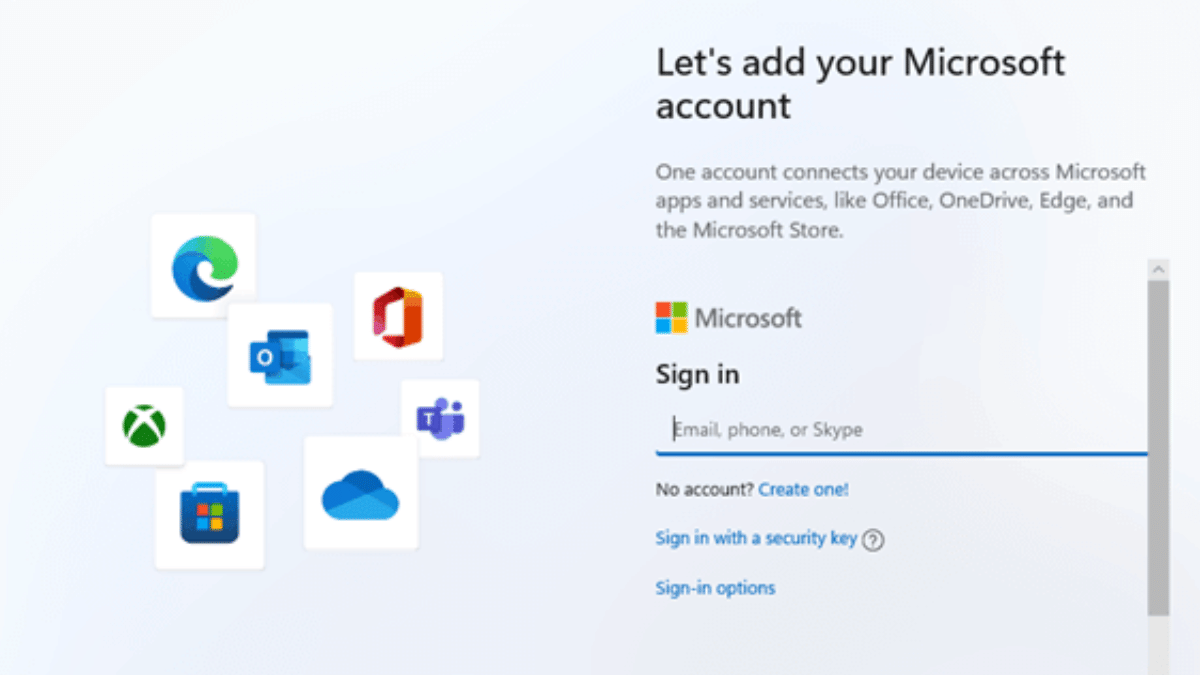
Step 4: Sign in to your Microsoft account. In the ‘Email, phone, or Skype’ box, enter your email address, phone number, or Skype username. Then press Next. Choose ‘Create account’ if you do not already have a Microsoft account.
Step 5: Create a PIN. It is not advised to use your Microsoft account password to login in if you don’t create a PIN. Select Create PIN to create a PIN.
Step 6: Select your privacy settings. Microsoft has every setting enabled by default, but you might want to have a look at them to see if there’s anything you want to turn off. Click the blue slider switch next to a setting to make it inactive. When finished, press the Accept button or tap to proceed.
Step 7: Customize your device. Click ‘Skip’ if you do not wish to customize your device.
Step 8: You might see some steps after this one that doesn’t apply to you. Only if you chose a certain customization option may some of the options shown in this article apply to you. You should skip any steps that you see that don’t match what you are viewing.
Step 9: Connect your phone to your laptop. To access it from your PC, you simply link your iPhone or Android device to your computer. Choose ‘Skip for now’ if you don’t want to connect your phone to your laptop.
Step 10: Whether or not to back up your files to OneDrive is up to you. The option ‘Only save files to this PC’ should be chosen if you don’t wish to backup your files. However, bear in mind that if you select this option, your files can be lost forever.
Step 11: Await the setup’s completion. Just be careful not to unintentionally shut off your PC. You will need to reinstall Windows otherwise.
Also Read | Windows 11 Laptop, PC Reset Guide: How To Perform System Reset Without Loosing Data
Run All Windows Updates
It’s likely that your laptop will automatically download a number of Windows 10 updates, so why not get it over with by forcing them to install manually?
Step 1: In the search box, type ‘updates’.
Step 2: Tap on ‘Check for updates’.
Step 3: If Windows doesn’t automatically search for updates, select the ‘Check for updates’ box. That’s all!
For the tech geeks, stay updated with the latest cutting-edge gadgets in the market, exclusive tech updates, gadget reviews, and more right on your phone’s screen. Join Giznext’s WhatsApp channel and receive the industry-first tech updates.