Categories
Apps How To

WhatsApp iOS: How To Restore And Export WhatsApp Chats Using iCloud Backup On Any iPhone

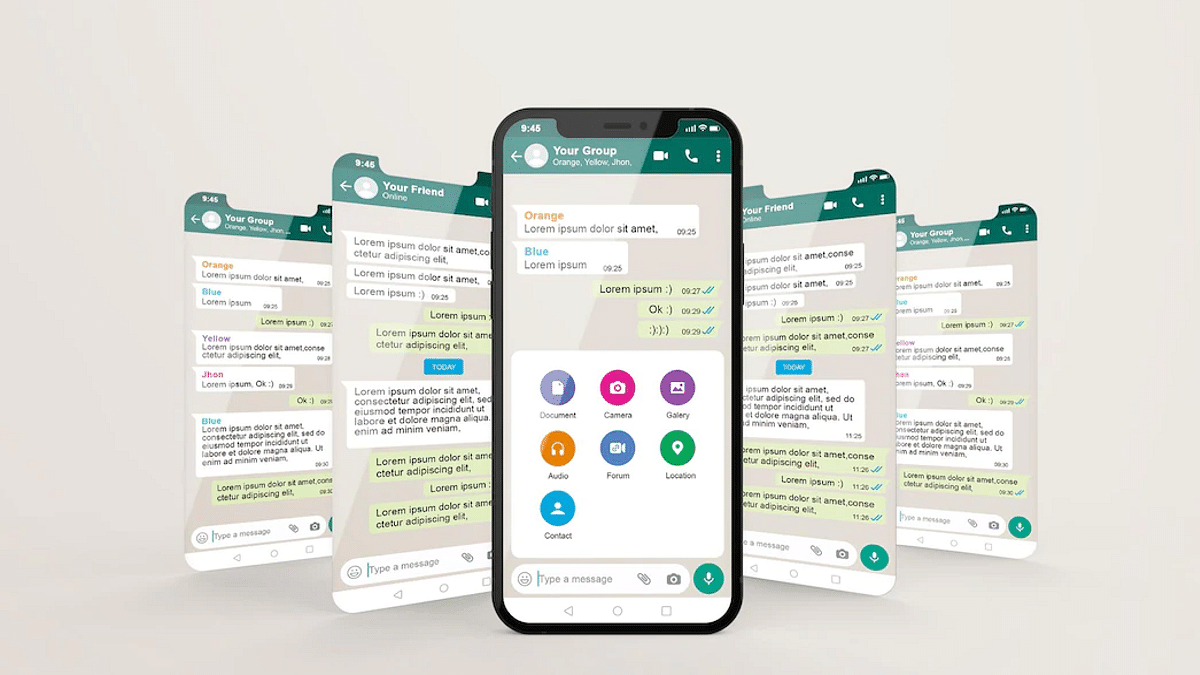
There are several factors that have contributed to WhatsApp’s popularity. The end-to-end privacy and advanced features such as voice and video calls are a few to name. Now, if you are a WhatsApp user, you would be familiar with the UI. Be it Android or iOS, there are only notable differences in its functionality. The usability of WhatsApp isn’t limited to just texts. Thanks to all the advanced set of features, WhatsApp now allows users to make audio and video calls, and share voice notes, locations.

WhatsApp is currently testing multiple features with Android and iOS smartphones and is expected to release the stable version going forward. Over the years, WhatsApp has also released the provision for group conversations and has made several improvements with both private and group chats. WhatsApp chats are end-t-end protected and they aren’t stored on the company’s server.

But that doesn’t mean you will lose the old conversations if they are not being used or if in case you are setting up a new device. With the latter, you can even restore the older conversations. This chat restore method can be easily accessed by both Android and iOS users.

We previously guided you with the steps to create a chat backup on iCloud both manually and automatically. Once you have done that, it becomes easy to restore chat backups on your iPhone. In addition to the chat restore, we are also listing down the steps to export chat history on iOS-powered iPhones.

How To Export WhatsApp Chat History On iOS

Step 1: On your iPhones, launch the WhatsApp application.

Step 2: Go to the individual chat or the group chat window that you wish to export.

Step 3: Now, click on the contact’s name or group subject.

Step 4: Select the Export chat option.

Step 5: Click on Attach Media if you wish to export the chat history along with the media files. Select the ‘Without Media’ option if you want to avoid sending the media files.

Step 6: Launch the Mail application. Click on More for extra options.

Step 7: Now, type in your email address and click on Send.

How To Restore WhatsApp Chat History From iCloud Backup On iOS

As previously mentioned, WhatsApp chats can only be restored if you have created the backup on iCloud. You would first need to check if the iCloud backup is present and then only you can restore the chat backup.

Step 1: To verify an iCloud backup is present on your respective iPhones launch the WhatsApp application and go to the settings.

Step 2: Click on Chats.

Step 3: Select Backup. You will be able to see when was the last backup taken. You will also get the option to delete and reinstall WhatsApp.

Step 4: Enter your phone number for verification and complete this process.

Step 5: Follow the on-screen steps to restore the chat history on your respective iPhones.

Categories
How To Mobile

How To Create Manual, Automatic WhatsApp Chat Backup On iCloud Using iOS

WhatsApp is one of those applications which has over a million users in the global markets. This messaging application has been made available for both Android and iOS smartphone users. The company has also released the web version of this application which can be used on laptops and PCs. It wouldn’t be wrong to say that WhatsApp is currently the prime mode of communication for smartphone users all across the globe including in India.

You would generally get all the latest features that WhatsApp adds to its platform on both Android and iOS ecosystems. But what remains the same since the beginning is the format where you can access your previous chats and conversions with different contacts at any given point in time. All the chats are stored and will be available on our devices unless deleted manually.

WhatsApp also lets you create chat backups which you can set to default so that you don’t lose the chat data be it texts or media files. Creating a backup is one of the safest ways to protect your WhatsApp data from accidental loss. But you would need to restore the old backup to see the previous chats with any contact.

In this article, we are guiding you with the methods with which you can create a WhatsApp backup on iCloud. We will also be covering the process to restore the chat history using iCloud in the next article.

How To Create WhatsApp Back Up To iCloud

Using Manual Backup Method

If you are opting for the Manual backup method, the chat history will be saved only till the time performed the manual backup. The steps for a manual backup are below:

Step 1: Launch the WhatsApp application on your respective iPhones.

Step 2: Open the WhatsApp settings.

Step 3: Click on Chats and then select Chat Backup.

Step 4: Tap on Back Up Now.

Setup Automatic Backup

If in case you want to get free from the hassle of creating a manual WhatsApp backup on iCloud then using setting up an automatic backup is the best option. Once you have activated the Auto Backup option all your WhatsApp chats will be saved on your iCloud account. It could take a while for the backup to be completed. It all depends on the internet speeds.

Step 1: Make sure you are signed in to your Apple ID with which you access your iCloud.

Step 2: From the Chat backup, select Auto Backup.

Step 3: Select the frequency for backup.

That’s it, your WhatsApp chats will now be backed up automatically to the iCloud account. Besides an active Apple ID, you would need an iPhone running on iOS 12 or above. Also, the device should have enough space on both iCloud and iPhone. You can also set back up over Wi-Fi to save your mobile data.

Categories
Apps Featured How To

Instagram Reels: How To Add Own Audio Recording, Other Creator’s Music To Insta Reels Videos

Instagram is definitely the most addictive social media application that is available on Android, iOS smartphones, and also for desktop users. And ever since the Meta-owned giant released the Reels feature on its platform to counter TikTok and other such apps, we have seen a massive surge with new content creators and also the general audience on this platform. Instagram has been proactively adding new features and has now improved the user experience by creating Reels and other content.

Not just influencers, any general user on Instagram can easily create a new Reel video. All you need is the Instagram app on your phone, an account, and an active internet connection. If you already have been using Instagram, you would definitely know how to create stories or Reels and add different types of multimedia effects, and use hashtags for a better reach. Adding music, text, and even location is quite a simple task with Instagram Reels.

But are you aware that you cannot just add licensed music to the Instagram Reels background but also original sounds like your own voice? Well, this is one of the options that Instagram has added with Reels wherein you can add your own voice or audio recording to a Reels background. The steps aren’t too tricky either. Take a look below:

How To Record Reel With Your Own Audio And Mix It With Other Music Or Creator’s Original Audio

Step 1: Open the Instagram app on your respective devices.

Step 2: Go to the reels section and record your own reel video.

Step 3: Click on the Preview button. This will be placed at the bottom of the app’s home screen.

Step 4: Now, add the audio by tapping on the music icon.

Step 5: You would need to make the preferred selection here. You will get two options. The first “Music” option will let you use audio from other sources, while the ‘voiceover’ option will let you mix your own audio recording with the reel.

Step 6: If you want to add your own voice recording to the reel, click on the Voiceover option. You need to tap and hold the button to record the audio.

Step 7: Tap on Done once the audio recording is complete and is added to the video.

Step 8: Select the Sound effects options and add the desired audio effects to the reels video. Click Done.

Step 9: Now, make the required edits to the video by dragging the bars below each type of audio. You can also adjust the volume levels, add effects, and edit or remove some sections of the audio.

Step 10: Click on Done and then Next to upload and share the new reel with your contacts.

Categories
Info Tablet

iPad Slow Charging Or Not Charging At All? Here Are Some Quick Fixes For iPad Charging Issues

Apple has one of the strongest ecosystems with consumer gadgets. The Cupertino giant is all popular amongst the Indian and the global audience with its premium range of iPhones, iPads, MacBook laptops, Apple Watch, and even audio accessories. The Apple iPad tablets are known for offering a premium end-user experience. The iPads have been a preference for users who don’t wish to carry around a bulky notebook yet don’t wish to compromise anyhow with performance.

Apple has been shipping iPads with a powerful set of battery hardware so that the users get a long-lasting backup to complete all tasks. The powerful battery and fast charging hardware also allow the iPads to be the best travel companions. But with time and extensive usage, the battery performance might not be as good as you would generally get with a new iPad.

The fast battery drainage is an issue with not just iPads but also Android tablets and smartphones. In some cases, you might also notice the iPad not charging properly with the charging icon missing as soon as you plug in a charger. There are several ways with which you can improve your iPads battery health and also fix no charging issues without paying a visit to the service center directly. If you are also experiencing frequent issues with iPad charging, then this article will be your guide to fix it:

Check The Accessories: Only Supported Charging Accessories Should Be Used With iPads

Step 1: Do check the charging accessories including the power brick or the charging cable. It should be the genuine accessories that Apple ships for its iPads. It is preferred that you use the charging cable as well as the adapter that ships with the retail box of your iPad or is purchased from authorized service centers.

Step 2: Connect the USB power adapter to your iPad.

Step 3: Complete the connection by pairing the cable with a USB Power adapter that is plugged into the wall outlet (make sure it’s working).

Step 4: If in case the iPad isn’t getting charged using the USB power adapter, try connecting it to the laptop or computer’s USB port. It should be a USB 2.0 or above port. Also, the laptop should not be in sleep mode. If your tablet starts charging, this is a sign you need to replace the power adapter.

Step 4: You can also check the iPad charging using another Apple-certified accessory including a USB hub.

Try Force Start And Other Methods To Check iPad Charging

Step 1: If you already have tried changing the power adapter and the USB cable and still have no results, you can perform a hard reset or force restart your iPad.

Step 2: Before you proceed with the force restart, you need to make sure your iPad’s temperatures are stable. Only if the device isn’t super hot or cold then only go ahead with the restart method.

Step 3: If your iPad doesn’t feature a Home button then first press and instantly release the volume key closest to the top button and then press and release the second volume button.

Step 4: Press and hold the top button. Do this until the iPad reboots.

Step 5: If you own an iPad with the Home button, you would need to press and hold the top or side button and simultaneously press the Home button. Release the keys once the Apple logo shows up on your screen.

Do note that these steps will only resolve issues with the charging when there is no major damage to the circuitry or the charging system on a hardware level. If for some reason your iPad still won’t charge after performing the aforementioned steps, you would need to contact Apple support.

Categories
How To Mobile

Recovery Mode In Vivo: How To Use Recovery Mode In Vivo Phones To Wipe Data And Fix General Issues

Key Highlights

  • Vivo smartphones speeds can be boosted with hard reset
  • Hard Reset can be performed using settings menu
  • Recovery mode can also be used for hard reset of Vivo phones

Vivo is one of the most popular Android smartphone manufacturers in India and the global markets. The brand is competing against the popular Chinese and non-Chinese smartphone brands with the Vivo V, Y, T, U, and X smartphone lineups. All of the Vivo smartphones are equipped with the latest hardware and firmware. Vivo has been using the Android OS along with its in-house Fun Touch OS and OriginOS user interfaces to power all its smartphone lineups.

All Vivo smartphones bring the goodies you would get with the latest Android version. While some of the features are in direct sight, some are hidden and need specific steps to launch. The Recovery mode is one of those options that you can find on any Vivo or other brand’ smartphones that you can use to fix general issues with performance and privacy.

Also Read: OnePlus Call Being Recorded Notification: How To Stop ‘Call Is Now Recording’ Message On OnePlus 10T, 10 Pro, OnePlus 9, 8 Series

Consider forgetting your phone’s password. The recovery mode on your Vivo smartphone will be your savior here and help you reset your device and set it up all fresh. If you aren’t aware of the steps to enter the recovery mode on your Vivo or any other brand’s Android smartphone, this article is what you need to check:

Also Read: Vivo Y100 Detailed Review: 100 Percent Complete Package Or A Mixed Bag?

How To Use Recovery Mode In Any Vivo Or Other Android Smartphone

The steps we have listed here will work with all Vivo smartphones running on Android v8 and above. If you own any other Android phone running on the same or above firmware the steps to enter and wipe the data using the recovery mode would be the same. And also, make sure device battery is over 50 percent so that the entire procedure is completed without any issues.

Step 1: Power off your respective smartphones.

Step 2: Press and hold the power key and at the same time keep pressing the volume up key. Do this until the Fastboot menu pops up on the screen.

Step 3: You’ll get two options on the screen Reboot and Recovery mode. Use the volume down key to scroll to the Recovery mode option.

Step 4: Use the power key to select enter the Recovery mode on your Vivo phone.

Step 5: From the next screen you’ll be able to Reboot System, Wipe Data, Install Update, enter System Repair mode, use power down, and Advanced options. Select the desired option using the power key and boost the performance and privacy of your Vivo phones.

Also Read: Vivo X80 Long Term User Review: Worth A Buy Under Rs. 60,000?

Categories
Apps Info

The Best Instagram Reels, Stories, And Photos Apps For 2022

Key Highlights

  • The social media is currently ablaze with Instagram Reels
  • Every day, content producers saturate Instagram with new reels
  • Recently, Instagram extended the time restriction and made a number of Reels-related enhancements

Instagram Reels is currently raging the social media. The Meta-owned instant photo sharing platform grabbed this emerging short video market soon after the ban on TikTok. Instagram has made several improvements to the Reels and has also increased the time limit in recent times. We have seen content creators flooding Instagram with new reels every day. The frequency is only getting higher now.

But if you are a general user of Instagram, watching Reels from different content creators would definitely be one of your favorite activities. At times, you would wish to download that Instagram Reel on your device offline so that you can watch it later as many times as you want.

Instagram has an in-house option where you can save the Reel directly in your profile. However, you would need active internet connection support in order to watch that Reel later. That wouldn’t be the case if you download the Reel on your smartphone offline. We have already covered how you can download and install Instagram Reels on your respective Android and iOS devices. Now, we have listed the best third-party apps that you can download on your Android and iOS smartphones to download Instagram Reels.

Also Read: 100 Best Instagram Boys Name With Alphabets M To Z

Top Instagram Reels Downloader App In India

Video Downloader For Instagram

The Video Downloader For Instagram can be downloaded on Android smartphones. This app has been rated 4.7 stars on Google Play Store and is downloaded by over 10 million users. It has an easy UI that lets you download Instagram Reels, videos, and photos. You can also download Instagram stories using this app on Android phones. The size of the Video Downloader for Instagram is around 6.9MB.

InstDown For Instagram Reels

This app will let iOS users download any Instagram reel video on their respective iPads. This app is also rated at 4.7 stars on Apple App Store and allows users to create automatic hashtags and download Instagram stories, and photos besides the Reels. This app weighs around 37.8MB and supports iPadOS 12 and above.

Video Downloader For IG

Another decent app that lets you download and watch Instagram reels later is Video Downloader for IG. This app has is available for Android users on Google Play Store and has over 5 million downloads. The star rating of this app is 4.4 and the download options are multiple as the other two apps in this list. This app also lets you download stories and photos on Instagram.

Also Read: Instagram Tricks: Here’s How You Can Change Instagram Language Settings On Android, iPhones

Categories
How To Tablet

Forgot Apple iPad Passcode? Here’s How To Reset iPad Passcode Of Any Model

The Apple iPad series is widely popular for its high-end performance and the wide array of user-friendly features. At its WWDC 2022 event, Apple unveiled the new-generation iPad OS 16 with a slew of new upgrades. The brand has also improved privacy with the new iPad OS. The previous-gen iPad OS has also offered a secure ecosystem for the users in terms of privacy. Setting up a passcode is one of the key security features offered by the iPad OS.

Bypassing this passcode feature on any iPad model isn’t an easy task for any unauthorized user that gets access to your tablet without permission. The iPad will get disabled if multiple failed login attempts are made to unlock it. But that can also happen if you have forgotten what passcode you set last and can’t log in to your iPad despite multiple attempts.

Well, resting the iPad passcode is the only option that you are left with in such scenarios. If you aren’t aware of the procedure, we have brought you the solution. But before you attempt to reset your Apple iPad’s passcode, you should be aware that the data stored will be lost. You would need a laptop or computer handy to initiate the process of passcode reset with iPad. If you have previously created a data backup, you will be able to restore the data post the passcode reset process. Now, let’s look at the steps:

How To Reset Passcode On Any iPad in 2022

You would first need to power off your iPad so that you can enter the recovery mode on your iPad. To power off the iPad follow the steps below:

Step 1: Make sure your iPad isn’t connected to any computer or laptop. Unplug it if it’s connected.

Step 2: If you have an iPad model with a Home button then press and hold one of the volume buttons along with the top button simultaneously. Leave the keys once the power off slider pops up on the screen.

Step 3: Power off your iPad using the slider. Don’t proceed to the next steps until one minute. That’ll make sure your iPad has switched off completely.

Using The Recovery Mode On iPads

Step 1: You need to immediately press and hold the correct Home button while connecting the iPad to the computer and laptop. For the models that don’t have the Home button, they need to use the top button.

Step 2: Don’t release the key until the recovery mode shows up on the screen.

Step 3: Now, once the passcode screen shows up, power off your iPad to reboot.

Complete The Reset iPad Passcode Using Computer

Step 1: On your PC or laptop, locate the connected iPad in iTunes or the Finder.

Step 2: You will get two options Restore or Update. Select the former if you wish to restore the iPad and the latter if you want the update.

Step 3: Wait until the entire process is complete and the iPad exits out of the recovery mode screen. Reboot your iPad and you are all set.

Categories
How To Mobile

iOS 16 Tips And Tricks: How To Unsend And Edit Text Messages On iMessages? What’s The Timelimit?

iOS 16 made its debut at the Apple WWDC 2022 event held earlier this year. The Cupertino giant introduced the iOS facelift with tons of new features and upgrades over the previous generation. With iOS 16, Apple made some notable upgrades to the iMessages application and added SharePlay support along with the option to edit or recover recently sent messages.

Currently, all the latest iOS 16 are being tested for a stable release. However, most of them are accessible with the iOS 16 beta version. If your iPhone is eligible for the iOS 16 update, you can download and use the iOS beta version to test all the features. We have previously shared the method with which you can easily install and use the beta iOS 16 on supported iPhones. Now, we will share the steps on how you can use the edit or unsend messages via the iMessages app.

How Can You Unsend Messages Use iMessages on iOS 16 Beta?

Step1: After you have successfully installed the iOS 16 Beta version on your iPhones, launch the iMessages app.

Step 2: Open the chatbox and scroll to the message that you want to unsend or delete.

Step 3: Now, you would need to press and hold on to the text message until the options pop up.

Step 4: From the bunch of options on the screen, select Undo message. Once you perform this step, the message will be deleted.

 We would like to add the time frame within which you can delete an already sent message is two minutes. The sent message will stay permanently in the inbox unless the receiver deletes it if the time exceeds two minutes. Also, the receiver will be notified that a message has been deleted.

Steps To Edit Sent Messages On iOS 16 Beta Version?

Step 1: Launch iMessages application on your respective iPhones.

Step 2: Open the chat window from where you wish to make the changes.

Step 3: Go to the message that you want to edit.

Step 4: Press and hold on the message.

Step 5: Now, select the Edit message option placed right below the Unsend option.

Step 6: Make the required changes and click ok.

Step 7: The message will have an Edited text highlighted next to it once it has been updated.

Categories
Comparison Tablet

Nokia T20 Vs Moto Tab G20 Vs Lenovo Tab K10: Best Budget Tablet India

India is one of the developing markets for mobile and PC tablets. The contribution is now coming from the major tech giants and smartphone players. A few of the names added to the list are Oppo, Realme, Nokia, and Xiaomi. Other players such as Lenovo and Motorola have already marked their presence in the tablet space and have introduced a plethora of tablets in the last few years.

We have multiple choices if we go out to buy an affordable tablet in the Indian market. We have compared several tablets in the mid-range and premium tablets available for sale in the country. This article is for the budget audience who are specifically looking for tablets in the price range between Rs. 10,000- Rs. 15,000. In this list, we have done a spec-sheet-based comparison between the Nokia T20, Moto Tab G20, and the Lenovo Tab K10 tablets. Which budget tablet is a complete package? Read on to know the details:

Nokia T20 Vs Moto Tab G20 Vs Lenovo Tab K10: Display Specifications

The Nokia T20 has been introduced just a few months back in the Indian market with an IPS LCD screen that measures 10.4-inches and supports a pixel density of 224 PPI. The display of the Nokia T20 supports a 2K screen resolution of 1200 x 2000 pixels and has a scratch-resistant coating.

The Motorola Moto Tab G20 also features an IPS LCD screen but it is smaller compared to the Nokia T20 and measures only 8.0-inches. The Moto Tab G20’s display offers a pixel density of 189 PPI and supports a lower screen resolution of 800 x 1280.

The Lenovo Tab K10 flaunts a 10.3-inch display. It is an IPS LCD panel similar to the remaining two budget tablets. The display on the Lenovo K series tablet supports a screen resolution of 1200 x 1920 pixels and has a pixel density of 220 PPI. The panel quality is good on all three models with amole clarity levels and balanced color production. However, the Nokia T20 and the Lenovo Tab K10 will deliver the best performance with video playback due to the higher resolution support.

Nokia T20 Vs Moto Tab G20 vs Lenovo Tab K10: Camera Specifications

The camera hardware is identical on both Nokia T20 and the Lenovo Tab K10. Both these tablets are packed with an 8MP main camera sensor at the back. The main camera on the Nokia T20 and the Lenovo Tab K10 can capture 1080p@30fps videos.

Moving on to the Moto Tab G20, it’s packed with a smaller 5MP main camera at the back which is also capable of recording 1080p@30fps. The selfie camera is also identical on both the Nokia T20 and the Lenovo Tab K10. They both ship with a 5MP selfie snapper.

The Moto Tab G20 has the smallest camera sensor out of the three, i.e., a 2MP lens. Optics are better with the Nokia T20 and the Lenovo Tab K10. You can expect good performance with their cameras in broad daylight.

Nokia T20 vs Moto Tab G20 Vs Lenovo Tab K10: Chipset, UI

Under the hood, the Nokia T20 is packed with the Unisoc T610 processor that is fabricated using 12nm TSMC process. The octa-core Unisoc chipset has Mali-G52 MP2 GPU support for graphics and 3GB/4GB RAM for multitasking. The Nokia tablet offers a storage space of 32GB and 64GB which can be further expanded using a shared microSD card slot.

The Moto Tab G20 features the octa-core MediaTek Helio P22T Procesor which is also based on a 12nm fabrication process and has only 3GB RAM option for multitasking. The Motorola tablet comes with an onboard storage capacity of 32GB.

Lastly, the Lenovo Tab K10 tablet is driven by the MediaTek Helio P22T processor as the Moto Tab G20 with PowerVR GE8320 GPU. The firmware is Android 11 on all three tablets layered with a custom user interface on top.

Nokia T20 Vs Moto Tab G20 Vs Lenovo Tab K10: Battery And Fast Charging

Powering the Nokia T20 is a massive 8,200 mAh battery unit with 15W fast charging support, while the Nokia T20 is packed with a compact 5,100 mAh battery unit. Unfortunately, there is no fast charging support with the Moto Tab G20. The Lenovo Tab K10 has a 7,700 mAh battery unit.

Nokia T20 Vs Moto Tab G20 Vs Lenovo Tab K10 Verdict: The Best Affordable Tablet

The Nokia T20, Moto Tab G20, and Lenovo Tab K10 are good options when you have a budget constraint. All three tablets flaunt a big display with 2K resolution which is suitable for binge-watching shows and movies. The chipset and camera configuration are also decent on all three tablets. You can consider any of the models as a daily driver.

Categories
Comparison Tablet

Realme Pad X 5G Vs OPPO Pad Vs Xiaomi Pad 5G: Best 5G Android Tablet In India

Smartphone OEMs are consistently marking their presence across the tablet industry with new launches. We have seen some of the latest product offerings in the tablet market from popular brands such as Realme, OPPO, and Xiaomi. All three Chinese tech giants have just ventured in the mobile tablet space and have already started populating their product catalogs with new tablet models.

This week Realme refreshed its tablet portfolio with a new 5G tablet called the Realme Pad X 5G. OPPO and Xiaomi have also released their powerful premium mid-tier tablets enabled with 5G network support and flagship-grade Qualcomm Snapdragon chipset.

All three tablet models are versatile and pack internals to complete any given task smoothly. If you had to buy any of the tablet models from this list, which one should you consider? This full comparison between the Realme Pad X 5G, OPPO Pad, and Xiaomi Pad 5 will help you decide.

Realme Pad X 5G Vs Standard OPPO Pad Vs Xiaomi Pad 5: Display Features

The display size is large on all three tablets and the panel type is the same. The Realme Pad X 5G, OPPO Pad, and the Xiaomi Pad 5 offer an IPS LCD screen. The Realme Pad X 5G’s display measure 10.95-inches, whereas the remaining two tablets, i.e., the OPPO Pad and the Xiaomi Pad 5 sport an 11-inch screen.

The display resolution differs on the Realme Pad X 5G compared to the other two models. It supports a screen resolution of 1200 x 2000 pixels, whereas both OPPO Pad and the Xiaomi Pad 5G’s display deliver a 1600 x 2560 pixels resolution. The screen refresh rate is higher on the OPPO Pad and the Xiaomi Pad 5, i.e., 120Hz. The display performance will be slightly better with the OPPO and the Xiaomi tablets.

Realme Pad X 5G Vs OPPO Pad Vs Xiaomi Pad 5: Camera Hardware

Interestingly, all three tablets mentioned on this list are packed with the same camera hardware both at the rear and upfront. Speaking of the optics hardware, the Realme Pad X, OPPO Pad, and the Xiaomi Pad 5 are packed with a big 13MP lens at the back. It is the only sensor you get on these tablets’ rear panels. The primary camera of the Realme Pad X, OPPO Pad, and the Xiaomi Pad 5 can shoot videos of 4K resolution@ 30fps.

Moving on to the selfie camera setup, there is an 8MP snapper with an f/2.0 aperture and 105-degree FoV on all three models. You wouldn’t notice any major difference in the camera performance with the Realme Pad X 5G, OPPO Pad, and the Xiaomi Pad 5. So, you can select any of the models of photography is your primary concern.

Realme Pad X 5G VS OPPO Pad Vs Xiaomi Pad 5: Chipset, UI Comparison

The Realme Pad X 5G uses a Snapdragon 600 series chipset for power delivery, while both OPPO Pad and the Xiaomi Pad 5 are equipped with the Snapdragon 800 series processor. The processor powering the Realme Pad X 5G is the Snapdragon 695 5G chipset.

The octa-core Qualcomm chipset on the Realme tablet employs Adreno 619 GPU to render extensive graphics. It is clubbed with up to 6GB RAM and 128GB storage configuration. As for the OPPO Pad and the Xiaomi Pad 5, they both use the same Snapdragon 870 chipset for performance delivery. The octa-core Qualcomm processor on both these tablets gets Adreno 650 GPU support to render the high-end graphics with ease.

Notably, both these tablets also come with 5G network compatibility as the Realme Pad X 5G. The storage and RAM configuration that you can choose with the OPPO Pad and the Realme Pad X 5G is up to 8GB RAM and 256GB storage. These two tablets get more powerful here with the premium Qualcomm Snapdragon processor and a higher RAM and storage capacity.

But the Realme Pad X 5G gets a few extra pointers for the latest Android 12 OS firmware. The Xiaomi Pad 5 and the OPPO Pad boot on the Android 11 OS. All three tablets mentioned here ship with an in-house user interface.

Realme Pad X 5G Vs OPPO Pad Vs Xiaomi Pad 5: Battery, Fast Charging Technolgy

Rounding off the Realme Pad X 5G’s spec-sheet is the 8,340 mAh battery unit. It gets a super fast 33W charging support. On the other hand, OPPO has used an 8,360 mAh battery unit to drive the Pad tablet. The Xiaomi Pad 5 uses the biggest battery in this lot which has a total capacity of 8,720 mAh. The fast charging speeds with both OPPO Pad and Xiaomi Pad 5 are the same as the Realme Pad X 5G, i.e., 33W.

Realme Pad X 5G Vs OPPO Pad Vs Xiaomi Pad 5: Final Verdict

The Realme Pad X 5G, OPPO Pad, and the Xiaomi Pad 5 are fully loaded Android tablets with 5G network support. The hardware features are also premium on all three tablets. But the display and processor are better on the OPPO Pad and the Xiaomi Pad 5 tablets compared to the Realme Pad X 5G. Out of all three, the Xiaomi Pad 5 takes the lead with its largest battery unit.