Categories
Apps Featured How To

Nothing Launcher For Android; How To Download And Use Nothing Launcher On Any Android Smartphone

Nothing is gearing up for its first smartphone launch this year which might be dubbed Nothing Phone (1). The rumor mill has been giving insights on the upcoming Android phone by the London-based startup founded by Carl Pei. Nothing already has hosted an event for its upcoming smartphone where the brand revealed a few details. Nothing has revealed its first smartphone will offer a near-stock Android experience which is one of the biggest highlights expected from the upcoming phone.

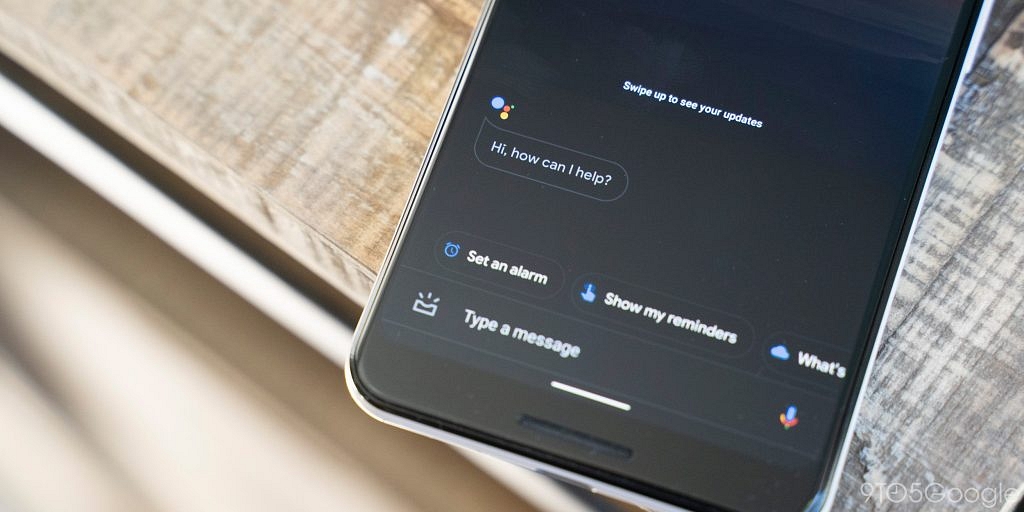
During the event, Nothing also revealed users will get to experience the Nothing OS launcher even before the handset goes official across the globe. Its expected availability was due in April 2022 which is now being processed in a phased manner across all the markets. The Nothing Launcher has been made available for the audience so that they can have an experience beforehand. This is one of the brand’s strategies to bring a maximum number of users on board.

The company has currently released the beta version of the Nothing Launcher for Android users all across the globe. The dedicated launcher for Nothing Phone (1) and all upcoming Nothing series phones can be downloaded from the Google Play Store on Android smartphones. But what are the steps to download and use the Nothing Launcher on any Android smartphone? Is the Nothing Launcher compatible with all Android smartphones from different brands? Details are as follows:

Nothing Launcher Android: Are All Android Phones Compatible With Nothing Launcher (Beta Build)?

The Nothing Launcher is now available for download via Google Play Store on all Android phones. This launcher is currently available in its beta build. The stable version will be introduced alongside the first Nothing smartphone, i.e, the Nothing Phone (1). While the launcher is available for download at the Google Play Store, it isn’t compatible with all Android smartphones.

The Nothing Launcher is currently supported on a handful of premium Android phones, including the Google Pixel 6 and Pixel 5. The beta version of the Nothing Launcher is also supported on the high-end Samsung Galaxy S21 and the Galaxy S22 series.

You might get a compatibility error if you try and install the Nothing Launcher beta build using Google Play Store on any other Android phone apart from the aforementioned models. The brand has assured more devices will be added to the compatibility list but hasn’t confirmed which devices are next in the pipeline.

Nevertheless, multiple Android users have reportedly successfully installed and used the Nothing Launcher (beta) via APK file. You can give this a try if in case you don’t own a Pixel or Samsung Galaxy S series model mentioned above.

How To Install And Use Nothing Launcher On Any Android Smartphone?

Step 1: Open Google Play Store and search Nothing Launcher by Nothing Technology Limited.

Step 2: Click on ‘Install’. Make sure you have toggled on the “trusted source” settings on your handset.

Step 3: Once the app is installed, you can try out the features.

Now, if you don’t own any of the above-listed Pixel series or Samsung Galaxy S series models, you can download the APK file separately via the web to use the Nothing Launcher.

Step 1: Open any web browser and go to the Google homepage.

Step 2: Type in Nothing Launcher APK file download and hit enter.

Step 3: You’ll get multiple links offering free APK files for the Nothing Launcher. If you have been using any specific website to download third-party Android apps APK, use it to download the Nothing Launcher APK.

Step 4: Complete the remaining setup process to use the Nothing Launcher on any brand’s Android smartphone.

Do let us know your thoughts in the comments below. You can follow the GizNext Tech Enthusiast Telegram group and GizNext Tech Enthusiast WhatsApp group for all the latest developments across the tech world.

Categories
Apps Featured How To

YouTube Super Thanks Now Available Across 68 Countries: What Is It? How To Earn Money Using Super Thanks On YouTube?

YouTube has come a long way in the last decade. It is one of the biggest online platforms that host user-generated as well professional videos. Its popularity has been at its peak ever since the brand monetized the platform allowing content creators to earn money. Google has been improving the payment services on its platform and is frequently working on new ways to help content creators generate more money.

The Super Thanks is one of those features that YouTube has been testing. Introduced last year, the YouTube Super Thanks feature has been available in the beta version until now. But the company has now expanded this option to multiple countries (up to 68) following which all eligible content creators will be able to access via the YouTube Partner Program. What exactly is the YouTube Super Thanks feature and how can you make use of this feature to earn money? Read on to know:

What Is YouTube Super Thanks?

The YouTube Super Thanks is a dedicated service for YouTube content creators that lets them earn money as donations from their subscribers. This option isn’t readily activated on the platform. You will have to perform some manual steps to enable the Super Thanks option for your YouTube channel. If in case you own a YouTube channel and wish to activate this feature, you need to follow the steps listed below:

Step 1: Open YouTube and login into your official YouTube Studio account. You will need to download the YouTube Studio app separately from Google Play Store or Apple App Store to complete this process.

Step 2: Now go to the “Menu” option which is placed on the top left corner of the YouTube app/website’s home screen.

Step 3: You will need to select the “Monetization” option.

Step 4: Scroll down to the Supers option. You might need to setup this option first. You will get the steps to do the same on your screen.

Step 5: You will now be able to locate the “Super Thanks” option. Toggle it on and you are all set.

It is worth adding that the Super Thanks feature is currently available in limited markets. This option has been rolled out to 68 countries as of now. Therefore, not all YouTube content creators will have an access to this feature. If in case, you see the Super Thanks feature missing from your YouTube Studio app, chances are Google is yet to bring this option to your region. You will be able to activate the Super Thanks option on YouTube once it’s rolled out to your country.

Do let us know your thoughts in the comments below. You can follow the GizNext Tech Enthusiast Telegram group and GizNext Tech Enthusiast WhatsApp group for all the latest developments across the tech world.

Categories
Apps Featured How To

Google Switch To Android App Finally Available At App Store: How To Transfer Data From iOS To Android Wirelessly

Back in 2021, Google started working on a new app to help the audience to transfer data from iOS devices to Android. The company has finally released the stable version of the “Switch To Android” app for iPhone users. The latest app by Google will allow iPhone users to easily transfer content from their old iPhones to new Android smartphones. How can you download and use the latest “Switch To Android” app to move your data from your old iPhone to a new Android device? Below are the steps:

Switch To Android App Makes It Hassle-Free To Transfer Data From iPhones To Android

Google has officially released the stable version of the “Switch To Android” application. The dedicated app for data transfers between iOS to Android ecosystem has been now added to Apple’s App Store. With the availability of this new app, iPhone users will now get the option to transfer all the necessary data from their old iPhones wireless to their new Android phones.

This is one of the most useful apps that will simplify the migration process between iOS and Android phones and tablets. It is worth mentioning that Apple already has a similar application available on its platform that lets Android users easily transfer data from old Android phones to iOS devices.

Google might be slightly delayed with bringing the stable version of this app to the Apple App Store, but finally is catering to the audience’s high demand for this app. With this app available, users will be able to transfer all the data wirelessly from one device to another. Earlier, this process required one to use any third-party app or wired connection with laptops or PCs to copy-paste content.

How To Transfer Data From iOS to Android Using ‘Switch to Android’ App

Step 1: You will need to download the Switch to Android app on your respective devices to begin with the data transfer process. Open the App Store and do the same.

Step 2: Once the installation is complete, follow the on-screen steps to move the data from iOS to Android devices.

Step 3: Since the entire process is completed using Wi-Fi, make sure you have an active Wi-Fi connection that can be accessed on both devices. The pairing process will be initiated on the required devices using a QR code scan.

Step 4: Make sure you have cleaned your older device if you plan to switch to the new Android phone entirely and not use the older device going forward. This will make sure your data doesn’t land in the wrong hands if anyhow the privacy is compromised.

Do let us know your thoughts in the comments below. You can follow the GizNext Tech Enthusiast Telegram group and GizNext Tech Enthusiast WhatsApp group for all the latest developments across the tech world.

Categories
Apps Featured How To

How To Restore Old Deleted Instagram Posts And Content: Step By Step Guide

Instagram is used by millions of Android and iOS users across the globe. The photo-sharing application has become a favorite destination for content creators since its venture in the social media space. The Meta-owned social media application has been getting a fair share of updates for new features and services that further enhances the user experience on its platform. Over the years, Instagram has improved the content sharing on its platform.

Instagram’s Direct Messaging option has also been upgraded multiple times with new features. Even the privacy factors have been improved with Instagram messaging and the overall platform’s services. But despite all measures, you might at times have to delete some content that might have been shared by any of your Instagram contacts or the ones that you have saved on your Instagram profile.

Are there any ways to restore old chats or deleted Instagram content? Well, you will be relieved to know that Instagram does offer the provision to download deleted content from its platform. If you want to know the steps, take a look below:

Steps To Restore Deleted Instagram Content And Chats

It is worth mentioning that you can only restore old deleted Instagram content including images, videos, reels, and IGTV videos. There is no direct way to restore old deleted chats. For that, you need to keep a backup of the chat. Also, the aforementioned Instagram content doesn’t get permanently deleted. They are moved to the ‘Recently Deleted’ folder from where you can restore the required data. To do so, follow the steps below:

Step 1: Open the Instagram mobile application on your Android or iOS devices. You can also perform these steps on the Instagram desktop version. Make sure you are logged into your profile to proceed with the data restore.

Step 2: Go to your profile and click on the menu option (three horizontal lines) placed on the top left corner.

Step 3: Now, click on the “Your activity” option.

Step 4: Scroll down to the “Recently deleted” menu. Tap on it.

Step 5: You now need to select the image, video, or other profile posts that you would want to restore.

Step 6: From the more option (positioned on the top right), select “Restore”.

Step 7: Once you complete the aforementioned step, the data will be restored to your Instagram profile.

Do share your thoughts on the latest Sony smartphone. You can also follow the GizNext Tech Enthusiast Telegram group and the GizNext Tech Enthusiast WhatsApp group for more technology updates.

Categories
Apps Featured How To

New WhatsApp QR Code Scam Alert: What Is It? How To Stay Safe?

Our modern-day lifestyle has gone all digital and it’s not communication but other daily tasks as well for which we rely on online services. Buying goods has made payments also has been simplified with the availability of digital payments apps such as Paytm, GPay, and PhonePe. Even WhatsApp which is a popular instant messaging application has started offering services for online payments.

While this feature is quite handy for general users, cybercriminals are finding out loopholes to scam the masses. WhatsApp users have been the target of several such scams where they have lost money and even crucial personal information despite the high level of security. Now, WhatsApp users are being targeted by online scammers once again. What is the latest WhatsApp scam and what can you do to stay safe? Let’s find out:

New WhatsApp QR Code Scam: What Is It?

In the latest WhatsApp QR code scam, WhatsApp users are being shared QR codes for payments via cybercriminals and fraudsters using which money is wiped out using the customer’s bank account. Users are generally being targeted at online marketplaces where the payments are made online.

In some cases, these fraudsters also lure in a customer by offering them some form of scheme or additional discount offer on any product that they can avail of later after making the payment.  The unaware user is then sent a fake QR code that deducts money from the user’s account itself.

How Can You Stay Protected From WhatsApp QR Code And Other Scam?

These scams are prevalent across major online marketplaces such as OLX and Quickr. If you are frequent with such online platforms, you must be aware that you are given bank details for money transfer to the seller. In some cases, you are also given a QR code so that you can send money. But if you are selling your own good, you will not be required to send any QR codes for payments.

If you are out in the marketplace to sell any of your products and the buyer is instead sending you a WQR code on WhatsApp instead of asking for one, this is a trick to rob you of your hard-earned money. In such cases, you must decline the request without thinking twice.

Also, whenever you are buying or selling goods at the online marketplace, do not share any crucial personal information, specifically bank OTPs with unknown or random users. Do not accept any QR code request on any of your digital wallet apps.

Do let us know your thoughts in the comments below. You can follow the GizNext Tech Enthusiast Telegram group and GizNext Tech Enthusiast WhatsApp group for fresh technology updates.

Categories
Apps Featured Info

How Instagram’s Updated Ranking Algorithm Proving A Boon For Original Content Creators?

Instagram has crawled up the ladder in a short span when we speak of social media apps across the Android and iOS mobile ecosystem. Owned by Meta, the photo-sharing app has become a favorite destination for both content creators as well as the general audience. But Instagram has become a major hub for influencers and brands to promote their content or products respectively. There has been a surging trend of users resharing content from other creators getting in a bid to get extra views or monetize their own accounts.

Instagram has been keeping an eye on this and is apparently modifying the ranking algorithm on its platform that’ll give original content more preference compared to the re-shared content. What exactly does Instagram have in store for the users? How will the originally posted content on the photo-sharing app be given a preference? Read on to know:

Instagram Improved Ranking AI, Product Tags To Benefit Content Creators

Instagram’s head, Adam Mosseri via his official Twitter handle has announced the new features including product tags for the photo-sharing app on Android and iOS. The tweet shared by Mosseri highlights the brand’s aim to improve the user experience for content creators on its platform by giving them legit credit for their work.

“Creators are so important to the future of Instagram, and we want to make sure that they are successful and get all the credit they deserve.” read the tweet shared by Mosseri. Besides making changes to the ranking algorithm, Instagram has also improved product tagging and released the enhanced tags feature. All these new tag systems and an altered ranking algorithm are Instagram’s sole attempt to boost the original content on its platform instead of the re-shared data.

What Exactly Is Original Content On Instagram?

While Instagram’s head (Mosseri) has highlighted the brand has re-worked the ranking algorithm that’ll help with a wider reach for the original content, the brand hasn’t specified what all it has tagged be original.

We are assuming Instagram is speaking of the original pieces from social media influencers or brands that are created from scratch. The brand could be excluding all the posts that are re-shared on a profile whether from other Instagram accounts or other content-oriented apps such as TikTok, Facebook, and others.

Do let us know your thoughts in the comments below. You can follow the GizNext Tech Enthusiast Telegram group and GizNext Tech Enthusiast WhatsApp group for fresh technology updates.

Categories
Apps Featured Info

Google To Block All Third Party Call Recorder Apps On Android; How To Record Calls Post New Privacy Policies?

Smartphones are the most potent gadgets of all time that lets us perform tasks beyond general calling or texting. With technologically advanced devices, we have the provision to do mobile photography, gaming, and various other tasks. Since communication has been the key usage for these handheld devices, the major focus of the smartphone OEMs has been to improve the calling and texting experience. And modern-day smartphones have made it easy for us to record audio as well as video calls with built-in or third-party app support.

But seems like Google is getting stringent with its mobile privacy policies and you might soon not see any third-party mobile app on the Android ecosystem that’ll support remote voice call recording. The search giant is reportedly taking down all the third-party apps for call recording from the Play Store starting next month. Why exactly Google is ending support for call recording apps on its mobile ecosystem? Details are below:

Google To Remove All Call Recording Android Apps From Play Store

Google has announced a new policy centered around the removal of third-party Android apps that supports call recording. The search giant is currently working on this new policy that is said to come in effect starting May 11, 2022. Notably, Google isn’t entirely killing the support for audio call recording on its platform but is rather modifying the Accessibility API for remote calling which will limit app developers from recording audio calls remotely.

The policy update post on the Google Play Console support page was initially reported by a Reddit user called NLL-APPS.

Who All Will Be Affected?

Google’s upcoming policy update that is said to come in effect starting May 11, 2022, will not allow apps from third-party developers to work around the Accessibility API to get access to call recording. Notably, Google already has been trying to block Android apps from recording calls or videos for privacy reasons.

The new policies will only restrict users from downloading third-party apps that support are asked permission for remote call recordings. If aby user’s smartphone has a built-in call recorder option as a part of the custom UI offered by the OEM, then there wouldn’t be any issues with the call recordings. For reference, Xiaomi’s MIUI OS comes with a built-in call recorder integrated within the dialer app.

Google has further specified that it is working on fixing all the loopholes with third-party call recording. Blocking the two-way call recording using wireless earphones or headphones will also be blocked once the new privacy policy comes into effect.

How Can You Record Calls On Android After Google Privacy Policy Are Updated?

As mentioned above, once Google makes updates its privacy policy and makes changes to the Accessibility API’s, third-party apps for recording apps won’t be useful. You’ll have to stick using to the default dialer app that has the call record feature integrated. A handful of smartphone OEMs do offer this support. If your device is one of them, you wouldn’t have to worry about the new Google policies.

Do let us know your thoughts in the comments below. You can follow the GizNext Tech Enthusiast Telegram group and GizNext Tech Enthusiast WhatsApp group for fresh technology updates.

Categories
Apps How To

No SIM Card Error: How To Fix No SIM Card Detected/ SIM Toolkit Issue With Smartphones

Smartphones have become an integral part of our modern-day lifestyle. These pocket-sized gadgets help users with daily communication, internet usage, gaming, and more. For mobile communication, smartphones use SIM cards. In India, we have multiple telecom brands such as Airtel, Vi, Jio, and others that we can use on smartphones from different brands.

Most smartphone OEMs pack their devices with a standard SIM card tray that is compatible with all SIM cards. But one of the most common issues users experience with SIM cards and their smartphones is the ‘No Sim Card’ or ‘SIM Toolkit’ error message. This issue has been prevalent with the newer generation of Android including Android 11 OS or Android 12 OS.

But in some cases, bugs and other issues causes can cause the ‘No Sim Card’ or ‘SIM Toolkit’ error message to pop up on your smartphone. Is this any concern? Or is this issue easy to fix or does your mobile phone needs a visit to the service center? Well, we have shared some troubleshooting steps to resolve this sim toolkit error message on your smartphones. Take a look:

Also Read: Lost Reliance Jio SIM Card? Here’s How To Block And Resume Your Jio Number

Methods To Fix No SIM Card/ SIM Toolkit Error Message On Smartphones

Step 1: Check if the SIM card is inserted properly. If not, remove and re-insert the SIM card into the SIM tray.

Step 2: Look for physical damages on the SIM card. A faulty SIM card might be a reason for the ‘No SIM card’ error on your smartphone. Get the damaged SIM card replaced if you see the aforementioned error message on your screens.

Step 3: Reboot your Android or iOS devices. If for some reason, your smartphone is unable to read your SIM card then a quick reboot might resolve this issue.

Step 4: Check SIM card network settings manually. Go to the device settings menu and from the mobile network section select the ‘SIM& network’ option. See if the SIM card is active. In most cases, an inactive SIM card causes the No SIM Card message to pop up on your smartphone.

Step 5: You can also try toggling on Airplane mode on and off to get back your SIM status online.

Step 6: Try checking your SIM card on any other smartphone. If it is working on the other device then your smartphone’s hardware might be faulty and is unable to read your smartphone. Therefore, it would be wise to take your device to the service center to get it fixed.

Also Read: Tablet With SIM Card: List Of Top Tablets With SIM Card Slot In India

Categories
Apps Featured How To

WhatsApp Pay Tips And Tricks: How To Check Bank Account Balance On WhatsApp App

WhatsApp has been serving millions of users across the globe and in India with its instant messaging application for Android and iOS devices. Not just the end-to-end encryption, but the availability of numerous features and tools for enhanced messaging experience makes WhatsApp popular amongst all users. Lately, the company has been integrating additional services to its instant messaging platforms such as UPI payments and chatbots so that users can make the most of it.

WhatsApp Payments is the service that we are speaking of. The company released this UPI-based feature in India back in 2020. Similar to other existing digital wallet apps such as Paytm, GPay, and PhonePe, WhatsApp also allows users to complete UPI transactions. Besides sending or receiving money, WhatsApp Payments also lets users check their bank account balance.

Now, most of us are frequent with using WhatsApp for our day-to-day communication. There are situations where you might want to check your bank account balance in midst of any chat.   WhatsApp Payment’s balance check feature comes in handy then. But are you aware of the ways to check your bank account balance using WhatsApp Payments? This step-by-step guide article will help you with the same.

How Can You Check Bank Account Balance On WhatsApp Using WhatsApp Payments?

It is worth adding that to initiate the process to check the bank account balance using WhatsApp, you need to set up your WhatsApp Payments profile. Once you have completed your WhatsApp Payments registrations by adding up your bank account and UPI details, you will be able to check the account balance.

Step 1: Launch the WhatsApp app on your respective Android or iOS devices.

Step 2: Go to the menu option and scroll down to the Payments tab. Click on it.

Step 3: Complete the WhatsApp payments setup by adding bank details and verifying your registered mobile number with the bank account.

Step 4: Once your WhatsApp Payments profile is complete, go back and select the back account whose balance you want to check.

Step 5: Select the “View account balance” option.

Step 6: Enter the UPI privacy PIN that you have set up while creating the WhatsApp Payment UPI account. Click on Ok. Your bank account balance will be displayed on the WhatsApp screen.

As mentioned above, WhatsApp Payments also lets you transfer or receive money from contacts without using another third-party digital wallet app. The steps are easy to perform. You just have to open the WhatsApp app on your smartphone and from the menu option, you need to select the Payments option to complete any transactions.

Do let us know your thoughts in the comments below. You can follow the GizNext Tech Enthusiast Telegram group and GizNext Tech Enthusiast WhatsApp group for fresh technology updates.

Categories
Apps How To

Telegram Custom Chat, Auto-delete, Notification Sound, And More Features Released; How To Use Latest Custom Chat Features On Telegram?

Telegram has earned a good rapport in the market for being a WhatsApp rival. The instant messaging application is among the popular messaging services that are based on end-to-end encryption. Enhanced privacy and user-friendly features for private conversations are what make it popular amongst the audience. Telegram is also frequently adding new features to its platform to deliver an improved user experience. Keeping in line with the same, Telegram has released a bunch of custom chat and notification features for both Android and iOS platforms. Below are the latest features released for the Telegram and the steps to use them:

Telegram New Custom Chat And Notification Features Released

For an enhanced user experience on its instant messaging app, Telegram has rolled out a custom chat mute, custom notification sound, and auto-delete feature. Users will also be able to reply to forwarded messages and use the enhanced bot menu feature as well. Telegram has shared the details related to all the new features vis its official blog.

Telegram Custom Chat Mute Option: What Is It? How To Use?

Telegram currently allows the users to mute any single or group chat for a certain timeframe. This feature is similar to WhatsApp where users can set a time limit of either 8 hours or up to two days. But Telegram has now improved this feature by adding the option to mute chats for a specific time limit. Users will now be able to mute chats for just a few hours depending on their requirements. The steps to use the custom chat mute option are listed below:

Step 1: Android users would need to go to the chat window and click on the ‘Notification’ option.

Step 2: Now, click on the ‘Mute For’ option and click select the time schedule for which you want to mute the notifications. Notably, the steps are similar for iOS devices.

Telegram New Auto Delete Chat Feature: Steps To Use

Telegram has also added the option to auto-delete chats by setting up a flexible timer. With this new feature, the chats or send data in any chat window get auto-deleted without performing any manual steps. Below is the procedure to enable the auto-delete chat feature on Telegram:

Step 1: Open the Telegram app and click on the user profile or chat window.

Step 2: Click the menu option (three horizontal or vertical lines on iOS and Android respectively) and select “Enable auto-delete”.

Step 3: Set the timer post in which the messages sent on Telegram would be deleted automatically.

Telegram Custom Notification Sound Features: How To Use It?

Telegram has also released a new custom notification sound feature that will allow users to set short audio files or even voice notes as notification ringtones for Telegram. Currently, Telegram has set the limit for these custom notifications to up to 5 seconds. The maximum size allowed is 300 KB. To use this feature, follow the steps below:

Step 1: Open the Telegram app on your respective Android or iOS smartphones and go to the settings menu.

Step 2: Tap on the ‘Notifications and sounds option’.

Step 3: Now, click on the ‘Add new tones’ option.

Other New Telegram Features To Check Out

Telegram has also improved the picture-in-picture mode on both Android and iOS devices. Also, the language translation is now enhanced on iOS devices. Additionally, Telegram has added the provision for the users to reply to any forwarded message they receive via any contact. Also, Telegram has enhanced the bot development tools for a better user experience.

Do let us know your thoughts in the comments below. You can follow the GizNext Tech Enthusiast Telegram group and GizNext Tech Enthusiast WhatsApp group for fresh technology updates.