Categories
Apps Featured Info

Ordering Groceries From WhatsApp Is Now Possible With JioMart Shopping Integration

WhatsApp is ramping up its app’s portfolio with numerous new features. Meta (Facebook) has released multiple new features and is consistently doing so in a bid to improve the user experience on a massive scale. The brand had recently released a feature allowing IRCTC users to order food while commuting via Indian railways. Now, the brand has integrated another popular shopping app into its messaging app with which users now can shop at their convenience without actually paying to the stores. Meta has now added the JioMarts shop to WhatsApp. Here are all the details:

JioMart Comes To WhatsApp

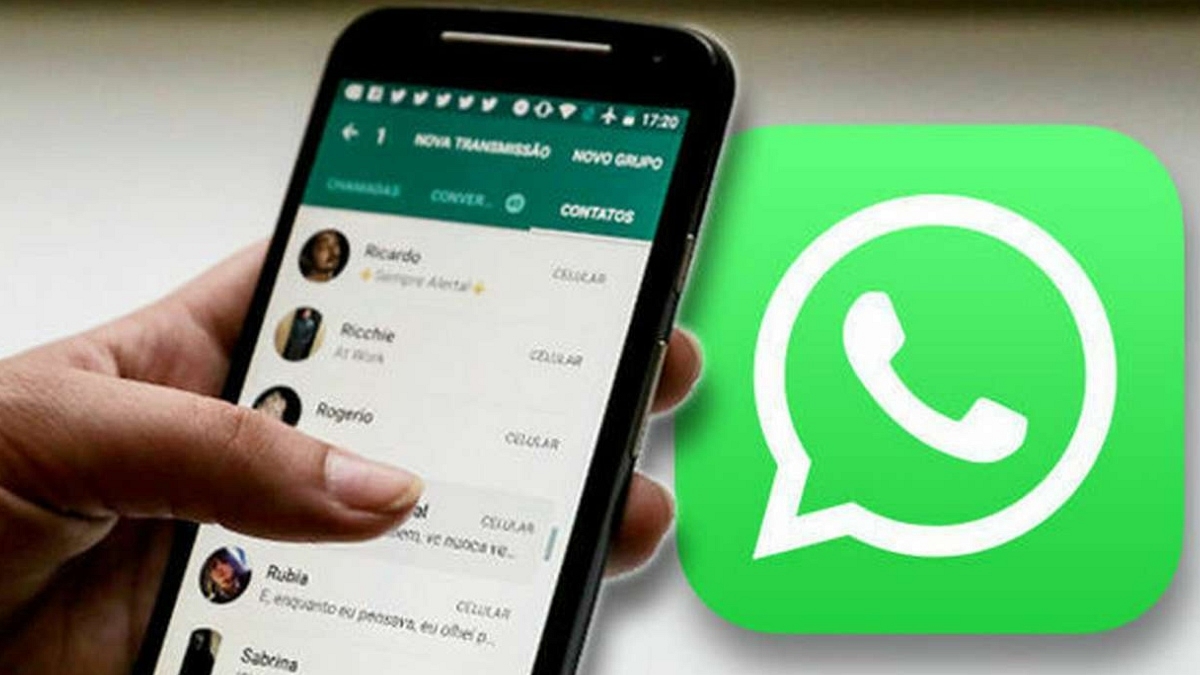
WhatsApp has integrated the JioMart grocery app into its messaging platform in what seems to be its first-of-a-kind move for any app giant. WhatsApp users will now get the option to access the JioMart grocery catalog right from the app itself.

Not just the option to go through the grocery store list, but WhatsApp will also allow users to make purchases from JioMart. All this including the payments can be done without actually leaving the app. This new development has been confirmed during the Reliance annual general meeting held a few days ago.

It seems WhatsApp is not restricting itself to just the end-to-end messaging ecosystem but is getting its forte stronger with end-to-end shopping. Facebook has also released a statement boasting its first of its kind of end-to-end shopping platform for the audience and how it believes business messaging will see major growth in the future.  

The brand quoted, “This is our first-ever end-to-end shopping experience on WhatsApp. People can now buy groceries from JioMart right in a chat. Business messaging is an area with real momentum and chat-based experiences like this will be the go-to way people and businesses communicate in the years to come”.

The in-app shopping experience is definitely going to boost with this new initiative from WhatsApp. Currently, the app has the provision where business organizations offer technical and sales support to customers. But buying a new product, that too grocery is the first of a kind move from WhatsApp. We can expect other messaging apps to follow this lead going forward. We are also assuming that WhatsApp will also integrate other major shopping apps boosting the end-to-end shopping format on its platform.

Categories
Comparison Featured Laptop

Asus Vivobook Pro 14 OLED Vs Dell Inspiron 16 Laptop: Which Laptop Is Best Under Rs. 70,000 In India?

The laptop industry is also advancing like the smartphone and other consumer IoT products with the latest technologies. From conventional bulky laptops, we now have options to select from ultrathin and 2-in-1 convertible designs. And that too without compromising on the hardware. Acer, Asus, Dell, Lenovo, and HP are amongst a few of the established players in the laptop market that are offering Windows-powered laptops with Intel and AMD series processors. However, there has been a recent trend with smartphone OEMs foraying into the laptop space and bringing in some pocket-friendly options for the audience.

We have done several gadget comparison articles including smartphones, smart TVs, tablets, and also chipsets. Now, we are starting with laptop comparisons as well. In this article, we are pitting down two of the most popular laptops in the Indian market. The spec sheet of the Asus Vivobook Pro 14 OLED and the new Dell Inspiron 16 models are compared in this article. If you are looking to buy a new machine for yourself and one of these models has been on your list then this comparison article is a must-read.

Asus Vivobook 14 Pro OLED Vs Dell Inspiron 16: Display Specification Comparison

Display game is getting stronger with laptops as it is being with smartphones. Laptop brands are making sure they are using a high-end panel for an immersive viewing experience with their products. The Asus Vivobook 14 Pro is one of the best examples of a mid-range laptop with a high-resolution panel. Asus has packed the Vivobook 14 Pro with a 14-inch compact display.

The panel type is OLED that offers a screen resolution of 1800 x 2880 pixels and has an aspect ratio of 16:10. The Asusu Vivobook 14 Pro OLED display also supports a 90Hz refresh rate and has a picel density of 243 ppi. It is HDR10 certified with which it can smoothly render FHD content via OTT platforms.

On the other hand, the Dell Inspiron 16 features an IPS LCD screen that is 16-inches in size. The screen resolution and the refresh rate is slightly lower here compared to the Asus Vivobook Pro 14 OLED variant. This laptop model supports 1920 x 1200 pixels resolution and has a standard 60Hz refresh rate.

The pixel density is also a bit lower compared to the Asus model at 142 PPI and also comes void of HDR10 support. The display size is bigger on the Dell laptop, but if you need better specs, opt for the Asus Vivobook Pro 14 OLED out of these two.

Asus Vivobook 14 Pro OLED Vs Dell Inspiron 16: Processor, Software Version

The Asus Vivobook 14 Pro OLED runs on the Intel Core i5-11300H quad-core processor with a 3.1GHz (up to 4.4Ghz) clock speed. The Asus Vivobook 14 Pro has integrated Intel Iris XE graphics, and NVIDIA GeForce GTX 1650 GPU support. This laptop comes with an onboard 16GB DDR4 RAM and has 512GB M.2 NVMe PCIe 3.0 SSD storage.

The Asus Vivobook 14 Pro OLED has the Windows 10 Home/ Pro edition pre-installed for home and professional users respectively. The software is upgradable to Windows 11 for free.

Moving to the Dell Inspiron 16, this laptop runs on the 12th Gen Intel Core processor. You can select from Core i3, Core i5, and Core i7 variants depending on the budget and user requirement. You can also select the integrated graphic card depending on the requirements including Intel UHD, Intel Iris Xe, and NVIDIA GeForce MX570, 2GB GDDR6 GPUs.

The memory version is also dual including 8GB DDR4 3200MHz and 16GB 3200MHz DDR4 RAM. The device has 512GB M.2 PCIe NVMe SSD storage.

Asus Vivobook 14 Pro OLED Vs Dell Inspiron 16: Connectivity Ports, Battery Capacity

Both Asus Vivobook 14 Pro and the Dell Inspiron 16 come with multiple connectivity ports.  The Asus Dell Inspiron 16 ships with two USB-A, one USB Type-C, one HDMI 1.4, and an SD card reader. On the other hand, the Asus Vivobook Pro 14 OLED ships with three USB-A, one USB Type-C, one HDMI 1.4, and one 3.5mm headphone jack.

As far as the battery capacity is concerned, the Asus Vivobook 14 Pro is packed with a 63wh battery whereas the Dell Inspiron 16 comes with 41whr and 54whr battery units. Both laptops comes with fast charging support.

Categories
Chipset Featured Info

AMD Makes Ryzen 7000-Series Gaming CPUs Official: All Details Here

AMD has introduced its new 7000-series CPUs which succeed the 6000-series chips from the previous year. It uses the company’s brand new AM5 platform and is based on the new Zen 4 architecture. Along with significant speed and efficiency gains, this upgrade is expected to introduce cutting-edge connection capabilities like support for new DDR5 memory and PCIe 5.0 technology.

There are currently four processors in the newly announced Ryzen 7000-series. Here is all the information you need to know regarding the new processors, including the release date, price, and other specifics.

AMD Ryzen 9 7950X

The Ryzen 9 7950X has 32 threads and 16 cores. It features a 4.5GHz base clock frequency and up to a 5.7GHz maximum boost clock. It comes equipped with an 80MB cache, 170W TDP, and PCIe 5.0 storage capabilities. The AMD Ryzen 9 7950X will cost you at $699 (approx. Rs. 55,731).

AMD Ryzen 9 7900X

The AMD Ryzen 9 7900X comes with 12 cores and 24 thread configurations. It is clocked at 4.7GHz with a 5.6GHz boost. It comes with a 76MB cache and supports PCIe 5.0 storage. As for price, the Ryzen 9 7900X is priced at $549 (approx. Rs. 43,767).

AMD Ryzen 7 7700X

The AMD Ryzen 7 7700X packs eight cores and 16 threads. It is clocked at 4.5GHz and can go up to a 5.4GHz boost. Also, it supports PCIe 5.0 storage and 105W TDP. It is priced at $399 (approx. Rs. 31,809).

AMD Ryzen 5 7600X

The Ryzen 5 7600X has a six-core and 12-thread architecture. It has a 4.7GHz clock speed with support for a 5.2GHz boost. The processor has a 38MB cache as well as a 105W TDP. Additionally, PCIe 5.0 storage is supported. For now, it is the most affordable chipset model on this list with a $299 price tag (approx. Rs. 23,837).

AMD Ryzen 7000-Series CPUs: Availability

The new AMD Ryzen 7000-series processors will be available for purchase starting from September 27, 2022. It is currently unknown whether Indian users will be able to purchase the Ryzen 7000-series processors on the same date. AMD is anticipated to give further information on regional availability in the coming weeks.

Categories
Featured How To Mobile

Apple iPhone eSIM: How To Convert Physical SIM To eSIM, Transfer eSIM/Physical SIM During And After New iPhone Setup?

Smartphones nowadays are all advanced with the brands embedding their new products with myriads of features for a better user experience. You can do all possible things if you own a modern generation smartphone right from gaming to photography and more. Even communication with these handheld gadgets isn’t restricted to just voice calls or texting. You get the option to make or receive video calls and also use dedicated messaging apps for voice and video calls using the internet.

Smartphone OEMs are also gradually routing towards adding an eSIM support instead of a physical SIM. This is one of the major changes that we have seen with smartphones; specifically, the new-generation models. Apple has also been integrating eSIM support with iPhones. The iPhone XS, iPhone XS Max, and the iPhone XR and above models are equipped with the eSIM feature. Just yesterday, we covered the procedure to set up and manage eSIM on iPhones.

This article is centered around the ways with which you can transfer your eSIM or physical SIM during setup. We also have mentioned the method to convert your physical SIM to an eSIM on iPhone and the steps to transfer a physical SIM or eSIM to a current iPhone after setup.

Steps To Transfer eSIM or Physical SIM While Setting Up An iPhone

 While setting up an iPhone, you will be asked to Transfer your Cellular Plan. This will be done in the Quick Start setup.

Step 1: You need to select the mobile numbers that you wish to transfer to the new iPhone during the setup process. Click on Continue from the bottom of the page. You can also select the option to decide later.

Step 2: You will see a set of instructions on the screen with which you can finish the setup process.

Step 3: Make the first call using your new iPhone. This is to check if you have active cellular connectivity before removing the cellular plan from the previous iPhone.

As soon as the cellular services are activated on your new iPhone, they will be discontinued from the old iPhone. You can then discard the physical SIM from your previous phone.

Steps To Transfer Physical/ eSIM On Your Current iPhone To eSIM On New iPhone Post Setup

Step 1: Unlock your iPhone and scroll to the Settings menu.
Step 2: Move to the Cellular option.

Step 3: Tap on Add Cellular plan option.

Step 4: Select the Convert Cellular Plan option.

Step 5: Click on the Convert eSIM tab.

Step 6: You will now need to hit the OK tab. A notification will pop up asking for transfer approval on the previous iPhone.

Step 7: Now, on your older iPhone, select the transfer option.

Step 8: You will have to wait for the eSIM to activate. Once it is done, you can remove the physical SIM from your iPhone.

Step 9: Now, wait until the cellular plan is activated on your new iPhone. The previous SIM card will be deactivated when the new cellular services are active.

Step 10: A new notification will show with Finish Setting Up Your Carrier’s Cellular Plan. Select this option.

Step 11: Click Continue and you will be redirected to the carrier webpage to transfer your eSIM.

How Can You Convert Physical SIM to eSIM On Same iPhone Model

Step 1: Open iPhone and scroll to the Settings menu.

Step 2: Click the Cellular option.

Step 3: Tap on Convert to eSIM.

Step 4: Tap Covert To eSIM in the next step.

Categories
Featured Home Appliances

Borosil Unveils Its All-New 4-In-1 ‘Best Air Fryer’: All Details

Key Highlights

  • Borosil launches its new Air Fryer
  • It uses 90 percent less oil while preparing food
  • The Air Fryer is available at Rs. 7,390 in India

India has seen a rise in the popularity of healthy cooking, and air fryers enable health-conscious individuals to indulge in some of their favorite foods guilt-free. Now, to help you enjoy preparing quick, simple, and wholesome meals for your family, Borosil has released its brand-new 4-in-1 ‘Best Air Fryer’.

The new Air Fryer is a multipurpose device that uses 90 percent less oil than conventional frying techniques to help fry, bake, grill, and even roast culinary items. Here’s all you need to know about Borosil’s all-new 4-in-1 Best Air Fryer:

Borosil 4-In-1 Best Air Fryer: Features

Instead of really deep-frying food, air fryers use hot air to swiftly cook and crisp up food to resemble the results of deep-frying. The Quick Fry technology in Borosil’s Air Fryer allows for the healthiest and tastiest meal preparation while using 90 percent less oil.

The device is safe to handle because the ‘cool-touch’ handle of the basket does not heat up, and it comes with a frying pan and tray. This air fryer aids in maintaining the same flavor and crispiness whether making samosas, french fries, or muffins.

Apart from this, Borosil’s Air Fryer has a 2.8-liter capacity basket that weighs around 3.2kg. It has an ABS body, a non-stick-coated steel fryer basket, and a tray. The Air Fryer is capable of handling temperatures up to 200°C. It supports baking, defrosting, and reheating apart from air frying.

The Air Fryer is equipped with 30 min integrated timer with an auto-off function. Some specific features of the Borosil Best Air Fryer are listed below:

  • Power: 1200W
  • Net Weight: 3.2 kg
  • Voltage: 230V AC / 50 Hz
  • Smart design with cord winder
  • Easy to clean accessories
  • Air vents at the rear
  • Space-saving design
  • Auto-off function
  • 1m long power cord

Borosil 4-In-1 Best Air Fryer: Price And Availability

The Borosil Air Fryer is priced in India at Rs. 7,390 and is available for sale on Amazon India and the official website of Borosil.

Categories
Featured How To Laptop

How To Fix Wi-Fi Connection Issues In Windows 11: Check Steps Here

Key Highlights

  • Wi-Fi connectivity issues in Windows 11 are among the most frequent problems
  • It could be caused by a missing, out-of-date wireless network driver
  • Removing and reinstalling your Wi-Fi driver could be helpful

One of the most annoying problems you can experience is when your Wi-Fi stops working. And on Windows 11, Wi-Fi connectivity issues are among the most frequent problems. User complaints regarding slow Wi-Fi and error messages like “Limited Access” or “No Internet Access” are common.

Most likely, you are not connected to your network and are unable to access the internet if you are unable to access your email, browse the web, or stream music. Here are some things you can do to solve the issue.

Also Read | Here’s How You Can Recover Lost Or Deleted Data In Windows 11 Laptops, PCs

Method 1: Remove And Reinstall Wi-Fi Driver

Windows 11 Wi-Fi issues could be caused by missing, out-of-date, or damaged wireless network drivers since they frequently conflict with systems or devices. Therefore, removing and reinstalling your Wi-Fi driver could be a recipe for dealing with Windows 11’s Wi-Fi issue.

We advise you to make a restore point before moving further with the steps in case something goes wrong. With the help of a backup of crucial Windows operating system files and configuration settings, a restore point enables you to return the system to a previous time.

Step 1: Open the program by searching “device manager” in the Windows search box.

Step 2: Double-click Network Adapters. Select Uninstall device from the context menu when you right-click the WiFi driver.

Step 3: Click Uninstall in the pop-up Windows.

Step 4: Restart your computer. After that, it will automatically search your system for stored drivers (which might not be the most recent version) and install them.

Step 5: Reconnect the Wi-Fi and check for any improvement.

Also Read | Effortless Typing In Laptop/PC: Here’s How To Use Voice Typing Feature On Windows 11 To Type Without Keyboard

Method 2: Run The Network Troubleshooter

Windows comes with powerful troubleshooters by default. It can locate and resolve issues with the Internet, audio, printer, update, and many other things.

Step 1: Press the Windows key and ‘I’ to open the settings on your keyboard.

Step 2: In the System tab, search ‘Troubleshoot’ and select it.

Step 3: Tap on ‘Other troubleshooters’.

Step 4: Next to Internet connections, click “Run.”

Step 5: In the pop-up Windows, select ‘Troubleshoot my connection to the Internet’.

Your internet connection should be detected by the troubleshooter as it runs. Watch to see if it uncovers anything while you wait.

For the tech geeks, stay updated with the latest cutting-edge gadgets in the market, exclusive tech updates, gadget reviews, and more right on your phone’s screen. Join Giznext’s WhatsApp channel and receive the industry-first tech updates.

Categories
Featured How To Mobile

eSIM iPhone: How To Setup And Manage eSIM On iPhones, Install Assigned Cellular Plans

Smartphones are constantly evolving; specifically with the advancements in the tech field. The OEMs are embedding their devices with the newest of technologies for improved user experience with photography, gaming, and more. But communication is one prime usage of smartphones right from the beginning. Brands have been focusing to bring the fastest internet and better connectivity with mobile communication. Most of you must be using a SIM card from one of the telecom operators for calling, texting, or mobile internet.

Smartphone OEMs have started integrating the eSIM feature so that one can start using cellular services instantly after purchasing a new device. This can be done without inserting any other physical SIM card. The use of eSIM (electronic SIM) is on the rise and brands are adopting this new technology gradually for their product lineups. Apple is one of those smartphone brands that is going full-fledged with eSIM for its iPhones.

The iPhone X series including the iPhone XR, iPhone XS Max, iPhone 11 series, iPhone 12 series, and the iPhone 13 series are all enabled with the Dual SIM feature with which you can use both a physical micro or nano SIM card along with the eSIM for communication.

But do you know the procedure to set up an eSIM if you own any of these aforementioned Apple iPhone models? If now, we are helping you with the process to set up an eSIM on iPhones and also install an assigned cellular network. We have also listed the steps with which you can transfer an eSIM from one of your previous iPhones to a new one.

Steps To Setup An eSIM On Supported iPhone Models

By Scanning A QR Code

You can easily set up an eSIM on your iPhone by using the camera scanner.

Step 1: On your iPhone, launch the camera app.

Step 2: Scan the QR code for the eSIM.

Step 3: Once the scanner detects the Cellular Plan, a notification will pop up. Select it.

Step 4: From the bottom of the screen, click continue.

Step 5: Tap on the Add Cellular Plan option.

You will then receive a confirmation code using which you will be able to activate the eSIM. Now, enter the mobile number that your mobile carrier has provided.

Steps To Install An Already Assigned Cellular Plan On iPhone eSIM

Step 1: You will get a notification on your respective iPhones stating Carrier Cellular Plan Ready to be installed. Once you see this message on your iPhone, click on it.

Step 2: You would need to click on the Carrier Cellular Plan Ready to Be Installed from the Settings app.

Step 3: Now, click on Continue.

Step 4: To check the status of the cellular connectivity on eSIM, you can make a call. If in case, the call is not being placed, you would need to contact the dedicated mobile carrier.

Step 5: You can also remove the physical SIM, if the activated mobile plan replaces the one on the physical SIM.  

Notably, you can also enter the plan details manually for your eSIM. Follow the steps below for the same:

Step 1: Unlock your iPhone and go to the Settings menu.

Step 2: Select either Mobile or Cellular data.

Step 3: Click on Add Cellular plan option.

Step 4: Now, enter the required details manually.

Categories
Featured Telecom

RIL AGM 2022: Reliance To Launch Jio 5G Services By Diwali This Year

Key Highlights

  • Reliance Jio 5G service to launch by Diwali this year
  • Mukesh Ambani announced Rs. 2 lakh crore investment in deploying 5G services
  • New Jio AirFiber launched in India

Today was the 45th annual general meeting of Reliance Industries Ltd. RIL Chairman and Managing Director Mukesh Ambani addressed the meeting and said that the company has made overall growth across all of its sectors and has become the first corporate in India to cross $100 billion in yearly revenues.

Jio 5G services will be accessible in Delhi, Mumbai, Kolkata, and Chennai by Diwali, according to Mukesh Ambani’s announcement. According to him, Reliance Jio’s 4G network has 421 million subscribers to mobile broadband services. By December 2023, Jio intends to roll out complete pan-India coverage.

Ambani said, “I want to announce the next leap forward that Jio is creating in digital connectivity, especially in fixed broadband. And that is JIO 5G services. Using 5G technology, we can dramatically reduce latency or lag, and deliver breakthrough increases in broadband speed, network capacity, and the number of connected users.”

Reliance will launch Jio 5G across multiple major cities, including the metropolises of Delhi, Mumbai, Kolkata, and Chennai, within the next two months, by Diwali, Ambani added.

During his speech, RIL Chairman Ambani said that Jio 5G will connect over 100 million homes with “unparalleled digital experiences and Smart Home solutions”. He further said that they will catapult tens of millions of small businesses and small merchants to great heights that will empower them with cutting-edge, plug-and-play solutions delivered from the Cloud.

The telecom company has further committed Rs. 2 lakh crores in order to roll out the 5G services. The company will start rolling out 5G in key cities before covering pan-India by December 2023, Mukesh Ambani added.

Apart from this, he pointed out, “Our company became India’s first corporate to cross $100 billion in annual revenues. Reliance’s consolidated revenues grew 47 percent to Rs 7.93 lakh crore, or $104.6 billion.”

Jio Chairman Akash Ambani also announced Jio AirFiber while speaking at the AGM. He said, “the idea of Jio 5G’s ultra-high-speed fixed-broadband is much more exciting. We are calling it Jio AirFiber since you can get fiber-like speeds wirelessly over the air without any cords. It would be quite simple to swiftly connect your house or office to gigabit-speed internet with Jio AirFiber.”

He said that the company has created a Jio AirFiber Home Gateway, a wireless, simple, single-device solution. Simply pick it up, plug it in, and turn it on. That’s it.

“Your home now has a personal Wi-Fi hotspot that is connected to True 5G for ultra-fast internet. Additionally, there are no unsightly wires entering your home because it is an end-to-end wireless solution,” said Akash Ambani.

Categories
Featured Gaming Info

BGMI Unban Date Rumors Surfaces Online: Everything You Need To Know

On the Indian government’s orders, BGMI was removed from Google and Apple’s online stores around a month ago. Due to an alleged privacy violation, MEITY issued a prospective suspension on the game’s purchases and downloads.

Since then, online rumors about the game’s revival have surfaced online. Indian gamers are eager to find out if Krafton has provided any information regarding the Battlegrounds Mobile India unban date.

Images Of BGMI Unban Date Surface On Internet

Recently, an image of Battlegrounds Mobile India’s return has appeared online. Based on the image, the popular game was ready to return to the Google Play Store and Apple App Store on August 22. However, it has been days since then, and Indian users are still unable to access Battlegrounds Mobile India yet.

The graphic also revealed an imaginary timeline for the game’s unbanning. It stated that on the specified date, at 4:00 PM IST, iOS gamers would be able to access BGMI. Additionally, it specified that on the same day, from 12:30 PM to 7:30 PM IST, it will be accessible to Android gamers. The widely circulated image, however, turned out to be fake and unreliable.

Towqeer Gilkar, a co-founder of Stalwart Esports, recently used his popular Instagram account to hold a live session and post a story highlighting the game’s unban. Towqeer said during the live session that the game would return sooner than anticipated. Ideally, it would return within a month.

He continued by saying that the relevant authorities had called a meeting, and numerous notable figures, including him, had attended. He claimed that everyone put gave their best effort with the goal of bringing BGMI back. He thinks the popular title will return shortly because the meeting came to a successful conclusion. Fans and players should be aware that Krafton India has yet to make any formal announcement regarding the lifting of the ban from Battlegrounds Mobile India since MEITY is yet to lift the ban from Battlegrounds Mobile India. This emphasizes how much longer it will be until there is any notification about the unban date.

Categories
Featured How To Mobile Tablet

How To Use Live Text On iPad, iPhone To Copy Text, Make Calls, Send Emails From Any Photo Or Image?

Apple uses an in-house custom interface for its products including iPhones, iPads, and Mac laptops. For the iPads, it’s the iPadOS which is renewed each year with new features and tools along with the new generation models. This year, the Cupertino giant has released the iPadOS 16 with numerous new user-oriented features and some major enhancements over the previous-generation iPadOS 15 OS.

The Live Text is among the sleuth of useful features available on the iPadOS. It is similar to the one available for the iOS 15 and above versions. The Live Text is one of the handiest features available for both iPad and iPhone users allowing them to copy and translate texts from any photo. Users can also make calls and send emails using the Live Text feature on iPads and iOS. That’s not it, the Live Text feature also makes it possible to translate language on the go.

So, how can you use the Live Text feature on Apple iPads and iOS to get information from any image, make calls and emails, and also translate language? You can follow the step-by-step guide below for the same. It is worth adding that you would need to first enable the Live Text feature on your respective iPads or iPhones. We already have covered the steps to activate the Live Text feature, you can read our previous coverage here. Let’s carry on with the further steps:

Steps To Copy Text Using From A Photo On iPads, iPhones Using Live Text Feature

Step 1: On your iPads/ iPhones, launch the Photos app. You can also open any image online.

Step 2: On the image, press and hold on the word and move the cursor to adjust the selection area.

Step 3: Select Copy option. If you wish to select the entire text in the image, you can click on the Select All option.

Step 4: Once you have copied the required text, you can paste in into any other app or can also share it with other users.

Step 5: You can also highlight all text in any photo or image by selecting it and tapping on the Live Text option from the lower right corner.

How To Make Calls Or Send Emails Using Live Text On iPad And iPhone

Step 1: Launch the Photos app on your iPad or iPhone to select any photo or use an online image.

Step 2: Click on the phone number or email address.

Step 3: You will see the Call or Send Message option. Click on the required option. Depending on the website, you will see additional options including Make a FaceTime Call or Add to Contacts.  

Steps To Translate Any Text Within A Photo Or Image

Step 1: Select the photo or image from the Photos app on your iPad or iPhone.

Step 2: You would now need to make the adjustments using the grab points.

Step 3: Now, from the list of options select Translate.

Step 4: Click on Continue and then select the language to which you wish to translate.