Categories
Featured How To Mobile

iPhone Tips & Tricks: Here’s How You Can Measure Height Using An iPhone Camera

Key Highlights

  • iPhones come with a pre-installed Measure app
  • It helps you to measure your height, an object, or surface
  • The feature is not available on iPhones that don’t have a LiDAR Scanner

Most users are still unaware of several features that their Apple iPhones offer. Although we are familiar with most of the features, there are still a few important aspects that are tucked away in the apps that we are unaware of. For instance, did you know that the Measure app on the Apple iPhone can be used to measure height? You can quickly determine your height using this app. The best part is that it’s fairly accurate, so you could even use it to gauge someone else’s height. Here is all the information you need to know.

iPhone Measure App

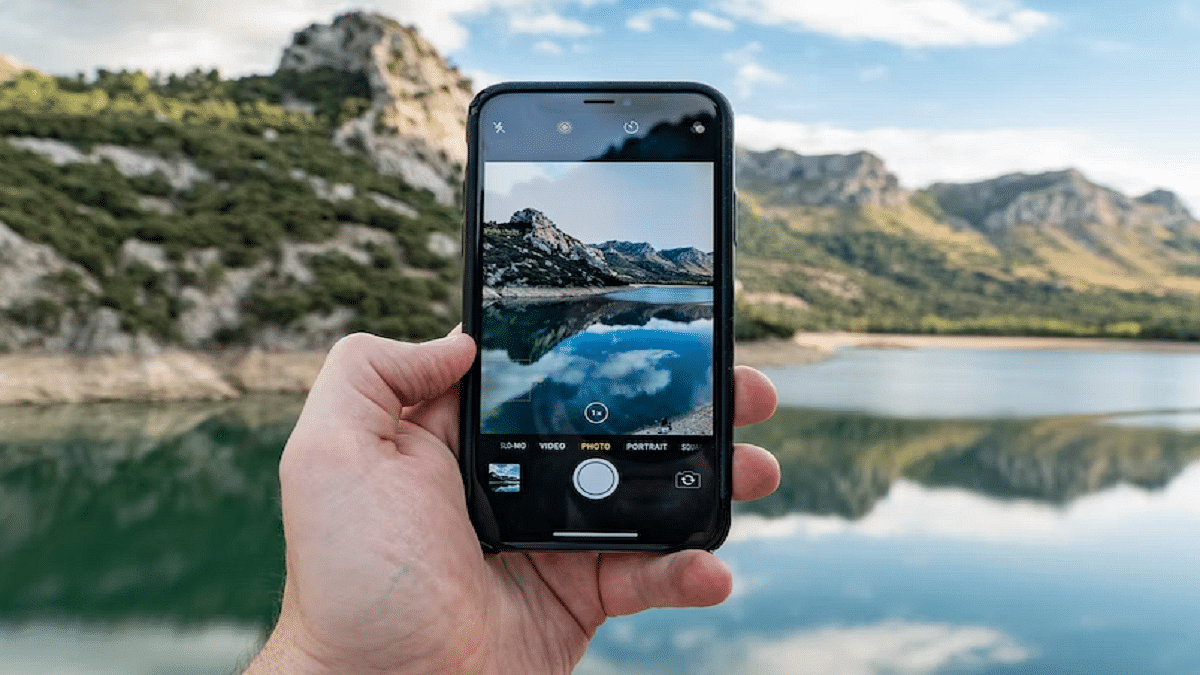
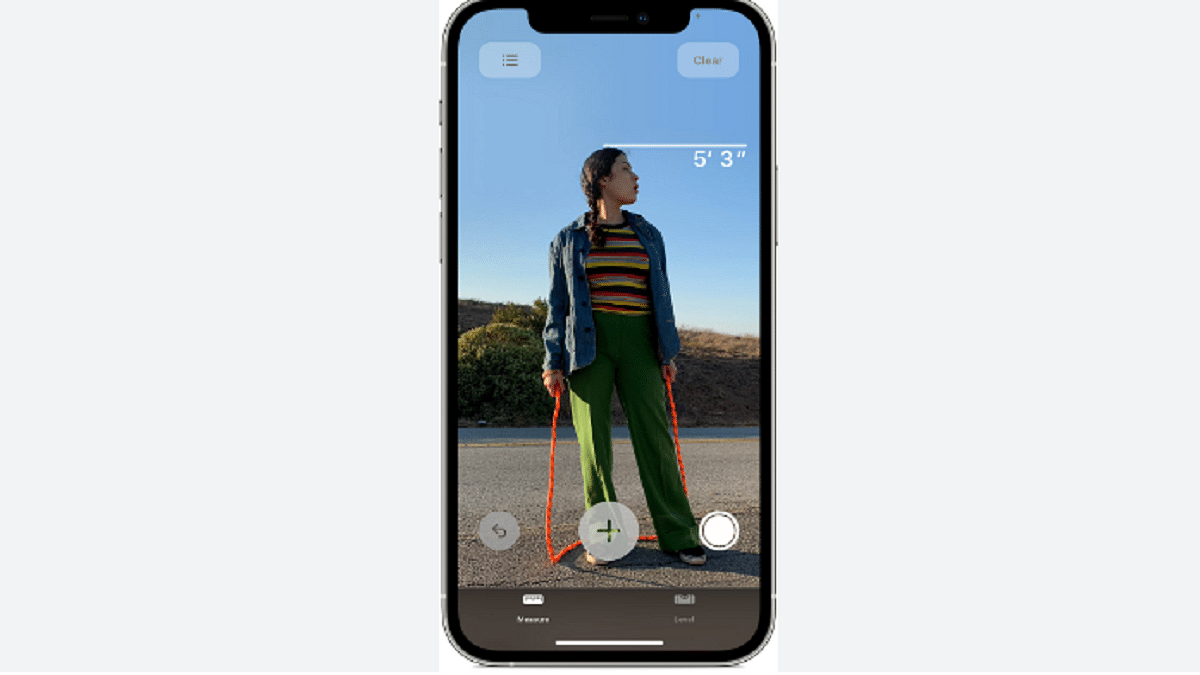
The Measure app for the Apple iPhone allows users to use the phone’s camera to measure the width or height of an object or surface. The only models that can measure a person’s height are the Apple iPhone 12 Pro, Apple iPhone 12 Pro Max, Apple iPhone 13 Pro, Apple iPhone 13 Pro Max, Apple iPhone 14 Pro, and Apple iPhone 14 Pro Max. But when we looked at the feature on our iPhone 13 and we discovered that we could measure the height.

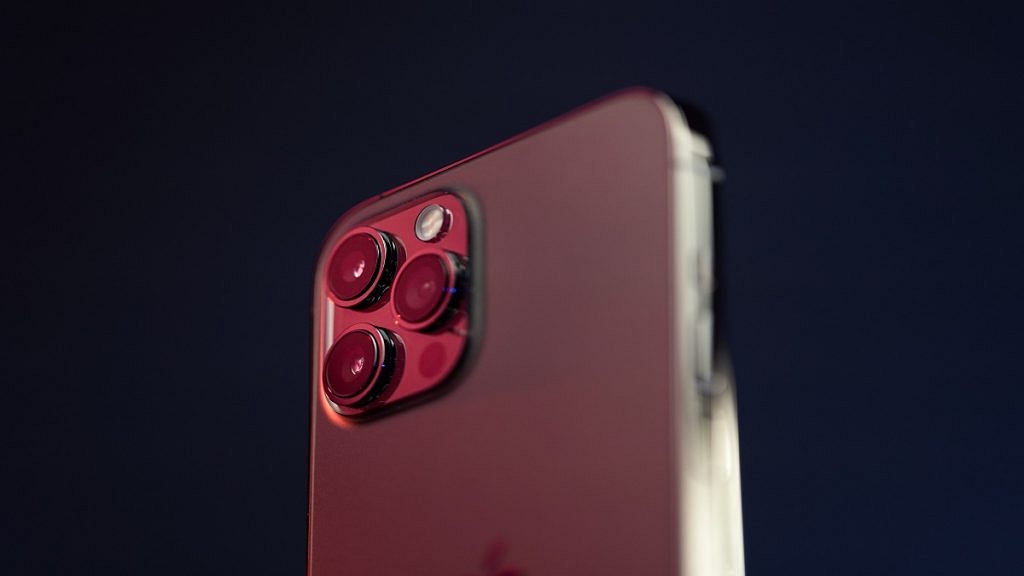
The Apple iPhone series mentioned above has a LiDAR scanner in addition to the rear camera. With the use of this LiDAR scanner, users can obtain precise readings by creating a depth map of what is in front of them. You can also measure a person’s height using the Apple iPhone’s LiDAR scanner.

Also Read | iPhone Tips And Tricks: How To Answer Call Without Touching Your Phone

How To Measure Your Height Using Your iPhone

The Measure app on your iPhone allows you to measure height instantaneously. Here is a step-by-step guide on how to measure height with an Apple iPhone:

Step 1: On your iPhone, open the Measure app.

Step 2: Position iPhone so that the entire subject you wish to measure is visible on the screen.

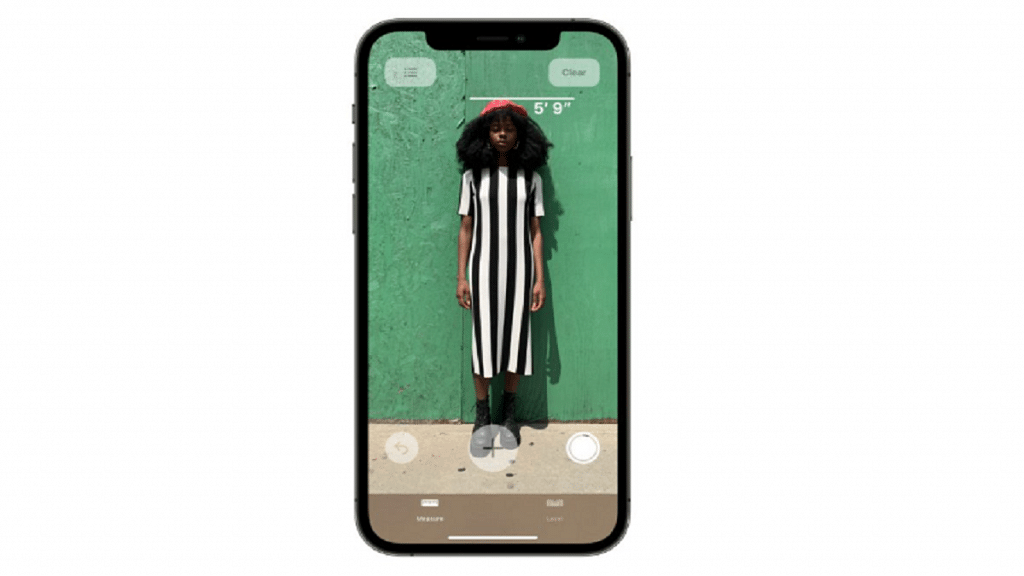
Step 3: The height measurement is displayed directly below the line that appears at the top of the person’s head (or hair, or hat) after a little delay. Tap the Take Picture button to take a photo of your measurement.

Step 4: Tap the screenshot in the lower-left corner to save the image.

Step 5: Then, tap Done and select Save to Photos or Save to Files.

Step 6: The height measurement image is easily accessible from Photos or Files on your iPhone anytime you need it.

To redo the measurement, move your iPhone away. Your height is now reset and you can start again.

Also Read | Shoot In 4K Cinematic Mode On Your iPhone 14: Here’s How

Categories
How To Mobile

Shoot In 4K Cinematic Mode On Your iPhone 14: Here’s How

Key Highlights

  • Apple introduced Cinematic Mode to iPhones
  • The iPhone 14 camera supports a Cinematic mode with 4K@30fps and 4K@24fps
  • A minute of 4K 30fps Cinematic movie will be 170MB in size

In recent years, Apple introduced Cinematic Mode to iPhones. The brand-new iPhone 14 has the feature, and the iPhone 13 models also have it. However, only a few people are aware of how to use it or what it will actually do.

The time is now for you to learn about and use the feature if you are one of those who have heard of it. On the iPhone 14 models, Apple has added 4K cinematic options. Users will be able to capture videos in two distinct qualities, 4K 24fps (more of a cinematic frame rate) and 4K 30fps (the regular frame rate).

You must first enable the higher quality in Settings on the new iPhone 14 in order to use Cinematic Mode in the new 4K resolution. The same procedures can be used to capture 1080p resolution in Cinematic mode on an older iPhone 13. Let’s see how to do that and shoot a Cinematic video in 4K.

Also Read | Apple iPhone 14 Vs iPhone 14 Plus Vs iPhone 14 Pro Vs iPhone 14 Pro Max: Quick Comparison

How To Record 4k Cinematic Mode On iPhone 14

Step 1: On your brand-new iPhone 14, go to Settings.

Step 2: Locate the Camera option by scrolling down and selecting it. In the most recent iOS version, that appears above and beneath the Photos and Books options.

Step 3: You should now be able to see and select the Record Cinematic option. Click on it.

Step 4: The default quality will be 1080p at 30fps, but below that are the two 4K alternatives. One of them will be used to capture a simple 30fps video, and the other will be used to capture a movie-like 4K at 24fps footage. Select any options by tapping on them.

Also Read | iOS 16 Tips And Tricks: Four Best Hidden Features To Try On Your iPhone 14

Keep in mind that this setting will offer a big file with the maximum resolution. A minute of a 4K 30fps Cinematic movie will be 170MB in size, compared to 135MB for a 4K 24 fps Cinematic video. This is substantially larger than a 1080p Cinematic video. A minute of 1080p cinematic footage only takes up 60MB. After following the instructions, turn on the camera, choose Cinematic Mode, and begin shooting.

For the tech geeks, stay updated with the latest cutting-edge gadgets in the market, exclusive tech updates, gadget reviews, and more right on your phone’s screen. Join Giznext’s WhatsApp channel and receive the industry-first tech updates.

Categories
Apps Featured How To

Can’t Find Images In Phone’s Gallery Your Device? Here’s How To Find Lost Photos And Videos On Google Photos

Google is offering multiple tools and services to mobile users and is frequently updating the Android platform with new features proactively. Google Photos is amongst the top few mobile applications being used by numerous users globally. Google Photos is one stop destination to store photos and videos and also edit and share via Google Drive and other mediums.

Google Photos is an in-house gallery app from the search giant which is pre-installed on every Android mobile and tablet and can be easily accessed from the app drawers. Data backup is also an option with Google Photos. It comes in handy when you wish to create some room for additional apps by removing old photos and videos from the device’s storage.

Also Read: Google Pay 9x Booster: Confirmed Working Trick To Get 9x Booster In Gpay Food Market Offer

Google Photos definitely works as a photo vault app for smartphones. Google has also made it quite simple to access old photos and you don’t have to scroll down the entire album to look for a specific image. But do you know you can also search for lost photos and videos on the Google Photos app?

Well, there are a bunch of tricks with which you can easily find any image or video that you think has disappeared from the gallery. This can happen when you have switched to a different Google account for photos or due to a random bug. If yo want to know the methods with which you can find lost photos and videos on Instagram then read this article:

Also Read: Want To Set Your Google Calendar Private? Here’s How To Do It

How To Find Lost Videos And Images On Google Photos

Step 1: Check the account with which you are logged in to the Photos app. It should be the same account on which you have enabled the backup. If it’s a different account, login back with the correct account.

Step 2: Check photos from different social media and messaging apps such as Facebook, Instagram, or WhatsApp. You will need to follow the steps below for the same:

  • On the Google Photos app, click the Library option from the bottom.
  • Go to the Photos on device option and select the device folders.
  • Tap on the required app folder to see the images and videos.

Step 3: Check the Bin or trash folder too. You might have accidentally deleted the image or the video. Thankfully, Google permanently deletes the images in the bin or trash folder after 60 days. You still have ample time to recover accidentally deleted photos.

Step 4: Check the Archive gallery. Photos and videos that aren’t regularly viewed might have be moved to the archive folder. Follow the steps for the same:

  • On the Photos app, go to the Library section.
  • Tap on the Archive menu.

Also Read: Want A Male Google Assistant Voice On Android Phone? Here’s How To Enable

Categories
Apps Featured How To

Want To Set Your Google Calendar Private? Here’s How To Do It

Key Highlights

  • You can set your Google Calendar visibility to Public or Private
  • If you make your Google calendar public, anyone can see it
  • Users can also grant selected users access to their Google calendars

Whether you already regularly use Google Calendar or you’re just getting started, it’s useful to understand how to control the privacy settings for both your calendar as a whole and individual events. It’s crucial to understand how to modify your privacy settings if you use Google Calendar through an organization such as your place of employment or school.

Also Read | Google Maps Tips & Tricks: Here’s How To Check Air Quality Index In Your Area

In this article, we shared a step-by-step guide to setting your calendar to private so that others can’t see what you’ve done or are up to for the day. We also shared a guide for sharing specific calendar items with selected contacts.

Steps To Make Your Google Calendar Private

Step 1: On your computer, launch Google Calendar.

Step 2: On the left side of the screen, click on the “My calendars” section.

Step 3: Click the three dots in the top-right corner of the calendar you just chose after moving your cursor over it to adjust the sharing options.

Step 4: Select the “Settings and sharing” option from the menu now.

Step 5: Then, in the left column, go to “Access permissions for events”.

Step 6: If it is checked, uncheck the “Make available to public” option.

Steps To Share Your Google Calendar With Specific People

Step 1: On your device, open Google Calendar.

Step 2: Locate the “My calendars” box on the left side, and then click the Down arrow to expand it.

Step 3: Next, click the “More” icon while still positioned over the calendar you want to share.

Step 4: After that, tap on the option “Settings and sharing”.

Step 5: Now, under the “Share with specific people” option, select “Add people”.

Also Read | Want To Hide Unwanted Memories In Google Photos? Here’s The Trick

Step 6: Add a person’s email address now. You can also add the email address for the Google group as an alternative.

Step 7: Change their permission settings using the drop-down menu. And you are done.

For the tech geeks, stay updated with the latest cutting-edge gadgets in the market, exclusive tech updates, gadget reviews, and more right on your phone’s screen. Join Giznext’s WhatsApp channel and receive the industry-first tech updates.

Categories
Featured How To TV

Unable To Cast Screen On OnePlus TV? Quick Fix Guide To Resolve Chromecast/Miracast Issue With OnePlus Smart TVs

OnePlus is a popular smartphone brand, but the brand has created a large catalog of consumer electronics for the audience in India and the global markets. OnePlus smart TVs have also gained instant popularity just like OnePlus-labelled smartphones. OnePlus has introduced two smart TV lineups including OnePlus TV U and OnePlus TV Y series with multiple screen sizes and premium features such as Dolby Vision, HDR/HDR10, and Dolby Audio technologies.

All OnePlus TV U and OnePlus TV Y series models are also enabled with wireless connectivity options including Wi-Fi and Bluetooth for easy internet access and pairing audio accessories. All OnePlus smart TV models are also enabled with Chromecast support which allows casting any smartphone screen to the smart TV.

The Chromecast feature available on OnePlus smart TVs offers a fluid experience with screen casting. Also, using Chromecast on OnePlus smart TV and the compatible device is easy you just need a few taps to access this feature. It isn’t quite often that you experience issues with Chromecast or screencast on OnePlus smart TVs. But what should you do if you experience issues with the OnePlus smart TV Chromecast issues? The troubleshooting steps are listed below:

Also Read: OnePlus TV Y1s Pro Vs Xiaomi MI TV 4X: Best 43-inch Smart TV Model Under Rs. 30,000 In India

Steps To Fix OnePlus TV Chromecast/ Screen Cast Connection Failed Issue

Step 1: If the screencast issue appears while using any app, turn off the app and restart after a while.

Step 2: Clear the app data (of the app being used for screencast).

Step 3: Open Google Play Store on your smart TV and see if there is any new update available for the “Chromecast build in” app. The app should be updated to the latest version to ensure there’s no screencast issue.

Step 4: Reboot the cast device and also the OnePlus smart TV. These quick troubleshooting steps needs to be performed step-wise to fix any temporary screen cast issue with OnePlus smart TVs.

Also Read: OnePlus TV HDMI Issue: How To Quickly Fix HDMI Picture Quality And Interface Issue With All OnePlus Smart TVs

How To Resolve OnePlus TV Miracast Issues

Step 1: On the OnePlus smart TV exit the miracast app if you are experiencing the issues. Relaunch the miracast interface again. This quick reboot should resolve any temporary casting issues with the miracast app.

Step 2: Reboot the cast device if the issue persists.

Step 3: If the miracast issue doesn’t resolve after performing step 3, try rebooting the OnePlus TV and then relaunch the screen casting interface.

Also Read: OnePlus TV Sound Issue: How To Fix No Audio Issue With OnePlus Smart TV Speakers

Categories
Apps Featured How To

Instagram Tricks: Here’s How You Can Change Instagram Language Settings On Android, iPhones

Instagram is a widely popular social media app for photo sharing and short videos called Reels. The brand has added numerous upgrades to its Android and iOS apps to ensure a premium user experience. The desktop version of Instagram isn’t far behind and offers most of the features that are available with the mobile version of the app.

Instagram also is gaining popularity with budding content creators and entrepreneurs. The photo-sharing app has monetized its platform and is giving an opportunity to the audience to earn monetary benefits and also get a wider customer reach by endorsing their products.

And you don’t have to restrict yourself to using the default English language on the app. In addition to English, Instagram has support from multiple other international languages. If you are from India, you can also set the default language to Hindi. Setting up a default native language on Instagram allows easy usage and a better understanding of the features.

It also gets easier to navigate through the app and uses all features, tools, and services that are offered by Instagram when you change the native language settings.  But what all steps do you need to perform in order to change the default language settings on the Instagram app? We have listed down all the steps for your ease:  

Also Read: Instagram Stylish Name And Bio: How To Write Instagram Profile Name And Bio With Stylish And Cool Fonts

Steps To Change Instagram Default App Language Settings On Android

Step 1: Open the Instagram app on your Android phone and tap on the profile option. You can locate this profile icon at the bottom right of the app homepage.

Step 2: Click on the More option (three horizontal lines) located on the top right.

Step 3: Tap on Settings (gear icon).

Step 4: Click on Account.Step 5: Scroll down to the Language option.

Step 6: Select the appropriate language that you wish to set as default.

Also Read: Need A Cool Instagram Boy Name? Top 100 Instagram Boys Name With Alphabets A To L

Steps To Change Instagram Default Language On iPhones

Step 1: Launch the Instagram app on your iPhone and tap on your profile icon.

Step 2: Click on the More option and select the Settings menu.

Step 3: Tap on the Account option.

Step 4: Select the language option and set the required one as default.

Also Read: Instagram Business Profile: How To Setup Professional Instagram Business Account

Categories
Apps Featured How To

Digi Yatra In India: How To Register And Use The Service At Airports

Key Highlights

  • The Government of India has launched the Digi Yatra service in India
  • The service aims to make airport travel contactless and paperless
  • It is currently available at airports in New Delhi, Bengaluru, and Varanasi

The government has introduced a brand-new service called DigiYatra in India. This service aims to streamline airport entry and embarkation procedures for passengers. Travelers will be allowed to switch airport terminals without a ticket or boarding permit thanks to it. Both Android and iOS users can use the new digital service.

Face recognition technology is the foundation of DigiYatra which is available at the airport. The technology provides contactless and seamless passenger handling at airports. The national capital, Bangalore, and Varanasi are the present locations where DigiYatra services are offered.

How To Enroll For Digi Yatra Service in India

Here is how to sign up for the Digi Yatra service if you’re traveling from New Delhi, Bengaluru, or Varanasi:

Step 1: On your iPhone or Android smartphone, download the Digi Yatra app from the Apple App Store or Google Play Store.

Step 2: Tap the button ‘Get Started’ to begin the registration process.

Step 3: Enter your mobile number and click on the ‘Register’ button.

Step 4: After that, you will get the OTP on your mobile phone. Enter the OTP you received.

Also Read | Applied For A New Passport? Here’s How To Check Your Passport Application Status

Step 5: Now, at the bottom of the screen, tap on the ‘Wallet’ option.

Step 6: Click on the ‘Identity Credentials’ options. You need to upload your Aadhaar-verified Identity Credentials.

Step 7: Then, upload your selfie when prompted.

Step 8: Agree to the terms and conditions and hit the ‘Ok’ button.

Also, you can use your DigiLocker account to upload your identity documents. After uploading, a DigiYatra ID will be generated.

How To Use DiGi Yatra At Airports?

Travelers can provide their DigiYatra ID when booking tickets. The airline will send the passenger’s information, including the DigiYatra ID, to the airport. The procedure at the airport is as follows.

Step 1: If a ticket or boarding pass is required at the entry point, you will need to show the same.

Step 2: The boarding pass or e-ticket will be scanned. After scanning the barcode, the system will check your information and flight details.

Step 3: DigiYatra ID will then verify the identity using face recognition.

Step 4: After the ticket and DiGi Yatra ID have been successfully validated, the gate will open.

Step 5: Your Face ID and ticket PNR are combined into a single token that is used for the duration of your stay at the airport as soon as you enter the airport.

Step 6: Using an e-gate with facial recognition technology, you can access the security area and board the craft.

Also Read | Lost PAN Card? Here’s How To Apply For A Duplicate PAN Card Online

Categories
Featured How To Laptop

Unable To Pair Bluetooth Device To Laptop/ PC? How To Resolve Bluetooth Pairing Issue With Windows 11

Windows 11 is a feature-loaded operating platform for laptops and PCs. Microsoft released this latest edition of Windows OS as an upgrade to Windows 10 with multiple new tools and features. This new version is also improved with the security aspects and overall user experience. The connectivity aspects are also enhanced and support for the latest networks has also been added.

Wireless connectivity is also better with Windows 11 machines and pairing Bluetooth devices is now a hassle-free task. All modern smartphones, tablets, and other compatible gadgets can be easily paired with a Windows 11 laptop or PC. While the Bluetooth pairing issue is least experienced with Windows 11 laptops/ PCs, it can occur randomly at any point.

It could be a general issue that can be fixed with basic troubleshooting steps and a visit to the service centers could be avoided. The Bluetooth issue pairing issue could randomly occur when you try connecting devices such as wireless audio devices including headphones and TWS earbuds. But if you are unaware of the troubleshooting steps to fix Bluetooth issues with Windows 11 OS, this article will help you with the steps:

Also Read: Dell PC, Laptop Support: How To Fix Display Issues With Dell Monitors At Home

Steps To Troubleshoot And Fix Bluetooth Pairing Issues With Windows 11 OS Laptop

Step 1: Check if the Bluetooth adapter on your laptop/PC is on. You can either check this via Bluetooth quick settings. Go to the Settings app and select Bluetooth & Devices option. Toggle on the Bluetooth settings if it’s off.

Step 2: Reboot the Bluetooth device that needs to be paired with the laptop or PC. Turn it off and wait for a few seconds before powering it on. This shall resolve general connectivity issues. Also, do check if the device is within range, otherwise, pairing won’t be successful.

Step 3: Turn off Airplane mode on your laptop or PC. This is one of the reasons that affect Bluetooth connectivity on laptops and PCs.

Step 4: Unplug and replug any Bluetooth device that is connected to the laptop/ PC.

Step 5: If this also doesn’t work, try re-pairing the Bluetooth device. First, remove the paired device and then re-initiate the connectivity process.

Step 6: You can also try rebooting the Windows 11 laptop or PC after performing the above steps. This should resolve the pairing issue.

Step 7: Running the Windows diagnostics test will also help you to identify and resolve the issue with Bluetooth. If there is any hardware issue, you will be notified and get it fixed from repair centers.

Also Read: Best Laptops To Buy For Programming In India

Categories
Featured How To Laptop

Snapchat Update: Here’s How To Download And Use Snapchat In Windows Laptop And PC

Key Highlights

  • Snapchat for Windows is now available as a Progressive Web App in the Microsoft Store
  • It doesn’t have all the features but it does have important features like video chat
  • Windows treats Snapchat as a native version app

The picture-sharing and instant messaging app Snapchat has refrained from arriving on Windows but it has officially made its debut on the Microsoft Store as a Progressive Web App.

It’s interesting to notice that the app on the Microsoft Store is based on the recently launched Snapchat web version. It is only 1.4MB in size and has the same features as the web version. The app is powered by Microsoft Edge, a Chromium-based browser.

How To Download Snapchat On Your Windows?

Since it is a progressive web app, the Snapchat app requires Microsoft Edge to be installed on your PC or laptop. Snapchat suggests using Edge’s most recent version.

Step 1: On your Windows laptop or computer, launch the Microsoft store.

Also Read | Dell PC, Laptop Support: How To Fix Display Issues With Dell Monitors At Home

Step 2: Use the top search bar to look for the Snapchat app.

Step 3: Tap on Get.

Step 4: The app will start downloading once you tap on Get. After that, click Open.

Step 5: Now, enter your information to log in. The Snapchat app is now accessible on your computer.

However, Windows treats it as the native app version. So, Snapchat for Windows has an app icon in the Start menu and supports responding to chats with notifications, replies, video filters, and more. The app will open the web address and allow you to use it. Since it isn’t a full-fledged version of the app, it makes more sense to use the web platform directly.

Visit Snapchat.com to go to Snapchat on the web, then sign up to start chatting. You can only accomplish a limited number of things on the online platform or the PC app, like video calling and chatting. The app’s mobile functions, such as filters and maps, are not accessible on a PC.

Also Read | Lost Your Snapchat Streak? Here’s How To Restore It With These Steps

Categories
Gaming How To

Stylish Free Fire Names: Easy Steps To Create A Stylish Name In Free Fire Game

Key Highlights

  • Players must set their name when first creating a Free Fire account
  • Users can also generate a stylish name in the Free Fire game
  • Users have to use certain websites to generate different fonts and symbols

Free Fire is one of the select few Android games with one billion downloads from the Google Play Store. Despite having been released in 2017, the Garena-backed survival shooter game and its MAX variation have a massive user base and remain relevant to date.

However, with such a huge and engaged Free Fire fanbase, it becomes challenging for players to distinguish themselves. Therefore, one of the few steps players can do to protect their identity is to choose a fashionable and distinctive FF moniker. This tutorial covers how to create a cool name in Free Fire. Also Read | Stylish Free Fire Nick Names 2023: 100+ Cool And Unique Free Fire Nicknames For Teams And Groups In 2023

How To Create A Stylish Name In Garena Free Fire?

Since normal mobile keyboards do not have fonts and icons, users have to use specific websites to create fonts and icons. You can use websites like FancyTextGuru, FancyTextTool, and Lingojam. These websites all operate in a similar way. Then, players can use them to create symbols and fonts by following the instructions below:

Step 1: Visit one of the websites that are mentioned above.

Step 2: In the text field, type the necessary IGN. Output is provided in a variety of beautiful fonts and symbols.

Step 3: Select a name, then copy it. If you want to update your nickname in Free Fire, insert it.

Also Read | Best PUBG Names For Players: Here’s How To Rename Your Character Name

Steps To Change Nickname In Free Fire

In order to modify their name in Free Fire, players can follow the instructions below:

Step 1: Launch Free Fire, then select the profile banner in the top-left portion of the screen.

Step 2: The profile will open up. After that, tap on the yellow rename icon.

Step 3: A dialog box will appear asking you to enter a new nickname.

Step 4: Paste the copied nickname and click the button below.

In order to change their name in the Free Fire game, the player must spend 390 diamonds.

Also Read | Garena Free Fire: Here’s The Best Game Settings Tips And Guide