Categories
Apps Featured How To

Paytm Bijlee Day Discounts: How To Get 100 Cashback By Paying Electricity Bills On Paytm

Paytm is the one-stop platform for digital money transactions and online bill payments. Paytm can be downloaded on both Android and iOS smartphones and offers digital wallet services on the go. Paytm is well known for offering cashbacks when payments are made using Paytm wallet and UPI. A new offer has been announced by the brand which will get you some extra discounts on the electricity bills. Called Paytm Bijlee Days, the limited period offer brings along Rs. 2,000 cashback and other deals. Check out the details below:

Paytm Bijlee Days Sale: What Are The Offers?

The Paytm Bijlee Days sale has been announced for the Indian audience which will get extra discounts and cashbacks on electricity bills. However, there’s a catch. The Paytm Days offer will be valid each month between 10th and 15th. A cashback of up to Rs. 200 will be given to the users making an electricity bill payment for the first time using Paytm. The code ELECNEW200 can be applied for the same.

This discount offer is valid for over 70 operators including Tata Power, DHBVN, BSES Rajdhani, Torrent Power, and others. In addition to the Paytm wallets, users will also get the option to pay electricity bills for all the operators using UPI, credit, and debit cards, net banking, and also Paytm postpaid.

In addition to the first-time payment discount, Paytm will also be offering a 100 percent cashback of up to Rs. 2,000. This will be given to at least 50 users every day to the users making electricity bill payments.

Also Read: UPI Money Transaction Limit In India: Here’s The Limit Of Transactions You Can Do Via GPay, PhonePe, Paytm Daily

How To Pay Electricity Bill Easily Using Paytm App Using Android, iOS

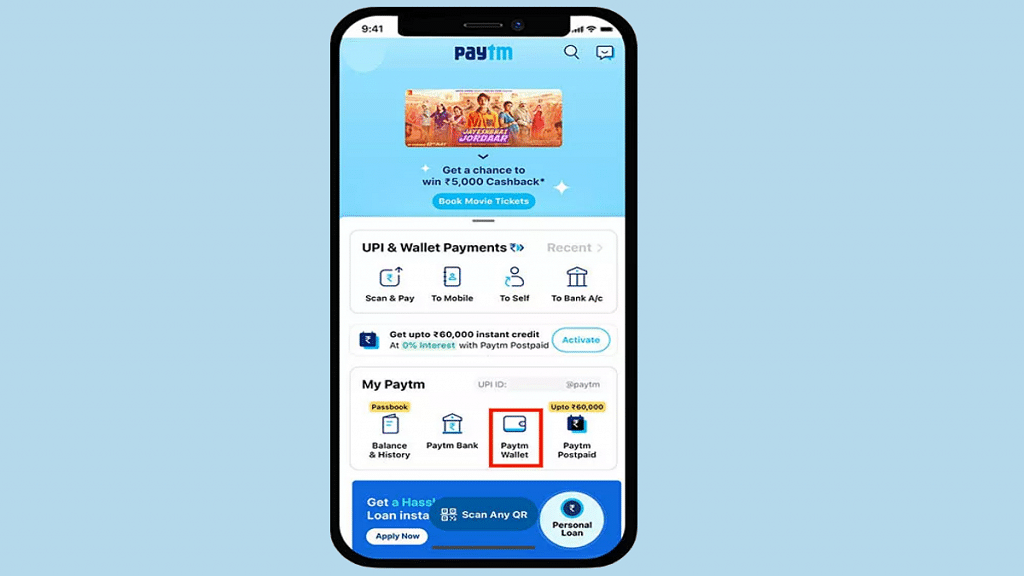
Step 1: Launch the Paytm app on your smartphones (Android or iOS)

Step 2: On the app’s home page, scroll down to the ‘Recharges and Bill Payments’ option.

Step 3: Tap on the Electricity Bill option.

Step 4: Fill in the fields including the Customer Identification number and account number.

Step 5: Select Proceed.

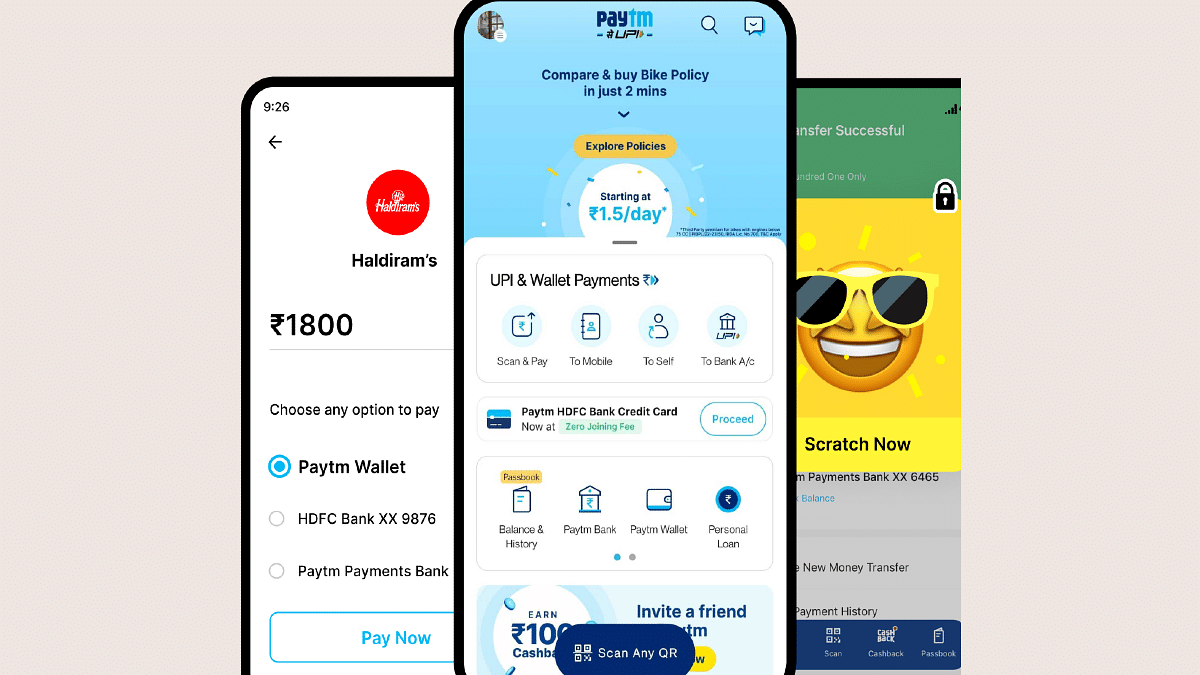
Step 6: Now, select the mode of payment with which you need to pay the bills.

Step 7: You can use the ELECNEW200 code to get first time discount.

Step 8: Click on Pay.

Also Read: Paytm Live Train Running Status Feature Released; How To Check Train Status Using Paytm App

Categories
Apps Featured How To

WhatsApp Call Recording: Here’s How You Can Easily Record Call On Android And iOS

Key Highlights

  • WhatsApp does not have the option to record voice calls
  • Users can only record audio calls using third-party apps
  • You can record voice calls on both Android and iOS

There are several features available on WhatsApp. Voice calling is one of them. However, there is no legitimate way to record calls on WhatsApp. Due to its privacy policy, the company doesn’t offer an official method of call recording on WhatsApp. On the Meta-owned platform, though, there is a way to record calls. You need to use a third-party app to record WhatsApp calls. Here’s how to record WhatsApp calls on Android and iOS.

How To Record WhatsApp Video Calls On Android

You can record WhatsApp video calls using any of the numerous apps that are available in the Google Play Store. The AZ Screen Recorder is one such app. You can use the app to record WhatsApp video calls with audio. Here’s how you can record it:

Step 1: Go to the Google Play Store and search for the AZ Screen Recorder app. Install the app on your smartphone.

Also Read | WhatsApp Self Message Feature Goes Official: How To Self-Chat On WhatsApp Using Android, iOS Devices

Step 2: When you launch the app, a pop-up widget will appear on your notification panel. It’s important to remember that in order to record calls, you must first enable “Enable voice recording”.

Step 3: Open WhatsApp and dial the number of the person whose call you want to record.

Step 4: Tap the record button in the AZ Screen Recorder widget as soon as the call begins. Simply stop the recording after you’re finished, and your WhatsApp video call will be preserved.

How To Record WhatsApp Voice Calls On iPhone

It can be challenging to record a WhatsApp voice call on an iPhone. There isn’t a specific app that makes it simple to record WhatsApp voice calls. However, there is a workaround that requires a Mac and an iPhone. Here’s how you can do it:

Step 1: Connect your iPhone to your Mac using a Lightning cable. On your iPhone, click the Trust This Computer option.

Step 2: Launch the QuickTime app on your Mac. Select New Audio Recording from the File option.

Step 3: Select the iPhone option, then press the record button in QuickTime.

Step 4: Then make a WhatsApp call from your iPhone to your mobile phone. Once you are connected, click the add user icon.

Step 5: Call the person you want to record the audio with and start speaking. Simply end the call and QuickTime recording after you’re finished. Save the file to your Mac to record WhatsApp voice calls. That’s all.

Also Read | Now Use WhatsApp In Picture-In-Picture Mode: Feature Available For iOS Beta Users

Categories
Featured Gaming How To

Fortnite WinterFest 2022 Rewards: How To Redeem Rewards In Fortnite WinterFest 2022 Chapter

Key Highlights

  • The Fortnite WinterFest 2022 game begins on December 13
  • It allows you to unwrap a new gift every day for the next 14 days
  • Epic Games will provide various new cosmetic items

The rollout of the v23.10 update marked the start of the Fortnite WinterFest 2022 event. The most recent update, which was released on December 13, includes a ton of brand-new game content. Once more, Epic Games will give away a ton of new cosmetic items. They can be accessed by players via Crackshot’s Cabin, another new feature of the update.

Everything you need to know about the Fortnite Winterfest 2022 event is covered in this post. We’ll also give you a quick tutorial on how to get all of the free rewards.

Also Read | Krafton Announces The Callisto Protocol, A New Sci-Fi Survival Horror Game

New Cosmetic Items

Once more, Epic Games will distribute a number of new cosmetic items. Another distinctive aspect of the update is Crackshot’s Cabin where players can obtain these items. Thanks to Epic Games, the video game now has a WinterFest lodge. At this lodge, you can unwrap gifts and take advantage of complimentary cosmetics.

Cosmetic Items: How Many Are Available?

There are 17 available items. You can get two different skins from the available ones. Additionally, these items will be available during the special Christmas-themed event. You only have until January 3 to take advantage of these benefits because this event is ending then.

The Guff Free Version: How To Use?

In addition to these advantages, this event has given Guff a free upgrade. However, access to this edition is restricted to Epic Games Store subscribers. If you are not playing on a PC, there is a method that you can apply to use this version. You must use a cloud gaming platform like GeForce Now to log into your Fortnite account in order to get the skin.

Also Read | Fortnite Chapter 4 Hacks: How Can You Level Up Super Fast In Fortnite Chapter 4 Season 1

Categories
Apps Featured How To

iOS 16.2 Tips & Tricks: How To Use Apple Music Sing Karaoke Feature

Key Highlights

  • Apple has unveiled a new Sing feature for Apple Music
  • Users can play songs in karaoke mode
  • The Apple Music Sing feature is available in the latest iOS 16.2 update

A karaoke-like feature will be added in a December over-the-air update to Apple Music, the company’s music streaming app. With a feature called Apple Music Sing, you can play a song, see the lyrics as they are being played, and even adjust the voice volume so you can perform. Remember that Spotify introduced a karaoke feature in June of last year. However, it’s more like a game experience where your voice is recorded and your performance is graded. Here is all the information you need regarding Apple Music Sing.

Also Read | Lost Your AirPods’ Charging Case? Here’s How To Charge AirPods Without A Case

Apple Music Sing: Which Devices Support It?

Apple Music Sing feature is exclusive to the subscribers of Apple Music. The feature is available in the Apple Music app on iPhones (iPhone 11 and later), iPads (including last year’s 9th generation models), and the latest Apple TV 4K. Android devices support real-time lyrics, but voice volume cannot be adjusted.

How To Use The Apple Music Sing Feature?

Step 1: Open the Apple Music app on your iPhone after updating to iOS 16.2.

Step 2: Look for music with lyrics available (the lyrics button is on the bottom left).

Step 3: If you haven’t already switched to lyrics mode while reviewing, tap the lyrics button in the bottom left to switch to lyrics mode.

Step 4: The Sing button should now be visible in the bottom right corner of the lyrics. Click on it.

Step 5: Now, lower the slider to the bottom to adjust the vocal volume, and start humming along.

You can use the Apple Music Sing feature just as easily as that. Tens of millions of songs will support the Sing feature, according to Apple. Though the specific songs that enable the functionality have not yet been identified, we think that they all include lyrics and are all accessible on Apple Music. In addition to singing songs by yourself, you can perform a duet.

Also Read | Get Apple Music Free For Four Months Via Shazam: Here’s How To Get The Deal

Categories
Apps How To

Want To Make Your Own Movie? Here’s How You Can Easily Create Movies And Animations Using

Smartphone photography has seen a major boom in the last few years. This trend has been on the rise with the smartphone OEMs bringing in some of the best camera hardware giving even professional cameras stiff competition with imaging capabilities.  But none of the new-generation smartphones enabled with a powerful camera is complete without a gallery app.

While you get different in-house and third-party mobile applications for viewing and editing photos, Google Photos is one of the most commonly found and useful tools for photos and videos. Google Photos not only works as a File manager app for photos and videos but it also doubles up as a powerful editor and sharing tool. With Google Photos you can also create animations and movies. If you wish to know this handy trick with which you can create your own movies and videos then this article will be your guide. Read the steps here:

How Can You Make A Movie Using Google Photos App

Step 1: Open your laptop/ PC and launch any web browser. Type in photos.google.com and hit enter.

Step 2: From the menu option select Utilities.

Step 3: You will see the “Create new” option. Tap on it.

Step 4: Select the New Movie option.

Step 5: Now, add the photos and videos that you wish to use as the movie footage.

Step 6: Click on the Create option from the top right corner.

Step 7: Once the movie is created tap on Save.

Also Read: Can’t Find Images In Phone’s Gallery Your Device? Here’s How To Find Lost Photos And Videos On Google Photos

How To Make A Movie On Google Photos Using A Specific Theme

Step 1: Launch photos.google.com on your laptop or PC.

Step 2: Go to the Utilities tab.

Step 3: Tap on the Movie option after selecting Create new option.

Step 4: Now, select the desired movie theme.

Step 5: Click on Get Started.

Step 6: You can now select any person or a pet from the library.

Step 7: Tap on Done.

Also Read: Want To Hide Unwanted Memories In Google Photos? Here’s The Trick

How To Create Animations Using Google Photos

Step 1: Open Google Photos on your laptop or PC and hover the mouse cursor over any photo.

Step 2: You can add up to 49 more photos while creating an animation.

Step 3: Click on the Create new option (+ symbol).

Step 4: Tap on Animation.

Also Read: Step By Step Process To Download Someone Else’s WhatsApp Status (Videos/Photos) On Your Phone

Categories
Featured Gaming How To

Fortnite Chapter 4 Hacks: How Can You Level Up Super Fast In Fortnite Chapter 4 Season 1

Key Highlights

  • Earning as much XP as possible is the fastest way to level up in Fortnite Chapter 3 Season 4
  • Each level in Fortnite Chapter 4 Season 1 requires 80,000 experience points
  • Users can gain double experience points by performing daily tasks and enjoying the game naturally

When a new season of Fortnite comes, players are completely reset to Level 1 as is the case with all other mobile games. To achieve the highest level of that season which offers them the most rewards, they must battle through several modes and conflicts. You’ve come to the right place if you’re seeking for a quick way to level up to level 100 while collecting all the Battle Pass rewards. Here, you will learn the best tips and tricks to level up fast in Fortnite Chapter 4 Season 1.

Fortnite Chapter 4 Season 1: Ways To Level Up Fast

Daily Challenges

In Fortnite Chapter 4 Season 1, players can earn experience by completing daily tasks. Even while each one only provides 1,000 XP, the bonus goal for accomplishing a predetermined amount is quite rewarding. Each day, players can earn a maximum of 3,000 + 45,000 XP.

Also Read | Cool Names For Gamers: Top 100 Best Boy Gamer Names To Choose From

Weekly Challenges

Players will likely be time-limited in Fortnite Chapter 4 Season 1 as opposed to past seasons when they could finish all weekly challenges at the end of the season. They will have seven days to finish each batch if this is the case. Every week, an average of seven new challenge sets are added. However, given the reduction in XP, there might be more this time. Each one will grant 16,000 XP once completed.

Oathbound Challenges

In Fortnite Chapter 4 Season 1, Oathbound challenges have a strong storyline connection and provide lots of XP. Each task will net players 20,000 XP when it is finished. Though, it will take some effort and numerous games to finish them all. There is a lot to do at each checkpoint due to the fact that they are broken up into stages. All of them can be finished for a total of 100,000 XP.

Milestones

In Fortnite Chapter 4 Season 1, milestones are great long-term challenges. There are presently 10, and a few more might be added later. Milestones function in stages, unlike normal tasks. There are 20 stages for everyone to complete, and each stage rewards 6,000 XP when completed. Players will earn 1,200,000 experience points for completing them all. As for bonus XP, you can get around 1,000,000. This brings 2,200,000 XP in total.

Also Read | Krafton Announces The Callisto Protocol, A New Sci-Fi Survival Horror Game

Categories
Featured How To

New GST Registration India: How To Register GST Online And GET GSTIN Number Quickly

A Goods and Services Tax Identification Number, or GSTIN, is required for every person, firm, or organization that wants to conduct business across India. Although there are a few exceptions, it is generally accepted by the law that you must register for GST. You don’t need hard copies or printouts to register your shop or business on the GST site because the process is paperless. You can enroll via the GST portal’s enrollment feature, which the government provides.

But getting a GSTIN is not a simple procedure. To apply for a GST number, you must adhere to a number of requirements. And we understand that for many people looking to establish a business, the entire procedure can be a little confusing and daunting. To help you, we have got a step-by-step guide to the GST registration process.

Also Read | How To Check Metro Card Balance Offline And Online? Learn Here

Steps To Complete GST Registration Process Online

Step 1: Go to the GST portal and tap the ‘Register Now’ link which can be found under the ‘Taxpayers’ tab.

Step 2: Select “New Registration” and enter the following information:

  • Select “Taxpayer” from the “I am” drop-down menu.
  • Select the respective state and district.
  • Enter the name of the business.
  • Enter the PAN of the business.
  • Enter your email ID and mobile phone number in the appropriate fields. The email id and mobile number you enter must be active as the OTP will be sent there.
  • Enter the image that is displayed on the screen and tap on ‘Proceed’.

Step 3: Enter the OTP sent to your email ID and mobile number in the respective boxes on the following page, then click “Proceed.”

Step 4: The Temporary Reference Number (TRN) will be displayed on the screen for you. Write down the TRN (Which helps in further Steps).

Step 5: Now go back to the GST portal and select “Register” from the “Taxpayers” option.

Step 6: Choose “Temporary Reference Number (TRN)”. Enter your TRN number and the captcha information now. Select “Proceed” from the menu.

Step 7: On both your registered mobile number and email address, you will get an OTP. Enter your OTP and press “Proceed.”

Step 8: The next page will provide information on the status of your application. On the right side of your screen, press the Edit icon.

Step 9: After that, there will be 10 sections that must be filled, and has to submit the required documents. The list of documents that must be uploaded are:

  • Photographs
  • Business address proof
  • Bank details such as bank name, account number, bank branch, and IFSC code
  • Authorization form
  • The constitution of the taxpayer

Step 10: Check the declaration on the ‘Verification’ page before submitting the application using one of the techniques listed below:

  • By EVC. The registered mobile number will receive the code
  • In case companies are registering, they must use a digital signature certificate to submit the application (DSC)
  • By e-Sign method. The mobile phone number linked with the Aadhaar card will receive an OTP

A success message will appear on the screen after it is completed. The registered email address and mobile phone number will receive the Application Reference Number (ARN).

Also Read | PhonePe UPI Pin Activation Via Aadhaar: Steps To Enable UPI ID Using Aadhaar Number

Categories
Featured How To Mobile

Google To iOS: How To Transfer Google Contacts Directly To iPhone

Key Highlights

  • Google contacts can be moved from Android to iPhone
  • Google contacts can also be transferred to Mac for Android users as well

Have you decided to switch from Android to iPhone? And now you want to transfer all your data including contacts, texts, and WhatsApp conversations to your new iPhone. Many people are concerned about Android to iPhone migration, especially data loss. These worries are unfounded now, thanks to new features that tech companies have developed that let users transition from one ecosystem to another without losing any data.

In order to assist you to move all of your Google Contacts from your old Android smartphone to your new iPhone, here is a detailed instruction.

Also Read | Apple iPhone eSIM: How To Convert Physical SIM To eSIM, Transfer eSIM/Physical SIM During And After New iPhone Setup?

How To Transfer Google Contacts To iPhone

Step 1: Open the Settings app on your iPhone.

Step 2: Now click on the Contacts option.

Step 3: Next, select Add Account option. Tap the Accounts option if you’ve already synchronized a Google Account to your device.

Step 4: Tap the Add Account option, then tap Google.

Step 5: To sign in to your Google account, follow the instructions.

Step 6: Select the Google apps you want to sync to your device.

Step 7: Tap Save.

How To Transfer Google Contacts To A Mac computer

Alternatively, you can sync all your Google Contacts on your Mac or MacBook laptop. Here’s what you need to do:

Step 1: Go to System Preferences on your Mac computer or MacBook laptop.

Step 2: Tao on the Internet Accounts.

Step 3: Next, click the Google option.

Step 4: Enter your email address and password, then click Next.

Step 5: Now check the Contacts option.

Step 6: Click Done. That’s all.

Also Read | WhatsApp Chat History Can Now Move From Android To iPhone: Learn How

Categories
Featured How To Printers

Here’s How To Print Documents And Images From Google Chrome Web Browser

Digitization is at its peak across the globe with multiple services going online for easy access for the general public. While our reliance on the internet and web services is gradually increasing each day, tech gadgets are also getting modernized to help better with this transition. Despite the availability of online documentation services, the need for printing documents is still a necessity. Modern-day printers have become all capable with the use of advanced technologies. Wireless printers and all-in-one printers are a few of the latest printing solutions available for the masses globally.

PC and mobile operating systems have also been optimized with advanced technologies to aid the high-tech printers of the current generation. Users now get the option to give remote print commands and also print on different paper types quickly. Printing documents directly from websites is also now a possibility. You can print not just text documents but also images using web browsers online.

Since Google Chrome is one of the most commonly used web browsers it is always better that you are aware of the steps to print using this browser. It isn’t super tricky to give prints using Google Chrome. You can easily give print commands directly from Chrome on any laptop/ PC.

Also Read; Best Monochrome Laser Printers To Buy In India

How To Print Using Google Chrome From A Standard Printer

Step 1: On your PC/laptop, open the Google Chrome web browser.

Step 2: Launch the website from where you wish to print a specific page or image. You can also open the image or file directly on the browser to print.

Step 3: You can use print shortcuts to print directly. Ctrl+ p command will work for both Windows and Linux PC and laptops. For Mac devices, you will need to press the command key (Apple key)+ p.

Step 4: You can also tap on the File option and then select Print.

Step 5: You can change the print settings if required.

Step 6: Click Print.

Printing documents directly from Google Chrome saves you from the hassle of saving a document or changing its format to print. This is one handy feature that takes care of urgent printing requirements.

Also Read: How To Add A Default Wireless Printer In Mac Devices

Categories
Apps Featured How To

Fed Up Of Cluttered Gmail Folders? Here’s How To Create New Category Tabs For Emails On Gmail

Key Highlights

  • Gmail offers an option to categorize emails into specific tags
  • Users can select from multiple available categories
  • Moving older emails on Gmails to the newly selected category tabs is also an option

Gmail is widely used by personal and professional users for mailing services. Google’s in-house email app is available for smartphone as well as PC/laptop users.  Sending an email is a hassle-free task and the availability of numerous features allows an enhanced emailing experience. Google has also ensured a private and secure ecosystem with Gmail emails.

Gmail also makes it easy for its user base to neatly organize their inbox and other folders for space management. Adding categories to emails is also handy to access important emails quickly. Users can easily create multiple categories or tabs for easy segregation of emails on Gmail. Google has also added the option with which older emails on Gmail can be moved to the newly created category tab. The steps to add or remove categories in Gmail are listed below:

Also Read: Annoyed With Unwanted Emails On Gmail? Here’s How To Block Individual Email Address Or Bulk Mails On Gmail

Steps To Add Or Remove New Category Tabs On Gmail

Step 1: Open the Gmail app or website on your smartphones or laptops/ PCs respectively.

Step 2: Tap on the Settings menu (gear icon) that is placed on the top-right corner of the app’s homepage.

Step 3: Scroll to the Inbox option and click on it.

Step 4: Select the Inbox type option.

Step 5: Hit the Default tab.

Step 6: You need to select another inbox type if you wish to hide all tabs.

Step 7: You will now see the Categories menu.

Step 8: Select from the list of available categories. It’s worth mentioning that you can only select from the pre-set categories. This is because there isn’t any provision to create new category tabs on Gmail just yet.

Step 9: Tap on Save Changes. Note, enabling notifications for emails will be shown in the Primary category only.

Also Read: How Can You Make Or Join Video Calls Using Gmail On Laptop And PC

Steps To Move Or Send Emails To A New Category Tab On Gmail

Step 1: Once you have selected the category, you can easily move existing emails to the designated tab.

Step 2: Go to the mail that you wish to add to the newly created category tab.

Step 3: Drag the email to the selected category tab. This will move the email to the newly created category tab.

Step 4: If you wish to move all future emails from a specific sender to a category, you can enable the pop-up notification from the bottom left corner of the mail.

Also Read: How To Use Gmail Confidential Mode? How To Unsend/ Retrieve Emails On Gmail?