Categories
Featured Gaming How To

Pokemon Unite: Here’s How To Download And Play On Your Phone

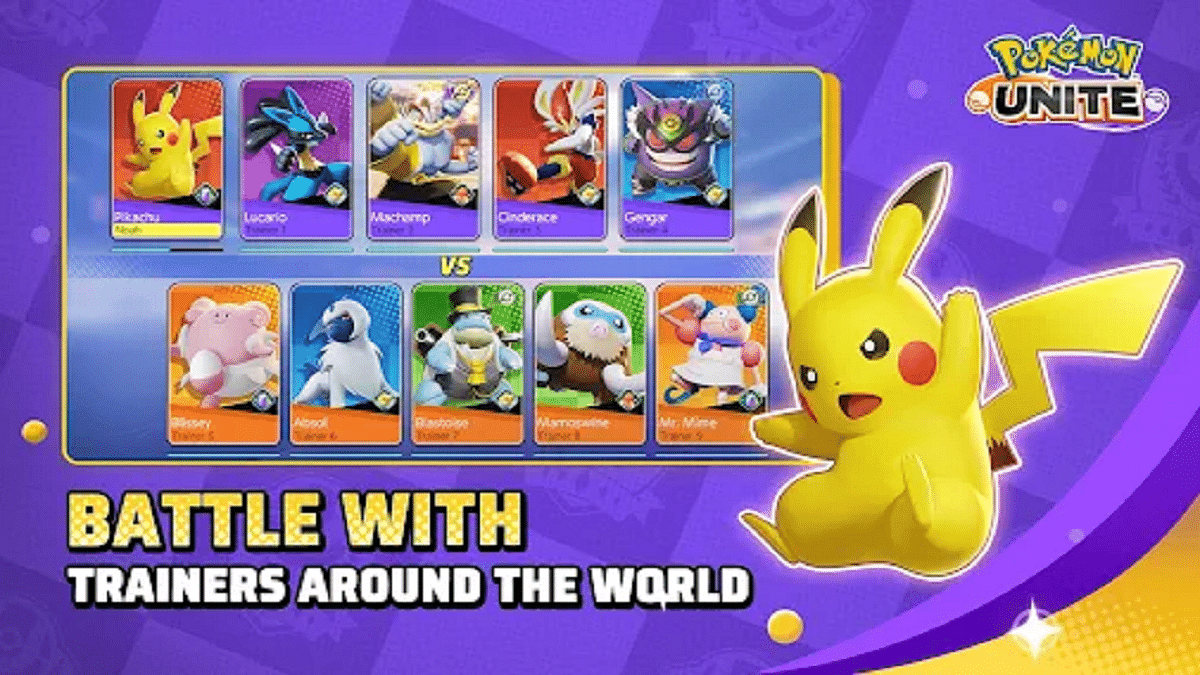
As a multiplayer online battle arena or MOBA, Pokémon Unite’s gameplay is similar to that of other well-known MOBAs like League of Legends or Arena of Valor. Ten (or five) minute matches pit teams of up to five players against one another for map domination. You will work together with four other players to prevail in Standard combat.

One of the offerings from The Pokemon Company and TiMi Studios is Pokemon Unite. It was previously restricted to the Nintendo Switch only. Now, the game is available on both Android and iOS smartphones. Here’s how to download and play Pokemon Unite in order to enjoy the 5v5 MOBA action:

Spec Requirements

There are certain specifications and operating system requirements for this game to work on mobile phones. Pokémon Unite requires iOS 10.0 or later in terms of firmware across all devices like the iPhone, iPad, and iPod touch if you’re an iOS user. For Android users, KitKat 4.4 or newer is required. The app may require some permissions from you in order to function.

How To Download Pokemon Unite?

The game is available officially on both the Google Play Store and the App Store. You simply need to follow these steps:

Step 1: Open PlayStore/App Store on your mobile phone.

Step 2: Search for the Pokemon Unite game.

Step 3: Next to the game, click on the install button.

Step 4: The game will be installed on your device automatically.

How To Play Pokemon Unite?

In Pokemon Unite, players engage in 5-on-5 team bouts called Unite Battles where trainers attempt to outscore their opponents. You must battle rival Pokémon and wild Pokémon on the field to collect Aeos energy. This will help your team score points. After that, direct that energy toward a goal zone belonging to the opposition.

There are different stadiums where Unite Battles take place and each stadium has its own set of rules. All Pokémon on the field begin at Level 1, advance by gaining Experience Points by defeating adversaries in combat and have the option to momentarily evolve. As you level up your Pokémon, you’ll also get access to different moves, including a Unite Move, a powerful attack that can only be used in Unite Battles.

Categories
Featured How To Info Laptop

Google Meet Hacks: How To Change/ Update Google Meet Name Using A Laptop Or PC?

The need for online video conferencing tools and applications skyrocketed in the last few years. Specifically with the pandemic situation due to the COVID-19 outbreak which restricted outdoor meetings and gatherings. Most industries and organizations routed to the remote working module. Tools and applications such as Google Meet, Microsoft Teams, and Zoom are some of those applications that have been helping the team members globally with online video conferencing.

Google Meet is currently amongst the most commonly used applications for video conferencing. It is loaded with user-friendly features that improve the user experience with group video calls. This application has wide compatibility with mobile devices as well as laptops/ PCs. A dedicated app has been made available by Google for Android and iOS users.

Desktop users also need to manually download Google Meet on their respective devices for online conferences. And to use its services, you would initially need to create a profile. The display name is one important factor that helps members in a meeting to know who all are attending the online conference.

We earlier helped you with the steps to download and use the Google Meet application on your laptops and PCs. In this article, we will be guiding you with the procedure to change the name on Google Meet using the desktop version on any laptop or PC. Read on the steps below:

What Is The Procedure To Change Google Meet Name On Laptop/ PC?

It might be a bit tricky procedure to update or change your name on the Google Meet application using a Laptop or PC. This is due to the fact this application comes void of any dedicated tab or settings that let you change the display name on the Google Meet application. You can perform the following workaround to get it done.

Step 1: Open any web browser on your respective laptop or PC.

Step 2: In the address bar, type www.myaccount.google.com. You can also directly open the Google Account settings from the browser.

Step 3: Locate the Personal Info tab placed on the upper left corner of the account settings page.

Step 4: Go to the Basic Info section.

Step 5: Tap on the “Name” option.

Step 6: Enter your first and last name.

Step 7: Click on Save to confirm the changes.

Once the changes are saved the updated name will be displayed across all your Google services including Google Meet.  

Categories
Gaming How To Info

Garena Free Fire Redeem Codes For 17 July 2022: Steps To Redeem

Garena Free Fire is one of the most exciting battle royale games to play. It has gained a lot of popularity in India particularly in the absence of PUBG Mobile. Today, it is one of the most popular games in the world and has a high rating on the Google Play Store. In the game, players can create their own strategies such as landing positions, acquiring weapons and supplies, and engaging in combat with the enemy.

How To Redeem Garena Free Fire Codes For July 17, 2022

Garena Free Fire has exclusive rewards and in-game items that players look forward to every day. One of the most demanding items in the game has always been Free Fire Redeem codes. Here’s how to redeem the codes:

Step 1: Go to the official website of Free Fire redeem code redemption.

Step 2: Log in to your account using Twitter, Facebook, Google, and Apple IDs.

Step 3: Copy and paste any of the above-listed redeem codes into the text box.

Step 4: Press the confirm button to continue.

You can check the embedded game mail section for the rewards. It might take around 24 hours for the rewards to show up in the game mail section of the players.

Here Are The Garena Free Fire Max Redeem Codes For Today, July 17, 2022

Garena Free Fire Redeem codes help to unlock resources that are otherwise too hard to get in the game. Also, they get a chance to win exclusive free rewards like vouchers and many more. For the players, new redeem codes for July 17, 2022, have been released.

  • A46N-U6UF-Q2JP
  • RHUV-SWWV-N9G4
  • FBJ9-MTXB-9XAP
  • 5R8S-AGS5-MCK5
  • 6LU6-9JJZ-J7S8
  • L8LN-F5WK-2YPN
  • 2K5A-WHD3-FKWB
  • 4UBY-XPTW-ERES
  • FXDS-TSWY-QTJ9
  • BKSK-ECCM-JZEB
  • TPNA-MS84-ZE8E
  • AMCT-7DU2-K2U2
  • FAG4-LHKD-92GZ
  • HDQK-XDFJ-7D4H
  • W73D-61AW-NGL2
  • UK2P-Z3NF-GV5U
  • NLCB-6S92-K2DE
  • XKVJ-M65A-NPUQy
  • LQ6Q-2A95-G29F
  • QA97-CXS2-J0F0

It should also be noted that the Free Fire Redeem Codes have a claim limit. If the redeem code fails, maybe they have been already claimed by too many other people. However, there is always another day for fresh new codes. Check back here every day for Garena Free Fire’s new redeemable codes.

Categories
Featured How To Mobile

Apple iOS 16 Tips And Tricks: How To Turn On Keyboard Haptics In iPhone

The public beta of iOS 16, Apple’s most recent iPhone software update, is now accessible. Therefore, if you have an iPhone 8 or later, you can test the beta version of iOS 16 and begin using features months before the official release in the fall.

With the most recent iOS version, users can use the native keyboard with haptic feedback. In this post, we’ll help you learn what a haptic keyboard is and how to use it on an iPhone. Let’s check it out:

What Is A Haptic On iPhone?

You might hear a clicking sound as you press each key when you type on your iPhone keyboard. It is known as haptic feedback. The touch-based responses your device provides when you interact with the screen are known as haptics. For instance, when you tap and hold a picture to access it, you might feel your iPhone vibrate.

Many individuals enjoy the vibrational effect they receive when pressing keys on their device’s keyboard. But Android users are the only ones who can experience this. The iPhone does not currently have a built-in function that would enable it.

Steps To Enable Keyboard Haptics On iOS 16

Apple is finally giving the iPhone a built-in keyboard haptics feature, following the lead of Android. You can experience vibrations while you type thanks to haptics. The good news is that you can now access haptics without installing third-party software. The purpose of keyboard haptics is to provide users with a tangible confirmation while they type. As the user types, these vibrations serve as “confirmations.”

On your iPhone, the keyboard haptics is still disabled when you download iOS 16. Here’s how to activate the iPhone’s keyboard haptics.

Step 1: Go to the Settings app on your Apple iPhone.

Step 2: Click on the ‘Sounds & Haptics’.

Step 3: Scroll down and select ‘Keyboard Feedback’.

Step 4: Then next to Haptic, tap the toggle to enable iPhone haptic keyboard.

You can also disable the sound effect for keyboard feedback after turning on the haptic keyboard. As you might anticipate, unlike sound keyboard feedback, haptic keyboard feedback functions when your iPhone is configured to ring or silent.

Categories
Apps Featured How To

Here’s How You Can Restore Accidentally Deleted Google Drive Files On Android, iOS

Google’s Android ecosystem is quite vast and offers users a whole range of services and tools. If you are one of the Android phone users, you must have accessed the different apps available on the Play Store. You not just get apps from third-party developers but also from the search giant itself. Google has a whole host of useful applications that helps the masses with different tasks. One of such applications offered by Google is the free cloud storage service called Google Drive.

The Google Drive application is available for both Android and iOS users. This storage app lets users save documents and other files on the cloud which can be accessed when required. This app not just allows the provision of storing files but also make necessary changes and share it with other users via different modes. You can delete unwanted files to free up some additional space.

While removing unnecessary files definitely helps with storage management, there are scenarios when we accidentally delete important documents on Google Drive. Thankfully, Google doesn’t permanently delete the files once removed from the app. A 30 days grace period is offered to restore deleted documents on Google Drive. How do you restore accidentally deleted files on Google Drive? Read on the steps below:

Steps To Restore Accidentally Deleted Google Drive Files On Android Phones

Step 1: Launch the Google Drive mobile application on your respective Android devices.

Step 2: Click on the menu option (three horizontal bars).

Step 3: Tap on the Trash/ Bin option.

Step 4: Scroll down to the file that you wish to restore and click on the three dots icon next to it.

Step 5: Select the restore tab. The file will be restored on your Google Drive application.

Steps To Recover Deleted Google Drive Files On iOS Devices

Step 1: Unlock your iPhones and launch the Google Drive app.

Step 2: Repeat the same steps as mentioned above for Android OS.

In addition to Android and iOS devices you can also use Google Drive services on laptops and PCs. You can access all the features that you get on the mobile version. Also, you can restore the deleted files on Google Drive using the desktop version.

Categories
Apps Featured How To

How To Make Your Android Smartphone A Document Scanner? Step By Step Guide

Smartphones are becoming powerful with each passing day. What was earlier used for communication is now capable of delivering a powerful gaming experience and photography experience. The new-generation smartphones are capable enough to replace laptops and PCs to some extent. That’s specifically with the usage of professional tools such as MS office and others.

And the market is majorly dominated by Google‘s Android and iOS devices. The former has a larger ratio due to the affordability factor and also the availability of numerous third-party mobile applications. We now have some of the popular PC apps available for download on the Google Play Store. And you get multiple options if you go to download any such app.

Document scanning is one such key task that a modern-day smartphone is capable of performing. And you wouldn’t require a PC or laptop for the same if you own a new-age Android phone. There are a plethora of Android applications that allow document scanning. But how exactly can you turn your Android smartphone into a document scanner? Here in this article, we have listed all the steps:

How To Scan Documents Using Android Smartphone?

In order to turn your Android smartphone into a document scanner, you will need either need to download a third-party application or use the Google Drive app. If you don’t want to use the dedicated Google app then Adobe Scan and Microsoft Office Lens are the two other popular options. We have listed the steps to use the Google Drive document scanner since this is a pre-installed app on most Android phones.

Step 1: Unlock your Android phone and launch the Google Drive application.

Step 2: On the bottom right corner, you will see the “Add” option. Click on it.

Step 3: Select the “Scan” button.

Step 4: Capture the photo of the document of which you need a scanned copy.

Step 5: Now make the required adjustments to the scanned document.

Step 6: Click on Done.

The process of scanning a document using the remaining two apps, i.e., Microsoft Office Lens and Adobe scan is almost similar. You would need to capture the image of the document and make a scanned copy.

Categories
Apps Featured How To

How To Activate Call Forwarding On Android, iOS Smartphones?

Smartphones today are one of the most commonly used commodities of the modern world. With numerous brands competing in the smartphone industry, users are flooded with options to choose from. We now can do much more than simple voice calls and messages with the new mobile phone age. Despite smartphones offering a plethora of services and tools, the primary function till date remains audio calling. Different telecom operators in India offer calling and messaging services.

The advancements in the tech field now allow users to divert calls on different mobile numbers. This is a useful option that comes to the rescue when you wish to avoid some calls or are traveling and might be unreachable due to bad networks or no battery.

Most Android OEMs are now pre-loading the call forwarding feature on their devices that you can use at your convenience. Similarly, Apple iPhones also offer the call forwarding option for you to divert calls on a different mobile number. But how do you start and stop call forwarding on your respective Android and iOS devices? Read on to know:

How To Start Call Forwarding On Android Smartphones?

Step 1: Unlock your respective Android phones and launch the Phone dialer application.

Step 2: Launch the phone application.

Step 3: From the top right corner click on the three dots option.

Step 4: Select the “Settings” option.

Step 5: Now, click on “Call Settings”.

Step 6: Select the “Call Forwarding” option,

Step 7: Set the option as required. You can either set Always Forward, Forward when busy, Forward when unanswered, and Forward when unreached.  

Step 8: You will now get an option to enter the mobile number on which you need to divert the calls.

Step 9: Click on Ok to save the settings.

How To Activate Call Forwarding On Apple iPhones?

Step 1: Open the settings menu on your iPhone.

Step 2: Select the Phone option.

Step 3: Tap on Call forwarding. While performing these steps, you need to make sure you have access to the cellular networks and are within range.

That’s all you need to do to activate call forwarding on your Android and iOS smartphones.

Categories
Featured Gaming How To

How To Download Minecraft On PC And Mobile Phone: Steps Inside

Key Highlights

  • The following article consists the steps to download Minecraft.
  • Visit the Minecraft website and click on the Free Download button to start your download.
  • Once the download is complete, you can launch the game by clicking the “Play” button.

Minecraft offers gamers an immersive gaming experience that enables them to discover limitless worlds. Over ten years after its release, the game still draws a huge player base.

In order to fight the Ender Dragon, players in this game must fend against waves of opponents, construct shelters, and gather food from the environment. To protect themselves from nighttime creatures, people first construct structures. But as the game goes on, players worked together to make beautiful, inventive things.

Minecraft is accessible on a number of devices including consoles, mobile phones, laptops, and PCs. Here is a simple step-by-step tutorial on how to download the free Minecraft game on a computer and mobile phone:

Also Read: Want To Make A Book In Minecraft? Here’s How

How To Download Minecraft On PC

There are two distinct Minecraft game iterations: Minecraft Java Edition and Minecraft for Windows 10 aka Bedrock edition. The latter is a bit more popular and supports cross-platform play that includes Windows, macOS, and Linux. The Minecraft Bedrock edition can be played on Windows 10 PC or laptops.

Minecraft Java Edition: Steps To Download On PC

Step 1: Visit minecraft.net on your PC.

Step 2: Select ‘Get Minecraft’.

Step 3: Followed by Platform, choose Computer from the available devices list. Windows, macOS, and Linux are all supported by the Minecraft Java Edition.

Step 4: After that, users of Mac and Linux will be able to purchase Minecraft Java Edition. On the other hand, Windows users will be given two games to buy: Minecraft Java Edition and Minecraft: Windows 10 Edition. Select the option that you want and proceed with payment.

Step 5: Once the payment is done, users will easily be able to download and install the game on their PC.

Minecraft Bedrock Edition: Steps To Download On PC

Step 1: Go to your browser on your PC.

Step 2: Search ‘Minecraft Free Trial’.

Step 3: Tap on the Windows icon.

Step 4: On Microsoft Store, it’ll redirect you to the ‘Minecraft for Windows 10’ page.

Step 5: Now, select ‘Free Trial’.

Step 6: Log in with your Microsoft ID, if you haven’t already.

Step 7: To install the game, open the downloaded file.

Also Read: Want To Make A Book In Minecraft? Here’s How

How To Download Minecraft On Mobile Phone

Similar to PC/laptop, Android users can download the free trial version of Minecraft for smartphones. You can still buy the game’s complete version for Android and iPhone smartphones from the Google Play Store and the App Store, respectively.

The complete version of Minecraft gives you access to a variety of game modes including Creative which has infinite resources, Survival where players must fend off monsters by creating weapons and armory, and Multiplayer which allows players to play with up to 10 others online. Listed are the steps to download the game:

Step 1: Go to Google Play Store for Android and App Store for iOS.

Step 2: Search ‘Minecraft’.

Step 3: Tap on the title which is developed by Mojang.

Step 4: From the store, purchase the game.

Step 5: Click on the install button after the payment is successful. And you are all done!

Categories
Featured How To Laptop

Find The Serial Number Of Your Windows Laptop And Mac: Here’s How

Whether you use a Mac or a Windows computer or laptop, every device in your home has a model and serial number. It shows information such as purchases, manufacturing, or configuration details. If you wish to sell, trade-in, or give away your device, you’ll need these numbers. Additionally, you will require that serial number if you ever need to use your warranty to have the manufacturer repair your device. But where exactly are they located?

Your laptop has been given a special string of numbers and letters called a serial number. Every laptop has a unique serial number. So, while you might never need to know it, it’s still a good idea to know how to find the serial number of your Windows laptop or Mac. Here’s how.

How To Find Your Window Laptop’s Serial Number Via Settings

Checking the Settings page is the best approach to finding the serial number of your Windows computer or laptop. All you have to do is:

Step 1: Open Settings. (You can use Start to search or launch the app.)

Step 2: Tap ‘System’.

Step 3: Now select ‘Above’.

Step 4: You can see the serial number under Windows specifications.

How To Find Your Window Laptop’s Serial Number via Command Prompt

With this technique, we’ll use cmd to run a command that will reveal your Windows PC’s serial number.

Step 1: Open cmd prompt. (To open it, either search for it or use the Windows key + R)

Step 2: Enter the command “wmic bios get serialnumber” at the command prompt.

Step 3: The serial number is now shown underneath the command.

This is to be noted that you will be required to have a working Windows PC with you in order to run the commands.

How To Find Your Mac’s Serial Number

Serial numbers are printed or engraved on your iMac, MacBook, or Mac Mini’s underside. Without having to open or log into your device, this method is the quickest way to check your serial number. The FCC numbers and assembly information are located close to the regulatory markings which also include your Mac’s serial number. Other than this, you can follow the listed steps to check the serial number:

Step 1: Click the Apple logo at the top left corner of the screen.

Step 2: Then click ‘About This Mac’ to quickly open your Mac overview.

Step 3: Your Mac serial number will appear on the last line below Graphics. That’s all.

Categories
Apps Featured How To

Change Snapchat Username On Android And iPhone: Here’s How

You make a Snapchat account, pick a goofy username, gain followers, and all of a sudden you realize you no longer like your username. That brings you here – to try and modify your Snapchat username.

You choose your username when you first sign up for a Snapchat account. A username is a distinctive identifier that Snapchat uses to identify users. Your display name, which is how you appear on the app, is different from your username. Your display name can be changed whenever you desire. But you can change your username only once a year. We’ll go over how to modify or change your Snapchat username in this post.

Steps To Change Snapchat Username on Android, iOS

Users of Snapchat could previously only modify their display names. For those who are unaware, Snapchat now allows us to change our username. This feature is available for both Android and Apple mobile phone users. As we have mentioned earlier, this can be done only once a year. The steps to change your username on Android or iPhone are the same. Here’s what you should do.

Step 1: On your mobile phone, open your Snapchat app.

Step 2: At the top left corner of the screen, click on Bitmoji to go to your profile.

Step 3: Then, click on the settings icon which is placed at the top right corner.

Step 4: Now, go to the Username section and tap on the change username.

Step 5: Give a new name. Then, to change, click on the ‘next’.

It’s also vital to keep in mind that once you change your username, you cannot change it back. In addition to this, you can modify your Snapchat display name as well as other personal information like your birthday, email address, and mobile number from the settings menu.

When creating a new username, there are certain conditions. For example, there may be restrictions on the number of characters allowed, the character types that can be used, etc. You must adhere to these rules in order to choose a random name. The display name, linked email ID, profile settings, and other critical aspects of your account is unaffected by changing the username.