Categories
Featured How To Mobile Tablet

Sync Your iPhone With iPad Using iCloud: Check Out The Steps Here

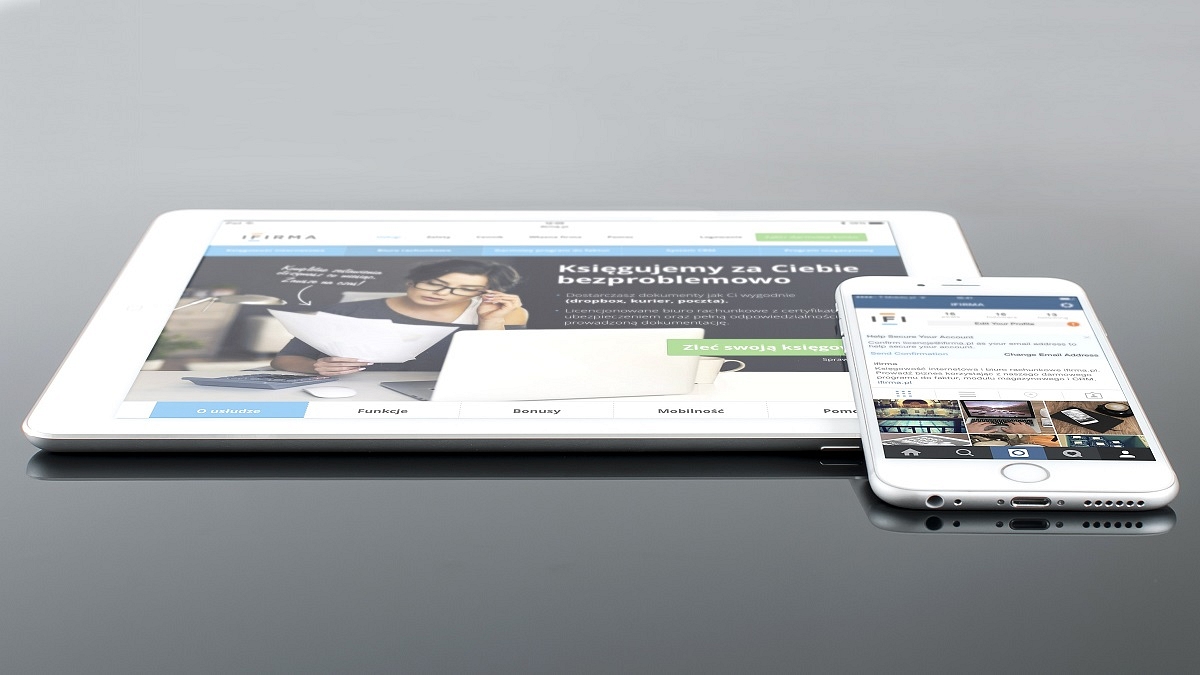
The simplest and fastest method of transferring media between your devices is through syncing your iPhone with your PC. Syncing is the method to have the same contacts, music, and images on your iPhone and computer. However, you might also want to sync your iPad and iPhone so that they both have access to the same files and content.

It will be important for you to know how to sync an Apple iPhone to an iPad if you use iOS. When you wish to transfer data to another iOS device, this will be useful. There are several reasons to move data, from protecting data to conserving iPhone memory. In this article, we will help you explain how you can sync your iPhone with your iPad.

How To Sync Your iPhone With Your iPad Using iCloud

Using iCloud to sync files between your Apple devices is the most straightforward method. You can save data on Apple’s servers including documents, images, and music, thanks to iCloud which was first introduced in 2011.

After that, you can access and download your content on iOS, iPadOS, macOS, and Windows devices. Also, the service allows you to back up mobile devices directly for setup as well as restoring purposes.

To get started with the syncing process, you must be logged into iCloud on both devices. Also, make sure both your devices are on the same WiFi network. Here’s how you sync your Apple iPhone with your iPad in these simple steps:

Step 1: On your iPhone, navigate to Settings > Your Name > iCloud.

Step 2: You’ll see a subheading in the iCloud settings screen that reads ‘Apps Using iCloud’. For every app that has data that you want to sync across your iPhone and iPad, tap the slider until it turns green.

Step 3: Repeat this process to sync as many apps as you like and make sure you do the same for your iPad. Otherwise, they won’t sync.

In the App Store, many iOS applications make use of iCloud in order to store data. This process makes their information easy to synchronize across your devices when you download the same app.

Categories
Apps Featured How To

How To Pay Utility Bills Using Google Pay? Here Are The Steps

Google Pay is one of the most popular UPI apps which is being used to conduct online payments using either a phone number or bank account, a QR code, or both. Today, every business, from a flagship grocery shop to a local fruit vendor, takes online payments. By just following a few easy steps, Google Pay enables you to make utility payments online, making the app more useful for you.

Google Pay lets consumers pay for their bills using the mode of payment they are most comfortable with, i.e., UPI or Debit or Credit Card and Wallet. On Google Pay, customers can also pay electricity bills for various electricity boards. So, if you are a Google Pay user and need to pay your utility bills online, here are the steps you need to follow:

How To Pay Utility Bills Via Google Pay

Step 1: Navigate to Google Pay on your mobile phone.

Step 2: Scroll to the bottom of the screen.

Step 3: Locate and tap on the option ‘+ New payment’.

Step 4: Now, select the ‘Bill Payments’ option.

Step 5: Tap the name of the biller from the search results. Then, make payment.

Step 6: Select an account.

Step 7: One of the following options is available: Pay a custom amount. Enter the desired payment amount and tap Make Payment.

Step 8: Pay an available bill. On the bill, tap Pay Bill.

Step 9: Depending on the biller, you can have the ability to select from several bill alternatives. These payment choices can be made for different time periods. Follow the on-screen steps.

Step 10: Once done, view the bill to confirm that the payment was successful.

The amount will be deducted from the primary account that you have set on the Google Pay app.

How To View Bills On Google Pay

You can also view your bills using Google Pay. Listed are the steps you should follow to see your bills:

Step 1: Open Google Pay on your device.

Step 2: Scroll to the bottom of the screen and click on a biller.

Step 3: You will see the list with details of paid and pending bills if any. That’s all.

Categories
Apps How To

Amazon Prime And Uber Partnership: How To Book UberPremier For The Price Of UberGo

Amazon Prime has joined hands with Uber ahead of the upcoming Prime Day sale on July 23 in India. Under this partnership, Uber, the ride-hailing app will provide exclusive offers or benefits to Amazon Prime users. Notably, the Prime members will get access to UberPremier at the price of UberGo. In addition, Prime users will get discounts on a few rides every month.

Amazon Partnership With Uber: Benefits For Prime members

According to the e-commerce website Amazon, all Prime members will receive exclusive offers with the ride-hailing app Uber. It said that Prime users will be able to upgrade their UberGo ride to UberPremier three times a month. In addition, Prime users will get a discount of 20 percent of up to Rs. 60 on three trips in a month. This discount will be available on rentals, intercity, and Auto. 

However, there is a catch. These offers can be availed via Amazon Pay Wallet and used for booking trips. “Discounts will be automatically applied to rides for Amazon Prime members when they pay with their Amazon Pay balance,” as per the company blog. However, to get discounts on Uber rides you have to follow these steps.

Steps To Discounts On Uber Rides

Step 1: First, you should have an active Amazon Prime account. Now, you have to link your Amazon Pay with your Uber wallet. 

Step 2: You have to pay via Amazon Pay balance and you will receive discounts automatically.

In case you are looking for ways to link Amazon Pay Wallet With Uber, then you have to follow these steps.

Steps To Link Amazon Pay Wallet With Uber

Step 1: First, open the app and click on the account icon. Now, select the Wallet and click on the Add Payment option.

Step 2: Tap on Amazon Pay and sign into your Amazon Prime account. Now, you have to add money via Add funds options. 

Categories
Featured How To Mobile

Got An Infinix Smartphone? Here’s How To Factory Reset It

Your mobile phone may occasionally need to be ‘hard reset’ or ‘factory reset’ for certain features and upgrades to work. One of the most effective ways to resolve the majority of software-related difficulties you might experience on your phone is to hard reset it. Even though it removes all data, it’s not necessarily something you want to do. But it’s priceless and worth every penny.

Perhaps your phone has malware on it, is getting a little clunky and slow, you installed a dud app that interferes with its usability, you encountered problems after installing a system update, or you simply want to start over. Here is a comprehensive article outlining the simplest methods for performing a hard reset on an Infinix phone.

Back Up Your Phone First

Data backup is essential before doing a factory reset on an Infinix phone. If you don’t already know, resetting your device erases all of your data including apps, pictures, contacts, games, and other files, and restores it to its default settings. Everything will be deleted with the exception of the operating system.

There are various ways to back up your Infinix phone locally or in the cloud, in case you haven’t already. Whatever method you select, be sure it is secure and simple to recover from a successful factory reset.

How To Hard Reset Your Infinix Phone From Settings?

The most popular and simple method for factory resetting an Infinix phone is this one. You only need to go to the ‘Settings’ to completely wipe your phone. But this only applies and is suitable only when the mobile phone is still up and running. Like, when you can still access the phone Settings and others. Check out the steps to hard reset your Infinix smartphone via the phone’s Settings app:

Step 1: On your Infinix phone, open the Settings app.

Step 2: Scroll to the bottom and then Select.

Step 3: Simply click on the ‘Reset’ options.

Step 4: Then, tap ‘Erase all data’.

Step 5: Go through what’s on the page, then hit ‘Erase all data’.

Step 6: Now, confirm your pattern/PIN/password.

Step 7: Finally, click on ‘Erase everything’ and sit back until the device reboots successfully. That’s all.

Categories
Featured How To Mobile

How To Screen Record On Your iPhone? Check Out The Steps Here

It’s simple to take a screenshot of a single, still image from the iPhone’s screen. However, there are instances where screen recording is required. Perhaps you want to show your buddies a fantastic trick or a process. If you enjoy playing video games, screen recording can help you show off your prowess by posting videos of your escapades online. Whatever the reasons are, video capturing is essential to completing numerous tasks.

Fortunately, you can save your favorite YouTube videos, make tutorials for your pals, or even record gameplay sequences with the iPhone’s screen recording feature. In this article, we’ll show you how to screen record on your iPhone, along with how to access the video.

How To Enable Screen Recordings On iPhone

You will need to turn on the screen recording feature on your iPhone before you can record your screen. Simply follow the listed steps for the same:

Step 1: On your iPhone, open the ‘Settings’ app.

Step 2: Go to ‘Control Center’ and click on ‘Customized Controls’.

Step 3: Find ‘Screen Recording’ that should be listed in the ‘Include’ section. If it isn’t already there, tap the green + sign next to it to add it to the ‘Include’ section.

In case you want to disable screen recording again, simply return to this screen and click on the red minus sign next to it.

How To Screen Record On iPhone

Once you have turned the feature on, you can screen record on your iPhone by following the below listed simple steps:

Step 1: Open your iPhone’s Control Center by swiping down from the top-right corner of the screen. Alternatively, swipe up from the bottom of the screen if you have an iPhone with a home button.

Step 2: Tap the ‘Record’ button.

Step 3: The ‘Record’ button will turn red and begin to record your actions after a three-second countdown, even if you close the Control Center. The time, which is displayed in the upper left corner, will be red, letting you know that you are still recording.

Step 4: To stop recording, tap the red time indicator at the top left of the screen and then tap “Stop.” You can also open the Control Center and tap the record button again.

Where To Find The Screen Recorded Video?

Step 1: Find the video in the Photos app and then tap ‘Edit’.

Step 2: At the bottom of the screen, tap and drag the arrow at the start of the video to the right. It will become a yellow frame.

Step 3: Size the frame to just include the portion of the video that you want to keep. You can always hit the play button to see whether you like the edit.

Step 4:  Tap ‘Done’ and then ‘Save as New Clip’. That’s all.

Categories
Apps How To

Twitter Users Can Now ‘Unmention’ Themselves From Threads: Here’s How To Use

Key Highlight

  • Twitter rolls out ‘unmention’ feature
  • It is meant to prevent unwanted replies
  • Users can now remove themselves from a conversation

Twitter is widely rolling out its ‘unmentioning’ feature to all its users. With the help of this new feature, you can leave a conversation that you don’t want to be a part of. The feature has been in development for more than a year.

Last summer, Twitter first hinted at the notion, saying it was designed to stop the kind of “unwanted attention” that frequently results in harassment. In April of this year, the social media app started testing this feature. However, it was only limited to a small group of users on the web only.

Now, with this update, anyone can remove themselves from a thread regardless of whether they are using Twitter’s apps or website. The official launch of the feature comes as the micro-blogging site has been building out anti-abuse features into its platform.

Twitter describes ‘unmention’ as the option to remove an undesired conversation on the platform. When used, it unlinks the handle of the users from the Twitter thread. This prevents other users from replying to them from the same thread or tagging them in subsequent tweets. Though it won’t stop people from joining the chat at least it will hide the person’s replies and notifications.

Here’s How To ‘Unmention’ Yourself From A Twitter Thread

If you wish to use this feature, here we will help you learn how to ‘unmention’ yourself from a Twitter thread. You simply have to follow the listed steps:

Step 1: Open Twitter on your device.

Step 2: Go to the Twitter thread that you don’t wish to be a part of.

Step 3: In the thread, open the tweet that you are mentioned in.

Step 4: Click on the option ‘Leave This Conversation’.

Step 5: Now, by selecting the ‘Leave option’ once more, you can confirm your choice.

It’s important to note that Twitter will remove your username from the original tweet and all replies once you leave a conversation. Additionally, it will stop others from bringing up your Twitter handle again in the same discourse. You won’t receive any notifications at all about the Twitter thread, either.

Categories
Featured How To Mobile

Google Text-To-Speech: How To Enable And Use It On Your Android Phone

Android devices come with numerous useful features. One of the most useful ones is Google text-to-speech. Many of us use this well-known productivity hack to write sentences more swiftly and easily. This screen reader app was made specifically for the Android operating system by Google.

Once you enable this feature, it can be used by different apps such as Google Play Books, Google Translate, and many other apps available in the Play Store. So, if you haven’t already enabled it, do so right away.

This article shows how to enable and use Android’s Google text-to-speech feature so that texts are read aloud to you. It contains details about managing the language as well as the voice used for reading text aloud.

How To Enable Google Text-To-Speech

You should first enable Google text-to-speech before using it. It is already enabled on many Android smartphones. Follow the below-mentioned steps to enable this feature:

Step 1: Open ‘Settings’ on your Android phone.

Step 2: Click ‘General’.

Step 3: Go to ‘Language & Input’.

Step 4: At the bottom of the screen, tap on the ‘Text-to-speech’ output.

Step 5: Then, you will see ‘Preferred Engine’ at the top of the screen.

Step 6: Select the ‘Google text to speech’ engine as the preferred one.

How To Use Google Text-To-Speech On Android

Step 1: Swipe down from the top of the phone, then click the gear icon to open the device’s ‘Settings’.

Step 2: In the Settings menu, click ‘Accessibility’.

Step 3: Now, tap ‘Select to Speak’.

Step 4: Tap the Select to Speak toggle switch to turn it on.

Step 5: To enable this function on your mobile phone, tap OK to confirm the permissions that are required.

Step 6: Tap the ‘Select to Speak’ icon in the bottom-right corner of any app that is open on your phone. It’s either a speech bubble or a person-shaped icon, depending on the version of Android.

Step 7: Tap the Play icon. The phone reads whatever you see from the top of the screen down. Simply highlight the text you wish to read aloud, then hit the ‘Select to Speak’ icon.

Step 8: Tap Stop to end playback. And you are all done.

Categories
Apps How To

Here’s How To Get YouTube Premium Access At Rs. 10 For Three Months: See All Steps

Following the footsteps of Amazon Prime Music, Spotify, and more, YouTube has also launched its paid services. YouTube Premium offers ad-free services to users and its plan starts from Rs. 129 per month in India. However, due to the referral offer, the plan will cost you Rs. 10 for three months.

This is quite surprising and you should not miss this great deal, but in case you are not aware of the exact, then you should go through this article.

Steps To Buy YouTube Premium Access At Rs. 10 For 3 Months

It is worth noting that the access can be purchased at Rs. 10 for three months; however, after the billing users have to pay Rs. 129 per month. See All Steps Here.

Step 1: First, you need to go to this link and see or check the exact availability of the offer. In case, you are eligible for the offer, you will get a text as an invitation from a friend.

Step 2: If you are not eligible for the offer, then you need to create a new Gmail account and tap on the link again. Write your billing address in the country.

Step 3: You have to check Paytm and start looking for Google Play Recharge Code. Now, you have to buy Rs. 10 recharge coupon and you will get a code in your mail.

Step 4: After that, you have to check https://play.google.com/redeem and you should be logged in to the same account in which you want to access the Premium plan.

Step 5: Now, you need to enter the gift card you get into your Paytm account and click on the redeem option. Now, you have to give your confirmation if you want or wish to add Rs. 10 to the account and if yes, then click on Confirm.

Step 6: Again, check the YouTube Premium link and purchase the pack, selecting the balance. That’s it, you are done and you are allowed to use the pack.

Categories
How To Mobile

Here’s How To Stop Call Recording Warning On Android Phones

Key Highlights

  • Both Android and iPhone users have access to the call recording warning.
  • Automatic third party call recording apps have been restricted on App stores
  • Call recording warning can be disabled manually on Android phones

If you are looking for ways to disable or off pre-announcement of the call being recorded announcement, then you might be surprised to know that few methods allow you to do that. For the unaware, the moment you press the record button, the Google dialer informs the other about the recording.

This means recording secretly has become difficult as other people get to know quickly. But, by adopting these three methods you can record calls on your Android phones without any warning or pre-announcement.

Also Read: How To Turn Off Call Recording Announcement In Vivo Smartphone

Method 1- Use Dialer App

It is worth noting that smartphone brands from Samsung, Asus, and Chinese smartphones come with inbuilt call recording features. However, Realme allows you to use or record calls to the company’s application without sending any alert to the other person.

In addition, another Chinese smartphone brand OnePlus also allows you to disable call recording warnings by installing ported OnePlus Dialer in smartphones like OnePlus 8T, OnePlus 9, 9R, 9 Pro, and Nord. On the other hand, smartphones like Samsung, IQOO, and Vivo allow you to use a preloaded Dialer without any recording warning.

Also Read: How To Record Calls On An iPhone? Here Are The Steps

Method 2-Record Via TrueCaller

Call Recording

Apart from using a preloaded dialer, you can use the Truecaller Caller ID application to record calls as it has an in- built-in option to do the same. However, you should know the methods before using them.

Step 1: Install Truecaller first, then tap on the call recordings that you found in the hamburger menu on the left side.

Step 2: You will receive a pop-up message saying set up Truecaller as your default dialer, which is optional. After that, click on the continue button and accept all terms and conditions.

Step 3: Click on the continue button and allow recording audio through the microphone. After that, click on the phone setting, accessibility, and True Caller settings. Now, turn it on, and call recording has been enabled. You Just need to tap on the record button to start the recording and to stop the recording you need to press that button again.

Also Read: Want Lag Free Calling Experience? Here’s How To Make Calls Using Wi-Fi Networks From Any Mobile

Method 3-Disable Call Recording Announcement

Step 1: Install the TTSLexx application from the Play Store. Now, open the settings on your smartphone.

Step 2: Click on the system, additional settings, and languages & Input option.

Step 3: Click on the preferred engine and click on the TTSLESxx. Now, click on the home screen and again tap on the Google dialer icon. Then, select app info.

Also Read | Stop Call Recording Announcement On Realme Smartphones: Here’s How

Categories
Apps Featured How To

How To Access And Enable The SIM Toolkit On An Android Device?

Key Highlights

  • SIM Toolkit often overlooked by users on Android phones
  • It’s pre-installed once a SIM card is inserted
  • Allows SIM to send commands to the phone and vice versa

A feature that many users believe has no purpose on their Android phones is accessing the SIM Toolkit. But there is more to it than just a feature on your device. Usually, it is pre-installed once you put your SIM card on your mobile phone. A SIM Toolkit allows your phone’s SIM to establish and spread commands from your SIM to your mobile phone and back. Think of the SIM card as the server in a client-server connection with the SIM Toolkit and your phone as the client. In this article, we will help you learn how to access and enable the SIM Toolkit on your Android phone. Also Read | Android Auto Quick Tips And Tricks: Steps For Hassle Free Calling Experience

How To Access SIM Toolkit

The majority of individuals don’t mind controlling their phone’s SIM card. In actuality, it is not a top priority for them. You may not know that your SIM card contains a significant amount of data. When you have the SIM Toolkit app installed on your device, you can access and operate all that data with ease. As a result, it’s crucial that you keep an eye out as well. Here’s how you can access SIM Toolkit on your Android device:

Step 1: Go to ‘Settings’ on your Android phone.

Step 2: Click on ‘Apps’.

Step 3: Select ‘SIM Toolkit’.

Depending on your telecom carrier, this may occasionally go by a different name. You will then view SIM Toolkit details after clicking on the SIM Toolkit.

Also Read | How To Check Number Of Sim Cards Registered On Your Name And ID: How To Block Unauthorized SIM Cards Issued On Your Name?

How To Install SIM Toolkit

When you enter your SIM card into your phone, the SIM Toolkit is frequently already pre-installed and you don’t have to install it for yourself. It is accessible from the home screen of your smartphone. However, you can download the SIM Toolkit application from the Google Play Store.

Steps To Enable SIM Toolkit

Step 1: Open your Android phone and go to your ‘Settings’ app.

Step 2: Select ‘Wireless Setting’.

Step 3: Go to ‘SIM & Networks Settings’.

Step 4: Tap on ‘Dual SIM Settings’.

Step 4: Scroll to the bottom of the list and tap on ‘SIM Toolkit’. That’s it.

SIM Toolkit is a standard of the GSM system. This enables the SIM card to initiate actions that can be used for various value-added services.