Categories
Apps Featured Leaks

WhatsApp Security Update: No More Screenshots Allowed With View Once Photos And Videos On WhatsApp

Key Highlights

WhatsApp new security update in works

View Once screenshots to be banned soon

Feature being tested with beta build

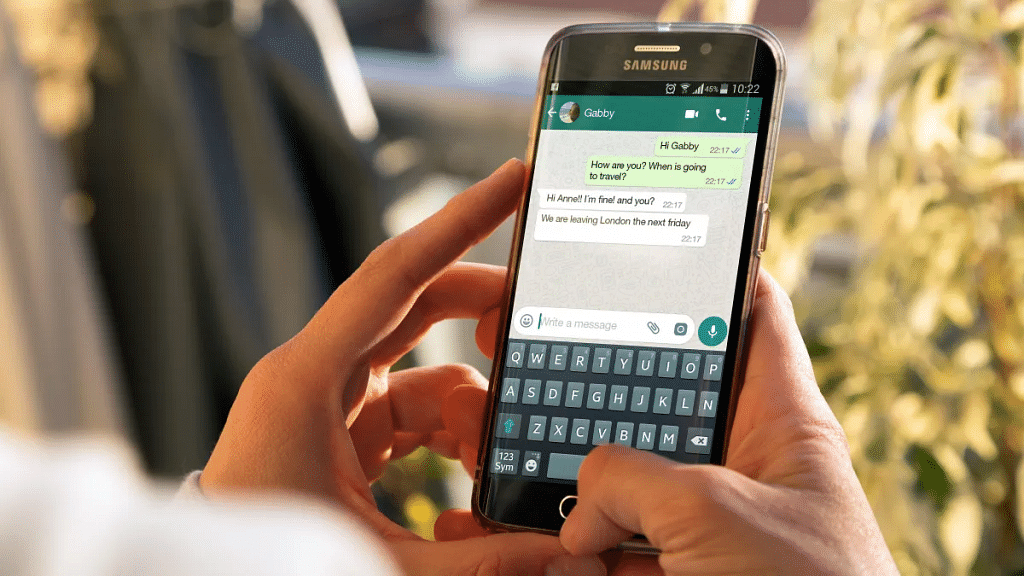
WhatsApp has been fortifying its platform with added security. Numerous users already prefer the Meta-owned instant messaging application across the globe and in India for its secure and advanced platform for texting. The app has expanded its services beyond texting and also lets users make voice and video calls on the go for Android and iPhone users. Despite offering a secure end-to-end encryption platform, WhatsApp is consistent with new security upgrades.

Recently, WhatsApp released the view once photo and video option for the users. However, this feature came with one major flaw. Any recipient of the view once message has the leverage to capture screenshots. This has been one of the biggest security concerns with the users sending view once photos with the notion of added security. But seems like WhatsApp is now working on a fix for this. Users will now be barred from capturing screenshots of the view once photos. Details are below:

WhatsApp Banning View Once Screenshots For Added Security

A fresh report shared by WaBetaInfo, WhatsApp has started testing the new security feature that will restrict all the users from capturing screenshots of the view once media files including images and videos. Currently, WhatsApp s testing this new security update with the beta version.

While there is no word on the release of the stable version, it should be around the corner. WhatsApp should announce the development via its official blog.  To recap, WhatsApp released the View Once feature earlier this year to improve privacy with personal and professional chats.

The photos and videos sent using the view once option comes with a self-destruct timer that helps users maintain privacy with the data. This also puts a break on message forwarding which most of you would wish to avoid with private content.

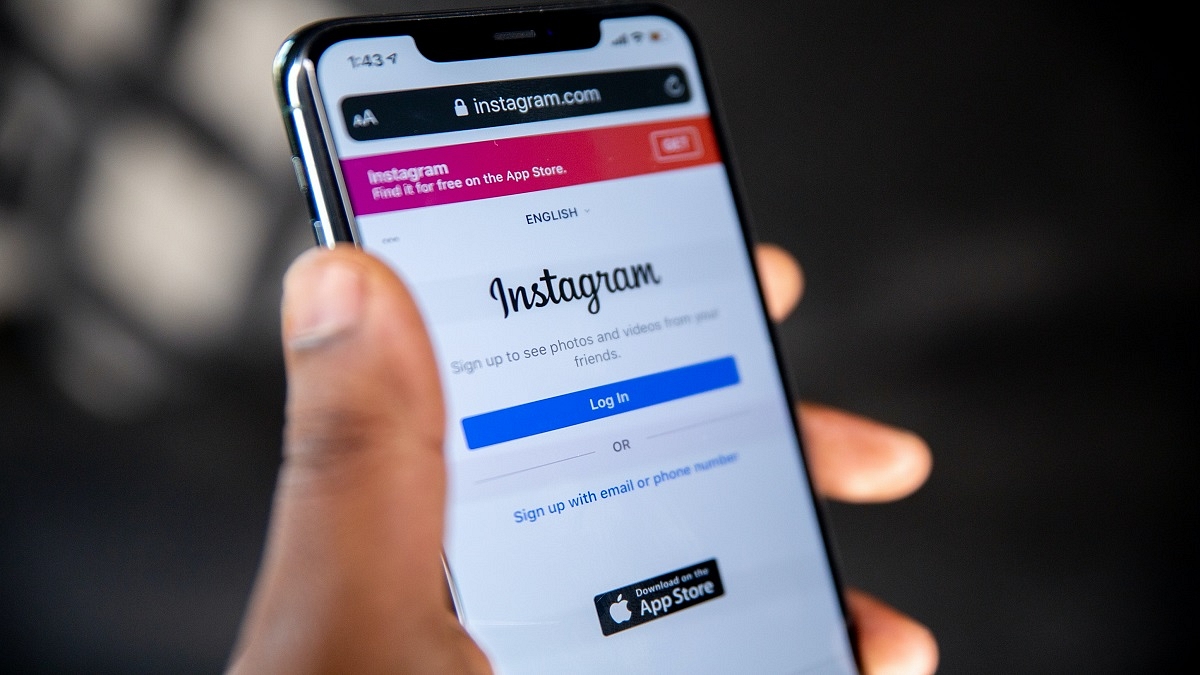
It is still not clear if WhatsApp will notify the sender if any screenshot has been taken of the view once photo/video similar to Instagram or will ban users completely from grabbing screens. Since the feature is still under the testing phase, it would be difficult to anticipate its functionality.

Nevertheless, WhatsApp acknowledging this issue is a relief for all users who are concerned about privacy while using WhatsApp as their primary mode of online communication.

Categories
Apps Featured How To

Here’s How To Send Dussehra Wishes On Snapchat And WhatsApp

Key Highlights

  • Dussehra will be observed on Oct. 12, 2024
  • Wish your loved ones via Snapchat and WhatsApp stickers
  • Here’s a quick look at how you can share Dussehra stickers on Snapchat and WhatsApp

Most Indians are currently celebrating Dussehra, an auspicious festival that commemorates good triumphing over evil, whether it be goddess Durga’s victory over Mahishasura or Lord Ram’s victory over Ravana. To celebrate the festival with friends and family, Snapchat and WhatsApp users have the option of using various lenses, effects, and stickers. If you want to know how to download and share Dussehra stickers on WhatsApp and Snapchat, then you are at the right place.

Also Read | Instagram AI Tips And Tricks: How To Create And Share AI-Generated Stickers For Stories Chats

How To Send Dussehra Wishes On Snapchat?

Dussehra lenses can be used on Snapchat, and users can upload them to their stories. Here’s how to do it:

Step 1: Open Snapchat on your mobile.

Step 2: Swipe left after tapping the emoji icon until you see “Explore” as an option.

Step 3: After that, just tap on the search icon and type Dussehra.

Step 4: Then, Snapchat will show you a variety of lenses and effects that you can use to wish your pals.

You can save Snapchat Stories to your camera roll. After you do that, you can use the same images or clips on Instagram or WhatsApp as well.

How To Send Dussehra Wishes On WhatsApp?

Step 1: Open Google Play Store and type WhatsApp Dussehra stickers into the search field. You’ll receive several apps. Choose whichever one you want, then choose “install.” We downloaded RP Developer Labs.

Step 2: Open the app and select “start” once it has been downloaded to your phone.

Step 3: There will be a few sticker packs displayed. Here, one can discover stickers for Dussehra. Tap on any of the sticker packs.

Step 4: By selecting the “Add to WhatsApp” button, you can now include the desired sticker pack in the messaging application. The app will prompt you to touch the “ADD” button once more.

Also Read | Android Cool Tips And Tricks: How To Customize Google Chrome Themes With Generative AI

Step 5: Now, simply launch WhatsApp and navigate to the stickers section to access the new Dussehra stickers. You can always remove any sticker pack in the messaging app’s Stickers section. That’s all.

For the tech geeks, stay updated with the latest cutting-edge gadgets in the market, exclusive tech updates, gadget reviews, and more right on your phone’s screen. Join Giznext’s WhatsApp channel and receive the industry-first tech updates.

Categories
Apps Featured How To

Instagram Notes: What Is It And How To Use This New Feature

Key Highlights

  • Instagram introduces its new feature ‘Notes’
  • Users can only post one note at a time
  • If users publish another note before the prior note’s 24 hours have passed, the first note will be automatically erased

Users now have access to a new 60-character limit short message feature on Instagram. The user-created messages will reportedly display in the DM section and vanish after 24 hours, much like Stories. However, users cannot keep track of a note’s views. The most recent version of Instagram must be downloaded in order for users to use the feature.

What Is The Notes Feature?

According to Instagram, the new “Notes” feature provides you a private area to share updates as brief text messages with certain people, who can subsequently reply to them using Instagram messaging. One note can only be shared at a time, and the preceding note will be removed if you frequently share more than one note.

Steps To Share A Note On Instagram

You can read and share notes from your friends and followers in the DM section. To share your note, follow these steps:

Step 1: On your iOS or Android device, launch Instagram.

Step 2: To access the chat page, swipe from left to right or hit the chat button in the upper right corner.

Step 3: Now, if you have this feature, you can find it on the chat page’s top, just below the search bar. Click the ‘Your Note’ button to create a new note.

Step 4: There is a 60-character restriction, so write what you want to say.

Step 5: Tap the Share icon in the top right corner once you’re done writing. You can tap on the Close Friends option and then tap on the Share button to send a note to them personally.

That’s it, that’s how you can try Instagram’s new feature. For 24 hours, everyone will be able to see your note at the top of the chat list. You can always delete your note by selecting the Delete note option after giving it one tap. There will be a private chat between you and the individual who answers to your note.

Categories
Apps Featured How To

Instagram Business Boost: How To Create And Share Shopping Stickers Via Stories On Instagram

Instagram is offering possibilities beyond just photo sharing now. The social media app is now full-fledged with features such as stories and reels. Direct messaging is also an option with Instagram on Android and iOS. Meta has also opened up business possibilities with Instagram and lets creators and even general users make use of this platform for marketing their products and getting monetary benefits using the app.

To aid with the personal business on Instagram, an option to add stickers has been released. Using this feature, Businesses and shopping partners can easily add any shopping-related sticker to Instagram Stories that will help boost the business. All the business accounts must be approved in order to be set up for Instagram shopping. You will also be able to tag products if you’re a partner with a professional account.

Additionally, the Instagram affiliate creators will be able to share shopping stickers via stories. And also there is a provision to add stickers with additional stickers and upload highlights and videos.

Steps To Add And Share Shopping Stickers To Instagram

Step 1: Click on the add icon and tap on Story.

Step 2: From the gallery, select the product image or the video that needs to be shared via story.

Step 3: From the Sticker tray, select the desired shopping sticker.

Step 4: Now, from the list of your product catalog, select the required collection that you wish to feature in stories.

Step 5: Click on Done.

Step 6: Adjust the placement of the shopping sticker by dragging it across. You can also fiddle with the styling of the shopping sticker.

Step 7: Once done, tap on send. You can select your desired audience.

Step 8: Click Share and the shopping sticker will be shared as a story on Instagram.

Categories
Apps Featured How To

Not Receiving WhatsApp Message Notifications On Google Chrome? Here’s The Fix

WhatsApp has been giving users a premium messaging experience. The messaging application has roped in the latest technology and has also made it possible to make voice and video calls using the same messaging application. The added end-to-end encryption is another benefit that you get with this messaging application.

WhatsApp is just catering to Android or iPhone users. The app is also available for laptop and PC users in the form of WhatsApp web. The company has extended the same features to the desktop version allowing users to experience the same premium experience as the mobile app. You can use the WhatsApp Web version on any web browser available on your laptop or PC. You just have to log in to the WhatsApp web account using Google Chrome, Edge, and other browsers.

Once the account is logged in and you receive a message, a notification will pop up on the Chrome browser just like the mobile apps. But in some cases, WhatsApp message notifications wouldn’t show while you are using the desktop version. Notifications being turned off could be one of the reasons you are not getting notified of incoming messages or calls on WhatsApp web.

Blocked notifications could be another factor. What should you do if you can’t receive notifications on Chrome while using WhatsApp web? Well, this article has all the steps mentioned that will help you resolve this issue with the WhatApp web notification on Google Chrome.

How To Fix No Notification Issue With WhatsApp Web On Google Chrome

You can start by turning on the WhatsApp notifications for the WhatsApp web on Chrome.

Step 1: On the Google Chrome browser visit the WhatsApp web portal and log into your account.

Step 2: Above the chat list, you will see a blue banner which is for activating the desktop notifications. Tap on it. If for some reason the blue banner isn’t visible, you can try refreshing the page.

Step 3: A bunch of steps will be shown on the screen. Follow them to turn on the WhatsApp notification on Google Chrome.

Step 4: You will start receiving WhatsApp notifications after performing all these steps.

If in case, you still aren’t able to receive any notification when a new WhatsApp message arrives on the desktop version, you can try the unblock notification method. The steps are below:

Step 1: Open the WhatsApp web application of Google Chrome and click on the More icon.

Step 2: From there, tap on the Settings option.

Step 3: Go to the Privacy and security tab.

Step 4: Tap on Site Settings.

Step 5: You will now see the Notifications option. Click on it.

Step 6: Check if Ask before sending the (recommended) setting is toggled on. If not, turn it on.

Step 7: If you see the https://web.whatsapp.com in the block list, remove it. To do so, click on the More icon right next to it.

Step 8: Tap on Allow. You will now start receiving WhatsApp message notifications on Chrome.

Categories
Apps Featured How To

Want To Set Up UPI Lite In BHIM App? Here’s How To Do It

Key Highlights

  • UPI Lite feature is allowed in the BHIM app
  • It has a daily transaction limit of Rs. 200
  • Users can save up to Rs. 2,000 in the UPI Lite e-wallet

UPI Lite could be your savior if you’re tired of repeatedly entering your UPI pin for insignificant payments. Shaktikanta Das, governor of the Reserve Bank of India, has introduced a new service for citizens named “UPI Lite.” Users can conduct small transactions up to Rs. 200 in a nearly offline mode without using their UPI pin.

An “on-device” wallet can be used to conduct low-value transactions after this feature is enabled on the BHIM App. It might resemble other wallets that are available in the market. A maximum of Rs. 2,000 can be stored in the wallet at any given time.

It is easy to use UPI Lite. You must first create an e-wallet in the BHIM app. This UPI Lite e-wallet is connected to your bank account. Then you send money to your UPI Lite e-wallet from your associated bank account. Contrary to how things operate in the case of standard UPI transactions, this balance is then used to make transactions without the need for a UPI. Here’s a step-by-step guide for configuring UPI Lite in the BHIM app.

Also Read | Replacing Paytm FasTag? Steps To Get Instant FasTag For Your Car

How To Set Up UPI Lite In BHIM App?

Step 1: On your Android phone or iPhone, download and install the BHIM app.

Step 2: For UPI transactions, sign in to the app and add your bank account.

Step 3: Next, scroll down and click on the UPI Lite banner.

Step 4: Now, click on the ‘Enable Now’ button.

Step 5: Then tap the ‘Enable Now’ option after reading all the details.

Step 6: Here you will be asked to add Rs. 2,000 to your UPI Lite e-wallet. Enter the amount you want to send.

Step 7: Select the bank account to transfer the amount. Then, click the ‘Enable UPI Lite’ button.

Step 8: Type in your UPI PIN. Your UPI Lite e-wallet will be enabled once the amount has been sent.

Also Read | Traveling To India? Here’s How To Pay Like A Local Using UPI One World

As of now, customers of the State Bank of India (SBI), Union Bank of India, Utkarsh Small Finance Bank, Canara Bank, HDFC Bank, Indian Bank, Kotak Mahindra Bank, and Punjab National Bank will only be able to use the UPI Lite payment system.

For the tech geeks, stay updated with the latest cutting-edge gadgets in the market, exclusive tech updates, gadget reviews, and more right on your phone’s screen. Join Giznext’s WhatsApp channel and receive the industry-first tech updates.

Categories
Apps Featured How To

WhatsApp Call Link Feature: How To Create And Send Cal Links Using WhatsApp On Android, iOS

WhatsApp has evolved over the years from just being a simple messaging app and has integrated services for voice as well as video calling. The Meta-owned messaging platform is also rapidly evolving with the technology and offering numerous features for a better messaging and calling experience. Of course, the end-to-end encryption service is the added perk that you get while using WhatsApp messaging app on Android and iOS.

Meta has been spotted testing multiple new features for WhatsApp including the option to create a personalized sticker avatar and the Call Links feature. The latter has been released for the masses allowing them to share links to other contacts to join any group call with a single tap. The Call Link feature is somewhat similar to what you get on the popular online conferencing apps available on the Play Store or the App Store including Google Meet, Microsoft Teams, and also Zoom.

With the WhatsApp Call Link feature, group admins and members will get the option to create a virtual call link and share it with the users who aren’t added to the group. The respective receivers of the WhatsApp Call link would just need to click on the link to join the online conference call.

Notably, the Call Link feature can be used for both voice and video calls. Also, the maximum limit that WhatsApp has set for members joining the  But what are the exact steps to create a new WhatsApp Call Link and share it with any user? We have shared the steps below. Read on:

How To Use WhatsApp Call Link Feature To Invite Users For Voice/ Video Calls

In order to use the call link feature, you would have to first check if it has been added to your WhatsApp. You might have to update the app in order to use all the latest features including the Call Link feature. If this new tool is already present, just follow the steps below:

Step 1: Launch the WhatsApp application and from the home page go to the Call section,

Step 2: An option will be present on the top of the call logs page stating “Create call link”. Click on it.

Step 3: Once the link is created, you can directly share it with groups or solo contacts. Otherwise, simply copy-paste it on the desired window. You can also share it via other messaging applications. The same link will allow users to join both voice and video calls.

Categories
Apps Featured Info

WhatsApp Personalised Avatar Feature Update: How To Create Your Own Avatar And Share As Sticker Packs On WhatsApp

Key Highlights

WhatsApp bringing new Avatar feature

Users will be able to create personised avatars

Stable update is yet to be released

WhatsApp has been rapidly evolving its mobile messaging application with the addition of new features and services. Android and iOS versions of WhatsApp are being updated with the same set of advanced messaging features to deliver an improved and secure platform for texting. WhatsApp’s end-to-end encryption service for both chats and backups has also created a secure environment for voice and video calling. This is what majorly defines WhatsApp’s wider popularity amongst the audience not just in India, but globally.

Animated sticker packs and GIFs have been released to make texting a fun processor on WhatsApp. But now, the company is ready to take another flight with the avatar feature for video calling. You can currently customize stickers as your personal avatars. However, for video calling, you either are visible directly or have to turn off the camera if you wish to avoid facing the caller. The upcoming WhatsApp video avatar feature is coming to the rescue in such scenarios. Below is the entire development on the same.

WhatsApp Video Call Avatar Feature Releasing

WhatsApp has been rumored to be working on the avatar feature for its Android and iOS mobile applications. A fresh report by WaBetaInfo reveals this development. According to the report, WhatsApp will let users create their own avatars and use them as stickers. The publication has also shared screenshots of this new self-avatar stickers feature which is being released for all the users in the coming weeks.

A similar feature is already present with Facebook and is apparently making its way to WhatsApp as well. Users will not only be able to create their avatars and share them as stickers but also use them as their profile pictures. This is again identical to Facebook Avatars.

How To Create Personalised WhatsApp Avatars And Use As Stickers

Since this feature is currently in the testing phase, the exact steps to create a personal avatar and use them as stickers are yet to be confirmed by WhatsApp. But going by the leaked screenshots, this new feature will be added alongside the GIF, emojis, and sticker options in the app itself. Users will need to tap on the Avatar sticker feature and then they will get the option to create their own avatar.

Once the avatar has been created, users will be able to share it with their contacts in form of stickers. Also, WhatsApp will create sticker packs of the personalized avatars along with several expressions such as love, confusion, crying, mid-blowing, and others. Once the stickers pack are created using the avatar, users can share them with the desired contacts.

Categories
Apps Featured How To

You Can Now Upload Longer 60-Second Stories On Instagram: Here’s How

Key Highlights

  • Instagram users can now post 60-second Stories
  • Until now, there was a time limit of 15-seconds
  • Here’s how you can upload a 60-second Instagram Story

If you sometimes post videos to Instagram Stories, you’ve probably encountered the 15-second restriction. This implies that Instagram will automatically trim the video you upload to your story to a maximum duration of 15 seconds, regardless of its length. Users had to split shorter Stories into 15-second chunks if they wished to upload them because there was a time limit of 15-seconds.

But now, a new feature that will let users publish longer uninterrupted Stories has finally been rolled out globally on the Meta-owned app. A Story that you publish won’t be divided into portions if it is under 60 seconds long. Late last year, the company started testing the modification with select users and has now rolled it out to all users worldwide.

How To Upload The Longer 60-Second Stories On Instagram?

Make sure your Instagram version is updated. Even if you have the auto-update feature enabled on your phone, please check the Instagram app on your Android or iPhone‘s Play Store or App Store, respectively. Following is the step-by-step guide that you can follow to upload a 60-second video on your Instagram Story:

Step 1: Open Instagram on your mobile phone.

Step 2: Now, swipe right to access the camera or click on the Plus sign (+) icon and scroll to Story.

Step 3: To start a video recording, simply tap and hold the circle and record a 60-second video.

Step 4: To add doodles, text, filters, or stickers, use the tools at the top.

Step 5: To post the video to your Story, tap Your Story (or Your Stories) at the bottom of the screen.

Step 6: To view your post, hit ‘Your Story’ at the top of your feed. Tap ‘Highlight’ next to your Story if you wish to keep it after 24 hours.

Additionally, Instagram users don’t have to keep tapping to watch a longer video they don’t want to watch. Now that users have two options for sharing a 60-second video, they can easily share both Stories and Reels.

Categories
Apps Featured How To

WhatsApp Business Quick Replies: How To Use Quick Replies For Businesses On WhatsApp Android, iOS

WhatsApp messaging service is used by numerous users globally. The app has evolved in the last few years and is offering services to general as well as professional users.  WhatsApp has also released a business app for small and large-scale industries to help customers with their queries instantly. With the WhatsApp Business app, you can also provide different services and resolve issues over chat.

Similar to WhatsApp’s primary messaging app, the business version also has the same set of advanced messaging features that enhances the experience with texting, voice, and video calls. WhatsApp is also proactively dishing out new features via OTA updates. The end-to-end encryption platform is also one of the crucial aspects that improve the messaging experience with business profiles.

One of the useful options that is available with the WhatsApp Business app is quick replies. This messaging feature can help you create shortcuts for a bunch of messages you frequently send the customers. With the WhatsApp Quick Reply feature, you can store up to 50 different text messages or images and videos and use shortcuts for the replies instead of typing the entire message. Below are the steps to add and use the Quick Reply feature for the WhatsApp Business app.

Steps To Add New Quick Replies To WhatsApp Business App

Step 1: Launch the WhatsApp Business app on your iPhone or Android smartphone.

Step 2: Click on the More option (three dots icon).

Step 3: Scroll to the Business tools tab.

Step 4: Tap on the Quick replies option.

Step 5: Click on Add and enter the desired message that you want to store as a Quick reply.

Step 6: Now, select the keyboard shortcut that you want to set as a Quick reply.

Step 7: Hit the Save tab.

How To Send Default Quick Replies Or Automatic Replies On WhatsApp

Step 1: Go to any chat window and type “/” in the message box. You can also click on the Attach (clipper icon).

Step 2: Select the Quick Replies option and then tap on the Use Quick reply as an attachment.

Step 3: Now, select the appropriate quick reply option that will automatically show up in the text box.

Step 4: You can either edit the message or send it directly