Categories
Featured How To

Missed Adhaar Pan Card Linking Deadline: Steps To Link PAN And Adhaar With Screenshots

Key Highlights

  • Adhaar and Pan link deadline exhausted on 31 May 2024
  • Linking essential of tax payers
  • Fines being charged for delayed PAN and adhaar card linking

Indian government made it mandatory for the Indian citizens to link their Adhaar card. The deadline earlier was set for June 30, 2023 failing to which leads to deactivation of PAN card an services. Thankfully, Income tax department provided a respite to the eligible tax payers by further extended the deadline till May 31, 2024. For the defaulters, a penalty is being charged by the Income tax department which can still be avoided if the linking is done online. If you have missed out on linking your Adhaar and PAN card then we are making it easier for you by listing the steps.

For the tech geeks, stay updated with the latest cutting-edge gadgets in the market, exclusive tech updates, gadget reviews, and more right on your phone’s screen. Join Giznext’s WhatsApp channel and receive the industry-first tech updates.

Also Read: WhatsApp Rolls Out ‘Favorites’ Filter: What It Is And How To Use

Adhaar And PAN Link: Late Fees

If you have somehow missed all the deadlines for linking your PAN and adhaar card, you still can get the process rolling. Visiting Income tax’s official website, you can complete the Adhaar and PAN linking after paying a penalty of Rs. 1,000. This late fee is mandate to be paid before proceeding with the steps to link Adhaar and PAN online.

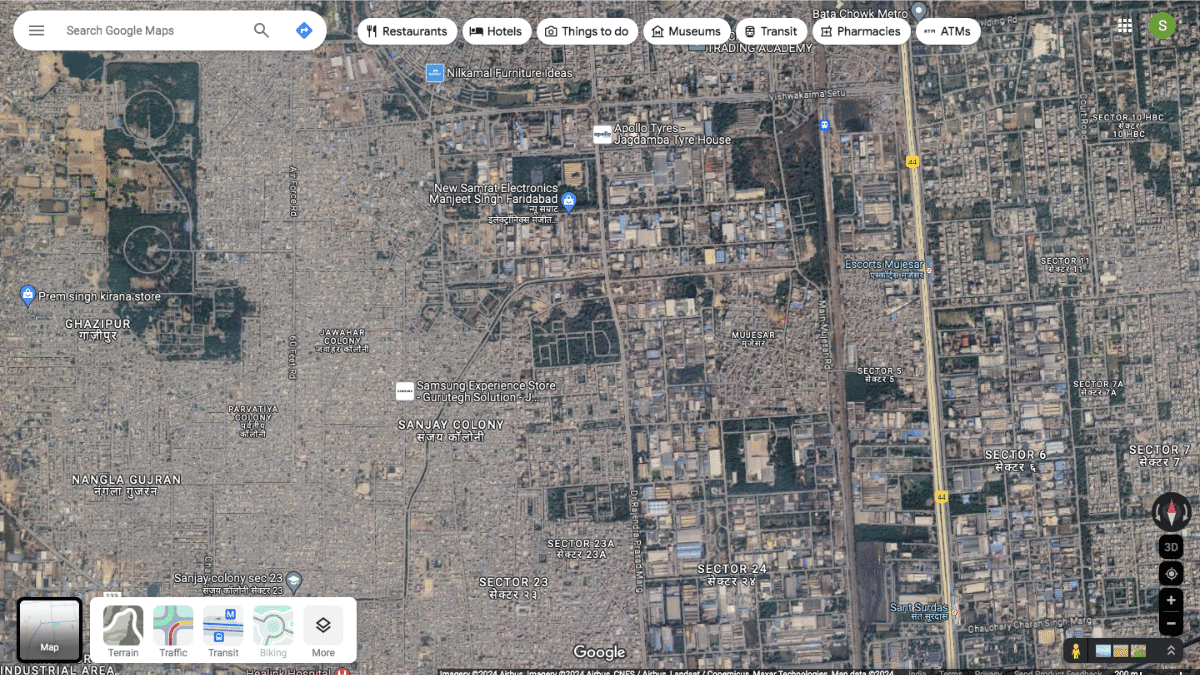
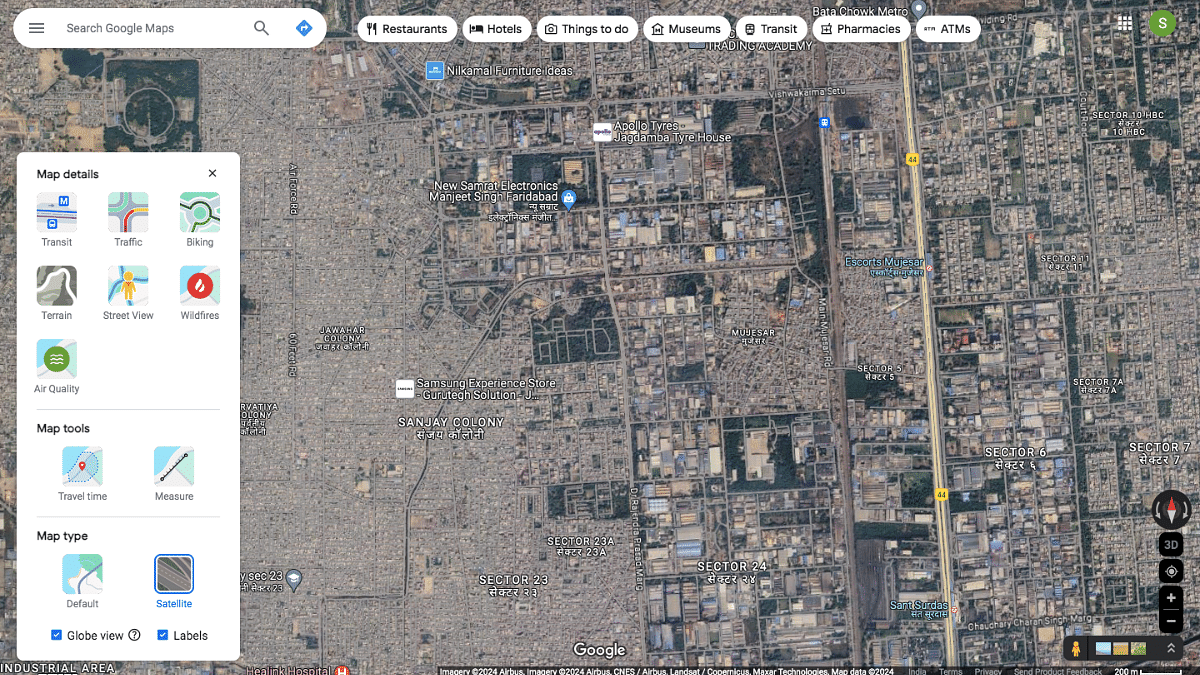
Also Read: Google Maps Quick Hacks: How To Enable Google Maps 3D View On Desktop

Steps To Link Adhaar And PAN Card Online

Step 1: Open any web browser on your laptop/ PC and visit Income tax official website.

Step 2: Login to the portal with your credentials. Ensure to register first if you are a new user.

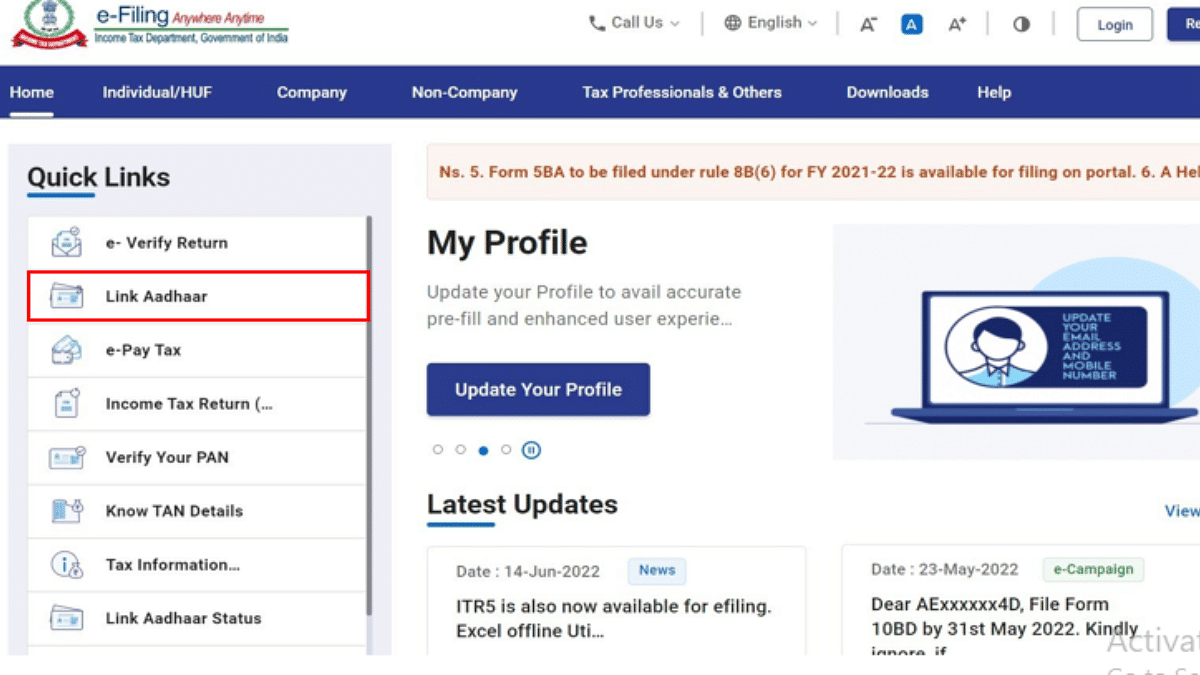
Step 3: Go to the ‘Quick Links‘ section which you can locate on the left.

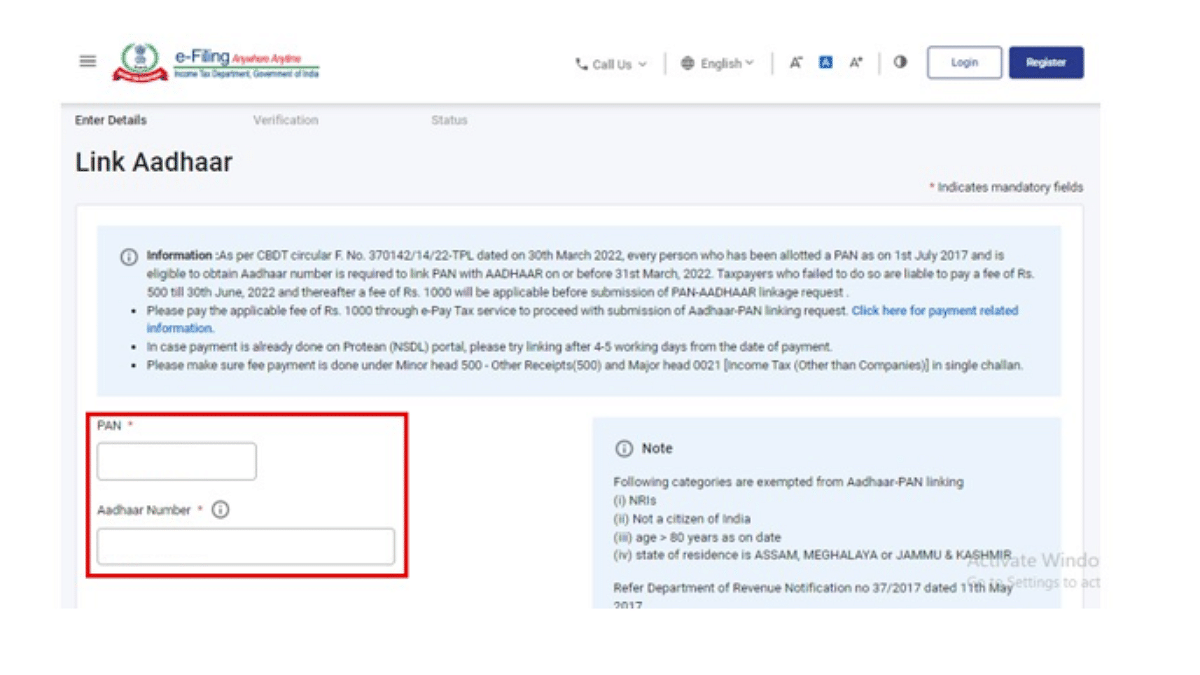
Step 4: Enter both your PAN and Adhaar number.

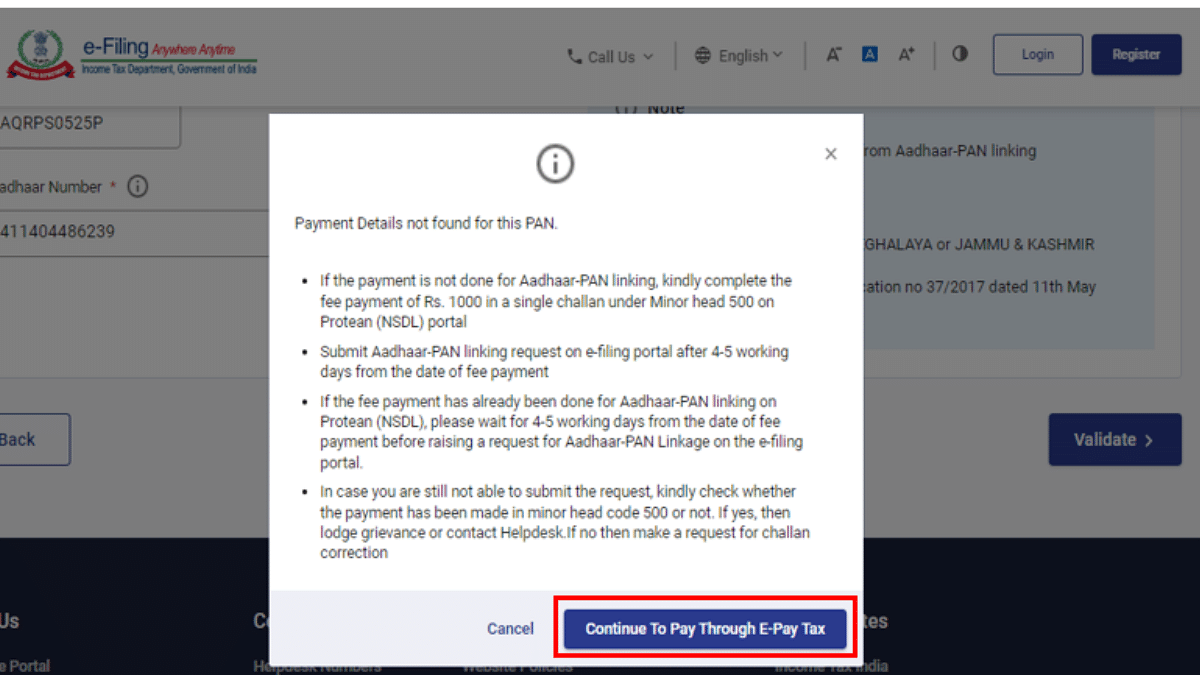
Step 5: A new pop up will show up on the screen from where you need to select ‘Continue To Pay Through E-Pay Tax‘ option.

Step 6: Re-enter and confirm your PAN number and also enter your Adhaar registered mobile number for OTP.

Step 7: After OTP verification a new e-Pay Tax page will open op. Click on continue.

Step 8: You’ll now see a bunch of more options including Income Tax, Equalization Levy, Fee/ Other Payments. Tap the Proceed icon on the Income Tax box.

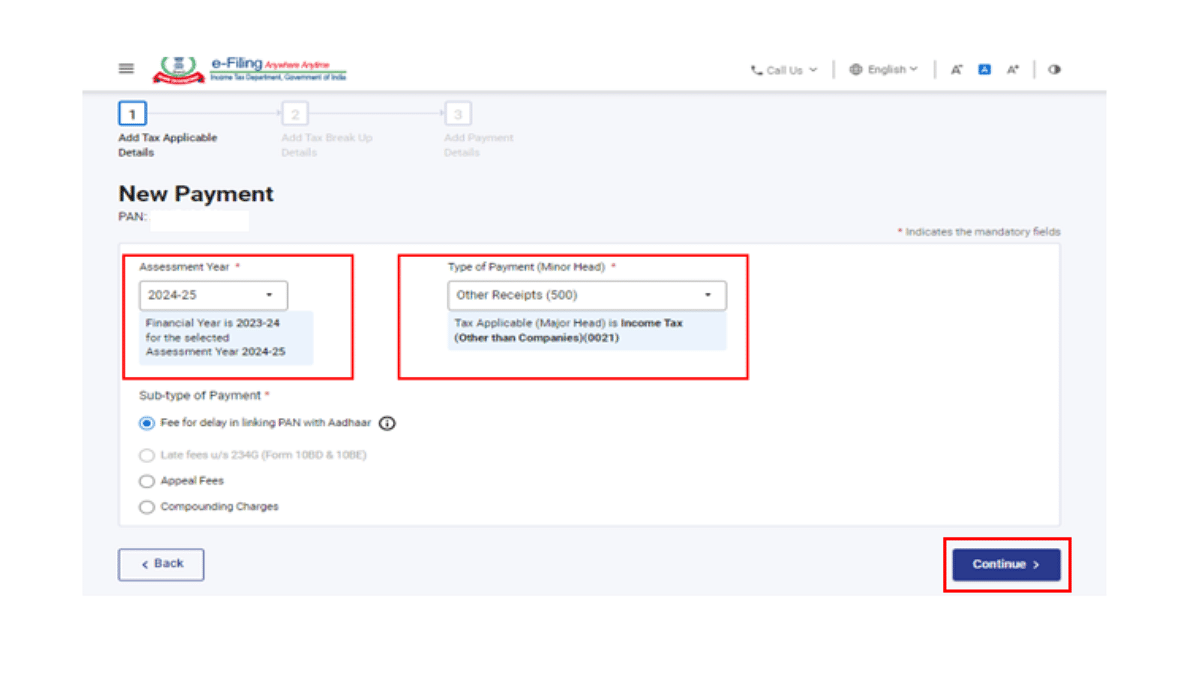
Step 9: Select 24- 25 option in the Assesment Year tab

Step 10: Select Other receipts (500) from the next checkbox and tap on Continue.

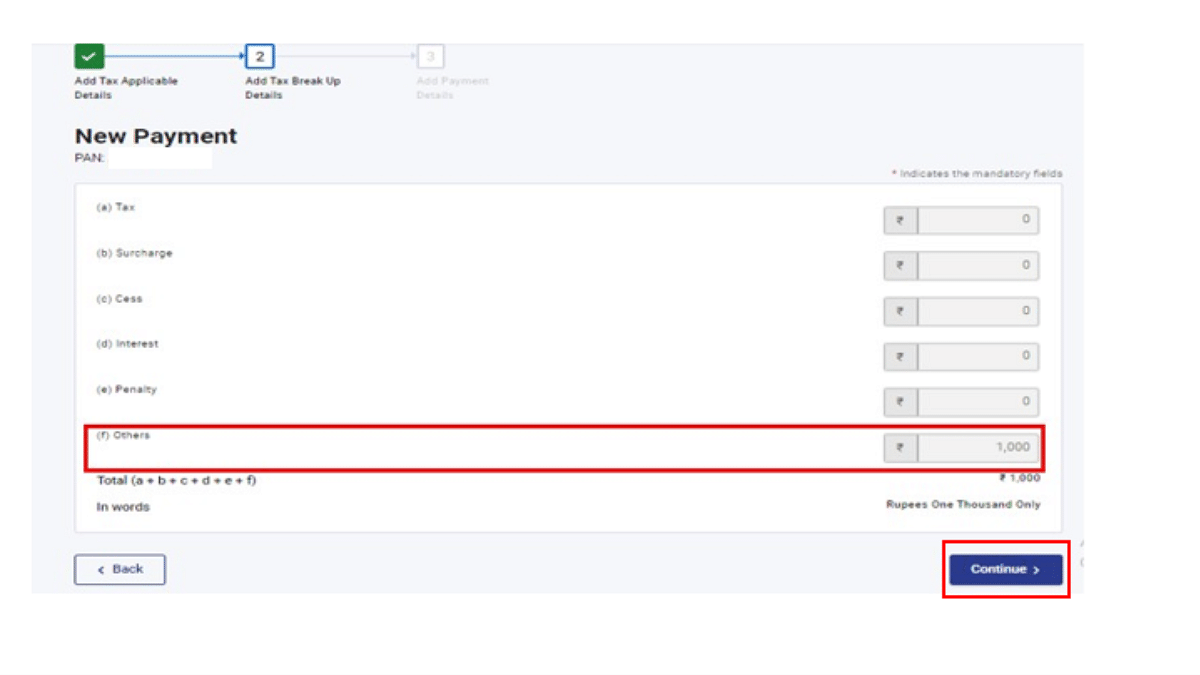
Step 11: Once the e-challan is generated, make the payment by selecting the desired mode.

Once these steps are complete and you are done with the late fees payment, you can easily raise the request for activation of Adhaar and Pan Link process.

Categories
Apps Featured How To

WhatsApp Rolls Out ‘Favorites’ Filter: What It Is And How To Use

Key Highlights

  • Favorites filter lets users easily find important contacts
  • Add and reorder favorites directly from the chats
  • WhatsApp is testing a feature to transcribe voice messages into text

WhatsApp is rolling out a new “Favorites” filter. This feature will allow users to mark specific contacts and groups as favorites, ensuring they appear at the top of the calls and chats tabs. The rollout is gradual and will be available across all platforms, including Android, iOS, web, and desktop versions, in the coming weeks.

Also Read | WhatsApp Tips & Tricks: How To Unblock Yourself And Regain Access

Understanding WhatsApp Favorites Filter

The Favorites filter is an addition to the existing chat filters on WhatsApp, which currently include “All,” “Unread,” and “Groups.” This new filter is intended to help users quickly find the people and groups they interact with the most. By setting contacts as favorites, users can easily access these important chats and calls without having to search through their entire list of active conversations and call logs. In the calls tab, the option to add a favorite will be prominently displayed at the top of the call logs.

How To Use The Favorites Filter

Using the new Favorites filter is simple:

Step 1: Add Favorites in chats

  • Open the chats screen
  • Select the “Favorites” filter
  • Choose the contacts or groups you want to mark as favorites

Step 2: Add Favorites in calls

  • Go to the calls tab
  • Tap “Add favorite”
  • Select the desired contacts or groups

Step 3: Manage Favorites

  • Navigate to Settings
  • Go to “Favorites”
  • To manage and reorder your favorite contacts and groups, choose “Add to Favorites”

Upcoming Feature: Voice Message Transcription

In addition to the “Favorites” filter, WhatsApp is also working on a new transcription feature for voice messages. This feature, powered by Meta AI, is currently being tested by a select number of Android users in some regions. It will provide users with a textual transcription of voice notes, making it easier to understand the content of voice messages without having to listen to them.

Also Read | WhatsApp Tips And Tricks: Easy Ways To Record WhatsApp Video Calls

Conclusion

With the introduction of the “Favorites” filter and the potential addition of voice message transcription, WhatsApp continues to improve its user experience. These new features are set to make communication on the platform more efficient and user-friendly.

For the tech geeks, stay updated with the latest cutting-edge gadgets in the market, exclusive tech updates, gadget reviews, and more right on your phone’s screen. Join Giznext’s WhatsApp channel and receive the industry-first tech updates.

Categories
Apps Featured How To

iOS 18 Public Beta: Check Steps To Install On Your iPhone For Early Access

Key Highlights

  • Apple’s ambitious update revolutionizing iPhone interactions
  • Public Beta available now for early access to new features
  • Install on secondary devices due to potential bugs

At WWDC 2024, Apple unveiled iOS 18, their most significant release to date. This update promises to transform iPhone user interactions with a range of new features. The iOS 18 public beta is now available for download on supported devices. This allows users to get an early look at the improvements. However, since it’s a beta version, it might come with bugs and other issues. It is advised to install it on your primary device. If you decide to go ahead, ensure you thoroughly back up your data to avoid potential problems.

Also Read | From iOS 18 To macOS Sequoia: Key Announcements At WWDC 2024

Supported iPhones For iOS 18

The following iPhone models can receive the iOS 18 update:

  • iPhone 15 Series
  • iPhone 14 Series
  • iPhone 13 Series
  • iPhone 12 Series
  • iPhone 11 Series
  • iPhone XS
  • iPhone XS Max
  • iPhone XR
  • iPhone SE (2nd generation or later)

How To Install iOS 18 Public Beta

To download iOS 18 public beta on a compatible iPhone, you’ll need an Apple ID. Follow these steps:

Step 1: Go to beta.apple.com and register your Apple ID for the public beta program.

Step 2: After that, open the Settings app.

Step 3: Go to General > Software Update.

Step 4: Look for the iOS public beta in the beta updates section and select “Update Now.” The iOS 18 public beta is approximately 6.98 GB.

Step 5: Once the download is complete, tap on “Install.” Your iPhone will restart, and iOS 18 will be ready to use.

Also Read | iOS 18 To Bring AI Features: What’s In Store For Your iPhone This Fall?

What To Expect After Installation

After installing iOS 18, you might not notice significant changes immediately. One of the first noticeable updates is the redesigned Control Centre. However, other new features are waiting to be explored. The much-awaited Apple Intelligence features are not currently accessible but should become available in September. Since this is a beta version, it’s best to install it on a secondary device to avoid any potential disruptions to your primary phone usage.

For the tech geeks, stay updated with the latest cutting-edge gadgets in the market, exclusive tech updates, gadget reviews, and more right on your phone’s screen. Join Giznext’s WhatsApp channel and receive the industry-first tech updates.

Categories
Auto Tech Featured How To

Google Maps Speed Limit, Speedometer Feature Rolling Out For iPhone, CarPlay: How To Use?

Key Highlights

  • Google Maps for iPhone and CarPlay gets speedometer feature
  • Speed Limit tool also added
  • Update rolling out in phased manner

Google Maps is improving its user experience with the iOS devices by consistently adding on new set of tools and features. Android OS has been first-in-line to get all the updates followed by iOS. One of such features which has been available with Google Maps Android version for over five years is the Speedometer and Speed Limit feature. Now, finally the company is rolling out this feature to iOS and CarPlay. How can you use these two features on your iOS devices and CarPlay-compatible infotainment screen of your car? Let’s find out”:

For the tech geeks, stay updated with the latest cutting-edge gadgets in the market, exclusive tech updates, gadget reviews, and more right on your phone’s screen. Join Giznext’s WhatsApp channel and receive the industry-first tech updates.

Also Read: Hassle-Free Daily Commute: How To Travel Free Via Uber (Even In Peak Hours)

Google Maps Speed Limit, Speedometer Feature iOS

Google Maps’ speedometer feature is finally making its way to the iOS ecosystem. This new tool will be displaying the speed limit on the user’s iPhone and other compatible iOS devices. With the availability of this new tool, users will be displayed the speed limit of their vehicle on the Maps during navigation.

The speed limit will be measured in kilometers of miles which will depend on the region where the Map is being used. Google has started dishing out the new speedometer feature for iOS users in India. The brand also is bringing this new tool to the global markets going forward. It is expected that the update rollout will be completed in phased manner.

Google via an official blogpost states, “If the Speed Limits feature is available in your location, the speedometer in the app will let you know if you’re driving too fast. The speed indicator will change colors if you go over the speed limit.” The brand further notes that the speed limit displayed on Maps for iOS might differ than the actual speed depending on several external factors. Hence, it is advised that one should only rely on the speed limits displayed by the vehicle’s speedometer.

Also Read: Mahindra XUV 3XO EV Productions Kicking Off By November 2024: Debut Set For Later This Year

How To Enable Speedometer In iOS Devices Or CarPlay

Step 1: Open Google Maps on your iOS devices

Step 2: Go to the Settings tab

Step 3: Click on the Navigation option

Step 4: Tap on Driving Options

Step 5: Enable Speed Limits feature.

Categories
Apps Featured How To

Hassle-Free Daily Commute: How To Travel Free Via Uber (Even In Peak Hours)

Key Highlights

  • Select ‘Shuttle’ in the Uber app and confirm your ride
  • Track the shuttle, arrive on time, and enjoy a comfortable journey
  • Get dropped at a designated point

Traveling in Delhi-NCR can be a hassle with crowded buses, long metro rides, and driving through peak traffic. Uber Shuttle offers a comfortable, safe, and convenient alternative. Here’s how you can use this service to enjoy a stress-free commute.

Also Read | Uber EV Auto Rickshaw Services Begins In Ayodhya: Full Details

What Is Uber Shuttle?

Uber Shuttle is a new service designed to meet the needs of Delhi-NCR’s daily bus commuters. It aims to reduce road congestion and carbon emissions by using private bus fleets. These buses are air-conditioned and operate on predefined routes, connecting business districts with residential areas. Each shuttle bus can accommodate 19 to 50 passengers and is operated by local fleet partners using Uber’s technology.

How To Book Your Ride

Booking an Uber Shuttle is easy and can be done through the Uber app. Here’s a step-by-step guide:

Request:

Step 1: Open the Uber app and enter your destination.

Step 2: Select the ‘Shuttle’ option.

Step 3: Review your fare, choose your preferred route, and pick-up timing.

Step 4: Once you’re ready, tap on the request button. The app will provide you with the driver and bus details 25 minutes before your journey.

Pickup:

Step 1: You can track the shuttle’s location via the app before your pickup time.

Step 2: Walk to the designated pickup spot shown on the map and ensure you arrive at least 5 minutes before your trip. The driver will wait for a maximum of 2 minutes at the pickup spot, so punctuality is crucial.

Step 3: Board the bus and enjoy your ride.

The air-conditioned bus will take you to your destination in comfort, allowing you to relax or even catch up on some work during the journey.

Drop off:

The driver will drop you at the designated drop-off point. You can use the Uber app to see walking directions to your final destination from there.

Uber Shuttle: Features

One of the standout features of Uber Shuttle is the ability to pre-book seats up to a week in advance. This ensures you have a reserved spot, making your commute stress-free. Additionally, you can track the bus’s live location and route through the app, providing real-time updates on the estimated time of arrival (ETA). This feature helps you plan your journey better and reduces the anxiety of waiting.

Free Ride: What’s The Catch?

Enjoy your first four rides on Uber Shuttle for free. This gives you a chance to experience the comfort and convenience of the service without any cost. After the initial four rides, the fare remains affordable, making Uber Shuttle a budget-friendly option for daily commutes.

Also Read | How To Book Your Uber Ride 90 Days In Advance: A Step-by-Step Guide

Conclusion

Whether you’re traveling to work or back home, Uber Shuttle offers a reliable and efficient alternative to traditional public transport. So, next time you plan your commute, give Uber Shuttle a try and experience the convenience firsthand.

Categories
Apps Featured How To

iOS Tips And Tricks: How To Manage Automatic ETA Sharing Using iPhone, iPads In Apple Maps

Key Highlights

  • Apple Maps allows auto ETA sharing on Maps
  • ETA can be shared with saved contacts
  • Feature beneficial for keeping users updated with travel

One of the biggest rivals to the Google Maps is Apple Maps. Available as the default navigation app for iOS devices including iPhones and iPads, Apple Maps makes it easy for the masses to reach unknown destinations and find nearby emergency services as well. While the range of features offered by both Apple Maps and Google Maps are familiar, they both have specific set of features that are distinguishable. Amongst the common set of features that you can find on both navigational apps is the ETA sharing with contacts. Apple Maps takes a step ahead with automatic ETA sharing with favorite contacts. This helps with route and map planning ahead of any trip and also keeps the contact updated with your estimated arrival time. What all steps you can follow to enable automatic ETA sharing with your contacts when using Apple Maps on your respective iPhones or iPads? Take a look below:

Also Read: Google Maps Hacks: How To Use Google Maps Simultaneously On Multiple Devices

Automatic ETA Sharing In Apple Maps: Detailed

Apple Maps allows users to enable a specific setting which allows automatic ETA sharing with dedicated contacts. One can enable the settings on Apple Maps using iPhone or iPad that are running on the new iOS versions. After this setting is enabled, the ETA will be shared to the selected contacts automatically when you are travelling to the ‘Favorite location’ which also needs to be added for this feature. Once the user starts his/her journey to the Favorite location, the ETA sharing message will be displayed at the bottom of the screen. The steps to enable it are mentioned below:

Also Read: First VinFast EV India Debut Slated For 2025: These Could Be The First Models

Steps To Manage And Share Automatic ETA With Contacts Using Apple Maps

Step 1: On your iPhone or iPad, open the Maps application. This feature will work for iPad with both WiFi only and WiFi+ cellular models.

Step 2: Click on the profile picture icon placed on the right of the search bar.

Step 3: Tap on the Favourites option. You’ll see a new window pop up on the screen displaying the locations that you’ve already tagged as Favorite. Y

Step 4: Spot the Info (i) button placed next to the Favorite location

Step 5: Now, scroll and locate the Share ETA option. You can review the contacts with whom the ETA is being shared automatically.

Step 6: If you wish to remove any specific contact, tap on the Remove icon placed next to the contact.

Step 7: Similarly, you can also add a new contact. To do so, tap on the Add Person option and select the contact from the contact list.

Step 8: Once all these steps are complete, the automatic ETA sharing gets enabled on the Apple Maps.

Categories
Featured How To TV

Xiaomi TV No Sound Issue: How To Fix Speaker/ Audio Issues With Xiaomi Smart TVs

Key Highlights

  • Xiaomi smart TV comes loaded with modern amenities
  • Most models support external audio peripherals
  • General audio issues can be fixed with quick troubleshooting

Xiaomi is amongst the top players when it comes to consumer tech products. The Chinese OEM has created a big portfolio of smartphones, tablets, and digital accessories. We also have seen the brand taking up a chunk of the evolving EV market with its first sports electric car, the Xiaomi SU7 series. Smart TVs are also amongst Xiaomi’s expertise with the brand catering to both affordable and high-end consumers with the Mi TV A and the X series.

Both these smart TV lineups from Xiaomi comes with advanced industry features which allows a premium home-theater like viewing experience while sitting at the comfort of your home. You get a decent sound system integrated with these Xiaomi MI smart TV lineups. But you can also additionally pair up external speakers for a better audio delivery. As premium as is the quality of Xiaomi smart TVs, there could be scenarios where your Xiaomi TV might get some hiccups with performance. These could be general audio video issues that can be addressed with simple troubleshooting steps cutting down on the service centre visits.

If you are having troubles with the Xiaomi smart TVs built-in sound system or are unable to hear any audio with the connected speakers, then we have brought you the fix for the same. With just a few basic troubleshooting, you can easily resolve audio issues with your Xiaomi smart TV models. Take a look at the steps below:

Also Read: Smart TV Buying Guide: Top Budget-Friendly Smart TVs Under Rs. 35,000 In India

How To Fix No Audio Issue With Xiaomi Smart TV (built-in speakers)

Step 1: Power on your smart TV.

Step 2: Head to the Settings menu.

Step 3: Now, click on Device Preferences option.

Step 4: Select the Sound option

Step 5: Select TV speakers.

These steps will ensure that your TV sound system is set to default instead of any external speaker. Often, resetting the TV speakers to default fixes the general issues with the audio delivery. Also, if in case the TV is connected to an external speaker which isn’t functioning, the default TV speaker setting will resolve the issue.

Cross-check External Audio Peripheral Issues With Your Smart TV

Step 1: Open the Settings menu

Step 2: Select the “Remote & Accessories” option

Step 3: Now, check if any external audio peripheral is paired with the smart TV via AV Port, 3.5 mm headphone jack, or HDMI.

Step 4: Disconnect the paired audio device from your Xiaomi smart TV. You can try repairing the same audio device or connect a new one to fix any general audio issue here.

Categories
Apps Featured How To

Write Emails Like A Pro With Gemini In Gmail: Here’s How

Key Highlights

  • Google’s Gemini AI helps users draft emails easily
  • Available for Gemini Enterprise, Business, Google One AI Premium, Workspace Labs users
  • Enhances email writing efficiency and saves time

Google has introduced AI feature to help users draft emails with ease. This new functionality, known as Gemini, is available to users with Gemini Enterprise and Gemini Business add-ons, as well as to personal account holders through Google One AI Premium. Additionally, it’s accessible through Google Workspace Labs, an early access testing program.

Also Read | Google’s Gemini Chatbot App Debuts In India, Now Supports 10 Indian Languages

Why Use Gemini In Gmail?

Gemini in Gmail controls AI to draft messages based on user prompts. This feature is designed to streamline email writing, making it easier and faster to communicate effectively. Users who are eligible will notice a “Help me write” button in Gmail. This button can be used to craft a new draft using a freeform prompt and then refine the draft as needed.

How To Draft An Email Via Gemini In Gmail

Here are simple steps to help you use Gemini in order to draft your emails:

Step 1: Start by opening Gmail on your computer. You can either compose a new email or reply to an existing email thread.

Step 2: In the top left corner of Gmail, click on “Compose” to start a new email.

Step 3: In the bottom left corner of the new email window, you’ll see the “Help me write” button. Click on it to activate Gemini.

Step 4: Type a prompt into the provided space. This could be as simple as “Draft an email to invite my friend to dinner,” or any other directive.

Step 5: Click on the option “Create” to let Gemini generate a draft according to your prompt.

How To Recreate Your Response

If you’re not satisfied with the initial response, you can click “Recreate” to generate a new version. Gemini offers several refining options:

  • Shorten: You can reduce the length of the draft.
  • Formalize: This makes your draft more formal.
  • Elaborate: This will add more details to build upon the text.
  • I’m Feeling Lucky: This will add creative details to the draft.

Once you’re happy with the draft, click “Insert” to place it into your email.

Important Considerations

While Gemini is a powerful tool, it’s important to note that its suggestions don’t represent Google’s views and shouldn’t be attributed to the company. Users are advised not to rely on Gemini for medical, legal, financial, or other professional advice. The feature is designed to assist with drafting emails but should not be considered a substitute for professional counsel.

Also Read | Google’s Gemini Outperforms ChatGPT in Multi-Discipline Benchmarks, Report Claims

Conclusion

Gemini in Gmail is a great tool for anyone looking to simplify their email writing process. By providing prompts and refining drafts, it can help users create polished emails quickly and efficiently. Whether you’re composing a formal email or adding creative touches to your message, Gemini makes the process seamless and enjoyable.

Categories
Apps Featured How To

Google Maps Quick Hacks: How To Enable Google Maps 3D View On Desktop

Key Highlights

  • Google Maps 3D view option available for desktop version
  • Gives a clear view of neighborhood and surroundings
  • Feature can be accessed using any web browser on laptops and PCs

Google Maps is currently the best navigational app which is accessible to smartphone as well as PC/ laptop users. Finding directions for a new destination is now easier than ever with Google Maps which is why it has become the go-to app for navigation across all the globe. With Google Maps, you can view the locality map in different layouts. Both 2D and 3D view is allowed with Google Maps.

The 3D Maps option gives an immersive and clear view of the streets and buildings for easy accessibility with directions. With just a few taps you can enable default 3D view on Maps. This can be done on both the mobile application as well as the desktop version. While the process is simple for the mobile app, it isn’t tricky for the desktop version too. Interested in knowing the steps to activate 3D Map view on your PC or laptop? Here’s the step by step guide for the same:

Also Read: Apple Maps Topographic Hiking Trail Feature: How To Use?

How To Enable Google Maps 3D View On PC Or Laptop

Step 1: Launch any web browser on your desktop. Just for reference, we have performed the steps on Google Chrome.

Step 2: Enter https://www.google.com/maps and hit enter

Step 3: Once the Google Maps homepage is open, locate the “layers” option at the bottom left of the apps homepage. Tap on it.

Step 4: You’ll see a bunch of options including “Terrain, Traffic, Transit, Biking, and More. Click on “More” option.

Step 5: Scroll to the Map Type and select the “Satellite” option.

Step 6: Do select the “Globe View” option to enable the 3D Maps view on your respective PC or laptop.

Categories
Featured How To

Ayushman Bharat Yojana: Here’s How To Apply For India’s Health Insurance Scheme

Key Highlights

  • Free Medical Insurance of up to Rs. 5 lakh per year for low-income families
  • Eligibility is based on SECC data, focusing on families who are BPL
  • Apply online or offline with basic documents and track status on the PMJAY website

Ayushman Bharat Yojana (ABY), also known as Pradhan Mantri Jan Arogya Yojana (PMJAY), is a significant health insurance program launched by the Indian government in 2018. This scheme provides free medical insurance to low-income families, covering up to Rs. 5 lakh annually per family. Here’s what you need to know about its benefits, eligibility criteria, and application process.

Also Read | Want To Check PMAY Status Online? Here’s How To Do It

Ayushman Bharat Yojana: Benefits

Ayushman Bharat Yojana is a lifeline for low-income families in India. It offers cashless hospitalization coverage of up to Rs. 5 lakh per year for each family. This coverage includes both serious (secondary) and critical (tertiary) care. The program covers a wide range of treatments and surgeries, such as knee replacements, heart bypass surgeries, cancer treatments, and care for chronic conditions. It also includes pre and post-hospitalization expenses, ensuring a complete healthcare experience for beneficiaries.

Eligibility Criteria

Families qualify for Ayushman Bharat Yojana based on Socio-Economic Caste Census (SECC) data. This data categorizes families into different income brackets, focusing on those living below the poverty line (BPL) and those identified as deprived based on specific socio-economic indicators. In urban areas, specific occupational groups like street vendors, construction workers, domestic workers, and sanitation workers are also included. Note that eligibility criteria may vary slightly across different states in India.

Required Documents

Applying for Ayushman Bharat Yojana is simple and requires a few basic documents:

  • ID Proof: Aadhaar card or another government-issued ID.
  • Family Details: Ration card to verify family information and economic background.
  • Income Proof (optional): Some states may require an income certificate.
  • Proof of Address: Utility bills or other documents confirming your residence.

How To Apply For Ayushman Bharat Yojana

Follow these steps to apply for Ayushman Bharat Yojana:

Step 1: Check Your Eligibility

  • Online Verification: Visit the Ayushman Bharat PMJAY website, click on “Am I Eligible,” and enter your mobile number, state, and captcha code to check your eligibility.
  • Offline Verification: Go to the nearest Common Service Center (CSC) or an empaneled Ayushman Bharat hospital. Use your Aadhaar card or ration card details to verify eligibility with the help of trained personnel.

Step 2: Choose Your Application Method

  • Online Application: Visit the PMJAY website, look for the “Register” or “Apply” section, and enter your details. Upload scanned copies of all required documents and submit the application.
  • Offline Application through CSCs: Visit a CSC, where the operator will help you complete the application form, verify your documents, and submit the application electronically.
  • Offline Application at Ayushman Bharat Hospitals: Many empaneled hospitals have helpdesks to assist with the application process. Present your documents, and the hospital staff will help you enroll.

Step 3: Track Your Application Status

  • Use the PMJAY website to track your application status by entering your mobile number and captcha code.

Also Read | How To Get Free Smartphone And Tablet From UP Government: See Here For All Details

Step 4: Collect Your Ayushman Bharat Card

  • After successful verification and enrollment, you will receive an Ayushman Bharat Card (PMJAY card). Present this card at empaneled hospitals when seeking treatment.

Ayushman Bharat Yojana aims to provide comprehensive healthcare to millions of low-income families across India, reducing the financial burden of medical expenses.