Vivo had launched its affordable 5G phone called the V21 5G earlier this year. Some recent reports suggested the company might soon introduce a new color option of the Vivo V21 5G. It seems that the rumors were correct as the company itself has confirmed the new color variant’s launch officially.
Vivo V21 5G New Variant India Launch Soon
The Vivo V21 5G will now be available in a Neon Spark color option. This new model’s launch is confirmed for October 13, 2021, which is just three days away. The teaser poster shared by Vivo via its official Twitter handle gives a glimpse of the upcoming affordable 5G phone. Besides the color scheme, the entire design language is identical to the other variants.
Just to recap, the Vivo V21 5G was previously launched in Arctic White, Dusk Blue, and Sunset Dazzle. With the upcoming variant, the V21 5G will be available in a total of four color options. The Vivo V21 5G Neon Spark variants’ specification will also be identical to the remaining models. Let’s have a look at the details:
Vivo V21 5G Full Specifications
The Vivo V21 5G has been announced with the Dimensity 800 SoC, which is further combined with 8GB RAM and 128GB/256GB storage option. The device has been launched with Android 11 OS, which is topped with FunTouch OS 11.1 UI. The Vivo V21 5G’s Neon Spark color variant will also sport a 6.44-inch AMOLED display.
The screen resolution offered by the V21 5G display is 1080P FHD+ and the refresh rate is 90Hz. The Vivo V21 5G is equipped with a 64MP main camera at the back along with an 8MP ultra-wide-angle sensor and a 2MP depth sensor. The device also has a 44MP selfie camera with OIS. The smartphone has a 4,000 mAh battery, which has 33W fast charging.
Vivo V21 5G Expected Price
Vivo has not confirmed the Vivo V21 5G Neon Spark model’s price details. However, it might be launched with the same price as the other models. This means, the 128GB model could be launched at Rs. 29,990 and the 256GB model might be announced at Rs. 32,990.
Realme has launched multiple new premium mid-range phones in its GT series. The upcoming phone in this series is the Realme GT Neo 2 which will be launching on October 13 in India. Soon after, the company is said to launch another variant in this series called the GT Neo 2T.
A new leak has surfaced online revealing some crucial information related to the Realme GT Neo 2T. Going by the looks of it, the upcoming handset will be a value flagship enabled with 5G network connectivity. Check out what else this new Realme phone will offer:
Realme GT Neo 2T Specifications Leaked Online
According to some leaks posted at the Chinese microblogging platform Weibo suggests the development of a new GT Neo 2 model. This handset is rumored to be launched as the GT Neo 2T in China and the remaining global markets. The leaked spec-sheet shared by the Weibo leaks includes the Dimensity 1200 processor.
We have seen a bunch of Realme smartphones featuring this premium-range MediaTek 5G processor. However, the company is said to use a custom version of the Dimensity 1200 processor. We have seen OnePlus using the custom Dimensity 1200-AI SoC on the Nord 2. Whether or not the GT Neo 2T has the same SoC is yet to be confirmed.
As far as the other features are concerned, the Realme GT Neo 2T is leaked with a 48MP camera. However, it is still not revealed if the GT Neo 2T will have three or four sensors at the back. Nevertheless, this is a downgrade than the standard GT Neo 2.
The leaks have also tipped the GT Neo 2T to sport an E4 AMOLED display. The display size is not revealed; however, it is said be a 120Hz panel with 1080p screen resolution. We can also expect a punch-hole camera cutout for the selfie camera.
The specifications of the selfie camera as well as the battery are also yet to be confirmed. But, there will be a fast charging support and a battery over 4,000 mAh. The company should confirm the details of the Realme GT Neo 2T launch ahead of the standard models debut. We will share the details .
Moto has unveiled new smartphones in its budget segment. The company has introduced Moto E40 and Moto G Pure in Europe and the Us market. However, the launch of Moto E40 in India has been slated for October 12th, 2021. The upcoming device will be available on Flipkart exclusively.
Moto E40 Specifications Details
The Moto E40 comes with a 6.5-inch HD+ display along with a 90Hz refresh rate. The smartphone is powered by a Unisoc T700 octa-core chipset. It has 4GB of RAM and 64GB of storage, which can be expandable further through a microSD card. The Moto E40 runs Android 11.
The Moto E40 comes with a triple camera setup at the back that supports a 40MP main sensor, which has Quad Pixel technology that allows you to take better images at night. In addition, the smartphone packs a 5,000mAh battery, which is likely to last for 40 hours.
Moto G Pure Specifications Details
Similary, the Moto G Pure also Android 11 OS. It comes with a 6.5-inch HD+ IPS TFT LCD, 269ppi pixel density, and a 20:9 aspect ratio. The Moto G Pure device is packed by the MediaTek Helio G25 chipset. The smartphone will have 3GB of RAM and 32GB of in-house storage that can be expanded up to 512GB via a microSD card.
Moto E40 And Moto G Pure Price In India
The Moto E40 has been introduced in Europe at EUR 149, which is close to Rs. 12, 900. The smartphone will be available in two colour options: Clay Pink and Charcol Gray. The Moto E40 smartphone will be launched on October 12th, 2021 and will be available on the leading e-commerce portal Flipkart.
On the other hand, the launch date of Moto G Pure is not known. But still, the smartphone is available in the US at $159,99, which is close to Rs. 12,000. The interested buyers are allowed to purchase the device from the company’s official website starting next week. Also, the smartphone is expected to be available in Canada soon.
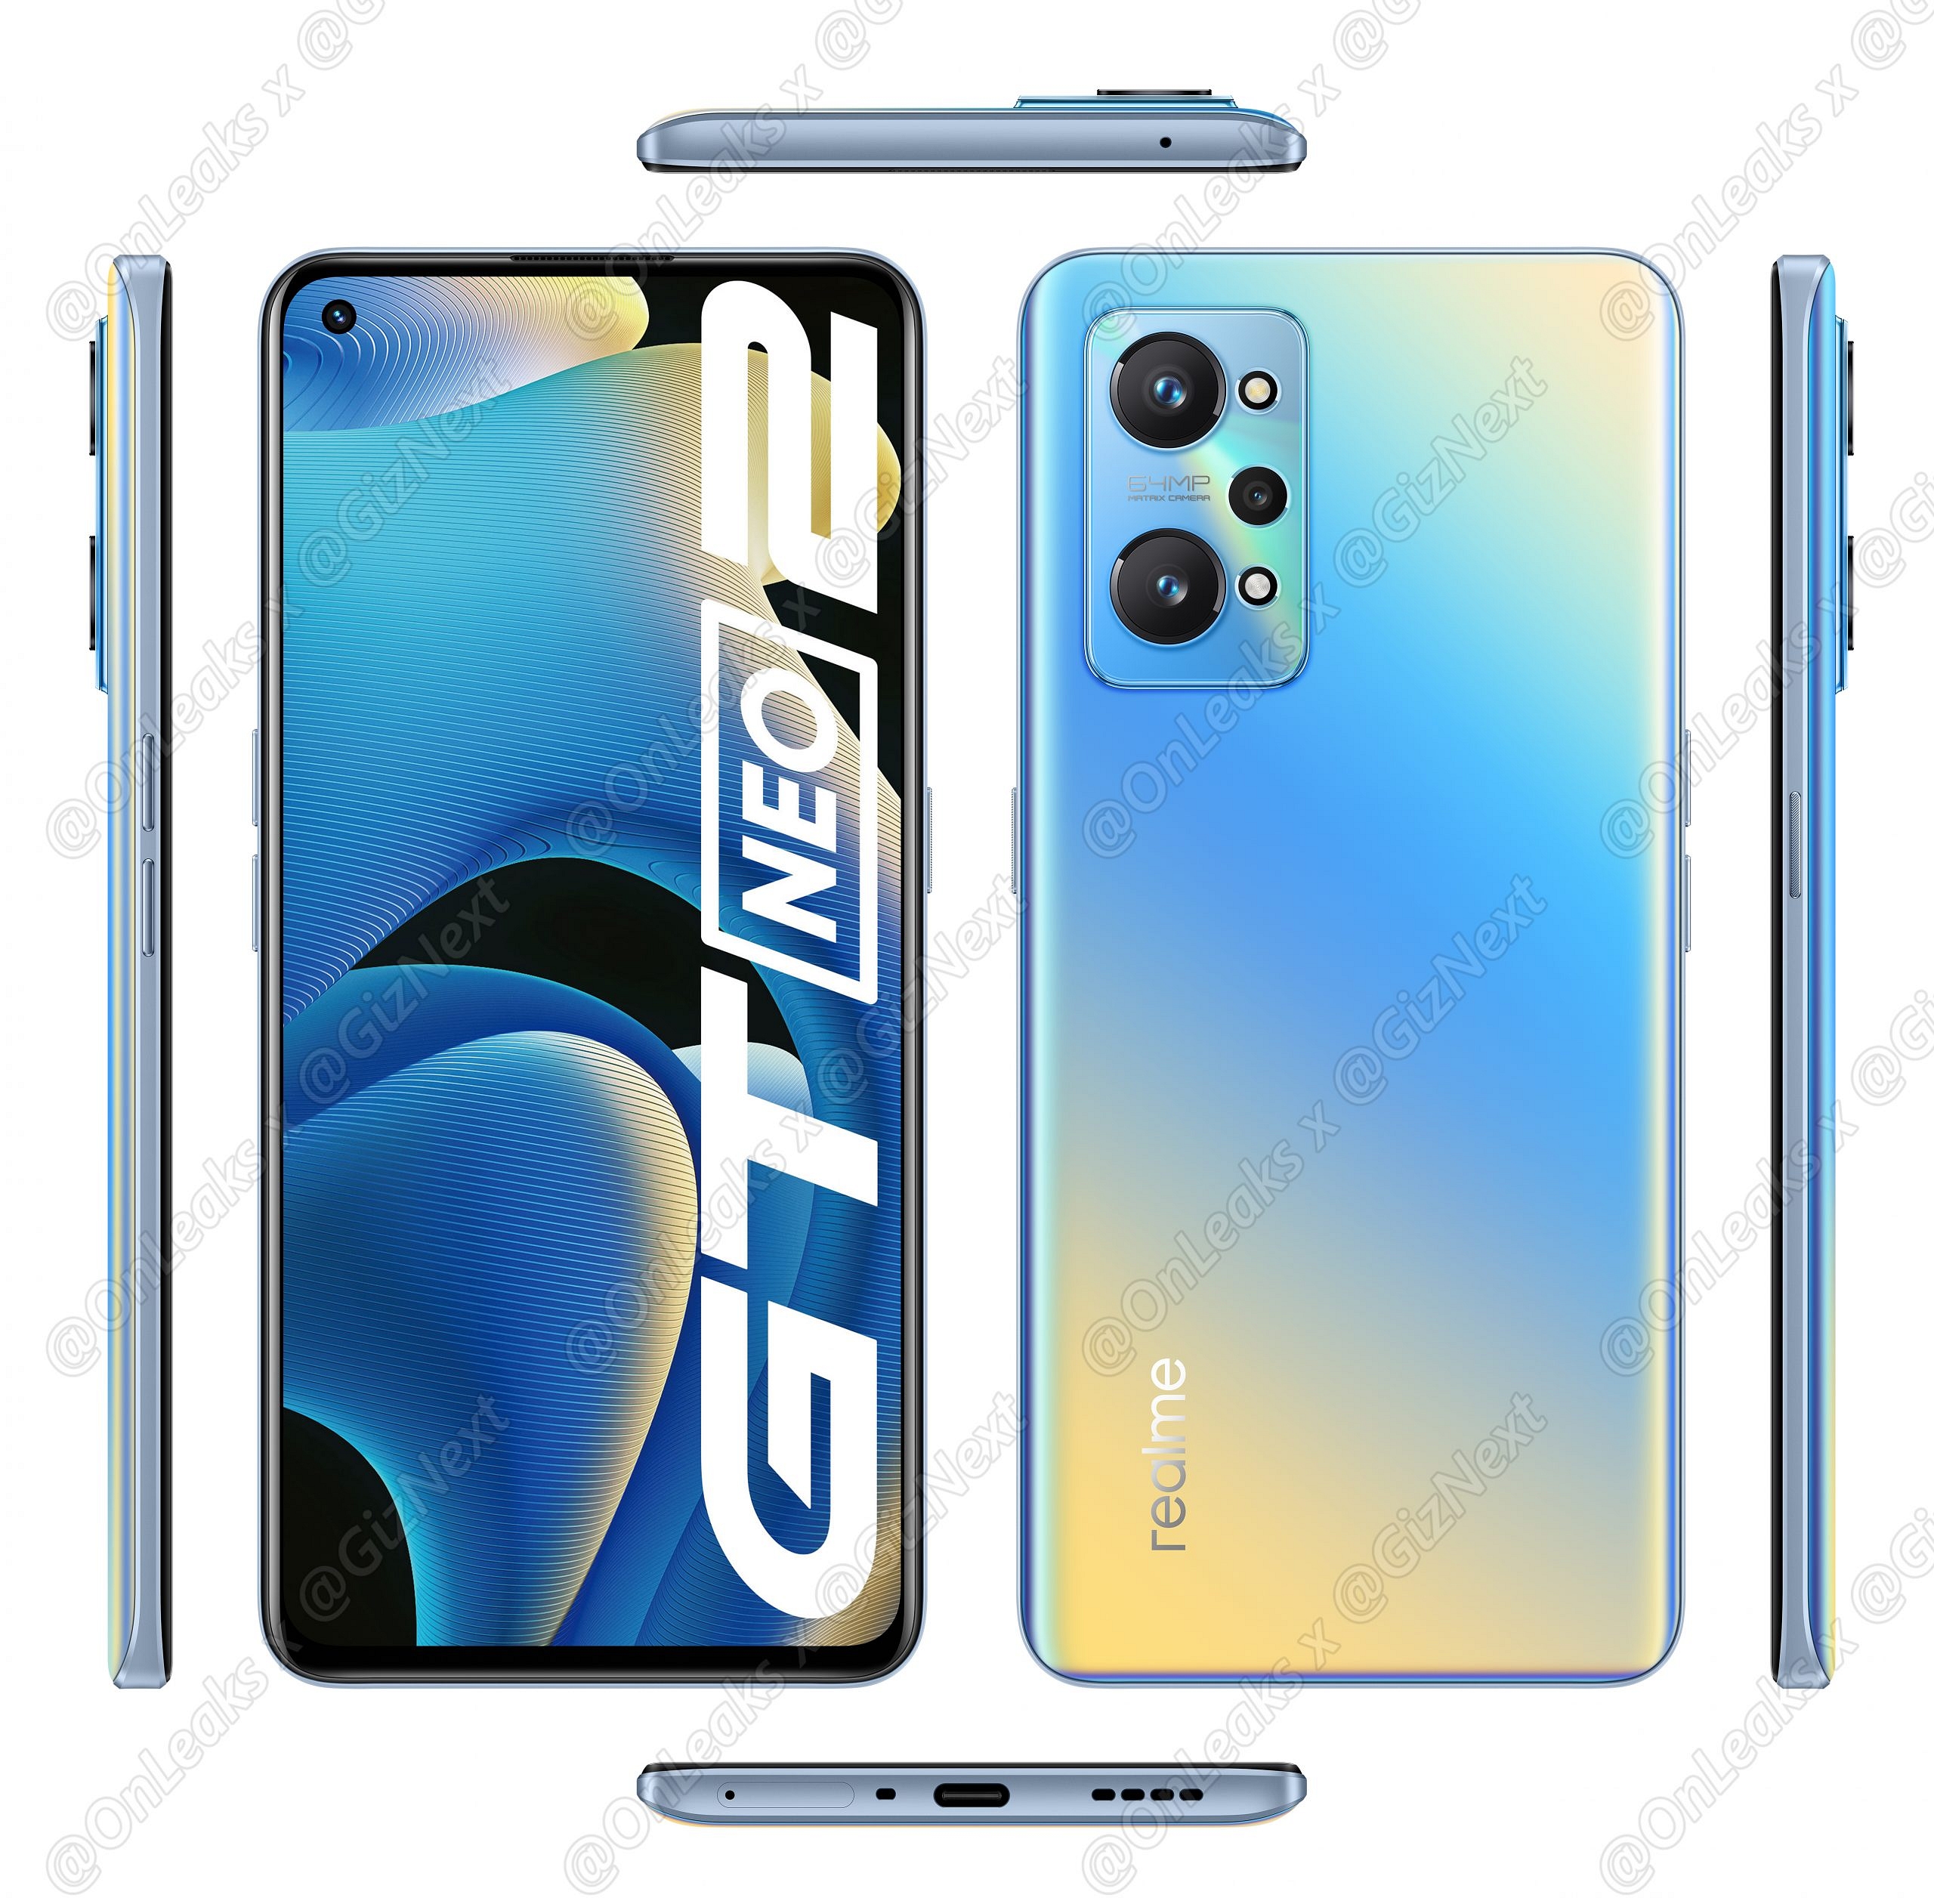
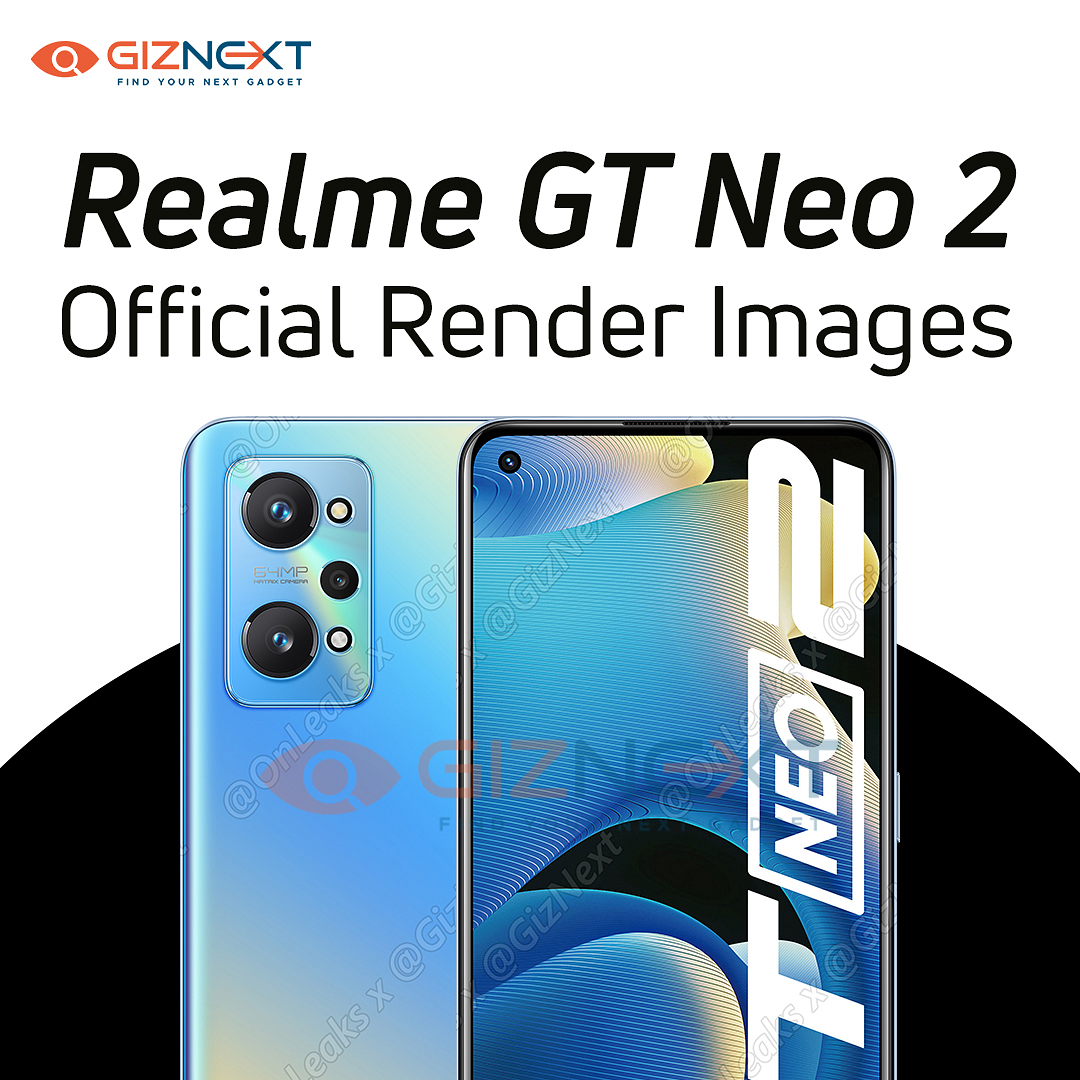
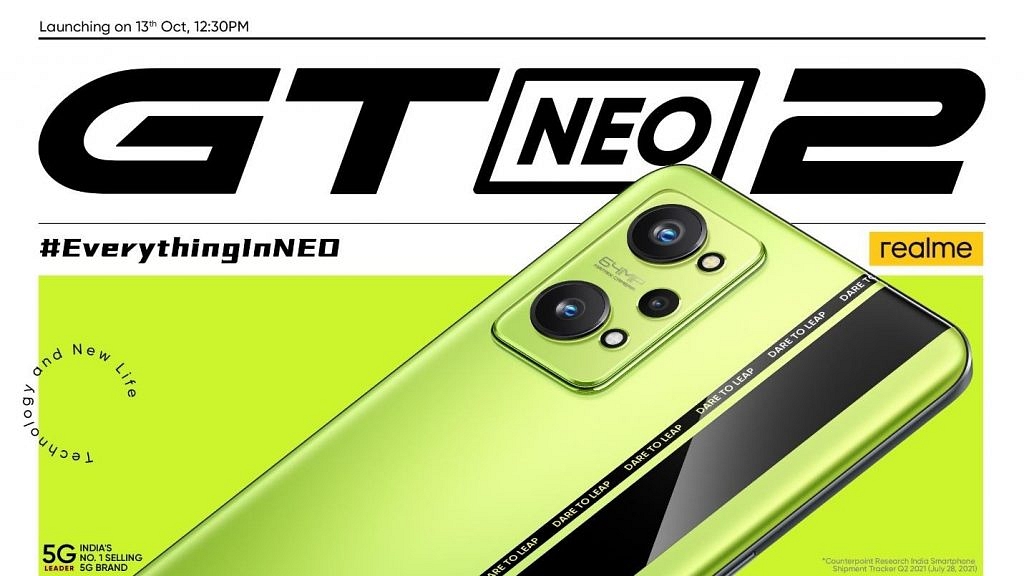
Realme is all set to launch the successor of the GT Neo smartphone in the country on October 13th, 2021. In fact, the company has already confirmed the launch via press note and its official Twitter page. The live streaming of the GT Neo 2 launch will be held on Realme’s Youtube channel and other social media platforms.
Realme GT Neo 2 Confirmed Specifications
Ahead of the official launch, Realme has shared some details of the upcoming smartphone. The company has confirmed that the Realme GT Neo 2 will have Qualcomm Snapdragon 870 processor, which you will find in the recently launched Xiaomi Mi 11 5G and the OnePlus 9R smartphones.
In addition, the smartphone will have a 120Hz E4 AMOLED display and 65W Dart Charge support. The company has confirmed that the Realme GT Neo 2 will focus on “The chipset, fast charging, VC cooling, and many more aesthetics of technology”.
Realme also confirmed that the smartphone will have stainless steel vapour cooling plus, a massive battery, exclusive colour, and an astonishing camera. “Realme GT NEO 2 5G will be a neo flagship killer and a premium mid-range that will strike the perfect balance,” the company added.
Realme has not shared the camera details, but several reports claim that the smartphone might have a triple camera setup at the back along with a 64MP primary lens. Besides, the smartphone is expected to have two storage variants: 8GB/12GB of RAM and 128GB/ 256GB of storage.
Realme GT Neo 2 Design
Apart from the specification, the company has shared the design of the smartphone via a teaser. According to the teaser shared by the company, the Realme GT Neo 2 will have a black strap on the top of a back panel. Furthermore, the device is expected to be available in three unique colours: Neo Black, Neo Green, and Neo Blue.
Realme GT Neo 2 Expected Price
It is important to note that the company has not shared the price of the upcoming smartphone. However, we expect that the device might be close to Rs. 30,000 as the base variant is already available in the European market for EUR 369, which is close to Rs. 32,000.
After launching OnePlus Buds Pro in India, the Oneplus is all set to bring new true wireless stereo (TWS) earphones in October. The OnePlus Buds Z2 TWS is expected to be a successor of the OnePlus Buds Z that was launched in October last year. Ahead of its official launch, we have managed to get the exclusive images in both colors and detailed specifications.
OnePlus Buds Z2 Design
The upcoming Buds Z2 TWS will be available in two color options: Day White and Night Black.
It is important to note that the upcoming earbuds look similar to the OnePlus Buds Z TWS, which means there will be no major changes. However, we expect that ear tips to be slightly angled so that they can give you a better or comfortable fit. The Z2 TWS earbuds will also have an in-ear style design with silicone ear tips.
Buds Z2 Weight
White
Black
Oneplus Buds Z2
4.6g
4.5g
Charging Box
42g
40.5g
Overall Product Weight
51.2g
49.5g
Buds Z2 Size
The Oneplus Buds Z2 Headphone dimension would be 33mm * 2244mm * 21.8 mm and the Charging box will come with the size of 73.15mm * 36.80mm * 29.07mm.
OnePlus Buds Z2 TWS Specification And Features
OnePlus Buds Z2 will have an IP55 waterproof and IPX4 sweatproof charging box. It will have a Type-C charging case, Bluetooth 5.2 connectivity with 10 meters operational range. However, there will be no wireless charging support.
In addition, the TWS is expected to have three microphones and an active noise reduction feature.
Headphone body IPSS waterproof and sweatproof ; charging box: IPX4
Buds Z2 Charging
Charging Port
Headphone: Pogo Pin, Charging Case: Type-C
Headphone Input
5V = 0.15 A
Charging Box Input
5V = 0.9 A
Charging Box Onput
5V = 0.3 A
Wireless Charging
Not Supported
Rated capacity of charging box
520mAh
Battery Headphone battery rated
40mAh capacity
Time required to fully charge
0% to 100% in 90 minutes
Maximum Playback Time
Full Charged Headset: up to 5h (music playback, noise reduction on), 7h (music playback, Noise reduction off) Fully charged headset: 3 h (talk time) Full battery life: up to 27h (music playback, Noise reduction on); 38h (music playback, noise reduction off)
The Oneplus Buds Z2 will last up to seven hours on a full charge. It offers a playback time of up to 38 hours with the charging case. It’ll get fully charged in 90 minutes.
Buds Z2 Other Detailed Specs
Control Method
Press once: play/pause Press twice: next track Press three times: Press and hold the previous track for 1 second to switch the noise control mode, and press and hold for 3 seconds to return to the last connected device. In the phone scenario: Double-click the default to be “answer/end call”, long press for 3s to reject the call.
Wear testing, Whether to support OTA upgrade, Transparent Mode
Support
Pairing Popup
Support (China: OAF, overseas: google fast pair)
ANC active noise reduction
Support (Hybrid ANC active noise reduction)
Noise Reduction Depth
40dB
Voice Assistant
Support, support double-click to wake up the voice assistant
Number of Microphones
3
a
98 dB (Type 4128); 102dB (india version)
rated power
5mW
Status Indicator
Red Light: low battery; white light: pairing; green light: sufficient battery
Microphone Sensitivity
– 38dB (+-2dB)
Oneplus Buds Z2 Price and Launch Timeline
There is no information about the price and the exact date of the launch, but still, we expect that the OnePlus Buds Z2 will launch in October along with the launch of Oneplus 9 RT and Oneplus will make some announcements on the upcoming true wireless stereo earphones soon.
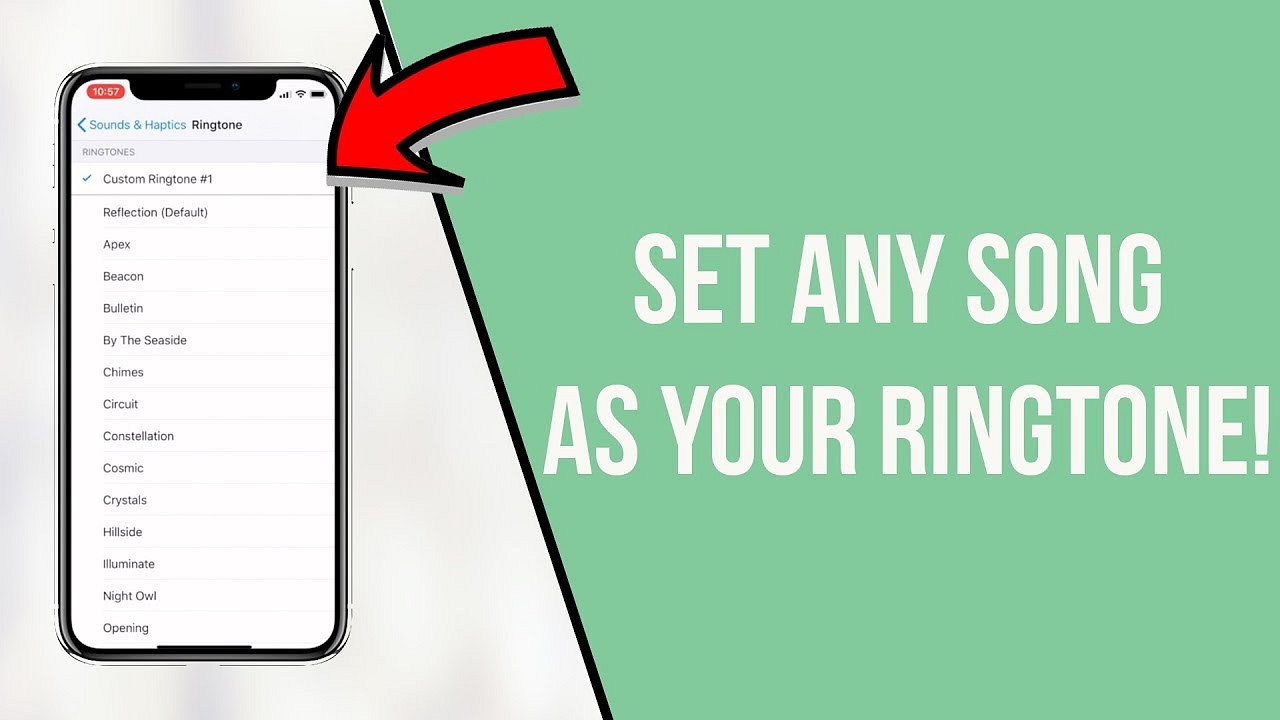
Despite the fact that the iPhone has been around for a long time, there is still no straightforward way to create a custom ringtone, but it is doable. You can make your own ringtones with iTunes if you don’t want to buy them or utilize the ones that come with your iPhone.
With iTunes 12.7, the procedure can be altered slightly. Although the previously synced “Tones” library has been gone, you can still manually install ringtone files on your iPhone.
Step 1: Getting Itunes
With a recent iPhone, you hardly ever need to utilize iTunes. But if you want to install your own custom ringtones, you have to get iTunes first.
On a Windows PC, you’ll need to download and install the most recent version of Apple’s iTunes.If you have a Mac, iTunes generally comes pre-installed. This method will work on both a Mac and a Windows PC.
However, iTunes for macOS Catalina is no longer available from Apple.
Step 2: Choose a Desired Sound File
You’ll need a sound clip to convert and use as a ringtone for this. You most likely already have an idea of what you’d like to use. If not, go ahead and look for anything that interests you. You are free to use any sound file you come across.
The length of your ringtone file must not exceed 40 seconds. Ringtones that are longer than 40 seconds will not be copied to your phone by iTunes.
If the file is long and you only want to use a portion of it, you can use an audio editor to chop it down to the desired length. You are free to use any audio editor you like.
You can visit mp3cut.net to cut your audio files. To utilize this website, go to the “Open file” tab and select the MP3 or other sound file you want to modify. If you submit video files, it can also extract the sound from them.
Step 3: Convert MP3 to AAC format
It’s likely that your audio file is in MP3 format. To use it as a ringtone, you’ll need to convert it to AAC format. (You can skip this step if your sound file is already in AAC format or has a .m4r extension.)
To begin, open iTunes and add the sound file to your library. This can be accomplished by simply dragging and dropping the file into the iTunes library. After that, look for the file under Library > Songs.
In iTunes, go to File > Convert > Create AAC Version and choose the sound file.
Step 4: Renaming Your File
In your iTunes library, you’ll have two copies of the same song file: the original MP3 version and the new AAC version.
To keep track of which is which, right-click on the library’s headings and select the “Kind” column from the drop-down menu.
A new “Kind” column will appear, indicating which file is which. The original MP3 is the “MPEG audio file,” while the “AAC audio file” is your new AAC file. If you choose, you can remove the MPEG audio file version (which is the MP3) from your collection by right-clicking on it.
You now have an AAC file for your ringtone. However, you must modify the file extension in order for iTunes to recognize it as a ringtone.
To begin, drag and drop the AAC file from your iTunes library to your Desktop or any other location on your computer.
The ringtone will be delivered as an AAC file with the.m4a extension. Replace the .m4a extension with.m4r. If the file’s name is Song.m4a, for example, rename it to Song.m4r.
Step 5: Adding Ringtone to your Phone
Finally, use the provided USB-to-Lightning cable to connect your iPhone to your PC or Mac.
If you haven’t previously connected your phone to iTunes on that PC or Mac, unlock your iPhone and hit the “Trust” option on its screen to confirm your file transfer. You’ll be asked to enter your PIN code.
In iTunes, select the device icon to the left of “Library” in the menu bar.
In the left sidebar, click the “Tones” box under My Device.
Drag the.m4r ringtone file from its folder into the iTunes Tones section.
The ringtone will be synced to your phone via iTunes and will appear under Tones here right away.
Conclusion
Listen to any music you like. You can follow the above-mentioned steps to set any customized audio file as your ringtone on your iPhone.
You may be asked for your IMEI number when registering your phone or trying to sell an old one online. Don’t worry if you’re stumped and urgently attempting to figure out what this number is.
What is the IMEI number?
Every mobile phone sold through legitimate channels is granted a unique number known as the IMEI (International Mobile Station Equipment Identity). This number will come in handy if you misplace your phone or it is stolen. When reporting your phone as stolen, the police usually ask for the IMEI number, and depending on local legislation, your phone’s IMEI can be blacklisted, preventing it from connecting to networks or making calls.
Due to the fact that an IMEI is linked to a specific SIM slot, dual SIM phones will have two IMEI numbers. Tablets with cellular connectivity will have an IMEI number as well.
This makes the number crucial in an emergency. If the device is found, the IMEI number can be used to verify that it is genuinely your phone.
Checking your Phone’s IMEI Number Using USSD Code
This is the most straightforward technique of determining your phone’s IMEI number. The advantage of this strategy is that it is almost universal. It works on practically all feature phones and smartphones, so give it a shot before looking for your phone’s bill.
On your phone, dial *#06#.
On the screen, the IMEI number will now appear. You should either write it down somewhere secure or snap a screenshot.
Checking IMEI Number on your Phone
For iPhones
The IMEI is also inscribed on the back panel of an iPhone 5 or any other subsequent iPhone. Simply flip the phone over to record it. The IMEI is printed on the SIM tray on iPhone 4s and any other previous iPhones.
For Android
Use the Google account associated with the Android phone to access Google Dashboard.
Next to the green robot logo, select Android.
This will provide a list of all devices associated with the account and their IMEI numbers.
Checking IMEI number through Settings
To see the IMEI number on Android, navigate to Settings > About > IMEI. Scroll down to get the IMEI information by tapping Status and scrolling down.
Tap Settings > General > About and scroll down to IMEI on an iPhone.
The IMEI is printed on a sticker inside the phone, under the battery, on most other phones with a replaceable battery. To check, remove the battery.
Checking the IMEI Number on Retail Box or Bill
The IMEI number is stated on both the retail box and the bill, which is an excellent incentive to save both instead of tossing them away. At the very least, keep the box because it will come in handy if you need to check the IMEI or if you decide to resell the phone later. The IMEI number will be printed on a sticker on the box’s side.
Conclusion
An IMEI number can come in handy if your phone goes missing or you want to sell your smartphone. If you are having trouble determining your phone’s IMEI number, you can use one of these effective remedies mentioned in this article.
Fast page loading rates, lightweight applications, and a unique tailored experience are just a few of the reasons why UC Browser is so popular among mobile users around the world. Despite this, the browser has been criticized in a number of nations. India, for example, has outlawed the app due to various issues about data protection. We’ve put up a list of the most acceptable UC Browser alternatives for Indian and international users.
Samsung Internet Browser
Samsung Internet Browser is a user-friendly and trustworthy application. It provides an uncluttered browsing experience, and it is probably the closest thing to UC Browser in terms of interface and capabilities. You can choose between search engines (Bing, DuckDuckGo, Google), sync bookmarks between devices, and use Samsung Cloud with ease.
Moreover, it is equipped with Protected browsing, which alerts you about harmful sites stealing data and blocks undesirable web pages that redirect you to other sites, as well as content filters and anti-tracking.
DuckDuckGo Browser
DuckDuckGo is one of the most secure and private web search engines available. When it comes to privacy, its Android browser will not disappoint you. It blocks trackers and only uses secure HTTPS connections everywhere.
Each site you visit is assigned a Privacy Grade (A-F), so you can quickly see how safe you are. We understand how dangerous it is when your personal information accumulates on your browser. DuckDuckGo has a convenient “fire” option that clears all of your tabs and browser history in an instant.
Brave Browser
Brave is a browser that prioritizes security and privacy, making it a viable alternative to UC Browser. Additionally, the Brave browser can use HTTPS everywhere to automatically switch unprotected URLs to HTTPS while simultaneously blocking advertisements and other trackers.
Brave also features data optimization mechanisms that are built-in to reduce data usage. Private browsing, customizable personal search, script blocking, third-party cookie blocking, private bookmarking, and data and battery-saving are just a few of Brave’s other features. Brave is also a member of the Global Privacy Control (GPC) technical committee.
Puffin Web Browser
Puffin is the way to go if all you need is super-fast web browsing. Puffin appears to load online pages faster than the other browsers on this list, thanks to its in-house compression methods. The workload is moved away from the user’s device and onto cloud servers. This allows resource-intensive web pages to load quickly on your phone.
Keep in mind that this thorough compression comes at a cost: Puffin uses a lot of memory when there are numerous tabs open.
Puffin’s internet speeds can be relatively quick, and it claims to save up to 90% of your bandwidth when you’re browsing. While we may not agree with such estimates, we do agree that the browser is extremely fast. Puffin offers an incognito tab that cleans your browser history for security and privacy purposes.
Maxthon
Maxthon browser is more than just a browser that speeds up web page loading and also has a number of other essential features. A password manager, note-taking tool, email manager, web clipper, and night mode are just a few of its valuable tools or functions. While Maxthon compresses web pages to save data and the Smart Image
Display option allows you to save even more data. When Maxthon is enabled, images are loaded in reduced quality or just when they are needed.
Moreover, your favorite websites can be added to a customizable speed dial and can be viewed any time. You can regulate your mobile data consumption and save money with a smart picture display.
Conclusion
A good browser can considerably ramp up your browsing experience. If you are looking for an alternative to the UC browser, make sure to check out these web browsers mentioned in this article and improve the quality of your web surfing.
Most of the modern days smartphones offer a large touchscreen display
You can check the performance of touchscreen of any smartphone
Third party apps can be used for the same
Why not put your Android‘s touchscreen to the test with a touch test app if you think it’s not working correctly? Each of these apps takes a different approach to identify and diagnose any problems with your touchscreen.
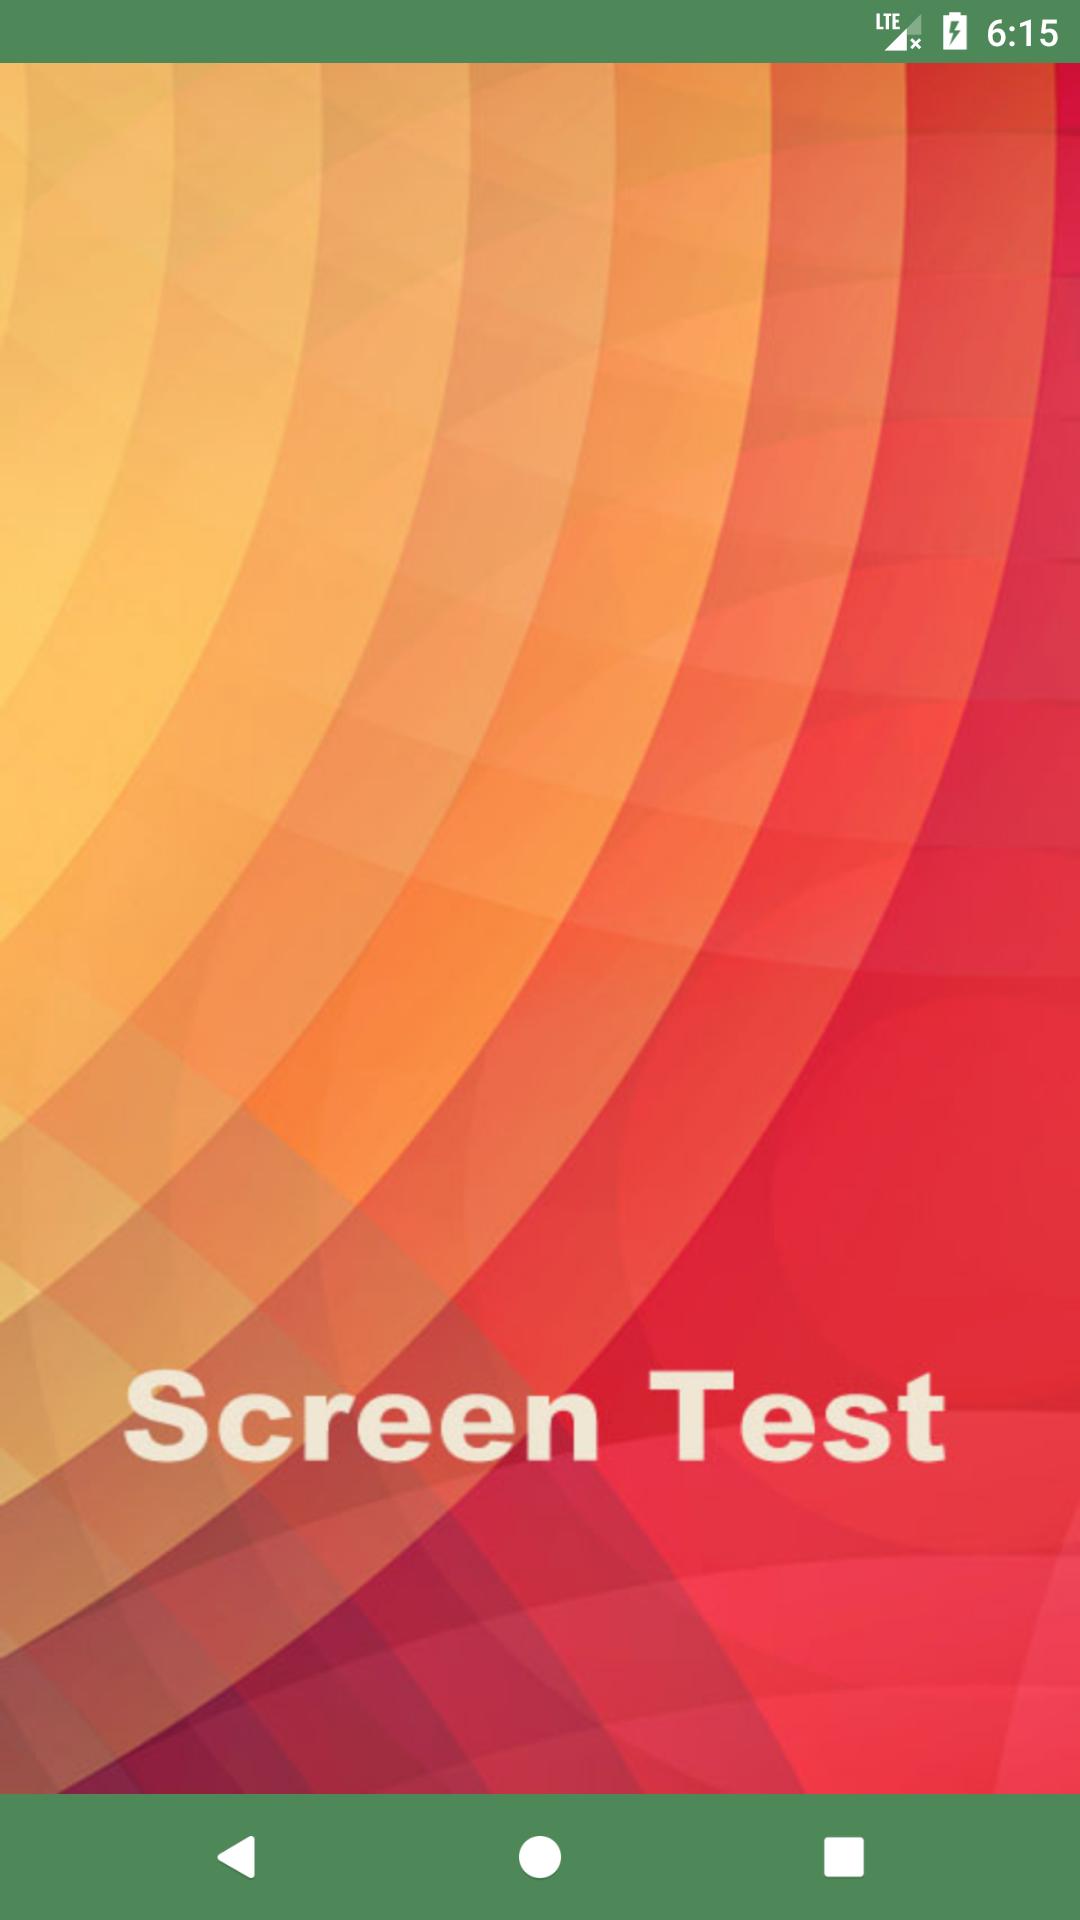
Let’s start with a touch test Android app that teaches you how to locate “dead zones” on your screen. Touch Screen Test is a blank canvas on which you can draw a line with your finger. It has no flashy features or banner ads.
If you can’t draw in a specific location, it means the touch capabilities in that area have been compromised. If you don’t require a feature-rich testing suite, the app’s simplicity makes it an excellent choice.
You can’t use your finger to navigate the in-app menu because the app is solely dedicated to touchscreen testing. To make it appear, you must hit the Volume Up button on your phone. Once it appears on the screen, use Volume Down to cycle through the menu, then hit Volume Up to select an option. It’s not really intuitive, but it’s required to allow you to test the screen while the menu is active.
You’ll discover a good range of toggle and modify choices on the menu. To help diagnose a dead spot, you can alternate between sketching dots and lines. You can enlarge or reduce the line, as well as see additional information such as how many fingers the touch screen can detect.
You can try the MultiTouch Tester if you want to see how many fingers your screen can register. With no sketching tools or extra features, this app is one of the most basic Android multi-touch screen test apps available on the Play Store. It shows you how many fingers your phone can manage at the same time.
MultiTouch Tester will number and assign a unique color to each of your fingers as you place them on the screen simultaneously. It will also keep track of how many fingers are on the screen in total. When you let go of your fingers, the app will track the highest number of fingers that touched the screen.
Do you want something with a few additional features? Then you should definitely try Screen Test Pro. It has many valuable features that make it a one-stop shop for all of your screen testing requirements.
To begin, Screen Test Pro combines the two touch checkers discussed above into a single program. It has a line-drawing feature as well as a multiple-finger tester feature, both of which are handy.
It also includes a pressure tester to see if your phone recognizes whether you’re pressing softly or not. If your phone doesn’t have this feature, no matter how hard you try, your taps will only result in a 1 when you touch the screen. More complex devices, on the other hand, will display values ranging from 0 to 10 depending on how hard you press down. The greater the number, the more pressure is detected by your phone.
Touchscreen Test is also a helpful app that is worth mentioning because of how it evaluates your screen. Other tests allow you to create a pattern to discover the dead spots, but Touchscreen Test has a unique way that shows you exactly where the problematic areas are.
You’ll see a blank grid when you first open the program. If you touch a grid point, it turns green and stays that way. You can continue to fill up the dots on the grid by connecting them. You’ll know if you’ve found a dead spot because the dot won’t light up. You can now work your way around the area to check how far the dead zone extends.
You’ll be left with a grid after running your finger across the entire screen, with green dots indicating regular functionality and blank dots indicating a dead zone. This grid may then be used as a map of your phone’s dead zones, which you can either plan to work around or send to an expert if you take it in for repairs.
If you suspect your touchscreen isn’t operating properly, perform a screen touch test to determine if it’s still functional. Fortunately, there are a slew of apps you can download and utilize to see if your phone is indeed broken or if it’s simply your imagination. If you find that your phone’s touch controls aren’t working properly, try these Android touchscreen remedies to see if they help.
Android phones from companies like Samsung, Xiaomi, and Realme come with a slew of system apps that you may or may not want to use. Nonetheless, they’re sapping your device’s resources unnecessarily. Don’t worry if you wish to remove these pre-installed programs; we’ve got you covered. Here are several simple ways to get rid of pre-installed apps that your phone won’t allow you to erase.
The simplest way to remove pre-installed programs or bloatware is to turn them off completely, as seen below.
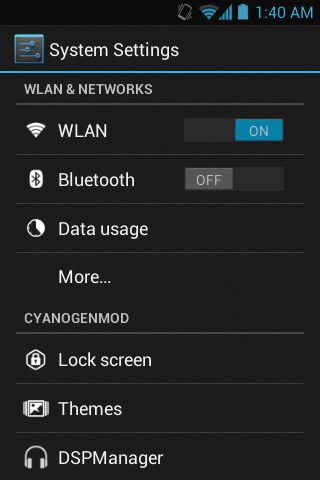
Step 1: Access the Settings option
Step 2: Go to Apps or Manage Applications and locate All Apps (this may vary based on the brand and model of your phone).
Step 3: Next, look for the apps you wish to get rid of. You can find it by typing its name into the top search box.
Step 4: Disable the app by tapping its name. When prompted, select confirm.
.That is all there is to it. The app will be removed from your home screen and app drawer once disabled. It will also no longer run in the background or consume unneeded disc space by gathering cache. Some bloatware can be deleted like regular apps, while others must be disabled using the methods outlined above.
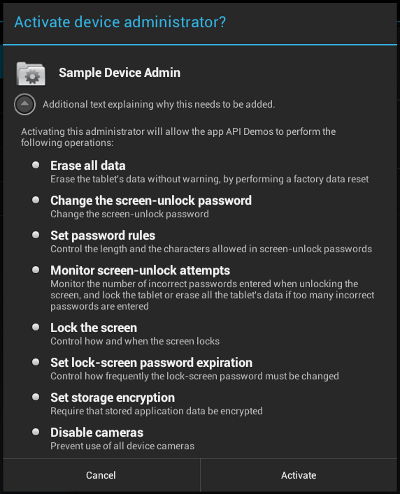
Uninstalling App Without Having Admin Authorization
Some apps require device admin authorization and hence are difficult to uninstall. This is typically the case with antivirus, app lock, and other apps for which you have granted device administrator authority.
To get rid of such apps, follow the procedures below to revoke administrator privilege.
Step 1: On your Android, go to Settings.
Step 2: Go to the section on security. Look for the Device administrators tab on this page.
Step 3: Press the Deactivate button next to the app’s name. The software can now be uninstalled whenever you want.
Removing Apps Without Rooting Your Phone
Another alternative is to connect your phone to your computer and uninstall each program one by one. It’s worth noting that it’s a little tedious and necessitates a basic understanding of computers. However, the procedure can be used to delete programs that cannot be disabled on Android.
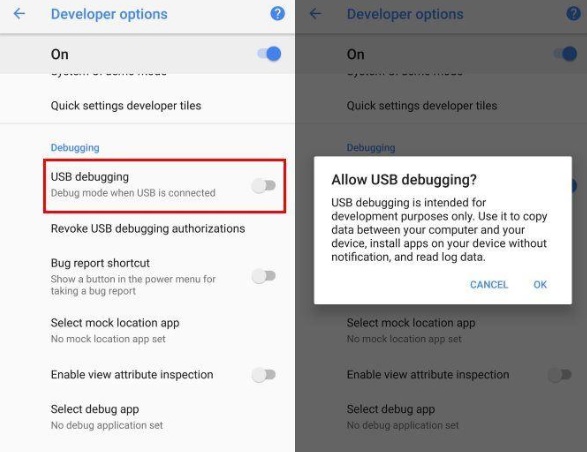
To establish an ADB connection between your phone and PC, you must first activate USB debugging on your phone.
Go to your phone’s Settings and scroll down to the About Phone section.
Tap on Build Number or Version seven times in a row till the toast message “You are now in Developer Mode” appears.
Return to the Settings page. Select Developer Options from the System menu. This feature is available in the ‘Additional Settings’ section of some phones.
Turn on Developer Options by clicking the toggle. Now go to the bottom of the page and enable USB Debugging.
Step 2: Connecting Phone to PC
You can connect your phone to a PC or laptop using a compatible USB cable after you’ve enabled USB debugging.
Make sure the notification pane is set to ‘Transfer Files’ mode. When prompted to “Allow USB Debugging,” select “Always allow from this computer” from the drop-down menu and tap OK.
Step 3: Instal ADB drivers
Install ADB drivers on your computer if you haven’t already. These links will allow you to get the package for Windows, Mac, and Linux.
Open the ADB directory once it has been installed.
Select Open PowerShell Window here by pressing Shift + Right Click.
Check whether your device’s code name appears in the following line, along with its serial number. To use the commands to uninstall apps on your Android, enter the same code again.
Step 4: Use ADB commands
You may now remove unwanted bloatware from your phone with precise ADB commands. “pm uninstall –k ––user 0 names of package>” without quotes is the general command.
Simply download and install the App Inspector app from the Play Store to learn the package names of the apps on your phone. The package name of the targeted application can then be found and used in the command line to delete the app.
Conclusion
Apps are an essential part of what makes your Android smartphone unique, but what if you need to remove them but can’t? Apps might be obstinate at times, but they don’t have to stay with you indefinitely. You can use one of these remedies if you want to uninstall any app from your device.