Ever wanted to isolate that perfect portrait from its busy background? Or maybe turn your product photo into a professional-looking cutout? Well, with Windows 11, you can do just that! This guide will walk you through three simple ways to remove image backgrounds on your Windows 11 machine, no fancy software is needed.
Also Read: How To Create Stickers On Instagram With Cutouts
1. Using Paint
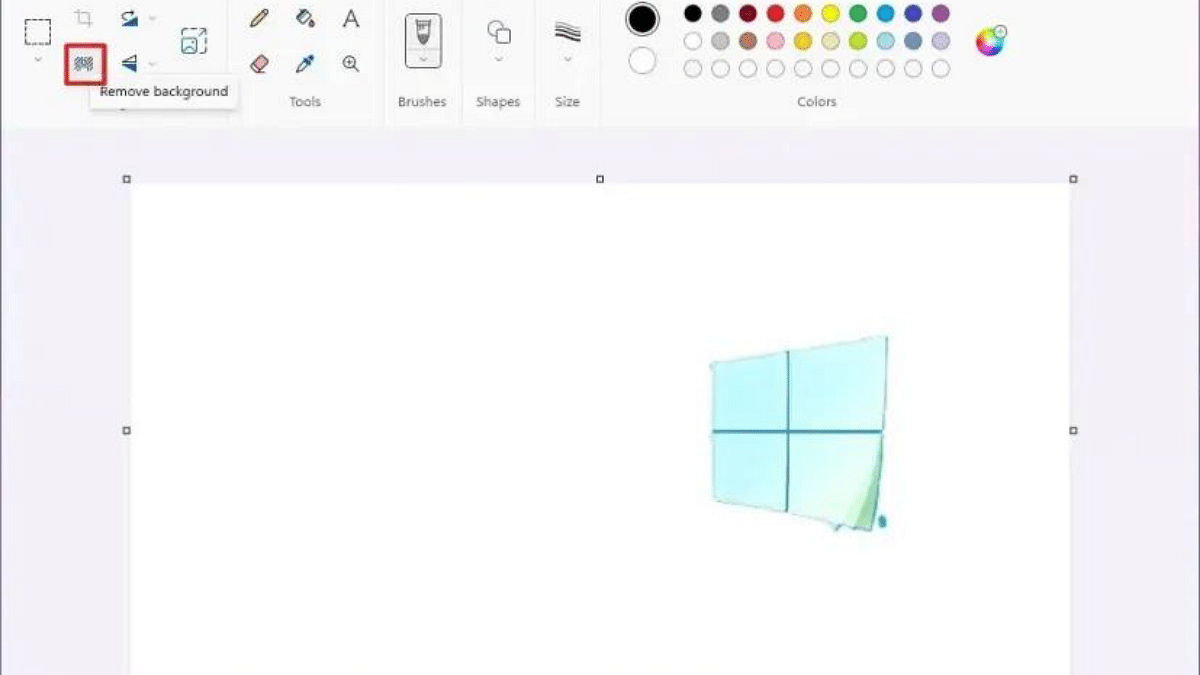
- Open your image in Paint (search for “Paint” in the Start menu).
- Click “File” > “Open” and select your image.
- Head to the “Image” tab on the ribbon and click the magic wand icon labeled “Remove background.”
- Paint automatically removes most of the background.
- Use the “Zoom” tool for precision and the “Eraser” to clean up any stray pixels.
- Click “Save” to keep your transparent masterpiece!
Also Read: Apple CarPlay Not Working? Here’s How to Fix It
2. Photos App
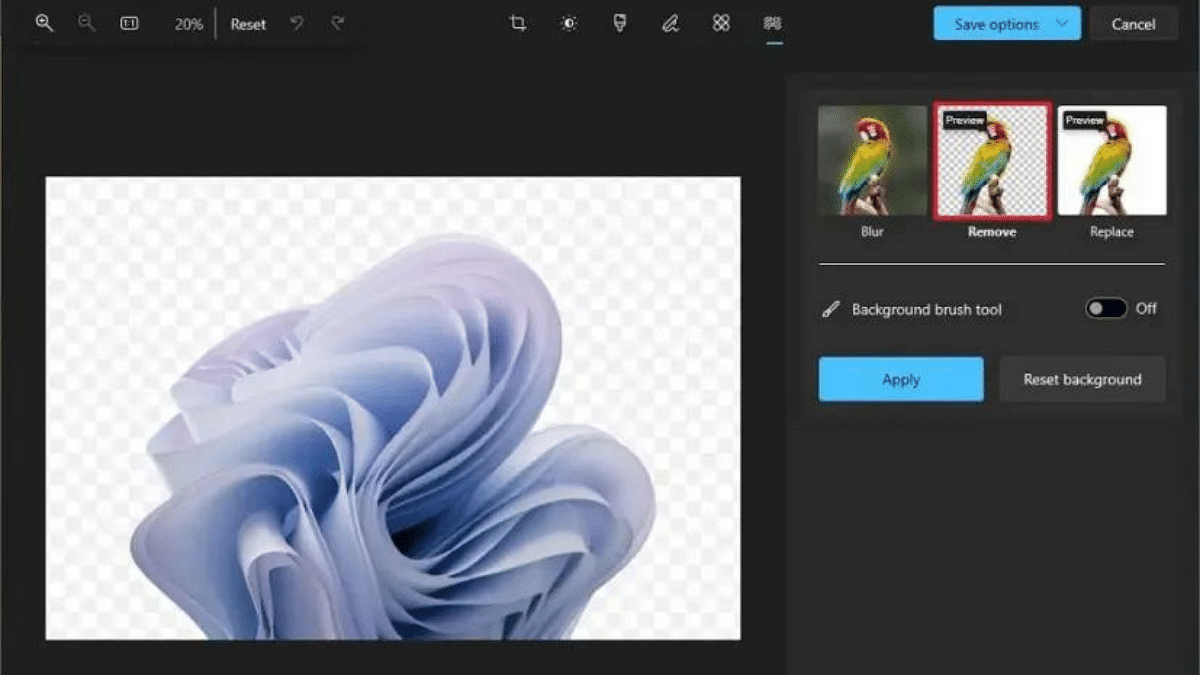
- Open your image in the Photos app (right-click the image and choose “Open with” > “Photos”).
- Click the “Edit image” button (pencil icon) at the top or press Ctrl+E.
- Look for the “Background” button (person with lines behind) and click “Remove.”
- Photos do the heavy lifting, but you can fine-tune with the “Background brush tool.”
- Click “Keep” or “Remove” to adjust the selection, and hit “Done” when happy.
- Click “Save a copy” to preserve your transparent image.
Also Read: Here’s How You Can Recover Lost Or Deleted Data In Windows 11 Laptops, PCs
3. Microsoft Office
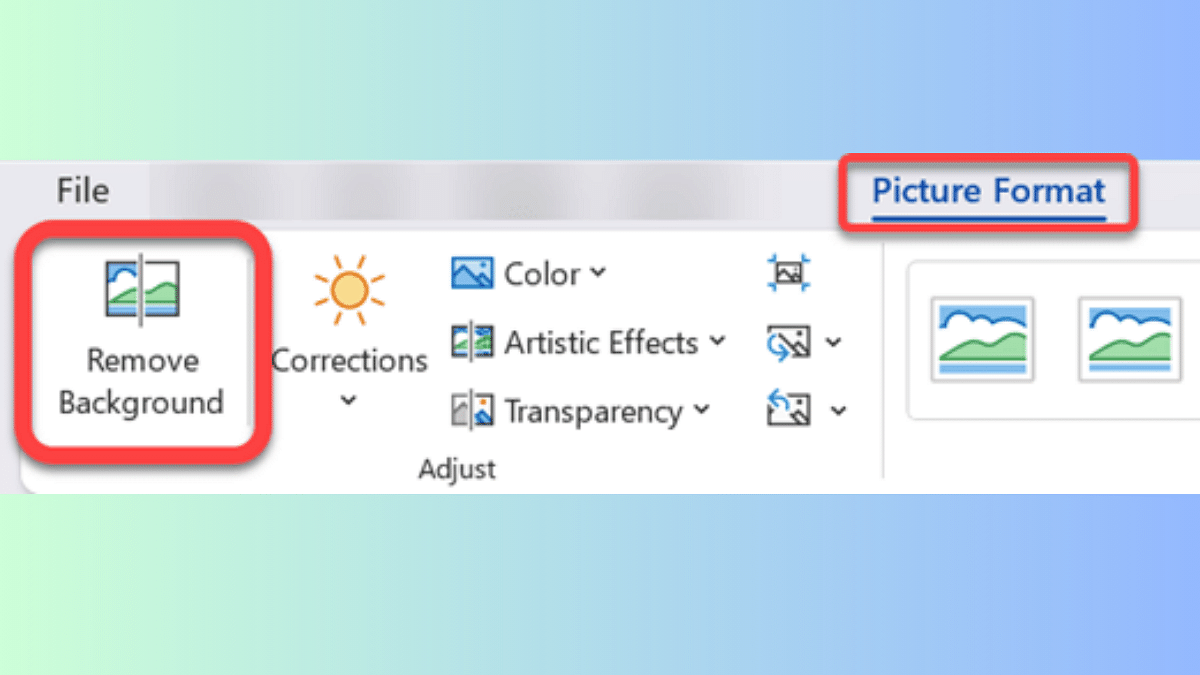
- Open your image in a Microsoft Office program like Word, PowerPoint, or Excel.
- Click on the image to select it.
- Go to the “Picture Format” tab (right-click and choose “Format Picture” if needed).
- Click “Remove Background” – it’s like magic for presentations and documents!
- Use the “+” or “-” buttons to adjust the selection area.
- Click “Keep changes” when you’re satisfied and save your file.
Bonus Tip: For complex images with hair or detailed edges, these built-in tools might not be perfect. Consider online background removers or dedicated photo editing software for more advanced results.