Categories
Apps Featured Info

Say Goodbye To Phone Numbers: WhatsApp Web To Offer Usernames Soon

Key Highlights

  • Users won’t have to use numbers to use WhatsApp soon
  • Usernames will enhance privacy and simplify connections
  • The feature is being refined and doesn’t have a release date yet

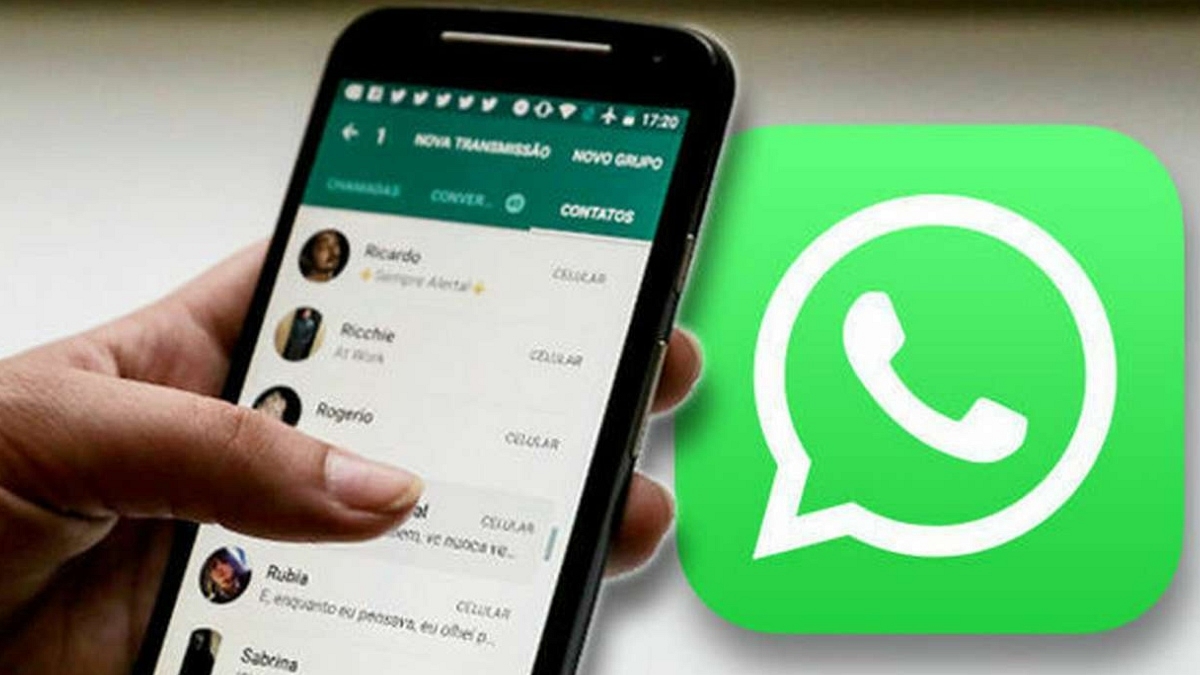
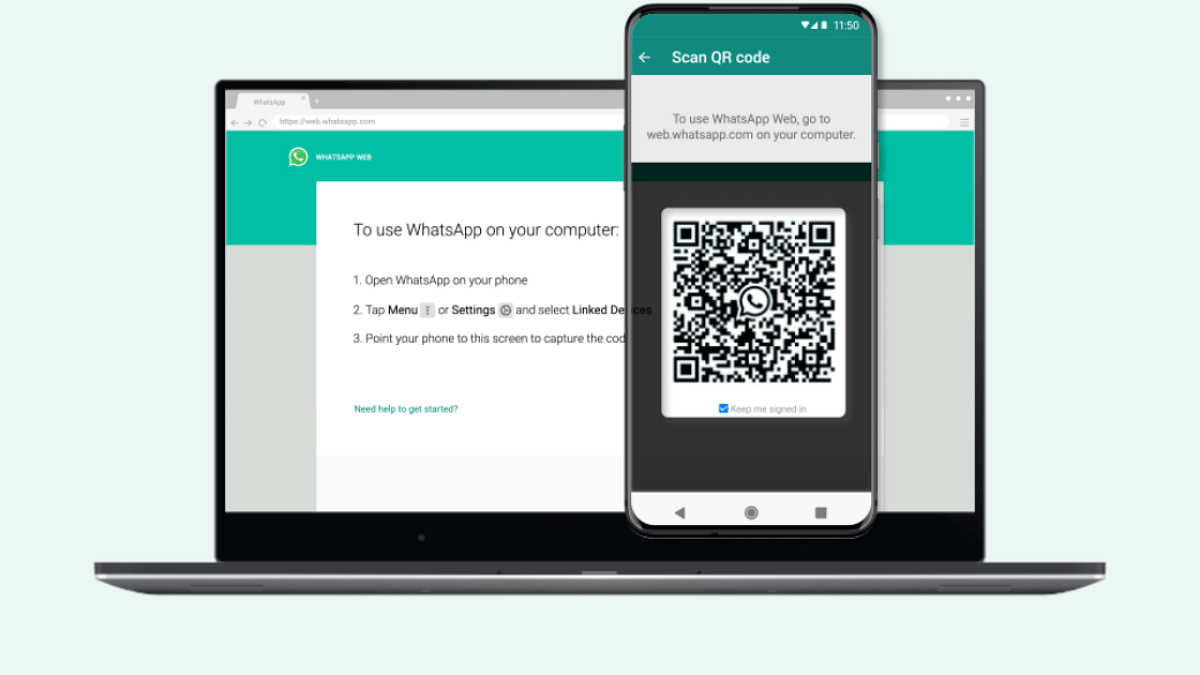
WhatsApp is about to roll out a major change that will transform how users connect. Known for relying on phone numbers, WhatsApp will soon allow users to create unique usernames for their profiles. This new feature will initially be available for WhatsApp Web users. According to a recent WABetaInfo report, this change is in development, and WhatsApp is actively refining the design to ensure a smooth user experience before its official release.

Also Read | WhatsApp Tips & Tricks: How To Unblock Yourself And Regain Access

How Will The Username Feature Work?

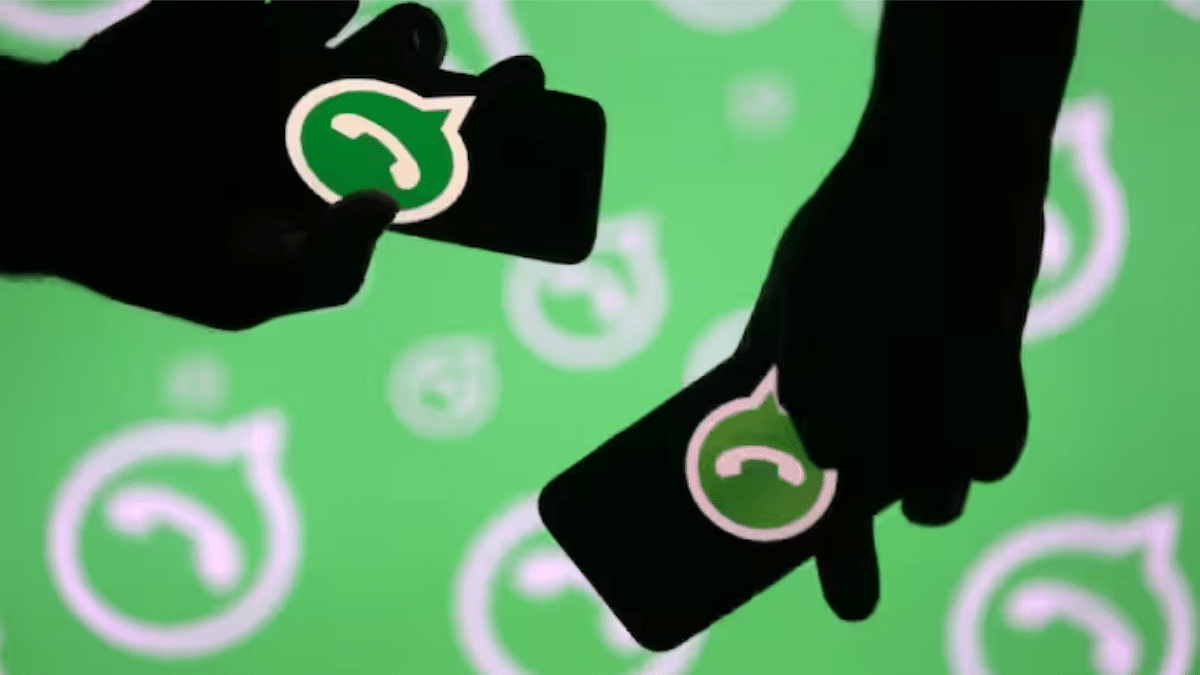
WhatsApp’s upcoming feature will let users choose a unique username, similar to how usernames work on other social media platforms. Users will be able to pick a username that is not already taken, making it easy to identify and connect with others. Unlike some platforms that use tags or discriminators, WhatsApp usernames will be entirely unique. This means each username will be distinct, avoiding any mix-ups or duplications.

Users will be able to choose their preferred username during setup, subject to availability. The goal of this new technology is to streamline the connection procedure and improve privacy. To initiate a chat, users won’t have to disclose their phone numbers anymore. They can communicate with others by using their username instead, which offers an additional degree of privacy. However, if someone already has your phone number saved, they will still be able to contact you as usual. The username feature just adds more control over who can reach you by requiring either your username or phone number for initiating conversations.

Also Read | WhatsApp Privacy Hacks: Tips You Must Follow To Stay Safe

What’s Next?

The feature is still under development, and WhatsApp is putting it through rigorous testing to ensure it meets high standards for security and usability. While WhatsApp has been discussing this feature for a while, there is no set release date yet. The company is focusing on perfecting the feature to provide a seamless experience for users once it goes live.

For the tech geeks, stay updated with the latest cutting-edge gadgets in the market, exclusive tech updates, gadget reviews, and more right on your phone’s screen. Join Giznext’s WhatsApp channel and receive the industry-first tech updates.

Categories
Apps Featured

iPhone Notes App Tricks & Tips: Five Features You Didn’t Know Existed

Key Highlights

  • Use the Notes app to scan documents and keep digital copies of important papers
  • Make to-do lists and checklists effortlessly to stay organized
  • Add password protection for sensitive notes and collaborate with others in real-time

The Notes app on your iPhone is one of the most powerful tools at your disposal. However, you might not be making the most of it. From document scanning to collaboration, here are five features you might not know about that can enhance your productivity and organization.

Also Read | iPhone Tips And Tricks: How To Answer Call Without Touching Your Phone

Scan Documents

Did you know you can scan documents directly from the Notes app? Instead of using a separate app, simply open a new note, tap the camera icon, and select “Scan Documents.” The app will detect the edges of the document and capture a clear image. You can even adjust the corners if needed. This feature is perfect for keeping digital copies of receipts, contracts, and important papers.

Create Checklists

If you’re a fan of to-do lists, this feature is for you. The Notes app allows you to create checklists effortlessly. To begin creating a checklist, open a new note, touch the checklist icon (a circle with a checkbox), and begin typing. A checklist item is automatically added to each new line. You can easily tick off tasks as you complete them, making it a great tool for grocery lists, packing lists, or daily to-dos.

Add Password Protection

For those sensitive notes you don’t want others to see, you can add password protection. Open the note you want to secure, tap the share icon, and choose “Lock Note.” You’ll be prompted to set a password and, if your device supports it, enable Face ID or Touch ID for easy access. This feature is ideal for keeping personal information safe, like financial details or private thoughts.

Collaborate With Others

The Notes app also supports collaboration, allowing multiple people to view and edit the same note. This is handy for planning events, sharing ideas, or working on projects together. To share a note, tap the share icon, choose “Collaborate,” and send the invitation via Messages, Mail, or another app. You can see changes in real-time, making it easy to stay in sync with your collaborators.

Organize With Folders And Tags

Keep your notes tidy and organized using folders and tags. Create folders by tapping the folder icon in the Notes app’s main view, then drag and drop notes into the appropriate folder. You can also add tags to your notes by typing a hashtag followed by a keyword (e.g., #work, #personal). This makes it easier to find specific notes later using the search function.

Also Read | iPhone Tips & Tricks: Here’s How You Can Measure Height Using An iPhone Camera

Conclusion

The Notes app on your iPhone is more than just a simple text editor. With features like document scanning, checklists, password protection, collaboration, and organization tools, it’s a powerful productivity app that can help you stay organized and efficient. Give these features a try and see how they can enhance your note-taking experience.

For the tech geeks, stay updated with the latest cutting-edge gadgets in the market, exclusive tech updates, gadget reviews, and more right on your phone’s screen. Join Giznext’s WhatsApp channel and receive the industry-first tech updates.

Categories
Apps

100+ Inspiring Instagram Username Ideas For Family Accounts

Key Highlights

  • Choose a username that’s easy to find and sets the tone
  • Capture and share special family moments
  • Use our ideas and modify them to reflect your family’s spirit

Creating an Instagram account for your family is a fun way to share special moments and stay connected with loved ones. Choosing the perfect username can set the tone for your account and make it easy for friends and family to find you. In this article, we’ll explore a variety of Instagram username ideas for family accounts that are creative, memorable, and reflect the unique spirit of your family. Let’s check them out.

Also Read | 100+ Best Usernames Ideas For Instagram Account Dedicated To Lord Shiva

Catchy Instagram Username For Family Account

Together We Smile FamFamily Dream TeamLoving Life Fam
Happy Family TimesThe Johnson JoysThe Happy Fam
Family Joy JourneyCherished Moments FamJoyful Journey Fam
Forever Family FunFamily Love ChroniclesHeartfelt Family
Bonded By Love FamOur Family AdventuresTogether As One Fam
United Hearts FamHappy Home VibesFamily Happiness Hub
The Smith ClanUnited Family BondsPrecious Family Moments
All Together FamFamily Time TreasuresFamily Smile Stories

Creative Instagram Username For Family Account

Fun Family TimesFamily Laughter LinesOur Happy Fam
The Family NestThe Great Family TimesFamily Love Stories
Together We Thrive FamFamily Moments CapturedJoyous Family Journey
Everlasting Family LovePure Family JoyHarmonious Family
Family Bonding TimeAlways Together FamThe Family Circle
Cherished Family BondsBlissful Family LifeTogether In Love Fam
Happy Clan TogetherHeartwarming FamilyFamily Adventures Daily
Our Family TalesFamily Bonding JourneyEndless Family Fun

Trendy Instagram Username For Family Account

Family Unity ForeverFamily Fun SquadFun Family Life
Love And Laughter FamUnited FamFamily Gems
The Happy HouseholdCherished Family FunOur Joyful Clan
Forever Family FavesSmiling Together FamFamily Happiness
Bonded BunchFamily Joyful MomentsUnified Family
Joyful Family JourneyHappy TribeEverlasting Family Fun
Family Treasures TodayFamily Love ChroniclesLove And Family Moments
Our Tribe AdventuresTogether We LaughFamily Joy Squad

Also Read | Earth-Friendly Handles: 100+ Instagram Username Ideas For Environmental Sustainability

Conclusion

Finding the right Instagram username for your family account can be a delightful process. With these ideas, you’re sure to discover a name that captures your family’s essence and helps you share your precious moments with the world. Don’t forget to modify these names according to your requirements.

For the tech geeks, stay updated with the latest cutting-edge gadgets in the market, exclusive tech updates, gadget reviews, and more right on your phone’s screen. Join Giznext’s WhatsApp channel and receive the industry-first tech updates.

Categories
Apps Featured Info

Flipkart GOAT Sale 2024: Big Discounts On Smartphones, Home Appliances From Top Brands

Key Highlights

  • Flipkart GOAT sale set for July 20-25
  • Early access for Plus members from July 19
  • Up to 10 percent instant discount with Axis, HDFC, IDFC First Bank cards

In response to Amazon’s announcement of its Prime Day Sale 2024, Flipkart has unveiled its much-anticipated GOAT Sale 2024. This sale promises to deliver big discounts and deals across a diverse range of products, particularly focusing on consumer technology.

Also Read | Amazon Prime Day Sale 2024 Set For July 20-21: Check Out Big Deals And New Launches

Flipkart GOAT Sale 2024: Date

The Walmart-owned e-commerce platform has announced that the GOAT Sale will run for five days, from July 20 to July 25, with Flipkart Plus members gaining early access starting on July 19.

Bank Offers

One of the key highlights of the GOAT Sale is the array of bank offers available to customers. Shoppers can avail of up to a 10 percent instant discount on purchases made with Axis Bank, HDFC Bank, and IDFC First Bank cards. Additionally, Flipkart Axis Bank credit card holders will benefit from a 5 percent cashback bonus. Flipkart will also give up to Rs. 50 off payments made with Flipkart UPI and discounts with Super Coins on a selection of products.

Exclusive Deals

Flipkart’s GOAT Sale 2024 promises exciting discounts across a wide range of products. Shoppers can look forward to impressive deals, especially in the smartphone and electronics categories.

Smartphones:

SmartphoneDiscounted Price
iPhone 14 PlusRs. 55,000
Google Pixel 7Rs. 32,999
Google Pixel 7aRs. 27,999
Google Pixel 8Under Rs. 50,000
Google Pixel 8aRs. 39,999
Realme 12 ProRs. 22,999
Realme 12 Pro+Rs. 26,999
Nothing Phone (2)Rs. 28,999

Furthermore, there will be enticing deals on smartphones from popular brands such as Vivo, Oppo, Motorola, Redme, and more.

Electronics And Home Appliances:

The Flipkart GOAT Sale 2024 isn’t limited to smartphones. Shoppers can look forward to large discounts on a wide range of electronic products and home appliances. This includes laptops, PCs, televisions, and various other gadgets. The sale presents a golden opportunity for those looking to upgrade their electronics or furnish their homes with the latest appliances.

Also Read | Amazon Prime Day 2024 Sale Is Coming: Discounts, Entertainment, Member Perks Await

Conclusion

Flipkart’s GOAT Sale 2024 is expected to be a big occasion for consumers, with steep price cuts and special offers on a variety of goods. Whether you’re in the market for a new smartphone, laptop, or home appliance, this sale is a great opportunity to make your purchases at reduced prices. Don’t miss out on the chance to take advantage of these offers from July 20 to July 25, with early access for Flipkart Plus members starting on July 19.

For the tech geeks, stay updated with the latest cutting-edge gadgets in the market, exclusive tech updates, gadget reviews, and more right on your phone’s screen. Join Giznext’s WhatsApp channel and receive the industry-first tech updates.

Categories
Apps Featured How To

Instagram Rolls Out 20-Track Reels: Here’s How To Use It Like A Pro

Key Highlights

  • Instagram now lets you add up to 20 music tracks to a single Reel
  • Align audio with text, stickers, and clips to the Reel
  • Update your app to create and edit your Reel with multiple tracks

Instagram users in India have a new way to enhance their creativity with the introduction of the Multi Audio Tracks on Reels feature. This update allows users to add up to 20 music tracks to a single Reel. The announcement was made via an Instagram post, stating, “Starting today, you can add up to 20 tracks to a single reel and visually align audio with elements like text, stickers, and clips while you’re editing in the app.”

Also Read | The Insta-Famous Five: Check Top Five Most-Followed Instagram Accounts

The new feature not only enables the addition of multiple audio tracks but also allows users to align these tracks with visual elements like text, stickers, and clips. This alignment ensures that the audio and visuals are perfectly synchronized. According to Instagram’s Head, Adam Mosseri, this feature is designed to provide more creative freedom for users.

Focus On Short-Form Videos

Instagram’s shift towards enhancing short-form video content has been evident. Mosseri has previously stated that long-form videos are less compatible with Instagram’s core mission of connecting people with friends. Short-form videos, such as Reels, facilitate more interaction and content sharing among users. By focusing on short-form content, Instagram aims to strengthen its community by encouraging more engagement.

Steps To Add Multiple Audio Tracks To Your Reel

To make the most of this new feature, follow these simple steps:

Step 1: Ensure your Instagram app is updated to the latest version on your Android smartphone or iPhone.

Step 2: Launch the app on your smartphone.

Step 3: Tap the Plus icon at the bottom of the screen, then select the Reels option.

Step 4: Capture the video content you wish to share.

Step 5: Swipe up to enter the editing mode.

Step 6: Tap the ‘Tap to add Audio’ option.

Step 7: Select the first track you want to add and adjust its length.

Step 8: Repeat the process to add up to 20 tracks, adjusting the length of each as needed.

Step 9: Add stickers, text, and other elements to your Reel.

Step 10: Once satisfied with your edits, tap the Share button to post your Reel on Instagram.

Also Read | How To Remove A Single Image From Instagram Carousel

Conclusion

With the ability to add up to 20 audio tracks to a single Reel, Instagram users in India now have more tools at their disposal to create engaging and dynamic content. This feature, combined with the platform’s focus on short-form videos, aims to foster greater creativity and interaction among users.

For the tech geeks, stay updated with the latest cutting-edge gadgets in the market, exclusive tech updates, gadget reviews, and more right on your phone’s screen. Join Giznext’s WhatsApp channel and receive the industry-first tech updates.

Categories
Apps Featured How To

WhatsApp Rolls Out ‘Favorites’ Filter: What It Is And How To Use

Key Highlights

  • Favorites filter lets users easily find important contacts
  • Add and reorder favorites directly from the chats
  • WhatsApp is testing a feature to transcribe voice messages into text

WhatsApp is rolling out a new “Favorites” filter. This feature will allow users to mark specific contacts and groups as favorites, ensuring they appear at the top of the calls and chats tabs. The rollout is gradual and will be available across all platforms, including Android, iOS, web, and desktop versions, in the coming weeks.

Also Read | WhatsApp Tips & Tricks: How To Unblock Yourself And Regain Access

Understanding WhatsApp Favorites Filter

The Favorites filter is an addition to the existing chat filters on WhatsApp, which currently include “All,” “Unread,” and “Groups.” This new filter is intended to help users quickly find the people and groups they interact with the most. By setting contacts as favorites, users can easily access these important chats and calls without having to search through their entire list of active conversations and call logs. In the calls tab, the option to add a favorite will be prominently displayed at the top of the call logs.

How To Use The Favorites Filter

Using the new Favorites filter is simple:

Step 1: Add Favorites in chats

  • Open the chats screen
  • Select the “Favorites” filter
  • Choose the contacts or groups you want to mark as favorites

Step 2: Add Favorites in calls

  • Go to the calls tab
  • Tap “Add favorite”
  • Select the desired contacts or groups

Step 3: Manage Favorites

  • Navigate to Settings
  • Go to “Favorites”
  • To manage and reorder your favorite contacts and groups, choose “Add to Favorites”

Upcoming Feature: Voice Message Transcription

In addition to the “Favorites” filter, WhatsApp is also working on a new transcription feature for voice messages. This feature, powered by Meta AI, is currently being tested by a select number of Android users in some regions. It will provide users with a textual transcription of voice notes, making it easier to understand the content of voice messages without having to listen to them.

Also Read | WhatsApp Tips And Tricks: Easy Ways To Record WhatsApp Video Calls

Conclusion

With the introduction of the “Favorites” filter and the potential addition of voice message transcription, WhatsApp continues to improve its user experience. These new features are set to make communication on the platform more efficient and user-friendly.

For the tech geeks, stay updated with the latest cutting-edge gadgets in the market, exclusive tech updates, gadget reviews, and more right on your phone’s screen. Join Giznext’s WhatsApp channel and receive the industry-first tech updates.

Categories
Apps Featured How To

iOS 18 Public Beta: Check Steps To Install On Your iPhone For Early Access

Key Highlights

  • Apple’s ambitious update revolutionizing iPhone interactions
  • Public Beta available now for early access to new features
  • Install on secondary devices due to potential bugs

At WWDC 2024, Apple unveiled iOS 18, their most significant release to date. This update promises to transform iPhone user interactions with a range of new features. The iOS 18 public beta is now available for download on supported devices. This allows users to get an early look at the improvements. However, since it’s a beta version, it might come with bugs and other issues. It is advised to install it on your primary device. If you decide to go ahead, ensure you thoroughly back up your data to avoid potential problems.

Also Read | From iOS 18 To macOS Sequoia: Key Announcements At WWDC 2024

Supported iPhones For iOS 18

The following iPhone models can receive the iOS 18 update:

  • iPhone 15 Series
  • iPhone 14 Series
  • iPhone 13 Series
  • iPhone 12 Series
  • iPhone 11 Series
  • iPhone XS
  • iPhone XS Max
  • iPhone XR
  • iPhone SE (2nd generation or later)

How To Install iOS 18 Public Beta

To download iOS 18 public beta on a compatible iPhone, you’ll need an Apple ID. Follow these steps:

Step 1: Go to beta.apple.com and register your Apple ID for the public beta program.

Step 2: After that, open the Settings app.

Step 3: Go to General > Software Update.

Step 4: Look for the iOS public beta in the beta updates section and select “Update Now.” The iOS 18 public beta is approximately 6.98 GB.

Step 5: Once the download is complete, tap on “Install.” Your iPhone will restart, and iOS 18 will be ready to use.

Also Read | iOS 18 To Bring AI Features: What’s In Store For Your iPhone This Fall?

What To Expect After Installation

After installing iOS 18, you might not notice significant changes immediately. One of the first noticeable updates is the redesigned Control Centre. However, other new features are waiting to be explored. The much-awaited Apple Intelligence features are not currently accessible but should become available in September. Since this is a beta version, it’s best to install it on a secondary device to avoid any potential disruptions to your primary phone usage.

For the tech geeks, stay updated with the latest cutting-edge gadgets in the market, exclusive tech updates, gadget reviews, and more right on your phone’s screen. Join Giznext’s WhatsApp channel and receive the industry-first tech updates.

Categories
Apps Featured Info

Google And Apple Weather Apps Get Major Updates: Check What’s New

Key Highlights

  • Google Weather to show actual dates in the 10-day forecast
  • iOS 18 will display actual and feels-like temperatures prominently
  • Both updates enhance user experience with more detailed information

Google and Apple are both rolling out updates to their weather apps, aiming to make it easier for users to plan their days and weeks. Here’s a look at what’s changing in Google Weather and Apple Weather, and how these updates could benefit you.

Also Read | Google Maps Levels Up: Android Users Gain Access To iOS Exclusive Weather Feature

Google Weather Update

Google is making a small but significant tweak to its Weather app. Previously, the 10-day forecast displayed only the days of the week, like “Today,” “Sunday,” and “Monday.” Now, the forecast will include actual dates along with the days. This change might seem minor, but it can be very helpful for long-term planning. When you look at the forecast beyond the current week, having specific dates can prevent confusion and make it easier to plan activities or trips.

This update is part of Google app version 12.25. While Google Weather hasn’t seen many updates since its redesign in 2023, this new feature shows Google’s commitment to improving user experience. Along with this change, Google is also leveraging first-party forecasting models. This means that Google Weather is using more accurate and reliable data for its forecasts.

Another exciting development is the potential addition of radar features and more widgets for all Android devices. Currently, Pixel phones and At a Glance weather icons have already received updates, but these new features could soon be available to a wider range of Android users.

Apple Weather Update

Apple is also enhancing its Weather app with the upcoming iOS 18 release. One of the major new features is the display of both the actual and “feels-like” temperatures. The actual temperature will be shown in a large font, while the feels-like temperature will be displayed below it in a smaller font and a different color. This addition helps users get a better understanding of how the weather feels, which can be particularly useful in extreme weather conditions.

Another useful feature in Apple’s update is the integration of home and work locations. By default, the Weather app will now add your home and work addresses to the list of tracked locations. This means you can easily check the weather for these important places without having to manually enter the addresses each time. This integration simplifies the process and ensures you are always updated about the weather conditions where you spend most of your time.

Also Read | Want To Get Weather Alerts On Your iPhone? Here’s How To Do It

Conclusion

Both Google and Apple are making their weather apps more user-friendly with these updates. Google’s inclusion of dates in the 10-day forecast helps with long-term planning, while Apple’s detailed temperature display and automatic location tracking make it easier to understand and monitor the weather. Whether you use Google Weather or Apple Weather, these new features aim to provide a more streamlined and informative experience, helping you stay prepared for whatever the weather brings.

Categories
Apps Featured How To

Hassle-Free Daily Commute: How To Travel Free Via Uber (Even In Peak Hours)

Key Highlights

  • Select ‘Shuttle’ in the Uber app and confirm your ride
  • Track the shuttle, arrive on time, and enjoy a comfortable journey
  • Get dropped at a designated point

Traveling in Delhi-NCR can be a hassle with crowded buses, long metro rides, and driving through peak traffic. Uber Shuttle offers a comfortable, safe, and convenient alternative. Here’s how you can use this service to enjoy a stress-free commute.

Also Read | Uber EV Auto Rickshaw Services Begins In Ayodhya: Full Details

What Is Uber Shuttle?

Uber Shuttle is a new service designed to meet the needs of Delhi-NCR’s daily bus commuters. It aims to reduce road congestion and carbon emissions by using private bus fleets. These buses are air-conditioned and operate on predefined routes, connecting business districts with residential areas. Each shuttle bus can accommodate 19 to 50 passengers and is operated by local fleet partners using Uber’s technology.

How To Book Your Ride

Booking an Uber Shuttle is easy and can be done through the Uber app. Here’s a step-by-step guide:

Request:

Step 1: Open the Uber app and enter your destination.

Step 2: Select the ‘Shuttle’ option.

Step 3: Review your fare, choose your preferred route, and pick-up timing.

Step 4: Once you’re ready, tap on the request button. The app will provide you with the driver and bus details 25 minutes before your journey.

Pickup:

Step 1: You can track the shuttle’s location via the app before your pickup time.

Step 2: Walk to the designated pickup spot shown on the map and ensure you arrive at least 5 minutes before your trip. The driver will wait for a maximum of 2 minutes at the pickup spot, so punctuality is crucial.

Step 3: Board the bus and enjoy your ride.

The air-conditioned bus will take you to your destination in comfort, allowing you to relax or even catch up on some work during the journey.

Drop off:

The driver will drop you at the designated drop-off point. You can use the Uber app to see walking directions to your final destination from there.

Uber Shuttle: Features

One of the standout features of Uber Shuttle is the ability to pre-book seats up to a week in advance. This ensures you have a reserved spot, making your commute stress-free. Additionally, you can track the bus’s live location and route through the app, providing real-time updates on the estimated time of arrival (ETA). This feature helps you plan your journey better and reduces the anxiety of waiting.

Free Ride: What’s The Catch?

Enjoy your first four rides on Uber Shuttle for free. This gives you a chance to experience the comfort and convenience of the service without any cost. After the initial four rides, the fare remains affordable, making Uber Shuttle a budget-friendly option for daily commutes.

Also Read | How To Book Your Uber Ride 90 Days In Advance: A Step-by-Step Guide

Conclusion

Whether you’re traveling to work or back home, Uber Shuttle offers a reliable and efficient alternative to traditional public transport. So, next time you plan your commute, give Uber Shuttle a try and experience the convenience firsthand.

Categories
Apps Featured How To

iOS Tips And Tricks: How To Manage Automatic ETA Sharing Using iPhone, iPads In Apple Maps

Key Highlights

  • Apple Maps allows auto ETA sharing on Maps
  • ETA can be shared with saved contacts
  • Feature beneficial for keeping users updated with travel

One of the biggest rivals to the Google Maps is Apple Maps. Available as the default navigation app for iOS devices including iPhones and iPads, Apple Maps makes it easy for the masses to reach unknown destinations and find nearby emergency services as well. While the range of features offered by both Apple Maps and Google Maps are familiar, they both have specific set of features that are distinguishable. Amongst the common set of features that you can find on both navigational apps is the ETA sharing with contacts. Apple Maps takes a step ahead with automatic ETA sharing with favorite contacts. This helps with route and map planning ahead of any trip and also keeps the contact updated with your estimated arrival time. What all steps you can follow to enable automatic ETA sharing with your contacts when using Apple Maps on your respective iPhones or iPads? Take a look below:

Also Read: Google Maps Hacks: How To Use Google Maps Simultaneously On Multiple Devices

Automatic ETA Sharing In Apple Maps: Detailed

Apple Maps allows users to enable a specific setting which allows automatic ETA sharing with dedicated contacts. One can enable the settings on Apple Maps using iPhone or iPad that are running on the new iOS versions. After this setting is enabled, the ETA will be shared to the selected contacts automatically when you are travelling to the ‘Favorite location’ which also needs to be added for this feature. Once the user starts his/her journey to the Favorite location, the ETA sharing message will be displayed at the bottom of the screen. The steps to enable it are mentioned below:

Also Read: First VinFast EV India Debut Slated For 2025: These Could Be The First Models

Steps To Manage And Share Automatic ETA With Contacts Using Apple Maps

Step 1: On your iPhone or iPad, open the Maps application. This feature will work for iPad with both WiFi only and WiFi+ cellular models.

Step 2: Click on the profile picture icon placed on the right of the search bar.

Step 3: Tap on the Favourites option. You’ll see a new window pop up on the screen displaying the locations that you’ve already tagged as Favorite. Y

Step 4: Spot the Info (i) button placed next to the Favorite location

Step 5: Now, scroll and locate the Share ETA option. You can review the contacts with whom the ETA is being shared automatically.

Step 6: If you wish to remove any specific contact, tap on the Remove icon placed next to the contact.

Step 7: Similarly, you can also add a new contact. To do so, tap on the Add Person option and select the contact from the contact list.

Step 8: Once all these steps are complete, the automatic ETA sharing gets enabled on the Apple Maps.