Categories
Apps Featured

100+ Trendy Instagram Username Ideas For Marketing

Key Highlights

  • A good Instagram username can be a game-changer
  • A creative handle is crucial for establishing a brand identity
  • It helps in fostering engagement and driving business success

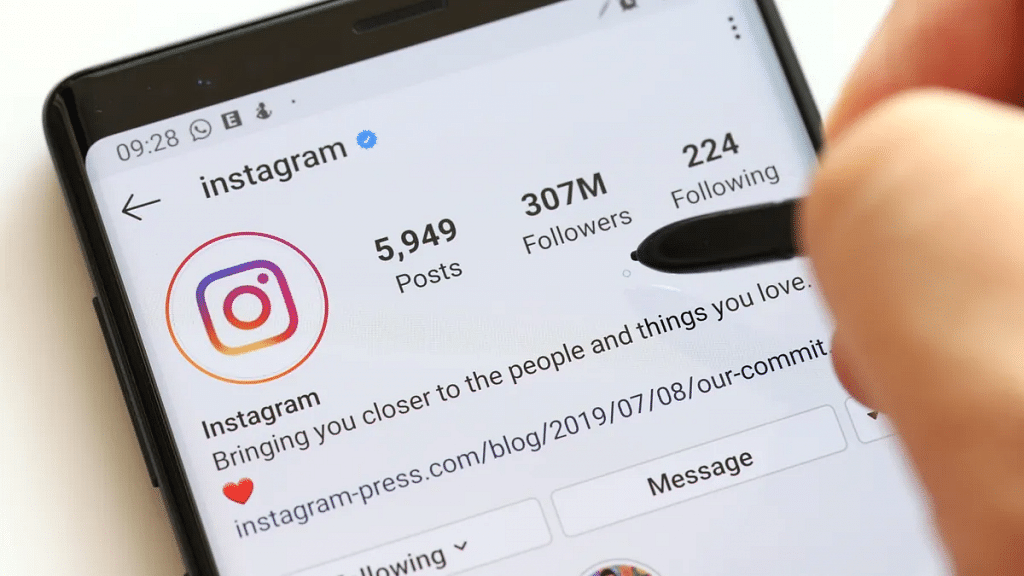
In the dynamic realm of digital marketing, a compelling Instagram username can be a game-changer. Crafting a unique and memorable handle is crucial for establishing a brand identity that resonates with your target audience. This introduction explores the significance of thoughtful Instagram usernames in marketing strategies, emphasizing their role in creating brand recognition, fostering engagement, and ultimately driving business success. Unlock the potential of your online presence with creative and strategic username ideas tailored for effective marketing on the visually-driven platform of Instagram.

Also Read | Best 100+ Instagram Names for Film and Cinema Fans

Creative Instagram Marketing Username Ideas

TrendCraftedCoBrandVistaTrendTrove
ImpactInfluxPixelPromoteEngageExpress
PromoPioneerBuzzBuilderHQThriveTactics
SocialSprintAdMomentumXBrandBurstHQ
AdvertAlchemyInsightInstaInstaInfluenceX
BrandBuzzProPromoPaladinAdAdeptify
TrendTacticianMarketMingleSocialSynergy
MarketMagnetPixelPersonaTrendTitanic

Unique Instagram Marketing Username Ideas

PixelPulseCoPixelPanoramaBrandBloomCo
PromoPinnacleBrandBespokePixelProphetX
BrandBlitzkriegAdApexHQAdAlchemyHQ
AdMaverickXSocialSculptorSocialStrive
InsightIntuitionPromoPrestigePromoPulsePoint
MarketMystiqueMarketMomentumXMarketMatrix
TrendTraverseInsightInsurgeInsightIllumina
EngageEmissaryTrendTorchTrendTrailblaze

Also Read | Best 100+ Creative Instagram Names For Productivity And Life Skills Mentors/ Influencers

Catchy Instagram Marketing Username Ideas

TrendTraverseHQSocialSurgeXTrendTwist
InsightInstinctXAdAvalancheHQInsightImpressX
MarketMomentumCoPixelProximaMarketMagnetize
PromoPulseXpressBrandBeyondCoPromoPinnacleCo
PixelPlungeAdAdeptXpressSocialSculptX
InsightInspireXTrendTactileBrandBridges
SocialSpireXPromoPrismMarketMingleCo
BrandBurstXPixelPioneerCoAdAuroraHQ

Also Read | 100+ Best Instagram Names For Pet Parents

Innovative Instagram Marketing Username Ideas

BrandBespokeXPixelPioneerHQAdAlchemyXpress
SocialSculpturePromoPrestigeXMarketMatrixX
InsightIlluminaXTrendTrailblazerBrandBridgesX
PixelPlungeXpressAdAdeptXplorerSocialSpireHQ
PromoPrismXMarketMingleXpressInsightImpressXpress
TrendTwistXBrandBeyondXPixelProximaX
EchoElevateApexAmplifySereneSpectrum
VistaVortexQuantumQuotientElevateEssence

Feel free to mix, match, or modify these ideas to align with your brand’s identity and marketing goals. Meanwhile, for the tech geeks, stay updated with the latest cutting-edge gadgets in the market, exclusive tech updates, gadget reviews, and more right on your phone’s screen. Join Giznext’s WhatsApp channel and receive the industry-first tech updates.

Categories
Apps Featured How To

Google Translate Tricks: How To Translate Text From Any Image On Smartphones, Laptops/ PCs

Key Highlights

  • Google Translate tool allows language translation online
  • Feature available for all smartphone, tablet, laptop/PC users
  • Options to translate language from text using image available

Google has multiple tools and services that one can access on smartphones, laptops/PCs. Most of the Google services require an active internet connection to function properly. However, some can even work offline. One of such useful Google tool is the Translate which is designed to help consumers to translate foreign languages from text and documents using neural machine tool. Most of you will be aware of the steps to translate any foreign language on websites using Google Translate. But are you aware of the steps with which you can extract any text from an image and translate it to your known language. If not, we have mentioned the steps with which you can do so.

Also Read: How To Use Nothing Chats For “iMessage” From Android

How To Extract And Translate Text From Any Image Using Google Translate?

Step 1: If you are using a smartphone, you can download and install the Google Translate app. But if the tool is being used on laptops/PCs, then you can directly launch the website.

Step 2: You will now need to select the language to which you need the translation

Step 3: Now, launch the camera by tapping on the camera icon

Step 4: Click the image or upload from the gallery whose text needs translation

Step 5: Once Google Translate is done analyzing the language, it will be translated to the one you selected

Step 6: For manual selection of the text, you simply need to tap and drag on the text

Step 7: The translated text will now be displayed over the image

Also Read: From Hindi To Korean: Learn How To Change Languages In Netflix

Categories
Apps Featured Info

Reliance’s JioCinema Welcomes Pokemon Content To Its Platform

Key Highlights

  • JioCinema has collaborated with The Pokemon Company
  • This aims to show Pokemon’s popular children’s shows and movies
  • The Pokemon Series will be dubbed into three Indian languages

In a strategic move to enhance its content offerings, the entertainment unit of India’s Reliance has entered into a partnership with The Pokemon Company. This collaboration aims to showcase Pokemon’s popular children’s shows and movies on the JioCinema platform. Also Read | Pokémon Go Tips & Tricks: 10 Ways To Catch Rare And Legendary Pokémon

Exclusive Streaming Deal For Indian Audience

The deal, inked this month, designates JioCinema’s streaming app as the “exclusive” platform in India for over 1,000 episodes and approximately 20 movies from the renowned Japanese anime series. While the financial details remain undisclosed, sources reveal that the content will be dubbed into three Indian languages, widening its appeal to a broader audience.

Pokemon’s Global Franchise Lands On JioCinema

Pokemon, known for its global multi-billion dollar media franchise encompassing trading cards, games, TV shows, and movies, finds a new home on JioCinema. Viacom18, the entertainment joint-venture led by Indian billionaire Mukesh Ambani, operates JioCinema. However, both Viacom18 and The Pokemon Company have refrained from commenting on the deal.

Also Read | Pokemon Unite: Here’s How To Download And Play On Your Phone

Strategic Move Amidst Streaming Market Competition

With an eye on the rapidly growing Indian streaming market, estimated to be worth $7 billion by 2027, Mukesh Ambani’s focus on child-focused content represents a strategic move. Competing with streaming giants like Netflix and Amazon, Ambani has recently set his sights on Disney’s Hotstar app, offering free streaming of cricket matches.

Extensive Children’s Content Expansion

JioCinema is set to bolster its children’s content library by approximately 3,000 hours. This expansion includes content from Entertainment One, Animaccord, Cartoon Network Studios, and DreamWorks. These additions will be facilitated through Viacom18’s existing content deals and integration with its other streaming app, Voot Kids. Notably, JioCinema’s deal with Pokemon marks a significant partnership, surpassing the previous presence of some Pokemon content on Voot.

Content Partnerships

This move follows Viacom18’s earlier agreement with Warner Bros Discovery Inc. in April. The partnership aimed to enrich JioCinema’s content library with more Hollywood and international offerings, featuring hit series such as “Succession” and “Game of Thrones.”

Also Read | Catch ‘Em All In Hindi: Pokémon Go’s Latest Language Addition

Categories
Apps Featured How To

From Hindi To Korean: Learn How To Change Languages In Netflix

Key Highlights

  • Netflix offers content in multiple languages
  • Netflix allows you to watch content in your native tongue
  • The language of Netflix can be changed with a few easy steps

Netflix provides a variety of movies and TV shows in numerous languages, encompassing both international and regional Indian languages such as Hindi. Switching between these languages allows you to customize the app for your convenience or that of your peers. When you change the language, it adjusts all aspects of the streaming service, including search, rows, collections, and payment, to the language of your preference. Here are simple steps to guide you through changing the language on Netflix. Also Read | How To Create And Manage Multiple Netflix Profiles: Step-By-Step Guide

Step-by-Step Guide: How To Change Language On Netflix

Follow these simple steps to customize your language settings on Netflix, whether you’re using a smartphone or laptop.

Step 1: Login and Profile Selection

Access your Netflix account and choose the profile for which you wish to adjust the language.

Step 2: Navigate to Account Settings

Click on the menu icon in the upper right corner and select “Account” to reach your account settings page.

Also Read | Netflix For Fitness Enthusiast: Collaborates With Nike To Stream Workout Videos On Its OTT App

Step 3: Language Preferences

Locate the “My Profile” section and click on “Language.” A list of available languages will appear, and you can use the search box to find a specific language.

Step 4: Select Your Preferred Language

Choose the language for your Netflix interface and content. A confirmation message will verify the successful update of your language preference.

Step 5: Apply Changes and Explore

Return to the home screen and search for your desired content. Note the updated audio and subtitle language options. Additionally, individual titles can have customized language settings by clicking the speech bubble icon in the playback bar.

Netflix simplifies language customization, allowing users to enjoy content in their preferred language or delve into new languages and cultures. Maximize your streaming experience with these user-friendly language adjustment features.

Also Read | Netflix Begins Password Sharing Crackdown In India: Should You Be Worried?

Categories
Apps Featured How To

Instagram Close Friends Feature Takes Center Stage In Main Feed: How To Use

Key Highlights

  • Close Friends feature expands on Instagram’s main feed
  • Posts and reels can now be shared with Close Friends by users
  • Users now have the option of selecting ‘Everyone’ or ‘Close Friends’

Instagram is expanding its Close Friends feature, bringing it to the main feed to facilitate the exclusive sharing of reels and photos among small groups. Meta-CEO Mark Zuckerberg himself announced this update, emphasizing the platform’s commitment to authentic social interactions. Also Read | 100+ Catchy Instagram Username Ideas For Poetry Enthusiasts

Close Friends: A Brief History

Introduced several years ago, the Close Friends feature initially received little attention. Users shared their daily activities with close contacts, but Instagram recognized the importance of extending this feature to include videos and photos for a more meaningful social experience.

A Step Towards Authentic Social Connections

The latest update aims to make social interactions more genuine, positioning Instagram in competition with apps like BeReal. While other platforms like X (formerly Twitter) once had a similar feature called Circles, Instagram’s commitment to enhancing user connections sets it apart.

Android And iOS Compatibility

The Close Friends feature is now available on the stable versions of the Instagram app, accessible on both Android and iOS devices. Users who don’t see the feature immediately are encouraged to check for updates as it may be rolling out gradually.

Also Read | Meta Finally Allows Deleting Threads Account Without Instagram: Here’s How To

How To Use Close Friends Feature: Step-By-Step Guide

For those eager to employ the Close Friends feature on the main feed, follow these simple steps:

Step 1: Update the App: Ensure your Instagram app is on the latest version.

Step 2: Create Your Post: Tap the Plus (+) button at the bottom center, create your post (photo or reel), and tap Next.

Step 3: Adjust Audience Settings: On the final Share page, navigate to the ‘Audience’ tab. Choose between ‘Everyone’ and ‘Close Friends.’ Select ‘Close Friends’ to limit visibility.

Step 4: Finalize and Share: Tap Done, then select Share in the top right corner. Your post or reel will now be exclusively visible to close friends, marked by a distinctive green Close Friends icon at the top right.

By following these steps, users can enhance their Instagram experience by sharing moments more intimately with their Close Friends.

Also Read | How To Use Instagram’s New Song Lyrics Feature In Reels: A Step-By-Step Guide

Categories
Apps Featured Info

Top 5 Most Searched Diwali Queries On Google: CEO Sundar Pichai Reveals

Key Highlights

  • Sundar Pichai revealed Global Diwali questions on X.
  • Top 5 Googled Diwali Questions
  • He showcased Interactive GIF to represent most-Searched queries worldwide.

Sundar Pichai recently wished everyone a Happy Diwali on X (formerly Twitter) and revealed the top questions people around the world are asking about Diwali. He shared the most popular “why” questions, giving us a peek into what people are curious about when it comes to the Festival of Lights.

“Happy Diwali to all who celebrate! We’re seeing lots of interest about Diwali traditions on Search, here are a few of the top trending ‘why’ questions worldwide,” Pichai posted on X, sparking conversations about Diwali traditions.

Also Read: Eco-Friendly Diwali Gadgets: Best Four Alternatives For A Greener Celebration

The Top 5 Diwali ‘Why’ Questions

In his post, Pichai used a fun GIF with a lamp and five numbers. Each number represented a question about Diwali. Click on those numbers, and you get specific questions people all over the world searched on Google about Diwali.

  1. Why Indians celebrate Diwali
  2. Why do we do rangoli on Diwali
  3. Why do we light lamps on Diwali
  4. Why is Lakshmi puja done on Diwali
  5. Why oil bath on Diwali

In reply to Sundar Pichai’s post, many people on X extended warm Diwali greetings to him.

Also Read: Best Diwali Apps To Download To Simplify Festive Preparations

Categories
Apps Featured How To Info

How To Use WhatsApp’s New Voice Chat Feature For Group Calls: Step-By-Step Guide

Key Highlights

  • Tap the Waveform Icon to Initiate Voice Chats.
  • Multitask Seamlessly While Engaging in Group Conversations.
  • Flexible Joining and Leaving

WhatsApp has recently introduced a new feature – voice chats for group calls. This update aims to make group conversations more seamless and less disruptive. If you’re eager to try it out, here’s a step-by-step guide to get you started.

Also Read: WhatsApp Enhances Group Calls For iOS Users: Up To 31 Participants Now Supported With Latest Update

1. Update Your WhatsApp

Make sure you have the latest version of WhatsApp installed on your Android or iOS device. You can find the update on the Google Play Store for Android users and the App Store for iOS users.

2. Access the Group Chat

Navigate to the group chat where you want to initiate a voice chat. Look for the group call button, which has now been replaced by a new waveform icon at the top right corner of the screen.

3. Start A Voice Chat

Tap on the waveform icon to initiate a voice chat. Group members will receive push notifications, inviting them to join the conversation. Unlike traditional group calls, the new feature allows users to engage in other tasks on WhatsApp simultaneously.

4. Profiles And Notifications

All group members, whether participating in the voice chat or not, can see the profiles of those involved. This ensures transparency within the group. Notifications will be sent to all members, making it easy to join the conversation.

5. Leave And Rejoin

Participants have the flexibility to leave and rejoin the voice chat at their convenience. The voice chat will automatically end when all participants have left. If no one joins within an hour or if there’s only one person in the chat, it will also conclude.

6. Group Size Limitations

WhatsApp is initially rolling out this feature for larger groups with more than 32 members. Users in groups with 33 to 128 participants can take advantage of voice chats. Keep in mind that this feature is only accessible via a user’s primary device, and linked devices are not supported.

With these simple steps, you can now make your group calls on WhatsApp more seamless and less intrusive, enhancing your overall messaging experience.

Also Read: How To Hide Your IP Address On WhatsApp Calls

Categories
Apps Featured How To

Meta Finally Allows Deleting Threads Account Without Instagram: Here’s How To

Key Highlights

  • Threads is Instagram’s take on X (Twitter)
  • Threads account deletion previously deleted Instagram account too
  • Option released to delete Threads account without Instagram

Instagram released a new dedicated app for microblogging called Threads recently for the global users. The social media app has been introduced as the primary rival to X which was earlier known as Threads. Threads became an instant hit in the market soon after its launch and got a huge user base within a short span. But Threads grabbed more headlines once users started complaining that deleting its account also deleted the linked Instagram account. With all the backlash from the consumers, Meta seems to have resolved the issue and is now allowing users to delete Threads account without affecting the Instagram account. Here’s the new update and the steps with which you can delete your Thread account without Instagram:

Also Read: 100+ Catchy Instagram Username Ideas For Poetry Enthusiasts

Threads And Instagram Accounts Become Independent: Know The Update!

Both Threads and Instagram accounts are now independent. The same has been confirmed by Adam Mosseri, Instagram’s CEO. This means users will now be able delete their Threads account which will have no direct impact on the Instagram account.

This has been one of the biggest concerns with the consumers where deleting the Thread account also led to automatic deletion of the Instagram account. Now, account on both these apps will be functioning independently and users will get to delete accounts on either of the apps separately.

Also Read: How To Delete Your Instagram Threads Account

How To Delete Threads Account While Keeping Instagram Account Safe

Step 1: Launch the Threads application on your Android or iOS devices ‘

Step 2: Login with your account credentials

Step 3: Open the Settings menu

Step 4: Scroll down to the Deactivate or Delete option

Step 5: Tap on Delete

You can also deactivate for your Threads account if you don’t wish to remove it permanently. The profile will be temporarily deactivated in this mode. Do note that it will take 30 days for Instagram to completely delete your Threads profile. Therefore, if you wish to comeback within that period, your account will be re-activated.

Also Read: How To Use Instagram’s New Song Lyrics Feature In Reels: A Step-By-Step Guide

Categories
Apps Featured How To

Step Into Safety: Learn How To Change Your UPI PIN On Google Pay And PhonePe

Key Highlights

  • It’s crucial to reset your UPI PIN periodically as a security precaution
  • You must enter your current UPI PIN to reset it
  • Resetting your UPI PIN with Google Pay and PhonePe is easy

Cashless transactions via QR code scanning have become common in the UPI era. While UPI offers speed and reliability, the rise of online scams emphasizes the importance of periodically resetting or changing your UPI PIN for enhanced security. This guide will walk you through the steps to reset or change your UPI PIN on popular platforms like Google Pay and PhonePe. Also Read | How To Update And Change Mobile Number On Aadhaar Card Online

Google Pay: Step-by-Step Guide

Step 1: Ensure you have the latest Google Pay app version installed.

Step 2: Open the Google Pay app on your smartphone.

Step 3: Tap on your profile photo located in the top right corner.

Step 4: Select the “Bank account” option.

Step 5: Choose the specific bank account linked to your Google Pay.

Step 6: Tap on the three dots and locate the “Change UPI PIN” option.

Step 7: Enter your existing UPI number and proceed.

Step 8: Input the new UPI PIN.

Step 9: Re-enter the new PIN to confirm the change.

Also Read | Google Play Country Settings Modification: How To Change Country Settings In Google Play Using Android For Payments And Other Apps

PhonePe: Step-by-Step Instructions

Step 1: Launch the PhonePe app on your Android or iOS device.

Step 2: On the home screen, click on the picture of your profile.

Step 3: Locate the “Payment Methods” section by scrolling down.

Step 4: Select the relevant bank account.

Step 5: Choose “Reset UPI PIN.”

Step 6: Enter the information for your debit or ATM card linked to the bank account.

Step 7: Proceed by entering the OTP received.

Step 8: Provide your existing UPI PIN and continue.

Step 9: Enter the new UPI PIN.

Step 10: Confirm the new PIN by re-entering it.

You may proactively protect your UPI transactions and guarantee the security of your financial transactions on PhonePe and Google Pay by following these procedures.

Also Read | No Card? No Problem: Here’s How To Withdraw Cash From ATMs Via UPI

Categories
Apps Featured How To Info

How To Hide Your IP Address On WhatsApp Calls

Key Highlights

  • WhatsApp enhances privacy with IP address concealment.
  • Calls relayed through WhatsApp servers for protection.
  • Simple steps to enable IP address protection.

WhatsApp is introducing a new privacy feature that allows Android and iOS users to protect their location and IP address during calls. This feature ensures your privacy by relaying the call connection through WhatsApp’s servers. Let’s see how to enable this feature and its implications for your privacy.

What Is WhatsApp’s IP Address Protection Feature?

WhatsApp’s engineering team has designed this feature to enhance user privacy. When enabled, your location and IP address are concealed from other call participants. It achieves this by switching from the standard peer-to-peer direct connection between callers to routing the call through WhatsApp servers. This obfuscates the IP address metadata that could reveal your internet service provider or general geographical location.

Also Read: WhatsApp Phasing Out Support For These Old Android Smartphones: Time To Upgrade Your Device?

Privacy And Encryption

It’s essential to note that while your calls are relayed through WhatsApp’s servers to obscure your location, the company cannot listen in on your calls. WhatsApp’s calls are end-to-end encrypted, ensuring the privacy and security of your conversations. The new feature mainly focuses on protecting the privacy-conscious users.

Also Read: How to Use Multiple WhatsApp Accounts On A Single Mobile Device: A Step-by-Step Guide

How To Enable “Protect IP Address in Calls”

Enabling this feature is straightforward. Follow these steps:

  1. Open WhatsApp and tap on “Settings.”
  2. Go to “Privacy.”
  3. Select “Advanced.”
  4. Tap on “Protect IP address in calls.”

This feature may result in a slight reduction in call quality, as your calls are routed through WhatsApp’s servers.

Also Read: WhatsApp Enhances Group Calls For iOS Users: Up To 31 Participants Now Supported With Latest Update

Additional Privacy Features

WhatsApp is also introducing a feature that allows users to silence unknown callers. This feature offers protection against more advanced cyber-attacks on your data, adding an extra layer of security for users.

Also Read: No More Lines And Cards: Learn How To Book Delhi Metro Tickets On WhatsApp