The Indian flag is currently available for purchase from an authentic government marketplace for just Rs. 25. As part of the Har Ghar Tiranga campaign, the Department of Post has announced an online sale of national flags through the ePostoffice portal at www.indiapost.gov.in. The sale of national flags began on August 1.
The government of India has now amended the Flag Code of India to allow citizens to hoist the Tricolor at their homes at any time of day or night. The Indian Flag previously could only be hoisted from sunrise to sunset. Here’s how you can purchase the Tricolor via the post office:
How To Buy Indian Flag From Post Office?
Recently, the Department of Post announced that National Flags would be sold online via the ePostOffice website, www.epostoffice.gov.in. The Indian flag measures 20 inches x 30 inches (without a flagpole). The price of the Tricolor is Rs. 25 per piece. There is no GST on the Indian Flag.
Step 2: On the ePostoffice Portal home page, click the image of the Indian flag.
Step 3: ‘Click the image to purchase Flag’ is written beneath the image.
Step 4: Include the delivery address, the quantity of Flags (up to five Flags per customer at first), and your mobile number.
Step 5: You will be prompted to adhere to the latest Flag code during the purchase process.
Step 6: Make the payment to finish the order after the procedure is complete.
The Department of Post has also ordered the post offices to deliver the flags in the minimum possible time as the sale window is very narrow just before Independence Day.
Since the sale window is quite narrow right before Independence Day, the Department of Post has also instructed the post offices to send the flags as soon as possible.
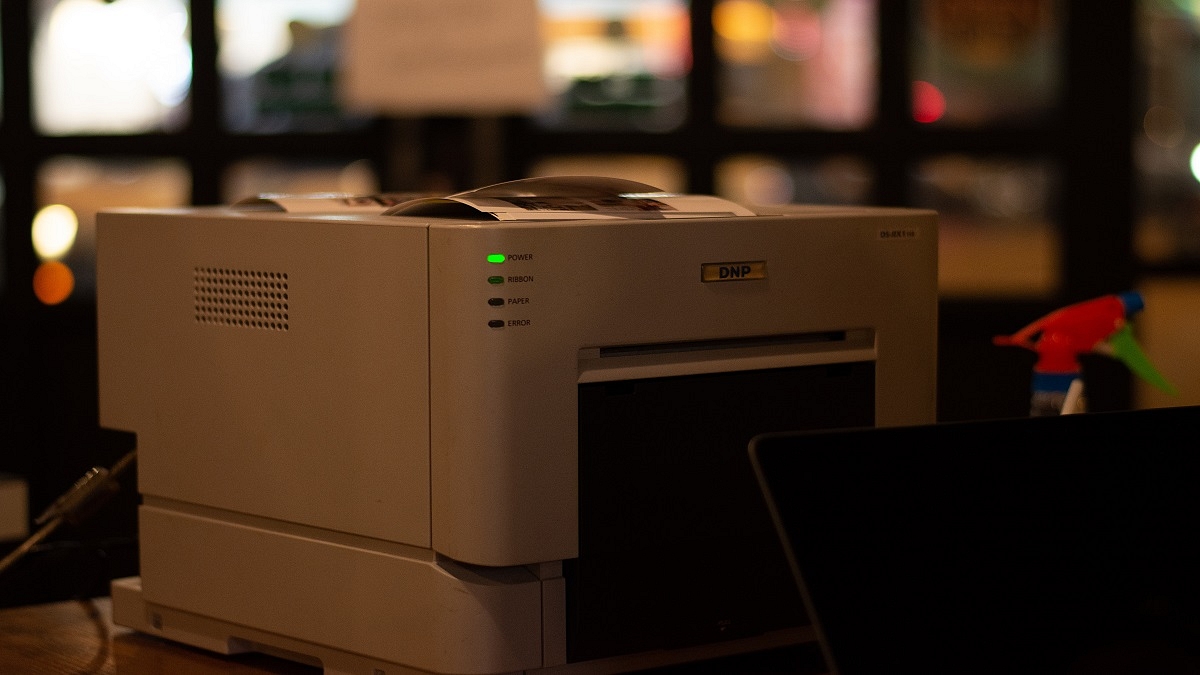
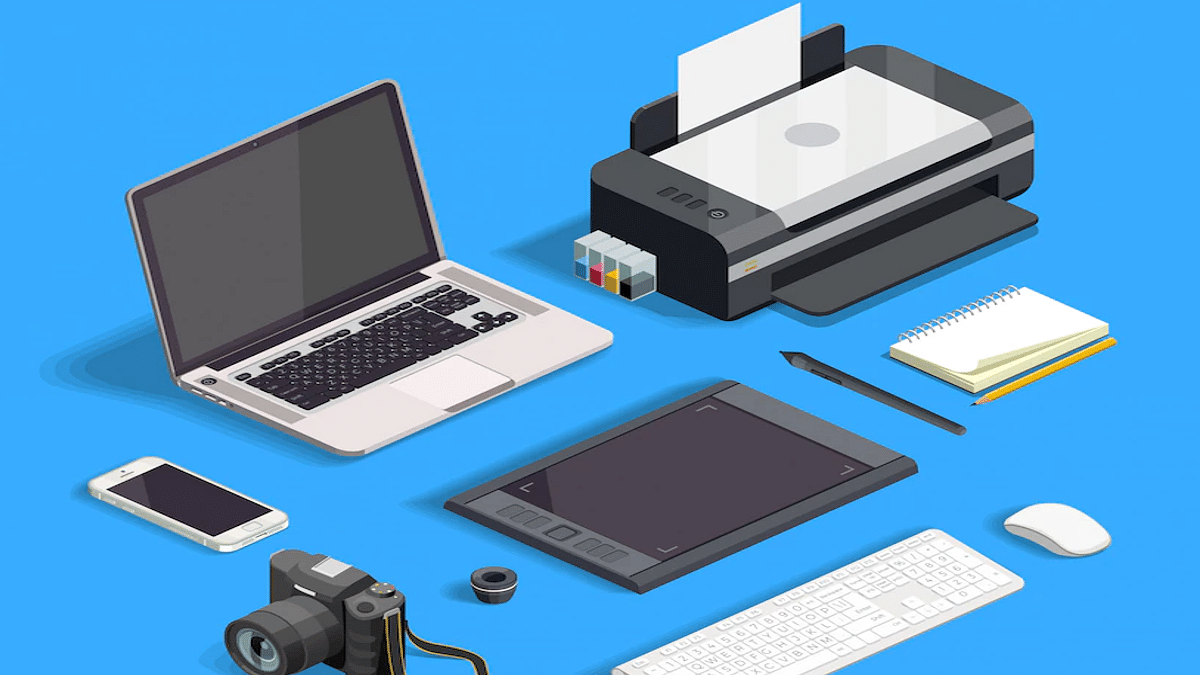
Having a printer around can be quite useful in terms of convenience and cost savings. Printers are used for a variety of tasks, including printing documents or photos. The icing on the cake is getting a wireless printer.
Wireless printers are the ideal way to clean up the mess caused by cords in the office and at home. Wi-Fi connections are typically used to operate these printers. This implies that you can easily send them papers using your phone or laptop.
There are many different Wi-Fi printers available today, but with so many options, it can be challenging to pick the ideal one. To help you pick the right option, we have here compiled a list of the best wireless printers to buy in India.
Canon Pixma G3000 WiFi Ink Tank Color Printer
A noteworthy alternative is the Canon Pixma G3000 All-in-One WiFi Ink Tank Color Printer. Wi-Fi and USB connectivity is supported by this ink tank printer, enabling wireless printing of documents. When printing in monochrome, it can print up to nine pages per minute, and when printing in color, it can print up to five pages per minute. Pages can be printed, scanned, and copied. This Canon wireless printer is available for purchase for Rs. 13,998 in India.
HP Ink Tank 419 Wi-Fi Color Printer
Voice-activated printing is just one of the many capabilities the HP 419 wireless printer offers. It also supports Google Assistant and Alexa. You can print, scan, and copy with this all-in-one printer, which is an ink tank model. It can print up to 7.5 monochrome pages and 4.5 color pages per minute. The printer will cost you Rs. 13,999 in India.
Without sacrificing quality, the Epson M205 All-in-One Wireless Ink Tank Printer with ADF offers affordable printing. It creates prints of the highest quality with resolutions as high as 4800 x 1200 dpi. You’ll be able to print images that are just as realistic-looking as the originals. With the ADF, it is simple to scan and copy multi-page documents. The Epson EcoTank M205 Wi-Fi Multifunction B&W Printer is available at Rs. 18,849.
Canon PIXMA E477 Wireless Ink Efficient Color Printer
Another affordable printer with multiple features—including scanning, printing, and copying—is the Canon PIXMA E477. It includes numerous networking options such as Wi-Fi, USB, and cloud connectivity. The device is compatible with PG47 and CL57 cartridges. It can print four pages of color and eight pages of black text per minute. It supports A4, A5, B5, letter, legal, and more page sizes. It can be purchased in India for Rs. 5,098.
Untethered connectivity on a printer is currently a requirement
The absence of a physical connection to a computer or phone might make setting Printer difficult
Users need to connect a wirelessly connected printer to a network
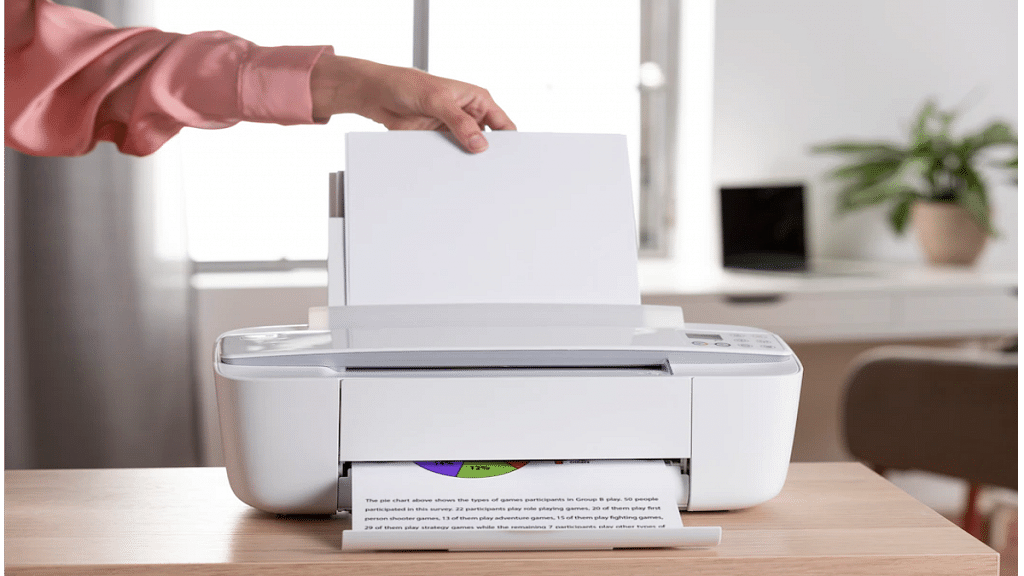
Due to the fact that many of us still choose hybrid working, untethered connectivity on a printer is currently a requirement. This enables the connection and printing from a device from more than one computer.
Whether Wi-Fi or Bluetooth, wireless printers can be placed almost anywhere without having to worry about cable clutter. Although they simplify life once they are operating, the absence of a physical connection to your computer or phone might make setting them up and using them more difficult.
So, if you need to print from a wireless printer, we are here to help. This post will walk you through adding your printer to your wireless network so you can print documents and images without annoying cords. Also Read | How To Add A Default Wireless Printer In Mac Devices
Step 1: Connect Your Printer To A Wireless Network
You must first connect a wirelessly connected printer to a network in order to print from it. Any PC or Mac can easily set up a wireless printer, and depending on the model, you can also print wirelessly from an Android, iPhone, or iPad. However, we will outline the procedures for connecting it to Windows and Mac in this article.
Put the printer in your wireless router’s coverage area.
Turn the printer on. There is no need to first connect the printer to a computer because you will be connecting to the wireless network directly from the printer.
Join your wireless network to the printer. Depending on the printer, the method will change. Your Wi-Fi network name (SSID) and password are requirements.
Step 2: Add A Printer To A Windows Computer
Connect your printer to the wireless network. The wireless network where your computer and printer are connected must be the same.
In the lower-right corner of your computer’s screen, click the Windows Start menu.
Click the Settings icon and then go to Devices.
Click Printers & Scanners.
When your PC discovers the printer, click ‘Add printers and scanners’.
Click your printer’s name and then click Add Device. This will your printer to your PC.
Depending on the app you are using, you can find the ‘Print’ option under the ‘File’ menu, or by clicking the icon with three dots in the upper-left corner.
How To Connect A Printer To A Mac?
Step 1: Connect your printer to the Wi-Fi network.
Step 2: Update your Mac. This will ensure that your computer has the most recent printer data. This step is not required if your printer supports AirPrint.
Step 3: Click the Apple Menu and then System Preferences.
Step 4: Click Printers & Scanners.
Step 5: Click ‘+’ at the bottom of the box with all the connected printers on the left. Your Mac will search for wireless network-connected printers.
Step 6: Click Add after selecting your printer. Your printer is connected through this.
How To Print Through A Wirelessly-Connected Printer?
Step 1: Choose the file you wish to print, then open it on your computer screen.
Step 2: Simultaneously press the Ctrl and P keys on your keyboard.
Step 3: Choose the printer you want to send the task to when the printing pop-up option displays on your computer’s screen.
Step 4: Modify your print settings if necessary. This step is optional.
Step 5: To add the job to the printer’s print queue and wait for it to finish, click the Print button on the screen. That’s all.
WhatsApp is one of the most powerful instant messaging applications which is available for both Android and iOS smartphone users. WhatsApp started its journey as a separate entity but later got acquired by Meta (Facebook). Since then WhatsApp is getting more potent each year and is rapidly getting new features and services for an improved messaging experience be it on Android smartphones or iPhones.
WhatsApp is among those apps that have amplified the messaging experience by allowing the provision of video and audio calls. The app also lets you send images, videos, and locations with your contacts. You can send images in both normal and high-resolution using WhatsApp on Android and Apple iPhones devices. The quality isn’t compromised if you send images as documents on WhatsApp on both these mobile OS.
While sending an image as a document on WhatsApp isn’t tricky with Android, iOS users have to follow some extra steps. Specifically, if you are a new iPhone user who has been using an Android phone all this while, this could be one task for you. So, how can you send WhatsApp images in high resolution as a document on iOS devices? Here’s the trick:
Steps To Send WhatsApp Images As Documents On iPhone
You can’t directly send any WhatsApp image as a document on iPhones. You would require some additional steps primarily saving the image to the device or the iCloud.
Step 1: Open the image that you want to send as a document on WhatsApp on your respective iPhones.
Step 2: Select the Upload tab placed at the bottom left.
Step 3: Scroll down to the “Save to Files” option.
Step 4: Now, select the destination where you want to store and save the image. You can select from iCloud Drive or On My phone options.
Step 5: Click on save.
Step 6: Now, launch the WhatsApp application on your iPhones and go to the specific chat or contact to whom you wish to send images as documents.
Step 7: Tap on the “Plus” icon placed at the bottom left and select the Document option.
Step 8: Now, select the folder where you have saved the image.
Step 9: Once the image opens up click on Send. The image will be sent as a document to the selected contact.
Tecno Camon 19 Pro 5G India launch confirmed for next week
To feature 64MP triple rear cameras
Could launch within Rs. 20,000 to Rs. 25,000 price range
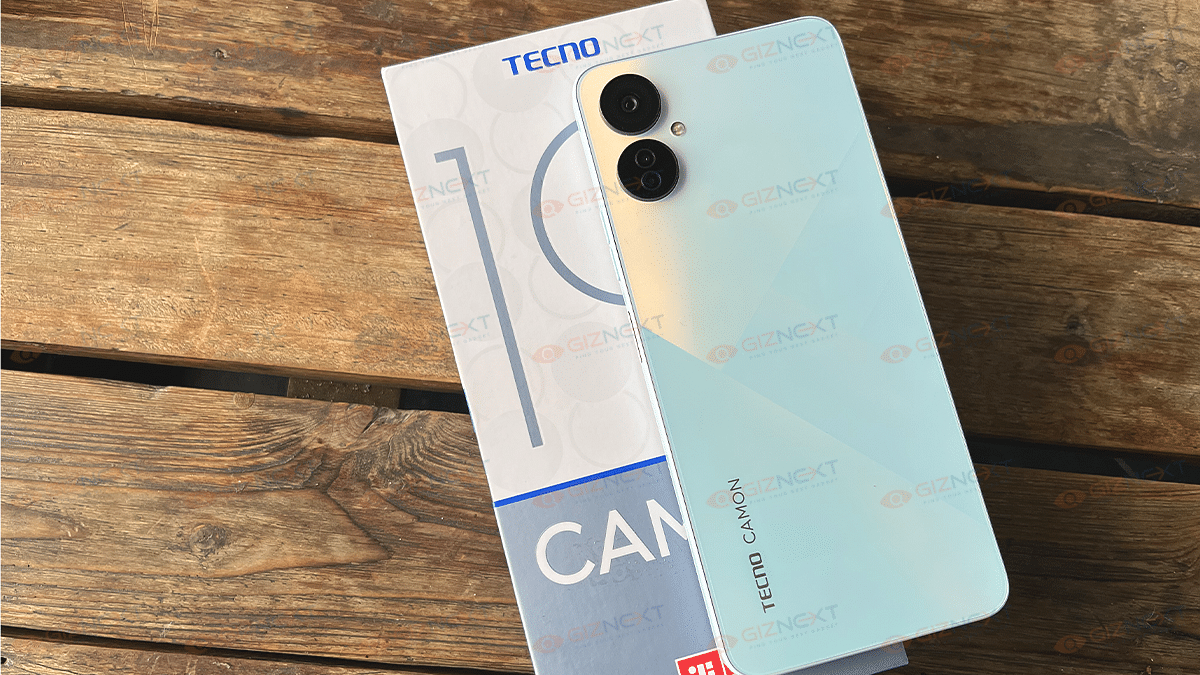
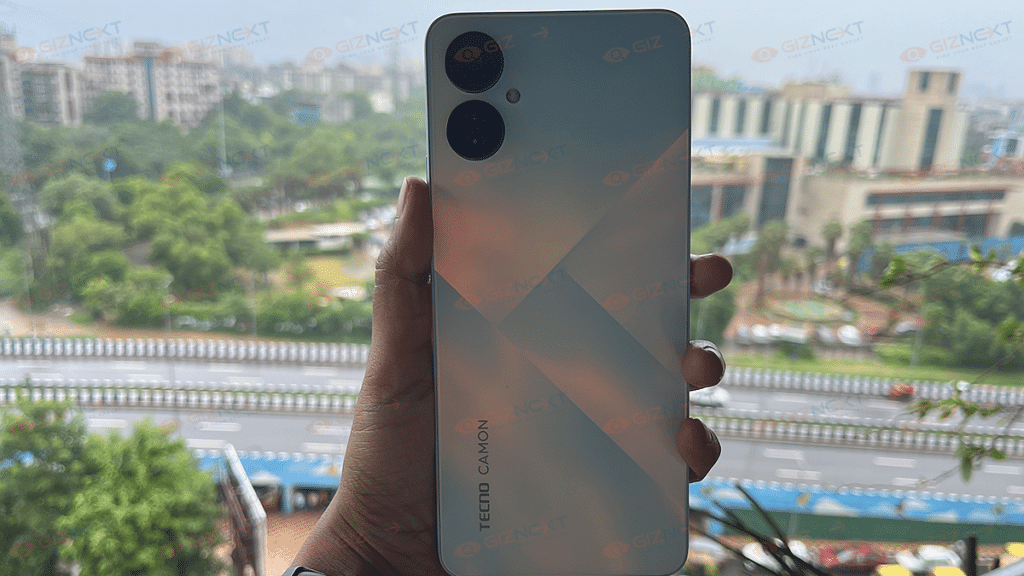
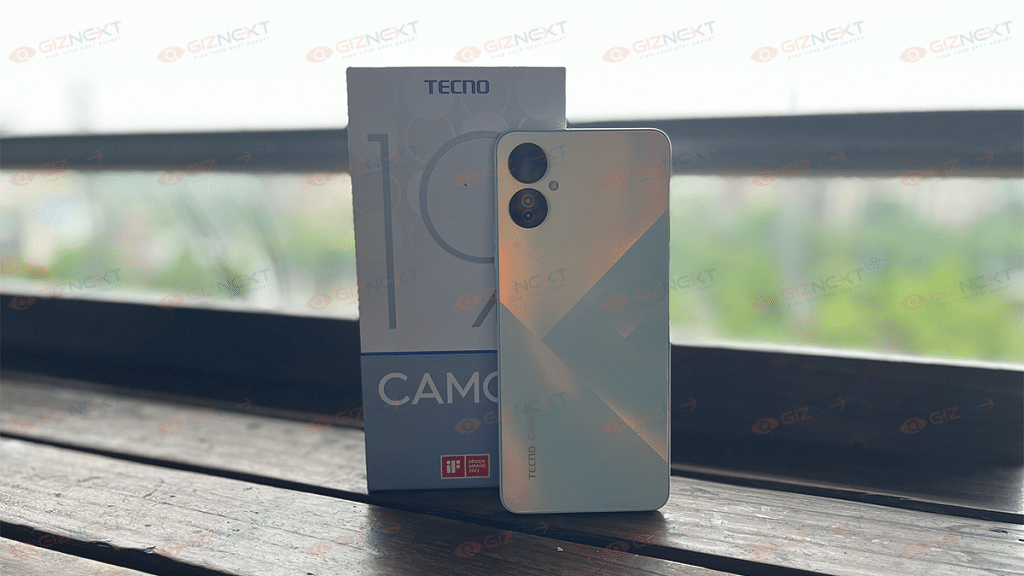
Tecno is getting aggressive with budget smartphone launches in the Indian market. The brand has launched multiple new devices in the Spark, Pova, and Camon series in the last few months. The brand recently refreshed the Camon lineup with the launch of Camon 19 Neo. Now, this series is getting expanded again this month with the Camon 19 Pro. Tecno has already confirmed its plan to bring this new budget 5G smartphone in India. Now, Giznext has managed to grab some exclusive details related to the Camon 19 Pro 5G’s India launch.
Tecno Camon 19 Pro 5G Exclusive India Launch Details
The Tecno Camon 19 Pro 5G is confirmed to make its official debut in India next week. Giznext received this tip from the industry sources and we can verify the upcoming budget 5G Tecno phone is getting released next week in the Indian market. Our source has not confirmed the exact date for the Tecno Camon 19 Pro 5G’s India launch. But we believe the company will announce the device ahead of the festive celebrations (Raksha Bandhan or Independence Day). We have also not received any updates related to the upcoming Tecno Camon series phone pricing.
Any light, dim or bright, can be a highlight for all your pics!
But since the Camon series is designed specifically for budget consumers, we can expect it to retail within Rs. 20,000- Rs. 25,000 price range. However, this is just our speculation and the exact pricing of the Camon 19 Pro 5G will be confirmed as soon as it goes official. It is not yet confirmed through which e-commerce platform the Camon 15 Pro 5G will be sold. But we are expecting Tecno to confirm this piece of information via official teasers.
Tecno Camon 19 Pro 5G Key Specification (Expected)
Tecno has not yet revealed all the features of the Camon 19 Pro but has teased the camera features. The Camon 19 Pro 5G will be launched with a 64MP main camera. The teaser poster confirms it to be a triple-lens module. The company is also touting the Night camera capabilities of the upcoming Camon series phone.
The other key internals is not yet confirmed. However, the device has already gone official in the international markets with the MediaTek Helio G96 gaming chipset. We are not sure what all differences the Tecno Camon 19 Indian variant will offer similar hardware as the international variant or will have slight differences. We will keep you posted with all the details.
Tecno has progressively established a reputation as a formidable rival in the inexpensive market
Tecno Camon 19 Neo is the brand’s mid-range device
The price of the single 6GB/128GB variant is Rs. 14,999
Pros
Stylish design
Good camera
Decent battery
Cons
IPS LCD panel
Average performance
Tecno has gradually made a name for itself as a strong competitor in the affordable segment. The latest mid-range offering by the Transsion Holdings-backed brand is the Tecno Camon 19 Neo. The latest budget Android device by Tecno just arrived at Giznext for an in-depth review. It is priced at Rs. 14,999 for the single 6GB / 128GB model. Let’s try and figure out where the Tecno Camon 19 Neo stands in the face-off competition from its rivals.
What’s Inside The Box?
Tecno Camon 19 Neo (main unit)
18W charger
USB Type-C cable
Soft transparent case
User manual
Tecno Camon 19
Specs
Display
6.9-inch IPS LCD 1080p resolution
Cameras
48MP triple (rear) 32MP (front)
Chipset
octa-core Helio G85
Android OS
Android 12
Battery
5,000 mAh 18W Fast charging
Design
The Tecno Camon 19 Neo’s key selling point is the geometric color-shifting frost pattern on the back. It comes in Dreamland Green, Ice Mirror, and Eco Black colors. We are using the Ice Mirror variant. It has a frosted appearance similar to glass and is made of polycarbonate. Smudges are therefore no longer a bigger issue. The phone feels comfortable to hold and it fits well in the hands.
On the back, it has two camera rings that house three sensors and an LED flash. The triple camera setup is situated uniquely with one lens serving as the housing for two sensors. On the front, it has a simple punch-hole that carries the selfie camera.
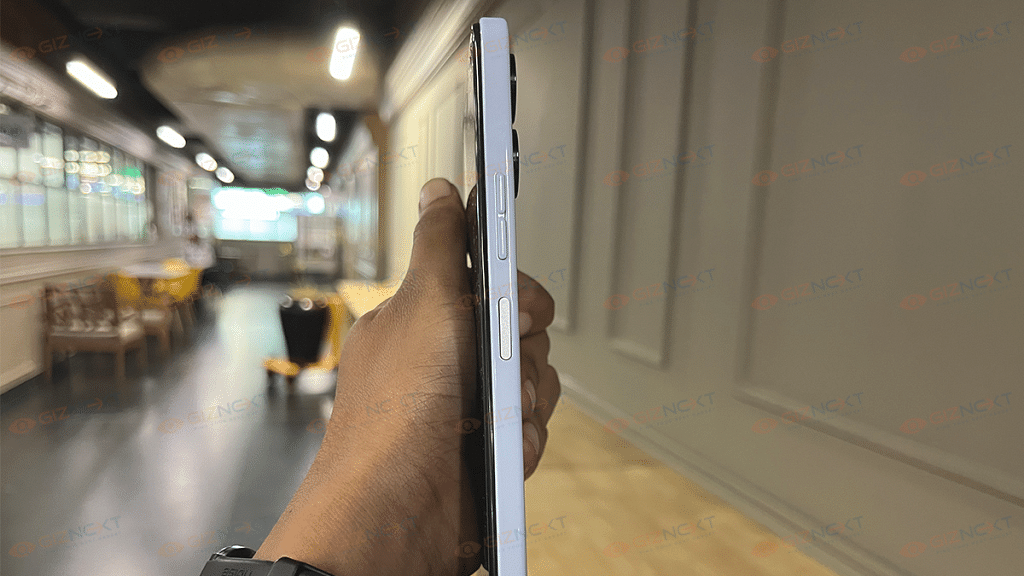
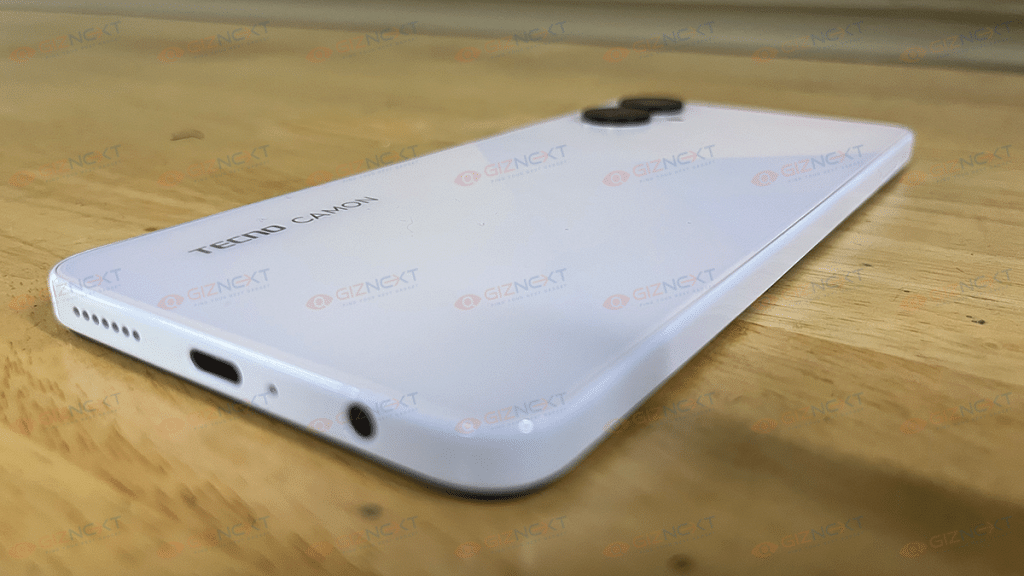
On the right side of the frame, the phone has the volume rocker and power button. The latter doubles up as the fingerprint scanner. On the bottom frame, the speaker and USB Type-C port are located. Also, the 3.5mm headphone jack survives with no sign of vanishing from the mid-range segment which is good.
Overall, it has a boxy design with flat edges that gives it a premium look. Be it outdoors or indoors, the light reflected on each of the indices brings out a unique look every time. With the Camon 19 Neo, Tecno definitely got the design elements right as it brings a notable improvement over the previous model. The design of the Camon 19 Pro looks elegant and beautiful.
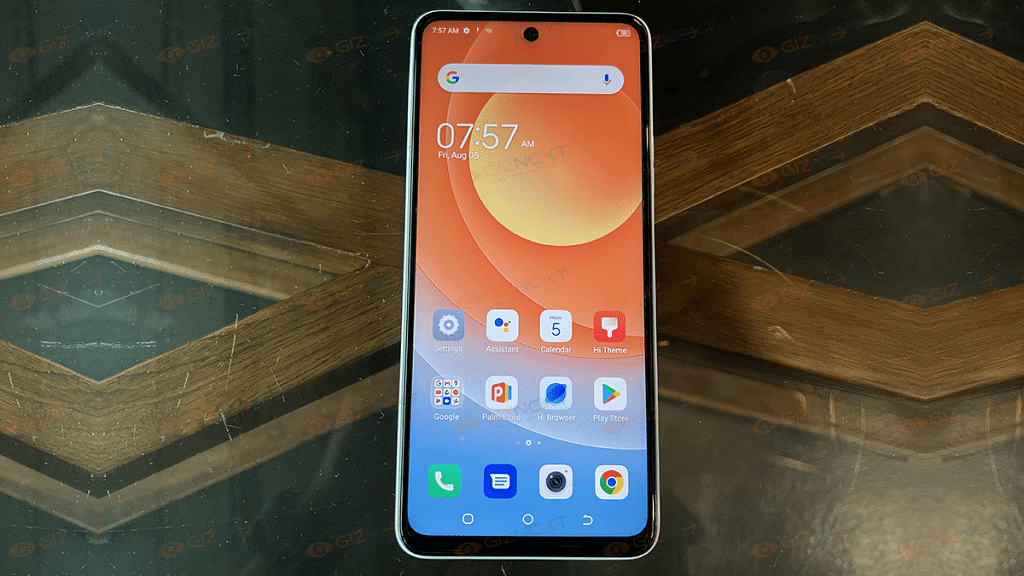
The display of the Tecno Camon 19 Neo is an IPS LCD which is a bit disappointing to see on a mid-range device. Many popular devices from Samsung and Xiaomi provide AMOLED panels within the same budget range.
The large 6.8-inch display of Camon 19 Neo comes with FHD+ resolution which is a saving grace of the device. Although the display doesn’t get particularly bright in direct sunshine, the colors are vibrant.
The phone arrives with a thin protective film on the screen. It may not be as long-lasting as tempered glass, but does its job of keeping scratches at bay. Overall, the display is passable at best. However, it is nothing stellar to be the main selling point for the device.
The Tecno Camon 19 Neo is a decent performer. It comes equipped with the MediaTek Helio G85 processor. It’s a 12Nm processor built on an octa-core 2 2.0GHz Cortex-A55 design. It is not up to the mark when we compare it with the other phones in this category. However, it is a trade-off for the high-end design you receive at this price.
The phone is perfect for light usage like browsing social media or watching YouTube. In a moderate setup, the processor can also handle lightweight games and graphics-intensive games. But the typical user should not worry as the device does a great job at heat management. The RAM fusion option also helps the phone run smoothly.
In addition to the 6GB onboard RAM, you will be able to get an extra 5GB of memory from the ROM. This will take an effective RAM count to 11GB when necessary.
The phone further comes with the latest Android version so software is not going to be an issue. Like all other Tecno phones, you will be getting the HIOS 8.6 based on Android 12.
Given its price, the Tecno Camon 19 Neo’s camera is going to leave many amazed. The triple camera setup on the rear has a 48MP main sensor. The other two accompanying sensors are a 2MP depth sensor and a QVGA sensor.
The primary 48MP camera does a decent job. Images look bright and sharp in outdoor and well-lit environments. Although there is a built-in portrait mode, the edge detection is still subpar. It sometimes captures the edges brilliantly but occasionally falls short. Its back camera might be like the sensors of other mid-range devices. But its selfie camera sets the league high.
It has a 32MP front camera that makes it among the best mid-range phones for selfies. Images looked great from the front camera but lacked the wide-angle view. With dual LED flash on the front side, you won’t need to worry about finding an illuminated spot for night selfies. The camera fares well in dimly-lit conditions.
On the other hand, the videography is only available in 1080p at 3ofps. Although the sensor can push higher resolutions, it is constrained by the chipset.
Tecno Camon 19 Neo comes with NFC connectivity which is a feature we seldom see at this price. It comes with a 5,000mAh battery. On a single full charge, it can run for six to seven hours of continuous usage. Additionally, Tecno offers an 18W fast charger that can fully charge the gadget in just over an hour.
Tecno Camon 19 Neo Review: Final Verdict
No doubt, it is an impressive smartphone in its own class. The phone has a few things going for it, such as a set of decent cameras, a stylish design, and satisfactory battery life with respect to its price tag. However, there is also some room for improvement in performance wise. All in all, this is a good value-for-money device that you should consider buying.
For the tech geeks, stay updated with the latest cutting-edge gadgets in the market, exclusive tech updates, gadget reviews, and more right on your phone’s screen. Join Giznext’s WhatsApp channel and receive the industry-first tech updates.
Apple has one of the strongest ecosystems for all of its gadgets including iPhones, iPads, and Mac notebooks and computers. The Cupertino giant has also been enhancing the privacy aspects with its dedicated firmware for laptops and smartphones. All the Apple iPhones boots on in-house iOS which Apple is upgrading each year. This year at its WWDC 2022 keynote, the Cupertino giant showcased the iOS 16 which will be replacing the iOS 15 in the coming months. Apple has released multiple new features with iOS 16 and is carrying forward a few from the previous version.
One of such features is the Face ID which has been present with older iOS versions as well. Last year, after the pandemic situation due to the COVID 19, Apple users were reporting issues with their Face ID if they have a mask on. Apple bright a solution for this with the iOS 15.4 and later version. You can easily unlock our respective iPhones if you have a face mask or any other extra layer on your face. The Face ID with mask feature will unlock your iPhone and let you use all the apps including Apple Pay.
Steps To Use Face ID On iPhones With A Mask
Step 1: You can only setup up the Face ID to work with a mask if your iPhone is currently running on iOS 15.4 or later.
Step 2: Go to the settings menu.
Step 3: Select Face ID & Passcode.
Step 4: Scroll down to the Face ID with a Mask option. Tap on it.
Step 5: You will get a prompt to use Face ID with a mask. Complete the on-screen steps to start using Face ID with a mask feature.
Step 6: Once all the above steps are completed, you will be able to unlock your iPhone even with a mask.
How Can You Improve Face ID Accuracy With Glasses And A Face Mask
Step 1: Unlock your respective iPhones and click on the settings app.
Step 2: Tap on the Face ID & Passcode option.
Step 3: Scroll down the menu and clock on Add Glasses.
Step 4: You will get a bunch of steps on your screen, follow them to complete this setup.
Step 5: You can now unlock your iPhones with the Face ID if you are wearing both glasses as well as a Face Mask.
Windows 11 is the latest firmware announced by Microsoft for new-generation laptops and PCs in the global market. The latest firmware brings improved features and support with multiple devices. Printer compatibility and functionality have also been improved with Windows 11. However, in some cases, users have been reporting issues with printers not working properly post a Windows 11 upgrade.
Similar issues have been reported on numerous occasions by HP printer users as well. Users are unable to give print commands or scan any document using their HP printers and scanners after the Windows 11 update. Since this is a firmware issue, you can fix it on your own and avoid your visit to the service centers. But what can you do if your HP printer stops working after the Windows 11 update? We have mentioned some of the ways with which you can quickly resolve printer issues with the Windows 11 update:
Quick Fixes To Resolve Printer Not Working Issue After Windows 11 Update
Step 1: Uninstall and re-install printer software. To do so, open the Windows search bar on your laptop/PC and go to the Check for updates option. Once you do this, Windows will automatically search for any new updates and show you the details. If there is any missing or new update that is available, go ahead and download it. Follow the remaining steps if there is no new update available.
Step 2: You now need to power off the Printer and then complete the remaining steps using the HP Smart app.
Step 3: Launch the HP Smart app and then remove the connected printer from the lost. You can right-click on the printer icon and select the Hide Printer option.
Step 4: Now go to the Control panel on your laptop or PC and open the Add or remove programs option.
Step 5: Once you see the name of the printer in the list, tap on it and select Uninstall.
Step 6: Reboot your laptop/ PC and also the printer.
Step 7: Re-launch the control panel on your laptop or PC and go to the Printers and scanners option.
Step 8: Find the name of your printer and click on Remove Device if it’s in the list.
Step 9: Now, check if the Wireless LED is glowing on the printer’s control panel. If the LED’s aren’t blinking, continue downloading the latest printer software and drivers from the dedicated website, i.e., 123.hp.com.
Step 10: If in case the Wireless LED is blinking then you would need to restore the Wi-Fi setup mode.
Step 11: If your printer has a touch control panel, then tap on the Setup menu or Wireless option.
Step 12: Select the Network Settings and then tap on the Restore Network Settings.
Step 13: For the printers without a touchscreen display or menu, you would need to open the Restore Wi-Fi setup mode on your HP printer and then continue with restoring the default settings. Finish this process by downloading the compatible printer and software drivers. Visit 123.hp.com. Once you have completed all these steps with, your printer will start functioning properly with Windows 11.
Instagram Reels is one of the most popular features that you get on the photo-sharing app. Meta, widely popular as Facebook, released this short video feature for Instagram back in 2020 as a rival to TikTok and other such apps. Instagram has made several improvements to the Reels since its launch and also added the Remix Reels option last year. This feature allows users to record their own videos and then club them with other popular reels on the platform from other content creators and users.
Not just videos, you can also Remix reels and photos with your Instagram Reel. This is one of the most interesting features that you get to use while creating any Reel video on Instagram. Instagram Remix Reels feature has been out for a long and still if you are new to creating Reels, you might not be aware of the ways to use it. If that’s the case, we will help you with the steps to create and remix any Reel video.
How To Remix Instagram Reel
You can remix any Instagram Reel video using Android and iOS smartphones.
Step 1: Open the Instagram application on your respective Android and iPhones.
Step 2: Click on the three dots option. It will be three horizontal dots for iPhones and three vertical dots for iOS.
Step 3: Click on Remix this reel option. You can set the preference if you want to place the remixed video next to the original video at the same time or later.
Step 4: Click on the Layout option. You’ll see this icon. This option will let you place the layout for the remixed video that you can place either below or next to the original video.
Step 5: Now, all you need to do is record your Reel video.
What Are The Steps To Remix A Feed Video On Instagram
You can easily remix any feed video on the Instagram app. The steps are almost identical to how you would remix any Instagram Reel on the app. Take a look:
Step 1: Once you have launched the Instagram app on your iPhone or Android phone, click on the menu (three dots) option.
Step 2: This time, select the Remix this video option instead.
Step 3: Now, choose the layout as you did above and place the below the original video or next to it. That’s it. Record your Reel and you are all set.
How Can You Remix Any Photo With Instagram Reels
Just like videos and other reels, you can also remix a reel with photos. The steps would be the same as with the remaining two. But the remix photos option isn’t available for all users at the moment, so, if in case you don’t find this option on your Instagram app chances are it’s unavailable in your region. Otherwise, update your app and then check if this feature adds up.
Step 1: Click on the menu option on the Instagram mobile app on your smartphone.
Step 2: Instead of reels and video, you would need to select the Remix this photo option.
Step 3: The photo will be set to default as the background of the reel video.
Step 4: Select the Layout option from the right-hand side if you wish to make any changes. Record your reel remixed with the photo.
Email services have become one primary mode for written communication across the globe. Different organizations and professional industries rely on emailing services to stay connected with employees and customers. Even the general public uses email services to connect with brands and users whose primary contact details they don’t have. Gmail and Microsoft Outlook are amongst the few big names in email services. The former is managed by Google and you can use its services on smartphones, tablets, laptops, and PCs. Google has been updating Gmail and its services frequently and has added tonnes of features in the last few years.
Google has also enhanced the privacy aspects of Gmail and recently made it easy to use the email services without an active internet connection. With Gmail, you can also use the confidential mode to keep privacy intact. But one of the major hurdles to date has been the missing undo feature. Once you have sent an email from your account, it is hard to retrieve or delete it from the receiver’s device. But if you are using Gmail, you shouldn’t be worried. You can easily unsend or retrieve any recently sent mail if you are using Gmail services. The steps to send confidential mail and to retrieve or unsend any email on Gmail are listed below:
How To Send Confidential Mail On Gmail
Step 1: Open the Gmail app on your respective devices and tap on the compose button.
Step 2: Now, select the confidential mode(timer icon). It is located at the bottom of the compose box.
Step 3: You can select from the two available options including “SMS passcode” and “No SMS passcode”. If you use the former, the recipient would be able to open the email only after entering the passcode. The latter doesn’t require any passcode to open.
Step 4: Compose the email and send it.
How To Unsend Any Email On Gmail App
Step 1: Launch the Gmail app on your smartphones or laptops/ PCs.
Step 2: Write an email using the compose option and add the recipient’s address.
Step 3: As soon as you have sent the email, you will see the Undo option pop up on the screen. Tap on it and the message will be retrieved/ unsent.
Do note that there is a certain time limit to unsend or retrieve messages using Gmail. The minimum timeframe is 5 seconds, while the maximum is 30 seconds. You can set the time limit to retrieve Gmail messages using the following step.
Step 1: Login into your Gmail account in any laptop/ PC.
Step 2: Click on the Settings menu placed on the top right of the app’s homepage.
Step 3: Scroll down to the “Undo Send” option.
Step 4: Set the desired cancelation period. You can select from 5, 10, 20, and 30 seconds.