Categories
Featured How To Info

Chandrayaan-3’s Moon Landing Today: How To Watch This Historic Moment Live

Key Highlights

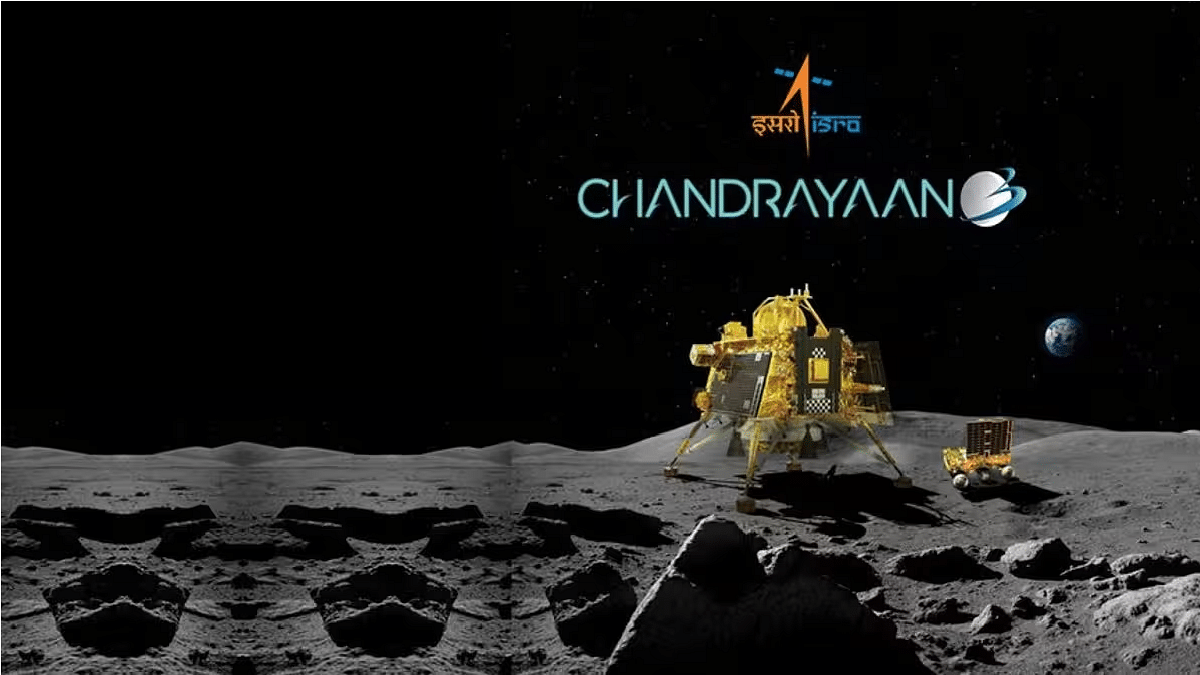
  • Chandrayaan-3 landing on the moon is scheduled for today
  • India will be the fourth nation to accomplish this
  • The launch will be broadcast live by ISRO and start at 5.20 IST

Chandrayaan-3 moon landing is scheduled for today (August 23). Given the recent setback of Russia’s Luna-25 mission, the significance of this endeavor has grown even greater. Anticipation is building across the nation and beyond, as viewers are set to engage to witness the momentous descent. The progress of Chandrayaan-3 will be broadcasted in real-time across social media platforms and television channels. India’s achievement becomes even more remarkable as it is poised to become the pioneer in lunar south pole landings. As Chandrayaan-3 prepares for a successful soft landing on the moon, here’s a comprehensive overview of the mission’s key details: Also Read | First Glimpse: Chandrayaan-3’s Awe-Inspiring Moon Snapshot Takes The Spotlight

Chandrayaan-3 Moon Landing Schedule: Date And India Time

  • Date: August 23
  • Time: 06:04 pm (IST)

ISRO’s Statement On Chandrayaan-3’s Mission

ISRO highlighted, “India’s pursuit of space exploration reaches a remarkable milestone with the impending Chandrayaan-3 Mission, poised to achieve a soft landing on the lunar surface.”

Also Read | Worried About How To Use An Air Fryer? Here’s The Step-By-Step Guide

Chandrayaan-3’s Moon Landing: How To Watch It Live

To be part of this historic moment, you have multiple options for live viewing. Tune in to the embedded YouTube video below or access ISRO’s official website, YouTube channel, and Facebook. The live stream will start at 5:27 PM (IST), which is 30 minutes before the actual landing time of 6.04 IST.

Stay connected with ISRO’s social media channels for real-time updates on the mission’s progress. Also, you can catch the momentous event by tuning in to the live-streamed launch of Chandrayaan 3 on the National Geographic Channel and Disney+ Hotstar. For those who prefer traditional TV viewing, the live landing of Chandrayaan-3 on the moon can be witnessed on DD National and various other news channels.

Chandrayaan-3’s Journey So Far

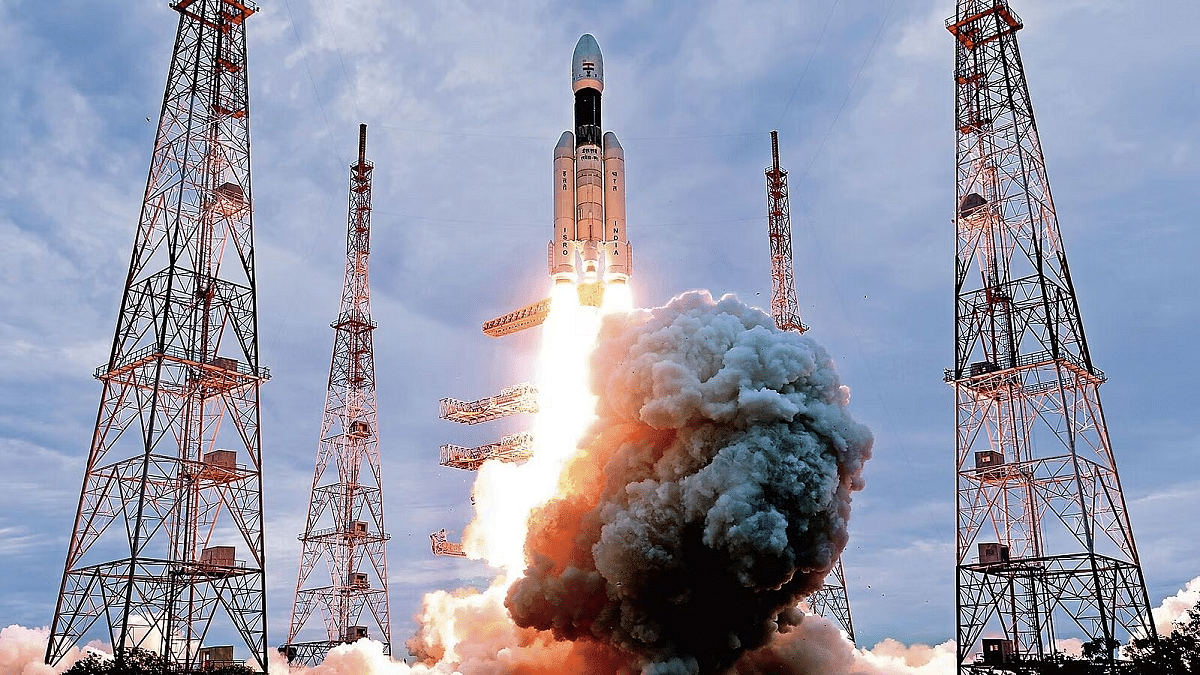
Launched on July 14, Chandrayaan-3 embarked on its mission from the Second Launch Pad, SDSC-SHAR, Sriharikota, Andhra Pradesh, India. This third lunar expedition by India aims to successfully deploy the Vikram lander and Pragyaan rover on the lunar surface. The plan is to operate them for approximately one lunar day, equivalent to 14 Earth days.

Also Read | Starlink Likely To Offer Internet Service Inside Aircraft

Categories
Apps Featured How To

WhatsApp Finally Allows Sending HD Photos: How To Send High Quality Photos On WhatsApp

Key Highlights

  • Latest WhatsApp feature allows sending high quality photos
  • Option released for Android and iOS
  • HD video sharing option coming soon

WhatsApp is one of those instant messaging apps that has redefined the mobile text messaging experience. Available for both Android and iOS, the messaging app is not only offering a convenient but also secure platform for personal and professional conversations. Sharing media files such as images and videos has been the selling point for this app. For long, users have been demanding the option to send media in high quality. But finally after all the anticipations, Meta has added this option to WhatsApp. Here’s how you can send HD images on WhatsApp Android and iOS.

Also Read: WhatsApp Edit Message Feature Is Now Available For Android And iOS: How To Correct WhatsApp Message Spelling Errors And More

WhatsApp HD Image Sending Option Released

Mark Zuckerberg, Meta CEO has officially confirmed the option to send high quality videos on WhatsApp is being integrated. The company will be dishing out the updated to both Android and iOS apps. Until now, all the WhatsApp images shared got compressed so that device memory doesn’t get clogged. And it required users to send images as a document so that quality doesn’t get deteriorated. With this new feature rolling, WhatsApp users will now get to send images in high resolution.

The feature will be added to the WhatsApp mobile application soon via an OTA update. It is expected the feature will be available to all the WhatsApp users in coming weeks.

Initially users will only be able to send high quality images on WhatsApp Android and iOS app. It still would take time for the brand to add the HD video sending option. However, this feature will also be made available to the masses. The same has been confirmed by Meta itself.

Also Read: WhatsApp Short Video Message Reply Feature Introduced: What Is It? How To Use?

How To Send High Quality WhatsApp Images?

Users will be directly able to send HD images from the toolbar at the bottom. One has to just select the image sharing option and select the desired image from the gallery to share it in high quality. It is worth mentioning that images when sent in HD would have some level of compression. But they still would be clear compared to the standard images.

Also Read: Want To Share Your Screen On WhatsApp Video Call? Here’s How

Categories
Featured How To Info

Scammed On The Internet? Here’s How To Report Online Scams Via India’s Cyber Crime Portal

Key Highlights

  • Online scams necessitate a proactive approach to safeguarding oneself against cyber fraud
  • Quick reporting through National Cyber Crime Reporting Portal empowers individuals to combat this menace effectively
  • You can easily report an online scam via National Cyber Crime Reporting Portal

In the modern digital era, online scams have emerged as a global concern, with India facing its own challenges. The rapid growth of online transactions and digital communication has substantially heightened the risk of falling victim to cyber fraud. Recent months have witnessed a notable increase in instances of online deception in India, spanning various scams such as part-time job schemes and YouTube video-liking scams.

Also Read | Best Antivirus Software For Your Android Smartphones

Impact Of Cyber Crimes

Victims of these scams not only endure significant financial losses but also grapple with profound emotional repercussions. Promptly reporting such incidents becomes imperative in order to mitigate these impacts. Reporting avenues include direct visits to local police stations or using the National Cyber Crime Reporting Portal—an online platform designed to streamline the reporting of cybercrimes. Early reporting, ideally within 24 hours, facilitates fast action by law enforcement, though immediate reporting is recommended.

How To Report Online Scam

To effectively report an online scam through the National Cyber Crime Reporting Portal, follow these steps:

Step 1: Open your web browser and visit the National Cyber Crime Reporting Portal.

Step 2: On the portal’s homepage, locate and click on the ‘File a complaint’ option.

Step 3: Read and agree to the terms and conditions presented on the subsequent page.

Step 4: Choose the ‘Report other cybercrime’ option.

Step 5: Opt for the ‘citizen login’ feature and provide your personal information, including name, email, and phone number.

Step 6: Enter the OTP sent to your registered phone number, fill in the captcha, and proceed by clicking ‘Submit’.

Step 7: On the ensuing page, furnish comprehensive information regarding the cybercrime you intend to report.

Also Read | WhatsApp Pink Scam Red Alert For Android Users: What Is This New Scam? How To Stay Safe?

Step 8: General Information, Victim Information, Cybercrime Information, and Preview are the four sections that make up the form. Populate each section with related details.

Step 9: After reviewing the entered information, submit the complaint by selecting the ‘Submit’ button.

Step 10: You’ll be directed to a page for incident details. Here, you can upload supporting evidence of the crime, such as screenshots or files.

Step 11: Once evidence is attached, click ‘Save and Next’.

Step 12: If you possess any information about the alleged suspect, provide the details in the next section.

Step 13: Verify the accuracy of the provided information and conclude the process by clicking ‘Submit’.

Step 14: A confirmation message will be issued, indicating the successful registration of your complaint. Simultaneously, an email containing your complaint ID and relevant details will be dispatched.

Also Read | How To Check Number Of Sim Cards Registered On Your Name And ID: How To Block Unauthorized SIM Cards Issued On Your Name?

When reporting cyber fraud cases related to online transactions, lottery scams, ATM transactions, fake calls, or Internet banking, it is crucial to attach evidence of the fraudulent transactions. Additionally, provide supporting documentation, including bank statements, address and ID proof, and any suspicious messages or emails received.

Categories
Apps Featured How To

Want To Share Your Screen On WhatsApp Video Call? Here’s How

Key Highlights

  • WhatsApp users can share their screens in real-time during video calls
  • The screen-sharing functionality serves various purposes, from showcasing documents to troubleshooting
  • Users can switch between portrait and landscape modes for optimized viewing

WhatsApp has unveiled an innovative addition to its video calling capabilities. This latest feature empowers users to share their screens in real-time during video calls, enabling them to display a live view of their screen to one or multiple participants in the call.

Also Read | WhatsApp Introduces Direct Messaging: You Can Now Chat with Unknown Numbers Without Saving Them

This newly introduced screen-sharing feature brings a multitude of advantages to users. It serves as a valuable tool for diverse purposes, such as showcasing documents, images, videos, or applications to fellow participants. Additionally, screen sharing proves invaluable for troubleshooting, educational purposes, and collaborative efforts on projects.

Optimized Landscape Mode

In a move to enhance the user experience, this feature also introduces landscape mode compatibility for video calls. Users have the flexibility to rotate their devices, allowing them to view the shared screen in a wider aspect ratio, thereby enriching the visual experience.

WhatsApp Screen-Sharing Feature Rollout

The rollout of this innovative feature is being executed in a phased manner across Android, iOS, and Windows Desktop platforms. WhatsApp is committed to ensuring a seamless and controlled deployment to users worldwide.

Also Read | WhatsApp Silence Unknown Caller, Privacy Checkup Security Features Released: How To Use?

How To Use Screen-Sharing On WhatsApp Video Calls

For users eager to use this new feature, here’s a comprehensive step-by-step guide to initiating screen sharing during a WhatsApp video call:

Step 1: Start a WhatsApp video call with the desired participant. This can be accomplished by selecting their profile picture and tapping the video icon within the chat window. Alternatively, you can navigate to the Calls tab and select the contact to initiate the call.

Step 2: Once the video call is established, a new screen-sharing icon will become visible on the bottom navigation bar alongside the video controls. Recognizable as a phone with two outward-pointing arrows, tapping this icon will activate the screen-sharing feature.

Step 3: Upon selecting the screen-sharing icon, a confirmation prompt will appear, requesting your authorization to share your screen via WhatsApp. This prompt also provides a crucial advisory regarding the visibility of all content on your screen, including sensitive information. To proceed, tap “Start now.”

Step 4: With screen sharing activated, you’re free to navigate through various apps and screens on your device. The shared content will be instantly visible to the other participant(s) on their devices. Moreover, users can effortlessly switch between portrait and landscape modes to optimize their viewing perspective.

Also Read | WhatsApp Short Video Message Reply Feature Introduced: What Is It? How To Use?

Step 5: To conclude the screen-sharing session, return to the WhatsApp video call interface and tap “Stop sharing.” This action will bring an end to the screen-sharing experience.

Update your app to the latest version and follow these steps to make the most of this exciting addition to your communication toolkit.

Categories
Apps Featured How To

Looking Beyond Google? Here’s How To Change Your Default Search Engine

Key Highlights

  • You can switch from Google to alternative search engines like Bing, Yahoo, and more
  • Every browser, including Google Chrome, has the option to change the default search engine
  • Consider privacy, features, and personal preferences when choosing a search engine

Default search engines have a significant impact on our daily online interactions, influencing our search habits. While Google Search is the default choice for most, the option to switch to other search engines exists for those who prefer alternatives due to trust or privacy concerns. If you’re looking to change your default search engine, this article provides step-by-step instructions for Google Chrome and Mozilla Firefox.

Also Read | Gmail Gets Google Calendar Schedule Feature: What Is It? How To Use?

How To Change Google Chrome’s Default Search Engine

Step 1: Launch Google Chrome.

Step 2: Access the menu by clicking on the three vertical dots at the top-right corner.

Step 3: Choose “Settings.”

Step 4: Scroll down to find the “Search engine” section.

Step 5: Click on “Search engine used in the address bar.”

Step 6: Select your desired search engine from the options (e.g., Google, Bing, Yahoo, DuckDuckGo, etc.).

Step 7: Close the settings tab, and your new search engine will be applied to future searches.

Also Read | Want To Translate Text With Your Voice? Meet Google’s AudioPaLM

How To Change Default Search Engine In Mozilla Firefox

Step 1: Open Mozilla Firefox.

Step 2: Click on the menu icon represented by three horizontal lines in the top-right corner.

Step 3: Opt for “Options.”

Step 4: On the left sidebar, click “Search.”

Step 5: Use the “Default Search Engine” dropdown to pick your preferred search engine.

Step 6: For additional search engines, click “Add more search engines.”

Step 7: Apply changes by closing the options tab.

Also Read | Curious About Google Meet’s Camera Lock? Learn How To Use This Useful Feature

Factors To Consider When Selecting A Search Engine

Prioritize Privacy: Certain search engines, like DuckDuckGo, prioritize user privacy more than others.

Feature Preferences: Different search engines offer varied features, including instant answers and personalized results. For instance, Google provides an array of features.

Test and Adapt: Experiment with different search engines to discover your preferred choice. Changing your default search engine is always an option if you wish to explore alternatives.

Categories
Featured How To

Har Ghar Tiranga 2.0 (2023) : How To Buy Indian National Flag At Just Rs. 25 From Any Post office

Key Highlights

  • Har Ghar Tiranga campaign live again
  • Marks 47th Independence Day Celebrations
  • National Flags can be purchased during this campaign at just Rs. 25

Last year, honorable PM, Narendra Modi started a new initiative motivating Indian citizens to hoist the national flag in every home. The campaign called Har Ghar Tiranga aimed to witness as many national flags throughout the country during the Independence day and was undeniably one the most successful campaigns yet. This year too, ahead of the 47th Independence Day in India, the Har Ghar Tirange 2.0 event is live. Want to know how you can buy the Indian tricolor flag at just Rs. 25? Read on below:

Har Ghar Tiranga 2023 Details: Price, Buying Limit, And More

The Har Ghar Tirange 2.0 or 2023 is identical to the last year’s campaign where Department of Post will be selling the Indian national flags via ePostoffice. This is the second consecutive year where a dedicated government marketplace has been created online just to sell the Indian tricolor flag at cheaper rates. The government believes this move will boost the feel of patriotism amongst the Indian citizens; specifically during the Independence Day.

As mentioned above, India is celebrating its 47th Independence Day this year and this campaign with a massive success last year is expected to surpass previous year’s sales figure. For reference, over 4.5 lakh Indian national flags were sold back in 2022 and the numbers are expected to rise this year. However, it would be difficult to assume the expected sales this year.

Speaking of the prices, the each national flag will cost Rs. 25. Do note that there is no additional charge on shipping. Also, no GST is charged if you buy the Indian tricolor flag via the ePostoffice portal. Additionally, a single user is allowed to purchase a maximum of five flags. Once the payment is done and the order is placed, the Indian national flag will be delivered to the registered address free of cost.

Also Read: Airtel Xstream AirFiber: How To Buy And Set Up Wireless Home Wi-Fi Connection

Har Ghar Tiranga 2.0: How To Buy Indian National Flag At Just Rs. 25

Besides visiting any near by post office physically, you can also order the Indian national flag online using the epostoffice portal and get it delivered to any preferred address.

Step 1: Launch any web browser on your smartphone, tablet, laptop, or PC.

Step 2: Type https://www.epostoffice.gov.in/Registration/Registration and press enter

Step 3: Enter your details and complete the registration process

Step 4: After you have logged into your profile, scroll to the National Flag section

Step 5: Now, add the National Flag to your shopping cart

Step 6: Enter the shipping addres

Step 7: Make payment of Rs. 25

Step 8: Once done, the Indian National Flag will be shipped to the stated address

Also Read: Apple Hacks: Here’s How To Hide And Unhide Your Photos On iPhone

Categories
Apps Featured How To

Netflix Game Controller App Released For iOS: Steps To Use

key Highlights

  • Netflix Game Controller app launched
  • Released only for iOS
  • Allows pairing with smart TVs to play games

Netflix recently stole all the headlines for starting crackdown on password sharing in India. But now, the OTT giant is working on further enhancing the user experience by bringing in a new app for gaming. Netflix has been offering games on its platform for a while and has released a dedicated game controller app which will allow users to pair smart TVs with mobile devices to play games. Here’s everything you need to know about the Netflix game controller app and the steps to use it:

Netflix Game Controller App: What Is It? Who All Can Use?

Netflix has introduced a new game controller application that users can download to connect smart TVs and play games. The Netflix Game Controller app has been currently launched for iOS users only. We can expect the company to expand this app’s availability to Android devices going forward.

As for the iOS users, Netflix has made the Game Controller application available for download on App Store. Interested users can simply search for this application on the App Store on their respective iOS devices to use this application. The has been released in global regions including India. Some reports suggests that the app is in the beta phase and might not be compatible with some of the devices.

Also Read: Netflix Introduces ‘My Netflix’ Tab For iOS Users To Help Access Movies, TV Shows Easily

Netflix Game Controller App: How To Use?

Speaking of the functionality, the Netflix Game Controller app will allow users to connect their smart TVs and play Netflix games. Once the application is installed one would simply have to pair the Netflix Game Controller app with smart TV and access the list of the list of games and select the preferred title to play.

Unfortunately. Netflix hasn’t yet added any new game to the Game Controller App. And the timeline by when the brand will start adding games to this list is also unknown. Just to recap, Netflix started offering games on its platform starting 2021 and has been consistently adding new gaming titles.

Also Read: How To Free Netflix From Airtel Broadband Plans: See Details Here

Categories
How To

Airtel Xstream AirFiber: How To Buy And Set Up Wireless Home Wi-Fi Connection

Airtel has launched India’s first high-speed fixed wireless access service Airtel Xstream AirFiber. Currently available in Delhi and Mumbai, this innovative wireless offering leverages 5G network technology via cell towers to deliver internet connectivity to areas devoid of fiber infrastructure. With Airtel Xstream AirFiber, users can relish ultra-fast internet speeds, making it an appealing choice for both residential and commercial users. Also Read | How To Use Airtel Xstream To Watch Live TV And On-Demand Content

Airtel Xstream AirFiber Connection: How To Buy

Step 1: Begin by determining if Airtel Xstream AirFiber covers your area. You can either explore the official Airtel website or reach out to the customer support helpline to assess coverage in your locale. As of now, Airtel Xstream AirFiber is exclusively available in Delhi and Mumbai.

Step 2: Buy the Airtel Xstream AirFiber exclusively from Airtel Stores. Locate the nearest outlet and pay a visit to acquire your AirFiber device.

Step 3: Opt for the AirFiber plan priced at Rs. 799 per month for a 100Mbps connection. Alternatively, you have the choice to make a lump-sum payment of Rs. 4,435 for a six-month subscription.

Step 4: Complete the payment of the Rs. 2,500 security deposit for Airtel Xstream AirFiber. This deposit can be settled online or at a designated Airtel store.

Step 5: Upon securing the Xstream AirFiber device, transport it to your chosen location where you anticipate optimal network coverage.

Also Read | Airtel Digital TV: How To Add Or Remove Airtel DTH Channels

Airtel Xstream AirFiber Connection: How To Set Up

Embrace the simplicity of setting up Xstream AirFiber, as it is a plug-and-play device. Download the Airtel Xstream AirFiber app from either the Google Play Store or Apple’s App Store, depending on your device. Use the in-app camera to scan the QR code on your AirFiber device. The app will seamlessly identify the device and prompt you to configure your Wi-Fi settings.

Following the successful installation of your Airtel Xstream AirFiber device, your new connection is ready to be enjoyed. Connect your devices to the Wi-Fi network and immerse yourself in high-speed internet experiences.

The installation process is easy and quick. By following these carefully curated steps, you can attain a brand-new Airtel Xstream AirFiber connection.

Also Read | Keep Spam At Bay: Here’s How To Activate DND On Airtel

Categories
Apps Featured How To

Gmail App Now Offers Built-in Translation Feature: Here’s How To Use It

Key Highlights

  • Gmail app users will be able to translate messages into several languages
  • The feature is available for iOS and Android smartphones
  • If an email is written in a language other than the user’s preferred language, the feature will alert the user

Google has unveiled an innovative addition to its Gmail app, enabling users to seamlessly translate messages in various languages without having to exit the app. This feature is available on both Android and iOS devices.

To enhance the translation process for Android and iOS users, Google has implemented an intuitive approach. When an email arrives in a language differing from the user’s preferred display language in their account settings, the new feature will automatically detect this contrast. Subsequently, a notification banner will emerge at the top of the email, extending an option to translate the content. Recipients can readily opt for their desired language from a dropdown menu or dismiss the banner if the translation is unnecessary.

Also Read | Need To Send SMS? Learn How To Do It Through Your Gmail Account

Gmail Translation Feature: How To Use

Step 1: Open the Gmail app on your Android or iOS device. Ensure that you have the latest version of the app installed to access the translation feature.

Step 2: Open an email that is written in a language different from your preferred display language in your account settings.

Step 3: Once the email is detected as being in a different language, a notification banner will appear at the top of the email.

Also Read | Running Low On Google Storage? Five Best Techniques To Clear Your Gmail Space

Step 4: Tap on the notification banner to reveal translation options. You will be presented with a choice to translate the email into your preferred language.

Step 5: Select your desired language from the dropdown menu provided. The email’s content will be automatically translated into the chosen language.

Step 6: After the translation is complete, you can now read the email in your preferred language.

Step 7: If you prefer not to translate emails automatically, you can adjust the settings. You have the option to turn off automatic translation for specific languages. You can find this setting either in the menu icon on the translation banner or in the Gmail app settings.

Gradual Rollout And User Accessibility

The rollout of this transformative feature will be staggered, gradually reaching all Gmail app users in the upcoming weeks. This enhancement is accessible to both Google Workspace users and individual Google Account holders. Particularly beneficial for those frequently communicating with individuals from diverse geographical backgrounds, the translation feature is anticipated to elevate the user experience of Gmail app users. It’s worth noting that Google already provides translation services for Gmail on desktop, the Google Translate app, and Google Assistant.

Categories
Featured How To Mobile

Apple Hacks: Here’s How To Hide And Unhide Your Photos On iPhone

Key Highlights

  • You can hide personal photos on your iPhone
  • You need to follow simple steps to control and manage your private media
  • The feature can help you enjoy your private moments while maintaining ultimate control

In today’s era of increasing smartphone usage for capturing cherished memories, the paramount concern is ensuring the privacy of these personal moments. Thankfully, Apple‘s iOS offers a simple and efficient method to hide photos on your iPhone, allowing you to maintain the utmost privacy. This comprehensive guide will lead you through the process of hiding your photos, empowering you with control over your individual media. Also Read | What’s That Tune? Your iPhone Knows: How To Identify Songs With Just A Tap

How To Hide Photos On iPhone

Step 1: Launch The Photos App

Begin by unlocking your iPhone and locating the Photos app on your home screen. Tap to initiate the app, and you’ll gain access to your photo library.

Step 2: Select Photos

Browse through your photo library and tap on the photo you intend to hide. To choose multiple photos, tap “Select” at the upper right corner, then designate the photos you wish to conceal.

Step 3: Hide Photos

Having selected the desired photos, tap on the share icon, depicted as a square with an upward arrow, situated at the lower left corner of the screen. A menu will emerge – scroll down until you locate the “Hide” option. Proceed to tap “Hide” and validate your decision by confirming “Hide Photo.”

Also Read | iPhone Check-In Feature: Learn How To Use It To Notify Loved Ones Of Safe Arrival

Step 4: Accessing Concealed Photos

Subsequent to hiding your photos, they will be relocated to a distinct album named “Hidden.” However, this album lacks password protection and remains accessible to anyone using your device. To increase security, contemplate using a third-party app tailored to securely store confidential photos.

Step 5: Revealing Hidden Photos

Should the need arise to reveal a hidden photo, navigate to the “Hidden” album and select the photo you wish to restore. Initiate the share icon again, scroll downwards, and you will now encounter the “Unhide” option. Confirm your choice, and the photo will be reinstated to its original position within your photo library.

Bear in mind that while the hidden album furnishes a fundamental level of safeguarding, exploring supplementary security measures, such as password-protected apps, can further elevate the security of your private photos.

Also Read | iOS 17 Live Voicemail: How To Use It On Your iPhone