Categories
Apps Featured How To

How To Use Gmail Confidential Mode? How To Unsend/ Retrieve Emails On Gmail?

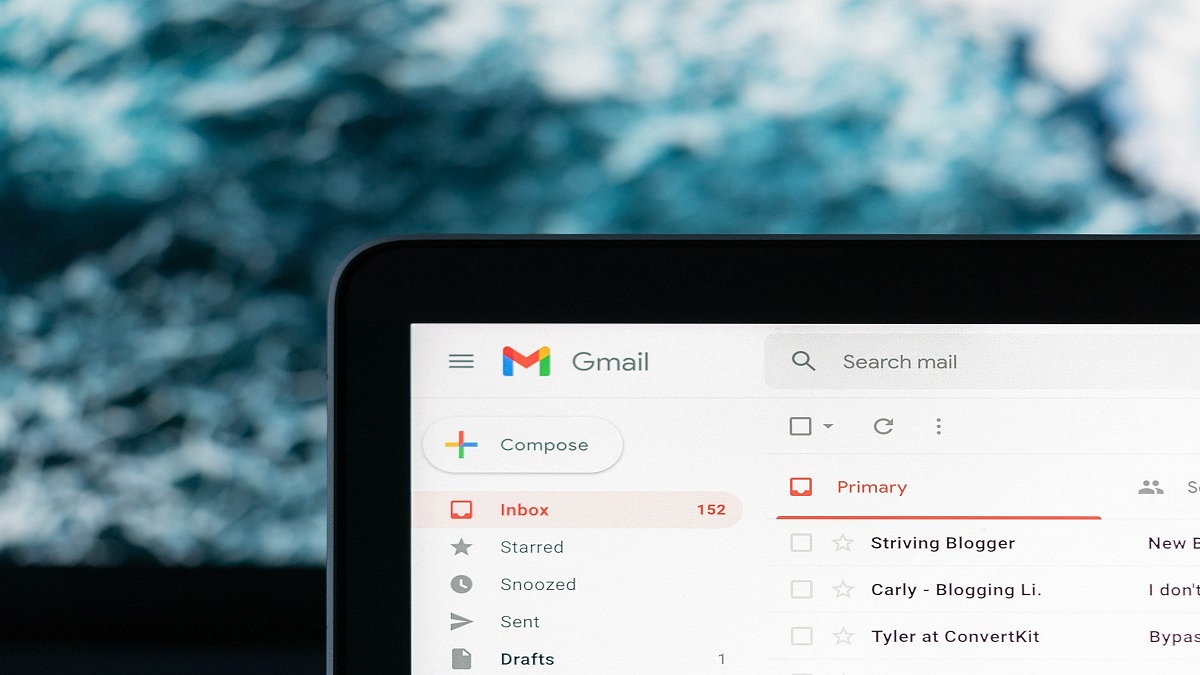
Email services have become one primary mode for written communication across the globe. Different organizations and professional industries rely on emailing services to stay connected with employees and customers. Even the general public uses email services to connect with brands and users whose primary contact details they don’t have. Gmail and Microsoft Outlook are amongst the few big names in email services. The former is managed by Google and you can use its services on smartphones, tablets, laptops, and PCs. Google has been updating Gmail and its services frequently and has added tonnes of features in the last few years.

Google has also enhanced the privacy aspects of Gmail and recently made it easy to use the email services without an active internet connection. With Gmail, you can also use the confidential mode to keep privacy intact. But one of the major hurdles to date has been the missing undo feature. Once you have sent an email from your account, it is hard to retrieve or delete it from the receiver’s device. But if you are using Gmail, you shouldn’t be worried. You can easily unsend or retrieve any recently sent mail if you are using Gmail services. The steps to send confidential mail and to retrieve or unsend any email on Gmail are listed below:

How To Send Confidential Mail On Gmail

Step 1: Open the Gmail app on your respective devices and tap on the compose button.

Step 2: Now, select the confidential mode(timer icon). It is located at the bottom of the compose box.

Step 3: You can select from the two available options including “SMS passcode” and “No SMS passcode”. If you use the former, the recipient would be able to open the email only after entering the passcode. The latter doesn’t require any passcode to open.

Step 4: Compose the email and send it.

How To Unsend Any Email On Gmail App

Step 1: Launch the Gmail app on your smartphones or laptops/ PCs.

Step 2: Write an email using the compose option and add the recipient’s address.

Step 3: As soon as you have sent the email, you will see the Undo option pop up on the screen. Tap on it and the message will be retrieved/ unsent.

Do note that there is a certain time limit to unsend or retrieve messages using Gmail. The minimum timeframe is 5 seconds, while the maximum is 30 seconds. You can set the time limit to retrieve Gmail messages using the following step.

Step 1: Login into your Gmail account in any laptop/ PC.

Step 2: Click on the Settings menu placed on the top right of the app’s homepage.

Step 3: Scroll down to the “Undo Send” option.

Step 4: Set the desired cancelation period. You can select from 5, 10, 20, and 30 seconds.

Categories
Apps Featured How To

iOS 16 Tips And Tricks: How To Add Up To 15 Stops In Maps With iOS 16 Beta

The iOS 16 took the centerstage at the WWDC 2022 even hosted a while ago. Apple released the iOS 16 with some major improvements over the previous-gen versions including the iOS 15 which is currently the backbone of the iPhone 13 series. Apple not just introduced a facelift with the iOS 16 but has also added multiple new features to the new-generation firmware for the upcoming iPhone 14 series and the supported older models. If you have one of the latest iPhones, you can also download and install the iOS 16 beta version and test all the latest features being added to the OS.

We have previously covered the steps to download and use the iOS 16 beta version on eligible phones. Now, we are back with another tips and tricks article where we will be discussing one of the latest features that have been released for the iOS 16 beta version. You will now be able to add up to 15 different stops with the iOS 16. What factors do you need to keep in mind and how can you add multiple stops on a route using the default Maps app on eligible iPhones? Read on to know:

iOS 16 Lets You Add Multiple Stops In Default Maps App

Apple had introduced multiple new features with iOS 16 and Maps isn’t left behind. The option to add up to 15 different stops has now been made possible with the latest iOS beta version. You can make the changes to the stops before starting with your trips on Apple Maps. You just need to enter the destination to where you are traveling and then add the required stops in between the transit route. The steps for the same aren’t tricky and can easily be applied while using iOS 16-powered iPhones. Take a look below:

Step 1: Launch the default Maps app on your respective iPhones. Make sure the device is running on the iOS 16 beta build. Update your phone to the latest build version so that you can use this feature.

Step 2: In the search bar, enter the destination where you wish to travel.

Step 3: Select the driving option. This is the only transit mode where you will be able to add multiple stops to the destination. This feature is currently not supported with public, and bike transit modes. We are not sure if Apple will add this support with the stable iOS 16 version.

Step 4: Add the first stop. To do so, locate the first stop on the map. You can also use the search bar for the same and then select the location.

Step 5: Select the blue direction arrow under the location option.

Step 6: You will see the Add option right above the Routes tab. Tap on it and your first stop is added.

Step 7: Do the same to add the next stops. Only 15 stops can be added to the transit route as of now.

Step 8: If you wish to edit or re-arrange the route then drag the stop by clicking on the menu (three lines option). That’s it. You are all set.

Just to recap, Apple had also added the estimated transit fares on Maps with iOS 16. Another key feature released includes the option to share locations from Mac laptops or PCs to iPhones.

Categories
Apps Featured How To

YouTube Account Hacked: What Should You Do? How You Can Protect Your YouTube Account If Hacked?

YouTube is one of our prime sources of entertainment nowadays. It started as a free platform where users could watch different videos on the go without paying any extra charges for the services. However, Google has gradually released subscription plans with which you can get an ad-free experience on YouTube.

Over the years, YouTube has also improved its policies specifically for content uploading, channel monetization, and more. And ever since YouTube announced monetization policies, content creators have been flooding this platform to make the most of it. You can easily create a channel on YouTube and start uploading videos and earn money out of it. Google has also improved the privacy features on YouTube and has released strict guidelines for users related to the same.

But despite all the security and privacy measures, we come across reports of a YouTube channel hack. This can be a tricky situation if someone gets hold of your account on YouTube and takes entire control making unnecessary changes or even upload videos that aren’t created by you. If you think your YouTube account has been compromised and is hacked, you don’t have to panic at all. We are mentioning some of the best ways with which you can fix your hacked YouTube account.

How To Fix A Hacked YouTube Account Easily?

The first step that you need to check is whether you are able to log into your Google account. If you are able to log in successfully to your Google account, the first thing you would need to do is secure your account. You can also add two-factor authentication to make sure there is no security breach on your YouTube account in the future. If for some reason you are unable to log in to your Google account, follow the steps listed below to recover your account. Then continue with securing your profile.

Step 1: Initiate the Google Account recovery process using this link.

Step 2: Follow the on-screen process to reset your password. You will need to answer the security questions and then complete the account recovery steps.

Step 3: Once the account recovery is complete you can set up the new password. Make sure this time you select a strong password.

How To Protect Your Google And YouTube Account From Hacks

Step 1: Open your Google Account.

Step 2: From the navigation panel, tap on Security.

Step 3: Now head to the “Signing in to Google” option.

Step 4: Select Add recovery option.

Step 5: Toggle on the two-step verification option.

Step 6: Once you setup two-step verification process, you will get two options Your Password and Your Phone.

Step 7: Allow 2-step verification.

Step 8: You can also setup Gmail filters to safeguard your YouTube account from hacks.

Categories
Featured How To Mobile Tablet

Use Live Text With iOS 15 On iPhone And iPad: Here’s How

With the release of iOS 15, many new features have been added and some handy features flew under the radar. This is the case with Live Text, a new feature for iPhone and iPad available as part of iOS 15 and iPadOS 15 respectively. It uses built-in smarts to analyze your photos for text and make them interactive so you can copy, translate, or do anything you can do with digital text on your iPhone or iPad.

How To Enable Live Text On iPad And iPhone

In iOS 15 and iPadOS 15, Live Text is enabled by default. But, in case you disabled it not knowing what it was, here’s how to reactivate this handy feature.

Step 1: Go to Settings.

Step 2: Tap on ‘Camera’.

Step 3: Go to ‘Live Text’ and enable it.

Live Text can recognize information in photos and online images so you can make calls, send emails, get directions, and more with just a tap. Point your camera at a photo or image that contains text and click the Live Text button.

How To Use Live Text In The Camera App

Live Text is also available in the Camera app and when using the camera with other apps like Notes and Reminders. It requires iPhone XS, iPhone XR, or later with iOS 15 or later. To turn on Live Text for all supported languages, you need to follow these steps:

Step 1: Open the Camera app on your iPhone or iPad.

Step 2: Point the camera at the text you’d like to select.

Step 3: When the device detects text, the Live Text feature will be activated, the text will be surrounded by a yellow box, and a new icon will appear in the lower right corner. Click the icon to ‘grab’ the text.

Step 4: Select the section of text you want to use and tap to either Copy, Select All, Translate or Share depending on what you want to do with the text. To select a specific portion of captured text, long press the text to select it. For phone numbers, tap the number on the screen to initiate a call on your device.

Additionally, iPad Pro 12.9-inch (3rd generation) and later models, iPad Air (3rd generation), iPad Pro 11-inch (all models), iPad mini (5th generation), and iPad (8th generation) with iPadOS 15.1 or later are all compatible with Live Text.

Categories
Apps Featured How To

Need Help With Your Instagram Account? Follow These Steps To Get Support

With more than one billion active Instagram users each month, it’s understandable how a customer care department may become overburdened. Users can browse a range of help pages in the extensive ‘Help Center’ offered by the Meta-owned app.

Whatever you need help with will probably be addressed by the Instagram Help Center. Everything from changing your privacy settings to describing how your Instagram feed functions are covered. However, if you discover that you still require assistance, speaking with a human at Instagram may not be entirely impossible. Here’s where to find the Instagram Help Center and how to get in touch with Instagram, if necessary.

Contact The Instagram Support Number

Instagram do have a direct phone number and email – their contact phone number is (650) 543-4800, and their contact email is support@instagram.com. However, it’s unlikely you’ll get a human response through these channels.

Instead, Instagram offers a powerful help center that helps answer most questions and makes it easy to report issues with content you see on the site.

How To Get Instagram Support Through App

Step 1: Open the app and then tap your icon in the bottom-right corner.

Step 2: Tap the parallel bars in the top-right corner.

Step 3: At the bottom of the menu, tap ‘Settings’.

Step 4: Tap ‘Help’ on the next screen.

Step 5: Select ‘Help Center’, and from there you can browse by topic, narrowing in on the issue at hand.

How To Get Instagram Support Via Website

On a computer, you can follow most of the same procedures as above by logging into your Instagram account, but the quickest method to get to the help center is simply entering help.instagram.com into your navigation bar. From there, you can search for your answer. Here’s how:

Step 1: Sign in to Instagram. Access the Help Center by going to help.instagram.com.

Step 2: In the top-right, tap on your profile icon.

Step 3: From the drop-down menu, go to ‘Settings’.

Step 4: Scroll to the bottom of the page and tap ‘Help’.

Step 5: Select an issue or topic listed on the Help Center dashboard. That’s all.

Categories
Apps Featured How To

Instagram Live Broadcast: How To Start, Manage Live Broadcast Sessions On Instagram Android, iOS App

Instagram is one of the biggest names in the social media space. This is a Meta-owned instant photo-sharing app that has gradually become a hot destination for content creators from across the globe. Instagram Reels video is what driving the major audience to this platform. But other features offered by Instagram are also beneficial for influencers that help them interact with the general audience. The Live broadcast feature offered by Instagram is one of them. If you are a social media influencer and wish to host a live Q&A session or wish to live stream any of your events, the live broadcast option will be your go-to option on Instagram or any other social media application such as Facebook and YoutTube.

The Live broadcast option isn’t available just for the social media influencers but also for the general user base. And going live on Instagram isn’t a difficult task. You just need a few taps on the app to get started with your live session. If you are new to the platform or with going live on the application, you need to be aware of the right steps.

Also, you would need an active internet connection with good speeds so that the live session isn’t jittery or pixelated. Here in this article, we have made it easy for you to start your live broadcast session on your Instagram profile and also how you can manage it. Take a look at the steps below:

What Are The Steps To Start A Live Broadcast On Instagram

Step 1: On you Android or iOS smartphone, open the Instagram app.

Step 2: When on the home feed, scroll right to open up the upload page.

Step 3: Scroll down to the Live tab placed at the bottom of the page.

Step 4: Add the title first by tapping the ‘Title’ tab on the left followed by the ‘Add Title’ option.

Step 5: Click on the Live icon. The session will initiate.

Step 6: Once the live broadcast has started, you’ll be able to see the total number of viewers and comments floating at the bottom of the screen.

Step 7: You can end the live session by clicking End on the top right. Select confirm to end the live broadcast session.

How To Manage A Live Broadcast Session During Instagram Live Broadcast Session

With Instagram Live broadcast, you can manage to turn off the comments and requests for collaboration from other users. Follow the steps below to do so:

Step 1: On your Android or iOS devices click on the turn comments off option which you’ll be able to locate at the bottom.

Step 2:  You can turn off the collaboration requests by clicking of Turn off requests to go live option.

Categories
Featured How To Laptop

Need Apple Customer Support For Your Mac Desktop Or Mac Notebook? Here’s How

Key Highlights

  • Mac Notebook users can troubleshoot their problems in a number of ways
  • Users can get in touch with Apple for extra assistance
  • Apple community is one of the most helpful technology communities

It doesn’t matter if you are new to Apple or an experienced Mac and iOS user—problems do happen. However, keep calm. You can easily troubleshoot your problems in a number of ways. On your Mac Desktop Or Mac Notebook, you can look up information right; get in touch with Apple for extra assistance. Additionally, the Apple community is one of the most helpful technology communities; all you have to do is ask. Also Read | Here’s How You Can Recover Lost Or Deleted Data In Windows 11 Laptops, PCs

How To Call Apple Customer Support By Phone

You can reach Apple customer service in India by calling 000800 040 1966. Be prepared to provide the serial number of your gadget when you call this number. When the customer support representative requests it, this will help you save time. To find your serial on a Mac computer, follow these simple steps:

Step 1: At the top-left corner of your screen, click the Apple icon.

Step 2: Tap on ‘About This Mac’.

Step 3: Now, you will see your serial number at the bottom of the pop-up window.

The customer service representative can help you if you need it, but there are alternative ways to locate the serial number of your Apple product.

How To Chat With Apple’s Customer Support

To chat with the Apple customer support team, all you have to do is:

Step 1: Go to getsupport.apple.com.

Step 2: Select the Apple service or product you need assistance with, followed by the problem you’re having.

Step 3: Finally, choose Chat and log in using your Apple ID or the serial number of your product.

Step 4: After you select Chat, a pop-up window will appear.

Step 5: You can start a chat with an Apple customer service representative by typing your issue in the text box at the bottom of the window.

If you forgot or don’t know your Apple ID, check out our step-by-step guide on how to reset your Apple ID on an iPhone.

How To Contact Apple Customer Support On Twitter

You can also contact Apple Support through the @AppleSupport Twitter account. You can then select the envelope icon to send a private message. Apple’s Twitter customer service hours are 5 am to 8 pm daily.

Also Read | Effective Ways To Keep Dirt And Dust From Your MacBook Laptop At Bay

Categories
Apps How To

WhatsApp iOS: How To Restore And Export WhatsApp Chats Using iCloud Backup On Any iPhone

There are several factors that have contributed to WhatsApp’s popularity. The end-to-end privacy and advanced features such as voice and video calls are a few to name. Now, if you are a WhatsApp user, you would be familiar with the UI. Be it Android or iOS, there are only notable differences in its functionality. The usability of WhatsApp isn’t limited to just texts. Thanks to all the advanced set of features, WhatsApp now allows users to make audio and video calls, and share voice notes, locations.

WhatsApp is currently testing multiple features with Android and iOS smartphones and is expected to release the stable version going forward. Over the years, WhatsApp has also released the provision for group conversations and has made several improvements with both private and group chats. WhatsApp chats are end-t-end protected and they aren’t stored on the company’s server.

But that doesn’t mean you will lose the old conversations if they are not being used or if in case you are setting up a new device. With the latter, you can even restore the older conversations. This chat restore method can be easily accessed by both Android and iOS users.

We previously guided you with the steps to create a chat backup on iCloud both manually and automatically. Once you have done that, it becomes easy to restore chat backups on your iPhone. In addition to the chat restore, we are also listing down the steps to export chat history on iOS-powered iPhones.

How To Export WhatsApp Chat History On iOS

Step 1: On your iPhones, launch the WhatsApp application.

Step 2: Go to the individual chat or the group chat window that you wish to export.

Step 3: Now, click on the contact’s name or group subject.

Step 4: Select the Export chat option.

Step 5: Click on Attach Media if you wish to export the chat history along with the media files. Select the ‘Without Media’ option if you want to avoid sending the media files.

Step 6: Launch the Mail application. Click on More for extra options.

Step 7: Now, type in your email address and click on Send.

How To Restore WhatsApp Chat History From iCloud Backup On iOS

As previously mentioned, WhatsApp chats can only be restored if you have created the backup on iCloud. You would first need to check if the iCloud backup is present and then only you can restore the chat backup.

Step 1: To verify an iCloud backup is present on your respective iPhones launch the WhatsApp application and go to the settings.

Step 2: Click on Chats.

Step 3: Select Backup. You will be able to see when was the last backup taken. You will also get the option to delete and reinstall WhatsApp.

Step 4: Enter your phone number for verification and complete this process.

Step 5: Follow the on-screen steps to restore the chat history on your respective iPhones.

Categories
How To Mobile

How To Create Manual, Automatic WhatsApp Chat Backup On iCloud Using iOS

WhatsApp is one of those applications which has over a million users in the global markets. This messaging application has been made available for both Android and iOS smartphone users. The company has also released the web version of this application which can be used on laptops and PCs. It wouldn’t be wrong to say that WhatsApp is currently the prime mode of communication for smartphone users all across the globe including in India.

You would generally get all the latest features that WhatsApp adds to its platform on both Android and iOS ecosystems. But what remains the same since the beginning is the format where you can access your previous chats and conversions with different contacts at any given point in time. All the chats are stored and will be available on our devices unless deleted manually.

WhatsApp also lets you create chat backups which you can set to default so that you don’t lose the chat data be it texts or media files. Creating a backup is one of the safest ways to protect your WhatsApp data from accidental loss. But you would need to restore the old backup to see the previous chats with any contact.

In this article, we are guiding you with the methods with which you can create a WhatsApp backup on iCloud. We will also be covering the process to restore the chat history using iCloud in the next article.

How To Create WhatsApp Back Up To iCloud

Using Manual Backup Method

If you are opting for the Manual backup method, the chat history will be saved only till the time performed the manual backup. The steps for a manual backup are below:

Step 1: Launch the WhatsApp application on your respective iPhones.

Step 2: Open the WhatsApp settings.

Step 3: Click on Chats and then select Chat Backup.

Step 4: Tap on Back Up Now.

Setup Automatic Backup

If in case you want to get free from the hassle of creating a manual WhatsApp backup on iCloud then using setting up an automatic backup is the best option. Once you have activated the Auto Backup option all your WhatsApp chats will be saved on your iCloud account. It could take a while for the backup to be completed. It all depends on the internet speeds.

Step 1: Make sure you are signed in to your Apple ID with which you access your iCloud.

Step 2: From the Chat backup, select Auto Backup.

Step 3: Select the frequency for backup.

That’s it, your WhatsApp chats will now be backed up automatically to the iCloud account. Besides an active Apple ID, you would need an iPhone running on iOS 12 or above. Also, the device should have enough space on both iCloud and iPhone. You can also set back up over Wi-Fi to save your mobile data.

Categories
Featured How To Laptop

Backup Your Mac Using Time Machine Or iCloud: Check Out The Steps

Key Highlights

  • Mac comes with a built-in backup feature called Time Machine
  • You’ll need an external storage device to use Time Machine
  • You can also use iCloud to store your data and documents

You probably don’t think about backing up your PC on a regular basis. Even if it hasn’t been in your thoughts recently, it will inevitably start to matter. If you’re like the majority of Mac users, your machine’s storage devices house a lot of highly critical documents and files. The consequences of a catastrophic data loss could be severe and have an influence on you in a number of different ways. It’s one of the risks we must acknowledge if we wish to benefit from the digital world.

In this post, let’s learn how to back up your Mac so that your important data is secure in the case of an unexpected circumstance that results in data loss.

How To Backup Your Mac Using Time Machine

Your Mac comes with a built-in backup feature called Time Machine. It automatically makes hourly backup versions of your computer that cover the preceding 24 hours, daily, and weekly for the previous month and all previous months, respectively.

Additionally, everything keeps the style you gave it, allowing you to look back on your setup rather than having to recreate it exactly as you remember it.

However, in order to use Time Machine to actually create backups, you’ll need an external storage device and, of course, a method of connecting it to your computer, whether that be by using an AirPort Time Capsule or a physical wire to an external hard drive. To begin, follow the listed steps:

Step 1: Plug the drive into your Mac and wait for the prompt to use it with Time Machine.

Step 2: By checking or unchecking the box (it is recommended to encrypt), you can decide whether to encrypt your backup disc. Then, click ‘Use as a backup’ to proceed.

How To Backup Your Mac Using iCloud

Using iCloud to store your data and documents is another option for backing up your Mac. You must set it up first before you can begin:

Step 1: Make sure your Mac is fully updated by choosing ‘Updates’ in the left sidebar after selecting ‘App Store’ from the Apple menu in the top-left corner of your screen. You first need to log in using your Apple ID.

Step 2: Select ‘System Preferences’ and then ‘iCloud’ from the Apple menu in the upper left corner of the screen.

Step 3: Sign in with your Apple ID and accept the terms of service.

Step 4: You can decide whether or not to use iCloud for your data and documents and the use of Find My Mac.

Following the steps explained above, you’ll be able to see which apps you can add to or remove from your iCloud account as well as how much of your 5GB of free storage space is presently being used by your data. If necessary, you can subscribe to a more expansive iCloud account for a variety of monthly costs.