Categories
Apps Featured How To

Create Your DigiLocker Account In Minutes: Here’s How

Key Highlights

  • DigiLocker is a free digital document storage platform by the Government of India
  • Users can store Aadhaar, driving license, PAN card, and educational certificates
  • DigiLocker promotes digital empowerment by offering secure document management

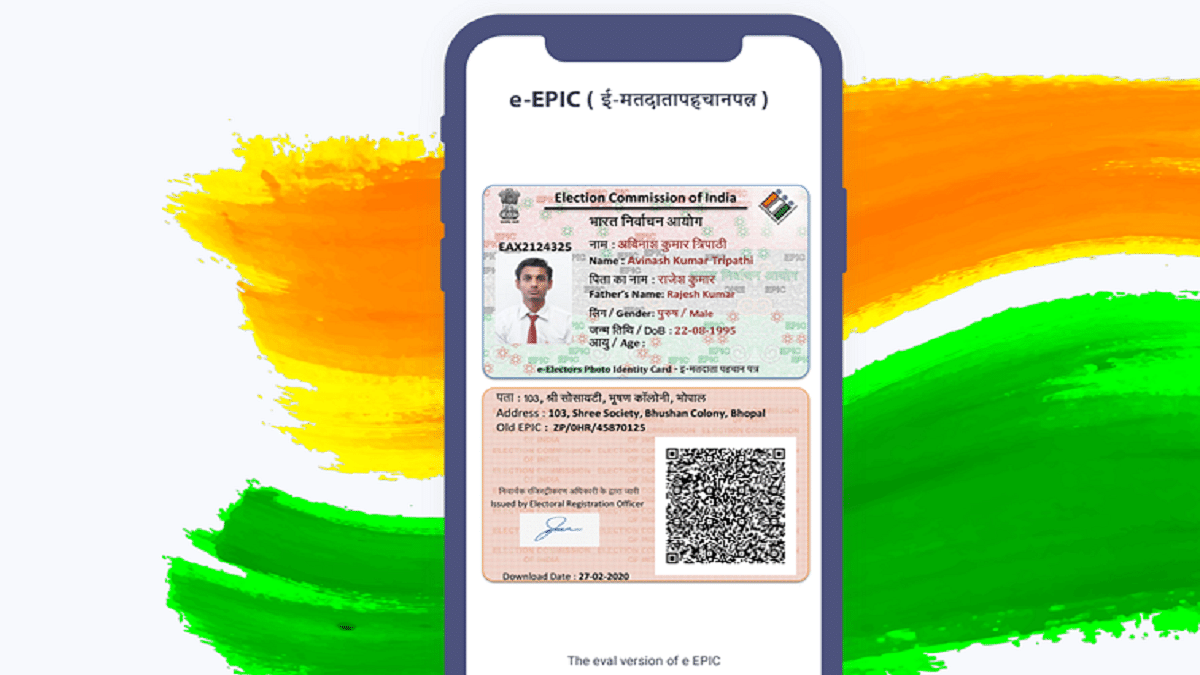
Digitalization has simplified many aspects of our lives, and managing important documents is no exception. DigiLocker, a government initiative, offers a secure and convenient platform for storing and accessing various documents digitally. Here’s a step-by-step guide on how to sign up for DigiLocker and create your account. Also Read | Lok Sabha Elections 2024: Here’s How To Download Your Voter ID Card Online In Minutes

What Is DigiLocker?

DigiLocker is like your virtual document locker, where you can store important documents such as Aadhaar card, driving license, PAN card, and educational certificates. It’s a free service provided by the Government of India to promote digital empowerment.

How To Create Account On DigiLocker

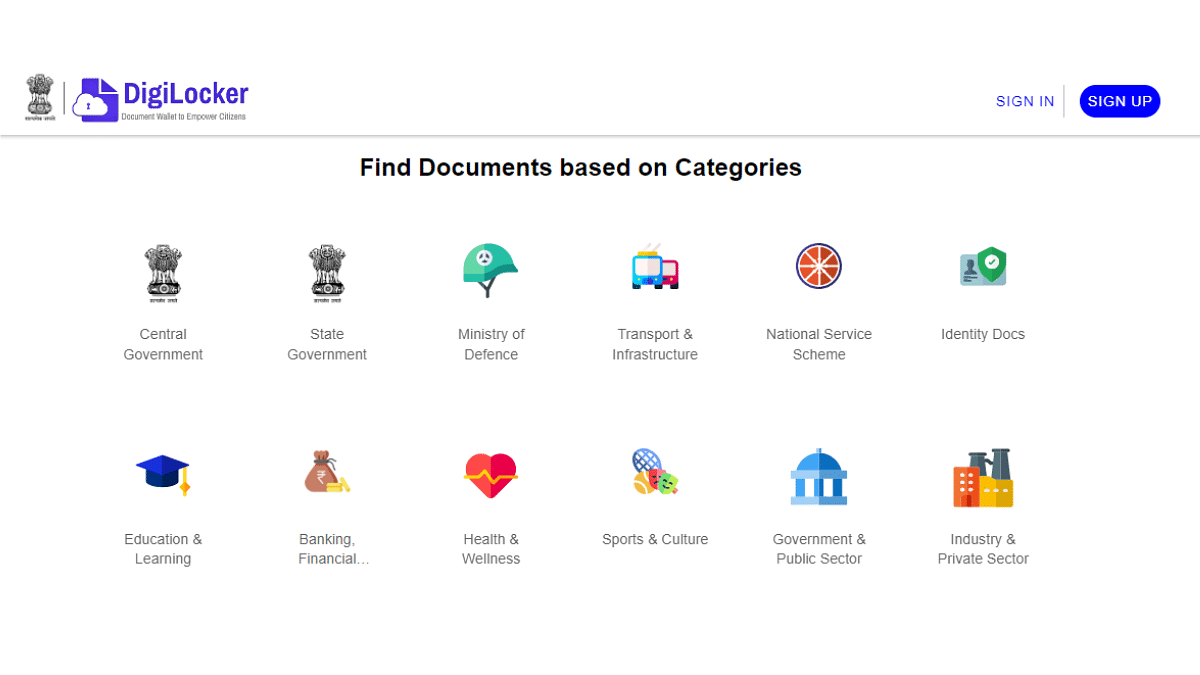
Step 1: To get started, visit the official DigiLocker website using your web browser.

Step 2: On the homepage, you’ll find the “Sign Up” option. Click on it to start the registration process.

Step 3: You will be asked to provide your mobile number. Enter your mobile number and then click on “Continue”.

Step 4: You will receive an OTP on the mobile number you provided. Enter the OTP in the designated space and click on “Verify OTP”.

Step 5: After OTP verification, you need to choose a username and password for your DigiLocker account. Make sure to choose a strong password that includes a mix of letters, numbers, and special characters for security.

Step 6: Next, you’ll need to fill in your personal details such as name, date of birth, and email address. Make sure all the information provided is accurate.

Step 7: Set up security questions and answers. These will help you recover your account if you forget your password.

Step 8: Read through the terms and conditions of using DigiLocker carefully. Tick the box to accept them if you agree.

Step 9: Once you have filled in all the necessary information, click on the “Sign Up” button to complete the registration process.

Step 10: You may receive an email asking you to verify your email address. Click on the verification link in the email to confirm your email address.

Your Account Is Ready

Congratulations! You have successfully signed up for DigiLocker. Now you can start uploading your documents and accessing various government services online.

Also Read | Online Safety: Eight Essential Cybersecurity Tips For Kids

Conclusion

Signing up for DigiLocker is a simple process that allows you to access your important documents anytime, anywhere, digitally. By following these easy steps, you can create your account and take advantage of the benefits of digital document storage and access.

Categories
Apps Featured How To

Control What Your Family Watches: How To Adjust Maturity Ratings On Netflix

Key Highlights

  • Set maturity rating on Netflix to control what content is available for viewing
  • Access settings on both the Netflix app and web browser to adjust maturity ratings
  • Manually block specific titles for additional control over content accessibility

Netflix, the popular video streaming service, offers a wide range of content across various genres. However, some shows and movies are meant for mature audiences, typically those over 18. If you’re a parent and want to ensure your kids only watch suitable content, you can set a maturity rating on Netflix. Similarly, you can also adjust settings to view content appropriate for grown-ups. Here’s how you can do it. Also Read | Hotstar vs Netflix vs Amazon Prime Video: The Best OTT Platform?

How To Set Maturity Rating On Smartphone, Tablet

Step 1: Tap on the Netflix app icon on your smartphone or tablet.

Step 2: At the bottom right, click on “My Netflix”.

Step 3: Navigate to Manage Profiles: Tap on the hamburger icon (three horizontal lines) in the upper right corner and then select “Manage Profiles”.

Step 4: Select the profile you want to edit.

Step 5: Tap on “Viewing Restrictions”.

Step 6: Tap on “Maturity Rating”.

Step 7: Enter your Netflix account password to proceed.

Step 8: Choose Rating Level: Netflix offers five options: U (Universal), U/A 7+, U/A 13, U/A 16+, and A for Adult content. Uncheck the maturity levels you want to restrict, then tap back.

How To Set Maturity Rating On Web Browser

Step 1: Open Netflix.com on your web browser.

Step 2: At the top right corner, click on your profile.

Step 3: Go to “Manage Profiles”.

Step 4: Choose the profile you want to edit.

Step 5: Click on “Edit” below “All Maturity Ratings”.

Step 6: Enter your Netflix account password.

Step 7: Choose from the five maturity rating levels available.

Also Read | From Hindi To Korean: Learn How To Change Languages In Netflix

How To Block Titles

You can also manually block specific TV shows or movies:

Step 1: In the Maturity Rating section, tap on “Block Titles”.

Step 2: Find the show you want to block and tap on it.

Step 3:  Finally, tap on “Save” to confirm.

By setting the maturity rating, Netflix will only display content suitable for the chosen age group, which is helpful for parents monitoring their children’s viewing habits. Additionally, manually blocking titles gives you more control over what content is accessible.

Categories
Apps Auto Tech Featured How To

Android Auto Update: Here’s The Manual Step Guide

Highlights

  • Android Auto update improves user experience
  • Update generally is automatic
  • Manual steps listed below for Android Auto Update

Android Auto is the modern connected car technology which has opened up range of possibilities while driving. If you own a new-age four wheeler, you possible will get a digital infotainment screen loaded with Android Auto suite. Features like turn-by-turn navigation, media playback, and answering calls is just a few taps away. In fact, voice assistance is another advanced user experience offered by an Android Auto-enabled car. As is the case with all Google Apps, auto update via OTA is a general practice which enhances the user experience with Android Auto. Google has added the provision of auto-updates with Android Auto. However, there can be instances where Android Auto fails to update automatically and the user experience can be hampered due to the bugs present in older version. Manual update is what comes to rescue here. But how can you perform a manual update for Android Auto? Here in this article we are listing the step-by-step guide. Take a look:

Also Read: Microsoft Rolls Out Passkey Support For Consumer Accounts: Here’s How To Use

Check If Auto Update Is Enabled Or Disabled

Make sure the Auto Update option is enabled for your apps on Google Play Store. If auto-update feature is disabled, Android Auto and all other apps that are installed on your devices won’t update automatically even if the OTA update is rolled out.

Step 1: Open Google Play Store on your mobile device or desktop

Step 2: Click on the Profile icon

Step 3: Head to the Setting menu

Step 4: Select the Network Preferences option and tap Auto-update apps

Step 5: Click on the preferred auto update mode such as Wi-Fi or mobile data or both.

Step 6: Auto-app update is now enabled

Also Read: Lok Sabha Elections 2024: Here’s How To Download Your Voter ID Card Online In Minutes

Steps To Update Android Auto Manually

Step 1: Open Google Play Store on your device

Step 2: Search Android Auto application

Step 3: Once on the app’s page, check for any new updates

Step 4: Click on Update if available

Step 5: Wait for the update to be completed and then relaunch Android Auto in your vehicle

Categories
Apps Featured How To

Instagram Introduces Four New Stickers: What Are They, How To Use Them?

Key Highlights

  • Instagram introduces four new stickers: Add Yours Music, Reveal, Cutouts, and Frames
  • Add Yours Music lets users share songs; Reveal hides stories for followers to discover
  • Cutouts turn photos or videos into stickers, while Frames give photos an instant print effect

Instagram has announced exciting updates with four new stickers for its platform. These stickers not only let users share their favorite songs but also add hidden stories for followers to discover. Also Read | Instagram’s Algorithm Change: No More Reposted Content In Recommendations

1. Add Yours Music Sticker

This new sticker combines the existing Add Yours feature with Instagram’s music sticker. With the Add Yours Music sticker, users can share their favorite songs or new music finds with their followers. Here’s how to use it:

Step 1: Open Instagram and create a post.

Step 2: Tap the stickers icon and select ‘Add Yours Music’.

Step 3: Choose a song from Instagram’s music library.

2. Reveal Sticker

The Reveal sticker lets users post hidden stories for friends and followers to uncover. Here’s how to use it:

Step 1: Create a post on Instagram.

Step 2: Tap the stickers icon and select ‘Reveal’.

Step 3: Type a hint for your friends.

Step 4: Preview how your story will appear.

3. Cutouts Sticker

The Cutouts sticker allows users to turn a part of any video or photo in their camera roll into a sticker for their story or reel. Here’s how to use it:

Step 1: Create a post on Instagram.

Step 2: Tap the stickers icon and select the scissors icon for Cutouts.

Step 3: Choose a clear subject from your gallery.

Step 4: The sticker will be generated automatically.

Step 5: Tap ‘Use sticker’ to add it to your reel or story.

Also Read | The Insta-Famous Five: Check Top Five Most-Followed Instagram Accounts

4. Frames Sticker

This sticker turns any photo into an instant print. To reveal the content inside, followers have to shake their phones. Here’s how to use it:

Step 1: Create a post on Instagram.

Step 2: Tap the stickers icon and select Frames.

Step 3: Choose an image from your gallery.

Step 4: Add a caption if you like.

These new stickers offer fun ways to engage with your followers and get creative with your stories on Instagram. Try them out and share your favorite moments in new and exciting ways.

Categories
Accessories Featured Gaming How To

Want Free Games On Your PS5? Here’s How To Download It On Your Gaming Console

Key Highlights

  • Over 50 million PS5s sold globally by December 2023
  • Learn to download games for your PS5, whether you’re new or a longtime fan
  • With a user-friendly interface, downloading games is easy via PlayStation Plus

The PlayStation 5 has taken the gaming world by storm, with over 50 million units sold globally as of December 2023. Its popularity continues to soar, outpacing its competitors, the Xbox Series S and Xbox Series X combined by a ratio of three-to-one. Whether you’re a newcomer to the PS5 fanbase or considering joining it soon, downloading games onto your console is essential knowledge. Here’s an easy-to-follow step-by-step guide to help you get started. Also Read | Blinkit Brings Sony PlayStation 5 Slim To Your Doorstep In Just 10 Minutes: Details

Exploring PlayStation Plus Game Catalogue

To access a wide range of games, follow these steps:

  1. Navigate to PlayStation Plus: From the Games home screen, select PlayStation Plus.
  2. Access Game Catalogue: Scroll to the Benefits tab and select Game Catalogue.
  3. Download Games: Choose the game you want and select Download.

This catalogue offers a variety of titles available for download directly to your PlayStation 5.

PS5: How To Download Free Games

If you’re looking for free games, follow these steps:

Step 1: Open your PlayStation 5 and scroll to PlayStation Plus from the Games home screen. Select Sign In.

Step 2: Go to the Game Library and then to the Your Collection section.

Step 3: Select the game you want to download.

Step 4: If the game has PS5 and PS4 versions, choose PS5 and select Download.

How To Use The PlayStation App For Downloads

For convenient downloading from your mobile device, use the PlayStation app:

Step 1: Launch the PlayStation app on your mobile device.

Step 2: Tap on Game Library at the bottom of the screen, next to the Search option.

Step 3: Tap Filters and select Games.

Step 4: Choose the title you wish to download.

Step 5: Tap Download to Console.

By following these steps, your selected game will begin downloading to your PS5, either immediately or upon waking it up from rest mode.

Also Read | Best Gaming Consoles To Buy

Conclusion

With the PlayStation 5’s expansive game library and user-friendly interface, downloading games is a breeze. Whether you’re exploring the PlayStation Plus catalogue or downloading free games through the console or app, accessing your favorite titles has never been easier. Enjoy the world of gaming at your fingertips with your PlayStation 5.

Categories
Apps Featured How To

Microsoft Rolls Out Passkey Support For Consumer Accounts: Here’s How To Use

Key Highlights

  • Microsoft introduces passkeys for consumer accounts
  • Passkeys replace passwords for better protection
  • Simple setup and usage for convenience

Microsoft announced a big update for its users: the introduction of passkeys for all consumer accounts. With passkeys, users can log into their Microsoft accounts using their face, fingerprint, or device PIN on Windows, Google, and Apple platforms. This new feature aims to enhance security and convenience for users across different devices. Also Read | WhatsApp Passkey Available For Android, iOS, And Web: How To Use?

What Exactly Is A Passkey?

For those unfamiliar, a passkey is a replacement for traditional passwords. Instead of relying on a single string of characters, passkeys use a combination of two keys for authentication. One key is stored on the user’s device and is protected by biometrics or a PIN, while the other key remains with the app or website for which the passkey was created. This unique key pair ensures that the passkey will only work for the intended website or app, making it more secure against phishing attempts.

Supported Devices

Passkeys are now supported on a variety of devices, including:

  • Windows 10 and newer
  • ChromeOS 109 and newer
  • macOS Ventura and newer
  • Android 9 and newer
  • iOS 16 and newer
  • Hardware security keys that support the FIDO2 protocol

How To Set Up A Passkey For Your Microsoft Account

Setting up a passkey for your Microsoft account is easy:

Step 1: Sign in to your Microsoft account Advanced Security Options.

Step 2: Choose ‘Add a new way to sign in or verify’.

Step 3: Choose fingerprint, face, PIN, or security key.

Step 4: Follow the instructions on your device.

Step 5: Provide a name for your passkey.

How To Use Your Passkey To Sign In

Using your passkey to sign in to your Microsoft account is just as simple:

Step 1: Choose Sign-in options or Other ways to sign in.

Step 2: Select Face, Fingerprint, PIN, or security key.

Step 3: Now select your Passkey from the list available.

Step 4: Once selected, your device will prompt you to use your chosen method (face, fingerprint, PIN, or security key) to authenticate.

Also Read | Google Passkey For Login: In-Depth Guide On What It Is And How to Use It

Security and Convenience

With passkeys, Microsoft aims to provide users with a more secure and convenient way to access their accounts across various platforms. By leveraging biometric data or PINs, passkeys offer an added layer of protection against unauthorized access while simplifying the login process for users.

Categories
Featured How To Mobile

Ready To Factory Reset Your Apple iPhone? Here’s What To Do

Key Highlights

  • Upgrading iPhones through carrier plans requires a factory reset to erase data for security
  • Factory reset is essential when selling or giving away the device
  • Factory reset is reversible through data restoration from backup

Getting a new iPhone is easy with upgrade plans from phone carriers. When you upgrade, your old iPhone needs a factory reset to erase your data and keep it safe. This guide will show you how to reset your iPhone, whether you’re selling it or upgrading to a new one. Let’s check it out. Also Read | Want To Stay Ahead Of Your Period? Learn How To Set Up Menstrual Cycle Tracking On iPhone

Understanding Resets: Soft Reset vs. Force Restart vs. Factory Reset

  • Soft Reset: Restarting your iPhone using the software option won’t delete your data. It’s useful when your phone is acting up.
  • Force Restart: This helps when your phone’s touchscreen isn’t working. You use hardware keys to restart it.
  • Factory Reset: This wipes everything from your iPhone, returning it to its original state.

When To Factory Reset Your iPhone?

Do a factory reset if you can’t fix problems on your iPhone, or when you’re selling or giving it away. It’s not permanent because you can restore your data later using a backup.

How To Factory Reset Your iPhone?

Once you’ve backed up your data, the easiest way to reset your iPhone is through the Settings app.

Step 1: Go to Settings > General.

Step 2: Tap Transfer or reset phone.

Step 3: Tap Erase all content and settings.

Step 4: Tap Continue.

Step 5: Enter your passcode.

Step 6: Your phone will try to back up to the cloud. If successful, you can continue. If not, you’ll be prompted to erase anyway.

Verify Restoration

After the restoration process, which may take a few minutes, ensure your phone is back to its original factory settings.

If done correctly, you’ll see the iOS Setup Assistant again, where you can restore your phone from a backup or set it up as new.

Note: If you’re selling or giving away your phone, the safest way to erase everything is by selecting Erase All Content and Settings.

Also Read | How To Check And Enhance iPhone Battery Health: A Step-by-Step Guide

Other Reset Options

  • Reset All Settings: Resets all settings to default, including network settings and preferences, without deleting your apps or data.
  • Reset Network Settings: Clears network settings, cache, and temporary files, useful for fixing Wi-Fi connection issues.
  • Reset Keyboard Dictionary: Clears autocorrect history to fix typing errors.
  • Reset Home Screen Layout: Restores the home screen to its default layout, handy if your arrangement isn’t working for you.
  • Reset Location & Privacy: Reverts privacy and location settings back to default without losing other data. Useful for fixing settings-related issues.

Conclusion

Resetting your iPhone is easy and important for protecting your data. Whether you’re troubleshooting or preparing to sell your phone, knowing how to do a factory reset is essential.

Categories
Featured How To

Lok Sabha Elections 2024: Here’s How To Download Your Voter ID Card Online In Minutes

Key Highlights

  • Downloading a Voter ID card online is a simple and easy process
  • You can easily download your Voter ID card and exercise your right to vote in the Lok Sabha elections
  • Make sure to apply for your Voter ID card as soon as possible to avoid any last-minute delays

As the elections are approaching in different parts of the nation, it is crucial for eligible voters to have a valid Voter ID card. The Voter ID card is a crucial document that proves an individual’s citizenship and their right to vote. If you are a voter in India and have not yet received your Voter ID card, you can download it online easily. In this article, we will guide you through the simple steps to download your Voter ID card online. Also Read | What Is A Masked Aadhaar Card? Here’s How You Can Download It Online

Steps To Download Your Voter ID Card Online

You can download an E-EPIC or digital voter ID card online to your smartphone, laptop, or computer via a few different methods.

Download Voter ID Card Using EPIC number

Step 1: To download your Voter ID card online, visit the official website of the National Voters’ Services Portal.

Step 2: Once you are on the National Voters Service Portal, click on the “E-Epic Download” option from the menu bar.

Step 3: If you haven’t already done so, register and log in using your mobile number or email ID.

Step 4: Enter your EPIC number or Form Reference Number.

Step 5: Verify your mobile number with the OTP sent (if registered with Eroll).

Step 6: Click on the “Download e-EPIC” button to complete the process.

The digital copy of your voter ID card will be stored on your mobile phone in the form of a PDF file, which will be approximately 250kb in size. You have the option to either print out the card or display the digital copy as proof of identity at the polling station. However, at present, the facility to download e-EPIC is only available for voters who registered after November 2020 and have a unique mobile number on record. For others, this service will soon be made available. In the meantime, you can search for your name in the electoral roll and take a screenshot of the details to use as proof of identity.

Download Voter ID Card Without EPIC number

If you have lost your voter ID card and cannot recall your EPIC number, you can locate your EPIC number by searching for your name in the electoral roll. Once you have obtained your EPIC number, you can download your voter ID card using the steps outlined above. To find your EPIC number in the electoral roll, follow the instructions provided in the section on how to check your name in the voter list online.

Also Read | Applied For A New Passport? Here’s How To Check Your Passport Application Status

How To Check Your Name In The Voter List Online

If you want to verify your name on the Voter list online, you can follow these steps:

Step 1: Open your browser and visit either the Election Commission of India (ECI) website or the National Voter Service Portal (NVSP).

Step 2: Look for the option “Search name in Voter List,” which is usually located below the “Current Issue” section, and click on it.

Step 3: You’ll be redirected to a new page where you can search for your name on the voter list.

Step 4: You can search by details such as your name, father’s/husband’s name, age/DOB, and state, or you can search by EPIC number, which is the number on your Voter ID card.

Step 5: Once you have entered the required details, type in the captcha code and hit the “Search” button.

Step 6: The details of the voter list will appear on the page, including the number of records found.

Step 7: Click on “View Details” to verify your name on the voter list.

If there are any discrepancies, you can correct them directly from the page. The website provides options such as “Apply shifting to a different Assembly Constituency,” “Raise an objection for the inclusion of this entry or Apply for deletion from electoral roll,” “Apply for corrections in electoral roll entry,” and “Apply for shifting within Assembly Constituency.”

Also Read | Wrong Name, Address On Your Aadhaar Card? Here’s How To Update It

Categories
Featured Gaming How To

Free Fire OB44 Update Available Now: Learn How To Install On Android, iPhone

Key Highlights

  • OB44 brings Villain Conquest, Mechadrake boss, and Kairos
  • Find Free Fire in the play/app store and update with ease
  • Character tweaks and Zombie Hunt map return

After hosting the Advanced Server in March, Garena has now rolled out the OB44 update for Free Fire this week. It is packed with exciting new features including Villain Conquest, a new character, and the challenging dragon boss Mechadrake. Here’s all you need to know. Also Read | Free Fire Reborn: Garena’s Popular Battle Royale Returns To India

How To Install OB44 Update On Android

Installing the OB44 update on Android is simple and hassle-free. Just follow these steps:

Step 1: On your Android device, open the Google Play Store.

Step 2: In the top search bar, search for Free Fire.

Step 3: Tap on the game to open its listing.

Step 4: Look for the update option and tap on it to start the update process.

Step 5: Once the update is complete, launch the game to experience all the new changes.

How To Install OB44 Update On iOS

For iPhone users, updating to OB44 is as easy as pie. Here’s how:

Step 1: Launch the App Store on your iPhone.

Step 2: Search for Free Fire in the search bar.

Step 3: Click on the Free Fire game.

Step 4: Hit the Update button.

Step 5: Launch the game after updating to enjoy the fresh patch.

If you don’t have Free Fire installed yet, don’t worry. You can install it from the Play Store on Android or the App Store on iOS.

Also Read | Stylish Free Fire Nick Names 2023: 100+ Cool And Unique Free Fire Nicknames For Teams And Groups In 2023

What’s New In The OB44 Update

The OB44 update introduces three major changes:

  • Villain Conquest: A thrilling Battle Royale mode where players combat invading villains from another world on the Bermuda map. Defeating villains earns rewards and a chance to face Mechadrake, the dragon boss.
  • Mechadrake Trial: Encounter a mighty dragon hovering over the sky, dropping rewards and aiming to seize players’ hard-earned treasures in Villain Conquest.
  • New Character Kairos: Meet Kairos, a Special Forces soldier with top-notch combat skills and a rich military background. Kairos debuts in the Paradox event.

Additional Changes

The update also includes character adjustments for Tatsuya, Santino, Joseph, Nikita, Ryden, Caroline, and Kapella. Plus, the old Zombie Hunt map makes a comeback with this update.

Categories
Apps Featured How To

Your Soundtrack, AI-Curated: Here’s How To Create Next-Gen Playlist On Amazon Music

Key Highlights

  • Amazon Music’s Maestro creates playlists from text inputs, in beta for US users
  • Available to Amazon Music Unlimited subscribers
  • Maestro offers instant playlist access at no extra charge

Amazon Music, a popular music streaming platform, has launched a new tool called Maestro. Maestro uses AI to create playlists based on text or text-and-emoji inputs. It’s like having a personal DJ, but with AI doing the mixing. Currently in beta testing, Maestro is only available to users in the US. Also Read | Spotify’s New: Personalized Playlists Made Simple With AI Prompts

How Does It Work?

It’s super easy. You just type in what you want to listen to or how you’re feeling, and Maestro does the rest. You can even talk to it using speech-to-text. So, if you’re feeling left out because your friends are hanging without you, just say it, and Maestro will whip up a playlist based on that.

Where Can You Find It?

Maestro lives in the Amazon Music mobile app, so you can’t access it on the web or your TV. It’s all about the phone for now.

How Is It Different From Spotify’s AI?

Well, both Amazon Music Maestro and Spotify’s AI Playlist do the same thing: create playlists based on what you ask for. But Maestro is still in the US and only for Amazon Music Unlimited subscribers, while Spotify’s AI works for Premium users in the UK and Australia.

Also Read | Apple Music Tips And Tricks: Here’s How To Create Collaborative Playlists

How Much Does It Cost?

Right now, if you’re one of the lucky beta testers in the US with a Prime membership or using the ad-supported version, you can get a sneak peek for free. Amazon Music Unlimited subscribers can dive right in and save their playlists without any extra charge.

Conclusion

Amazon Music Maestro is like having a music-savvy friend who’s always ready with the perfect playlist. Just tell it what you want, and it’s on it. And while it’s still getting started, it’s already making waves among music lovers. So, if you’re in the US and itching to try it out, keep an eye out for Maestro in your Amazon Music app.