Say hello to Shweta, a tech fan who's hooked on keeping up with all things tech. When she's not exploring the latest gadgets, she's diving into a good book, clicking photos as an amateur photographer, or enjoying classic movies and music. With her love for both tech and creativity, Shweta adds her own touch to tech news in a way that's easy to understand and enjoy.
JioTag Bluetooth tracker will help you to track all your belongings
It is an affordable alternative to the pricey Apple AirTag in India
Currently, JioTag will cost you Rs. 749 and is available for purchase
Reliance Jio has expanded its product portfolio with the introduction of a new hardware product called JioTag. This tiny Bluetooth tracker functions similarly to Apple’s AirTag, offering users a convenient way to keep track of their belongings. Also Read | Want To Install Jio TV On Your Smartphone? Here’s The Step-By-Step Guide
JioTag Features
The JioTag is a compact Bluetooth tracker that closely resembles Apple’s AirTag. It is designed in the form of a keychain and weighs 9.5 grams, measuring 3.82 x 3.82 x 0.72 cm. With Bluetooth 5.1 connectivity and a replaceable battery, JioTag allows users to easily locate their keys, and wallets, or even keep track of their pets by attaching it to their collars.
Locate And Find With JioTag
Users can view the location of their JioTag on a map, ensuring that they can quickly locate their belongings. Additionally, Jio has introduced Jio Community Find, a feature that enables users to seek assistance in finding their lost JioTag. With a battery life of up to one year, JioTag offers a range of up to 20 meters indoors and 50 meters outdoors. The device is available in a single White color variant.
The JioTag Bluetooth tracker is priced at Rs. 2,199 but is currently available for a discounted price of Rs. 749 on the Jio official website. The product is already available for purchase, with deliveries scheduled to begin on June 11. Notably, Cash on Delivery payment option is not available; customers are required to make upfront payments.
Amazon’s potential introduction of an ad-supported tier for Prime Video reflects its desire to expand its user base
It aims to replicate the success it has already achieved with its free ad-supported streaming service, miniTV
The exact details of the ad-supported plan are still unknown
Amazon is contemplating the introduction of an ad-supported tier for its streaming service, Prime Video, in an effort to attract more users. This move would align Amazon with other major players in the streaming industry such as Netflix and Disney Plus. Considering India’s price-sensitive market, a cheaper ad-supported plan could be particularly successful in the country. Also Read | How To Create And Manage Multiple Netflix Profiles: Step-By-Step Guide
Early Stages Of Development
According to a recent report by the Wall Street Journal (WSJ), Amazon has been exploring the idea of launching a new Prime Video plan that incorporates advertisements. Although details regarding pricing and features are currently unknown, the company has been considering this plan for a few weeks and is in the initial stages of development.
Comparatively Lower Cost
The ad-supported tier on Prime Video is expected to be priced lower than the ad-free tiers currently offered by Amazon. This approach mirrors the strategies employed by other streaming platforms like Netflix, Disney Plus, and Hulu. Users who prefer uninterrupted viewing can opt for the more expensive ad-free plans, while those willing to tolerate ads during their favorite movies and shows can choose the cheaper alternative.
While the global release of the ad-supported plan is still several months away, its arrival in India has the potential to be a resounding success. Given India’s price-sensitive market, streaming companies often introduce more affordable subscription plans compared to their global counterparts. Amazon already operates miniTV, a free ad-supported streaming service in India that features locally produced content, indicating its familiarity with this approach.
Indian Pricing
In India, Prime Video offers a range of subscription plans, with the cheapest starting at Rs. 299 per month and Rs. 1,499 per year. Additionally, Prime Mobile and Prime Lite annual plans are available at Rs. 599 and Rs. 999, respectively. Introducing an even more economical Prime Video plan that includes ads would likely generate excitement among Indian users who appreciate the possibility of accessing content at a lower cost.
In the vast world of personal blogging, finding the perfect Instagram name that encapsulates your unique voice and resonates with your audience can be quite a challenge. Whether you’re a lifestyle guru, a travel enthusiast, or a fashionista, a catchy and memorable Instagram handle can make all the difference in attracting followers and establishing your personal brand. In this article, we will explore some of the best personal bloggers’ names for Instagram, offering inspiration and creativity to help you stand out from the crowd. Also Read | 100+ Cool And Stylish Instagram Names For Bikers
Choosing the right Instagram name is crucial in establishing your brand as a blogger. It should reflect your personality, niche, and appeal to your target audience. Whether you opt for a clever play on words, a combination of your name and niche, or a catchy phrase, the key is to make it memorable and unique. With these suggestions and a touch of creativity, you’re well on your way to creating an Instagram handle that will captivate and engage your followers.
Google began rolling out passkeys for personal Google Accounts
Users of Google Workspace can now permit users to log in using passkeys
Passkeys are two times faster than passwords, according to Google data
Google has recently extended its passkey feature from personal Google Accounts to include Google Workspace and Google Cloud accounts. Given the increasing vulnerability of passwords to theft and phishing attacks, passkeys offer a secure and simpler alternative for users. Passkeys can be authenticated using fingerprints, face recognition, or other screen locks, ensuring convenient access across various devices such as phones, laptops, and desktops. Also Read | Struggling With Message Composition? Let Google Magic Compose’s AI Assist You! Here’s How
Passkeys adhere to a common standard and are compatible with numerous browsers and operating systems, including Android, MacOS, iOS, and Windows. By eliminating the need to memorize passwords, passkeys significantly reduce the risk of theft. According to Google’s data, compared to traditional passwords, passkeys prove to be twice as fast and four times less error-prone. Recognizing their benefits, Google has expanded the availability of passkeys to businesses, schools, and governments.
Passkeys For Google Workspace Users
Google has commenced the rollout of passkeys for Google Workspace users, along with providing controls for Workspace administrators. This deployment will be completed over the coming weeks, ensuring all users gain access to this new feature. Once enabled, Workspace admins can authorize users within their organization to sign in using passkeys.
How To Enable Passkey For Workspace Account Users
By default, the passkey feature is not activated for Workspace users, requiring them to continue using passwords. However, Workspace admins have the option to enable passkeys as a two-step verification method. To allow users in your organization to skip passwords and adopt passkeys for sign-in, follow the step-by-step guide outlined below:
Step 1: Sign in to your Google Admin console.
Step 2: Navigate to the Menu in the Admin console and select Security.
Step 3: Choose Authentication and then Passwordless.
Step 4: Opt for Skip passwords.
Step 5: To enable users to bypass password challenges, select the “Allow users to skip passwords at sign-in by using passkeys” checkbox.
FaceTime’s screen-sharing feature provides users with the ability to share important content with others during video calls on Apple devices
Knowing how to share your screen and manage screen sharing on FaceTime is crucial
Users can also take over someone else’s screen sharing
FaceTime, the default video calling app on Apple devices such as iPhones, iPads, and Macs, continues to evolve and enhance its features to compete with popular platforms like Zoom and Teams. One of its recent updates includes the addition of screen-sharing capabilities, allowing users to share presentations, sheets, or documents during work or personal calls. This article provides a detailed guide on how to share your screen on FaceTime using an iPhone. Additionally, it explains how to stop screen sharing and take over someone else’s screen sharing. Also Read | Magnify Anything, Anywhere: Learn How To Use Your iPhone As A Magnifying Tool
How To Share Your Screen On FaceTime On iPhone
To share your screen during a FaceTime call on your iPhone, follow these simple steps:
Step 1: Initiate a FaceTime call with the person you wish to share your screen with.
Step 2: While on the call, locate the Share Content icon next to the Video option on the FaceTime screen, and tap on it.
Step 3: Select the “Share My Screen” option.
Step 4: A 3-second timer will appear to notify you that the screen sharing will begin shortly.
Step 5: Carry out your desired actions on the device. The recipient will be able to see your screen.
How To Take Over Screen Sharing From Someone Else
If someone else is sharing their screen during a FaceTime call and you wish to take over, follow these steps:
Step 1: Join the call in progress that you want to take control of.
Step 2: Locate and tap on the Share Content button within the FaceTime call interface.
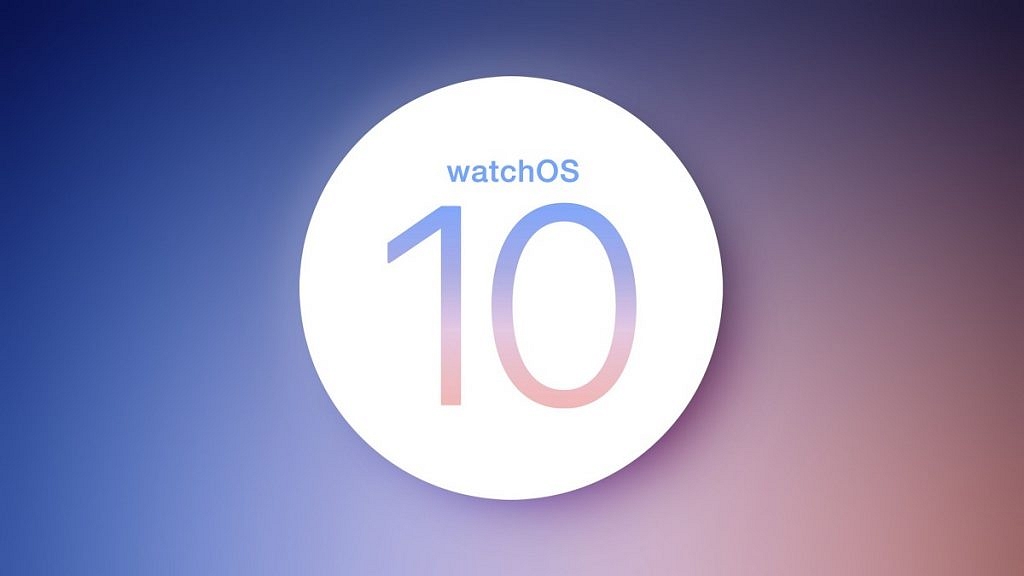
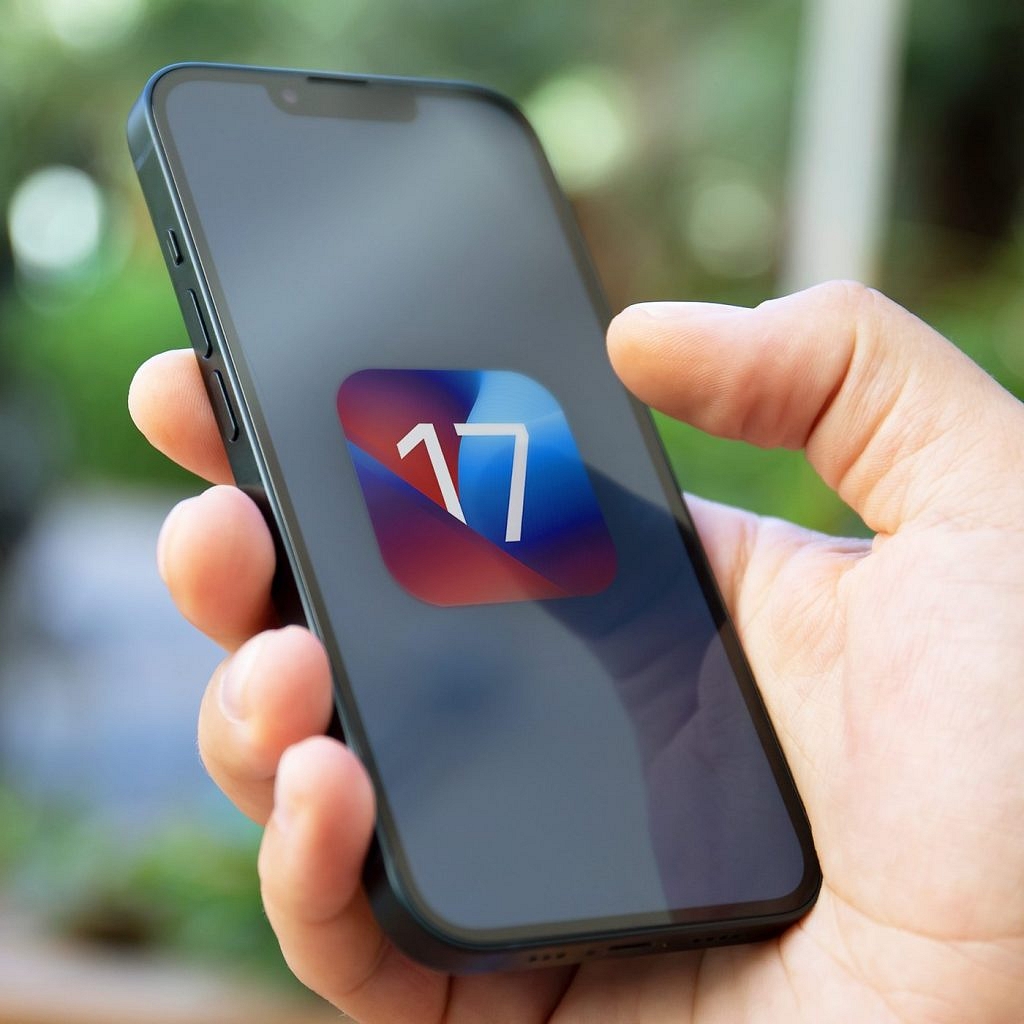
During WWDC 2023, Apple made significant announcements regarding its upcoming operating systems, including iOS 17, iPadOS 17, and macOS Sonoma. Alongside these updates, the company introduced watchOS 10, the successor to last year’s watchOS 9, enhancing the capabilities of Apple’s smartwatches. With watchOS 10, users can expect a fresh design, new watch faces, and a range of innovative health-tracking features, among other exciting additions. Also Read | Apple New ‘NameDrop’ Feature for iPhones: What Is It? Steps To Use
Enhanced App Display
Apple Watch apps like Weather, Stocks, Home, Maps, Messages, World Clock, and others have been optimized to utilize a bigger amount of the display as part of the watchOS 10 upgrade, giving consumers access to more information quickly.
Smart Stack
Smart Stack is a new element introduced in watchOS 10. It consists of widgets that adapt to a user’s context and can be accessed by simply turning the Digital Crown from any watch face. For example, the Weather widget displays the forecast at the beginning of the day, while the Smart Stack shows boarding passes from Wallet during travel. Calendars and Reminders are prioritized to display upcoming meetings or tasks, and running apps such as Podcasts are conveniently positioned for quick access.
Improved Design And Functionality
As part of the design changes, Apple has made Control Center accessible via the side button. Users can now easily revert any app to its original position by double-clicking the Digital Crown.
With watchOS 10, Apple Watch introduces two new captivating watch faces — Palette and Snoopy. The Palette face displays time in a range of colors using three overlapping layers, creating a visually dynamic experience. On the other hand, the Snoopy watch face brings the beloved characters from the Peanuts comic strip to life. The characters interact with the watch hands, react to local weather conditions, and even participate in workouts alongside the user.
New Health Features
watchOS 10 introduces a range of new health features for the Apple Watch. Here are the highlights:
Cycling Metrics and Views: When starting a cycling workout on the Apple Watch, it appears as a Live Activity on the iPhone, utilizing the full screen for easy tracking.
Optimized Workout Views: Workout Views like Heart Rate Zones, Elevation, Race Route, Custom Workouts, and Cycling Speed are optimized for the iPhone’s display size.
Seamless Bluetooth Connectivity: Apple Watch can automatically connect to Bluetooth-enabled cycling accessories such as power meters, speed sensors, and cadence sensors.
Bluetooth Support for Indoor and Outdoor Cycling: Bluetooth connection is supported for both indoor and outdoor cycling workouts.
Estimation of Functional Threshold Power (FTP): This represents the highest level of cycling intensity that a rider can sustain for an hour. Apple Watch calculates personalized Power Zones based on FTP.
Enhanced Compass App: It generates two new waypoints. The Last Cellular Connection Waypoint estimates the last location with cellular reception, useful for checking messages or making calls. The Last Emergency Call Waypoint estimates where the device last had a connection to any available carrier’s network, enabling emergency calls.
Elevation View: It provides a three-dimensional perspective of saved waypoints using altimeter data.
Improved Mindfulness App: The Mindfulness app in watchOS 10 allows discreet logging of momentary emotions and daily moods.
Vision Health Monitoring: With the help of the ambient light sensor, watchOS 10 now has the ability to track how much time is spent outdoors.
Screen Distance Feature: It encourages users to maintain a suitable distance from their device by utilizing the TrueDepth camera, also used for Face ID.
Availability Of watchOS 10
Apple has confirmed that watchOS 10 will be released in the upcoming fall as a free software update. To install watchOS 10, users will need an Apple Watch Series 4 or later, paired with an iPhone Xs or later running iOS 17. Eligible Apple Watch models include Apple Watch Series 4, Apple Watch Series 5, Apple Watch SE, Apple Watch Series 6, Apple Watch Series 7, Apple Watch Series 8, and Apple Watch Ultra.
Activate DND on your Airtel connection to effectively reduce spam voice calls and text messages
You can choose from multiple convenient methods to activate DND on Airtel, including SMS, IVR, and more
Activating DND is completely free of charge, and you won’t incur any fees from your telecom service provider
Receiving unwanted calls and messages from unknown senders can be a nuisance. Many people waste valuable time dealing with these unsolicited messages. If you’ve had enough of spam and want to stop it, activating the Do Not Disturb (DND) feature on your Airtel smartphone is the solution. In this article, we will explain what DND is, how it works, and provide step-by-step instructions for activating it on Airtel. Also Read | How To Use Airtel Xstream To Watch Live TV And On-Demand Content
Steps To Activate DND On Airtel Through SMS
To activate DND on Airtel via SMS, follow these steps:
Step 1: Type “START 0” and send it to 1909.
Step 2: You will receive an SMS confirming your request for DND activation.
Step 3: To finish the activation process, adhere to the directions in the SMS.
How To Activate DND On Airtel Via IVR
To activate DND on Airtel using Interactive Voice Response (IVR), do the following:
Step 1: Dial 1909 from your Airtel number.
Step 2: Follow the instructions provided to activate DND on your number.
To activate DND on Airtel online, follow these steps:
Step 1: Visit the Airtel website and log in to your account using your registered mobile number.
Step 2: Click on the “Do Not Disturb” tab.
Step 3: Select “Full DND” if you want to block all spam calls and text messages.
Step 4: Follow the guidance given to turn on DND for your number.
After activating DND, it may take up to seven working days for it to become fully effective. During this period, you may still receive some promotional calls and messages.
Calls and messages from people you know or from vital services like your bank or healthcare providers are not blocked by DND. You need to manually register separately with each of them to continue receiving their communications. You won’t be charged anything by your telecom service provider if you choose to activate DND.
By following these steps and activating DND on your Airtel smartphone, you can enjoy a spam-free communication experience while saving time and avoiding unnecessary disruptions.
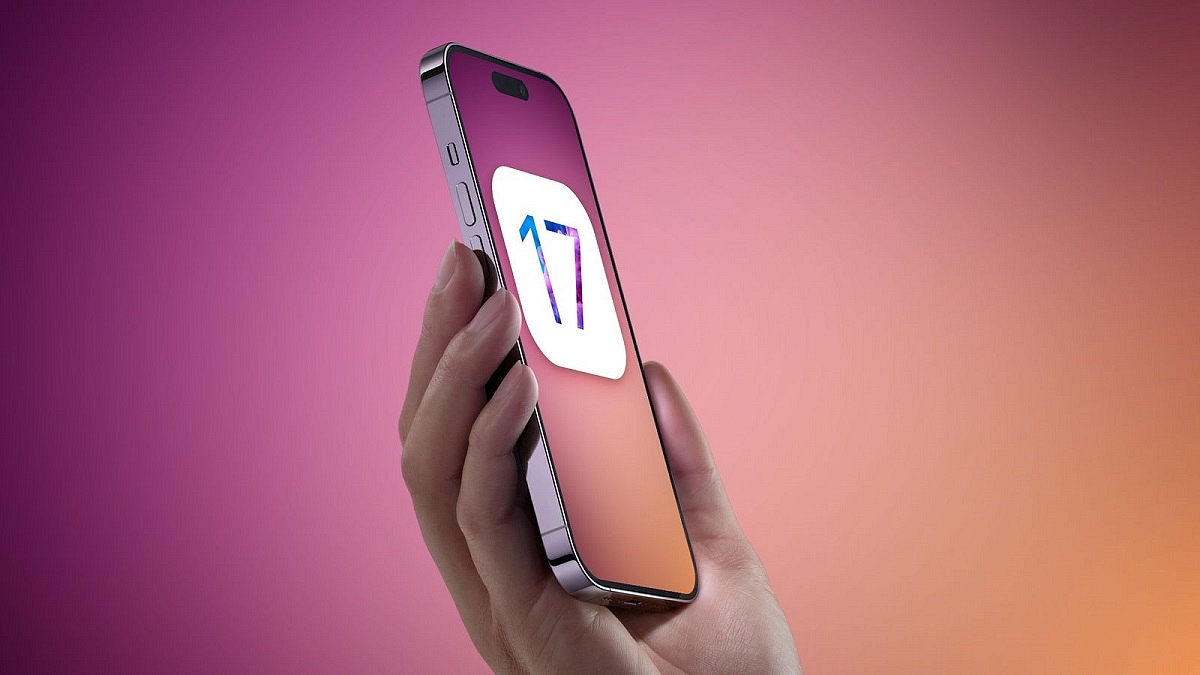
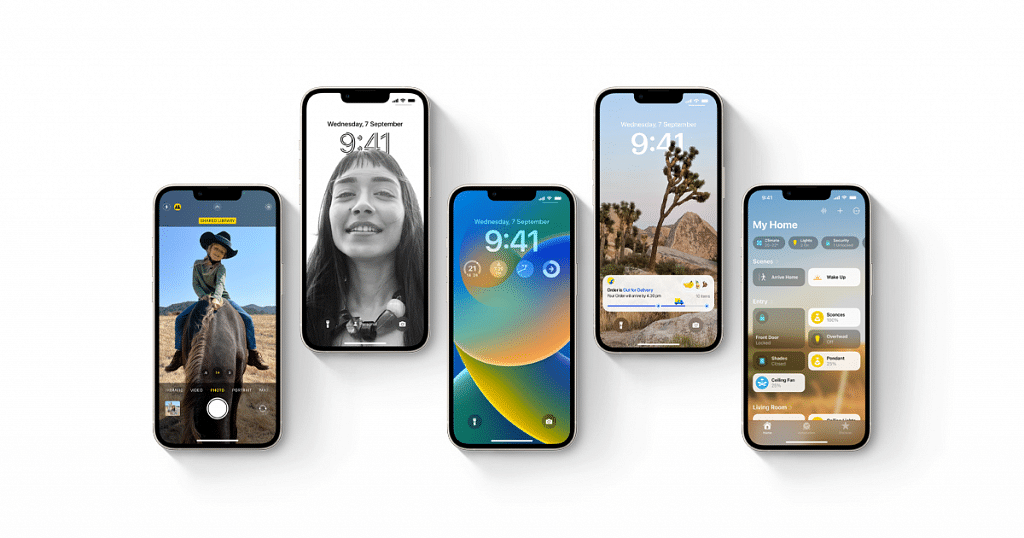
Apple has released the latest version of its operating system, iOS 17, aiming to boost productivity and enhance the iPhone experience. While the update may not include groundbreaking features as rumored, it brings several improvements and additions that polish the iPhone software. Discover some of its notable features that await iPhone users, allowing them to stay ahead of the curve and explore what Apple has in store for their devices. Also Read | iOS Tips And Tricks: How To Change Or Set A Customized Background In Safari Web Browser On iPhones
Customization Options For Personalizing Calls
Users of iPhones now have the opportunity to customize how their calls appear on the recipient’s phone thanks to iOS 17. The new Contact Posters feature allows users to create a unique visual experience by selecting a preferred photo or Memoji. Additionally, iOS 17 takes customization further by allowing users to choose the font and color that will be displayed when making calls to other iPhone users.
Live Voicemail Transcriptions
With iOS 17, Apple introduces game-changing features to enhance the voicemail experience. Users now have access to live transcriptions of voicemail messages in real-time when they receive a call that goes to voicemail. Users may now view voicemails as they are being left, giving them immediate access to crucial information without having to listen to the entire message.
Automated Destination Check-In
The safety feature in iOS 17 gives users and their loved ones peace of mind. When new-gen users safely reach their destination, their family and friends are automatically notified via the Check-In feature. Going beyond a simple notification, this feature proactively checks on the user if they unexpectedly stop traveling towards their destination. When this occurs, the Check-In feature uses the user’s iPhone to send a notification to the user’s loved ones with information about their position, battery life, and cell coverage.
Transcripted Audio Messages
The 17th installment of iOS brings a game-changing feature to audio messaging on iPhones. With the latest update, audio messages sent through the Messages app will be automatically transcribed. This allows users to choose between reading the transcribed message or listening to the original audio recording, providing flexibility and convenience.
iOS 17 introduces an exciting sticker update, elevating the messaging experience. A colorful selection of fresh stickers, including Live Stickers, emoji stickers, and Memoji stickers, among others, are included in the release. Users can now enhance their communication by adding fun and expressive stickers to their messages.
FaceTime Voicemails
iOS 17 introduces FaceTime voicemails, eliminating the worry of missed FaceTime calls. The new update includes video and audio messages, allowing users to leave heartfelt voicemails for their loved ones even when they are unavailable to answer the call. This feature strengthens the connection between users, ensuring communication is not limited by availability.
Updated Privacy Settings
iOS 17 provides an enhanced privacy control experience through advanced settings. Apple offers thorough protection for all facets of users’ digital lives, taking privacy protection to a new level. The update empowers users with up-to-date privacy settings and features, from browsing the internet to sharing photos via AirDrop. Notably, users gain the ability to blur photos and videos before viewing them, adding an extra layer of privacy.
Meet users will benefit from having an easier time organizing lengthy meetings
To watch their video, hosts, and co-hosts can convert viewers into contributors
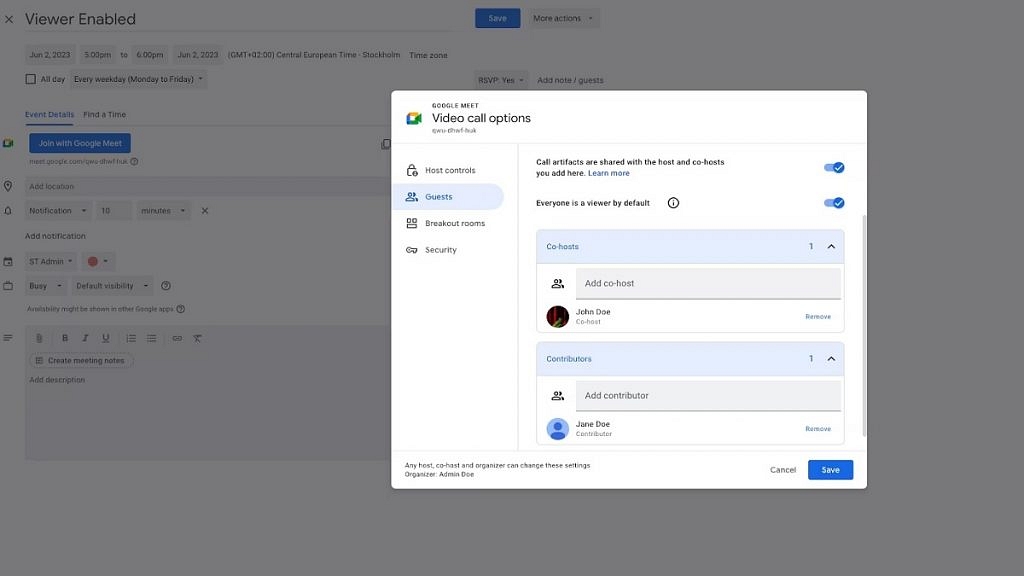
Google Meet is set to launch an exciting new feature called Viewer Mode. This recent announcement by Google aims to create a more focused environment during large meetings by minimizing distractions. In the upcoming update, participants can be designated as “viewers” when creating Calendar invites. Viewers are meeting participants who are unable to share their audio or video throughout the session, according to a blog post on Google Workspace Updates. Also Read | Google Meet Hacks: How To Change/ Update Google Meet Name Using A Laptop Or PC?
Maintaining Focus In Large Meetings
One of the primary goals of introducing the viewer mode in Google Meet is to reduce disruptive audio interruptions and help participants concentrate on the speaker and the meeting’s content. By designating participants as viewers, Google hopes to create a more engaging and distraction-free meeting experience.
Transitioning Viewers To Contributors
Google understands the need for collaboration, even in larger group settings. To accommodate this, hosts have the flexibility to transition viewers into contributors when it’s time for them to actively participate. Once designated as contributors, viewers gain access to Meet features like Q&As and polls. However, it’s important to note that support for in-meeting chat and emoji reactions for viewers will be added in the future.
To use the viewer mode feature in Google Meet, follow these simple steps during the setup of your video call:
Step 1: Access the video call options while setting up a Google Meet session.
Step 2: Locate the ‘Guests’ section and select the ‘Everyone is a viewer by default’ option.
Step 3: Once chosen, Google Meet automatically turns viewers into contributors, enabling them to actively engage in the meeting.
Step 4: From the same section, you can also assign co-hosts and contributors by selecting them accordingly.
With the upcoming launch of viewer mode, Google Meet aims to enhance focus, reduce distractions, and promote collaboration during video meetings. By utilizing the simple setup process and taking advantage of the viewer and contributor roles, users can create engaging and productive virtual gatherings. Whether it’s a large team meeting, a training session, or a conference, Google Meet’s viewer mode empowers hosts to control the meeting environment while ensuring everyone can actively participate.
BGMI is now available for both Android and iPhone users in India
The audio simulation warning in BGMI can become annoying, especially during consecutive matches
Players can hide the accompanying warning message that appears at the start of each match
Battlegrounds Mobile India (BGMI) has made its successful return to Android mobile phones and iPhones in India, offering the same exciting features and gameplay as before. However, for some players, the audio simulation warning that leads to each match can become bothersome, particularly during consecutive gameplay sessions. If you’re looking to remove this simulation game warning, follow our step-by-step guide below. Also Read | Best Game Settings For BGMI, PUBG For A Premium Gaming Experience On Android, iOS
How To Disable Voice Simulation Warning
To disable the voice simulation warning system in BGMI, follow these simple steps:
Step 1: Launch Battlegrounds Mobile India on your Android mobile phone or iPhone.
Step 2: On the home page, locate and tap the arrow icon situated at the bottom right corner to access the menu.
Step 4: Navigate to the “Privacy & Social” section.
Step 5: Look for the “Spawn Island Broadcast” option and choose the “Disable” button.
Step 6: Congratulations! You’ve successfully disabled the voice simulation warning.
How To Manage Warning Message
It’s important to note that disabling the voice simulation warning will not eliminate the accompanying message that appears at the start of each match. The message reads, “Battlegrounds Mobile India is not a real-world based game, but a survival simulation game set in a virtual world.” However, you can easily hide this message by pressing the “Ok” button to hide the warning message promptly.
By following these simple instructions, you can eliminate the audio simulation warning in Battlegrounds Mobile India and enjoy uninterrupted gameplay. Remember that while the warning message may still appear at the beginning of each match, you can quickly dismiss it by pressing “Ok.”