Categories
Apps Featured How To

Gmail Gets Google Calendar Schedule Feature: What Is It? How To Use?

Key Highlights

  • Google releases schedule feature for Gmail
  • Feature available for Workspace clients as well general users
  • A new calendar icon is added for the same

Google has been updating Gmail with new features proactively and has now made the platform more potent. The company has added the Google Calendar to the Gmail app using which users will now be able to schedule and upcoming events. How can you use the Google Calendar’s Schedule feature on Gmail? Read the details below:

Also Read: Gmail Help Me Write Feature: What Is It? How To Use?

Gmail Schedule Feature: Steps To Use

With the schedule feature on Gmail, one will be able to create a calendar to make the contacts aware of their availability or any upcoming events that have been scheduled. One can easily access and use the calendar schedule feature on Gmail from the email conversation tab itself. A new calendar icon has been added which once clicked will show two different options to mark an upcoming event or availability.

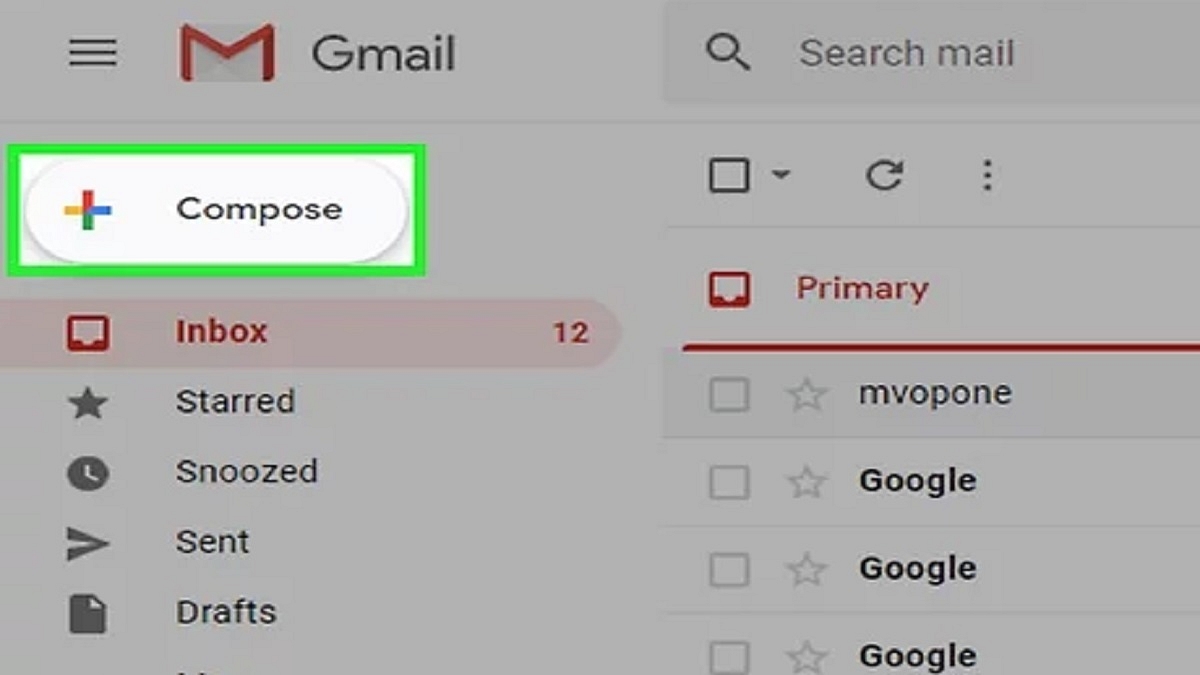
Step 1: Launch the Gmail application

Step 2: Go to the Email conversation tab

Step 3: Locate the calendar icon positioned at the bottom

Step 4: You will see two options “Create an event” and “Offer times you’re free”

Step 5: If you select the “Create an event” option, a Google Calendar tab will pop up on the screen. Here, you can use an email’s subject line for the event title and also use the same recipients as the event participant.

Step 6: If the second option, i.e., “Offer times you’re free option”, then it will allow users to add the time slots or dates they are free for any meeting.

Also Read: Gmail Vacation Replies: How To Create And Set Replies For Vacations On Gmail?

Who All Can Use Gmail Calendar Schedule Feature?

The Gmail Calendar feature is also made available to all Google Workspace clients. Notably, the personal Google account holders will also be able to use the schedule feature to mark their availability or events they have lined up.

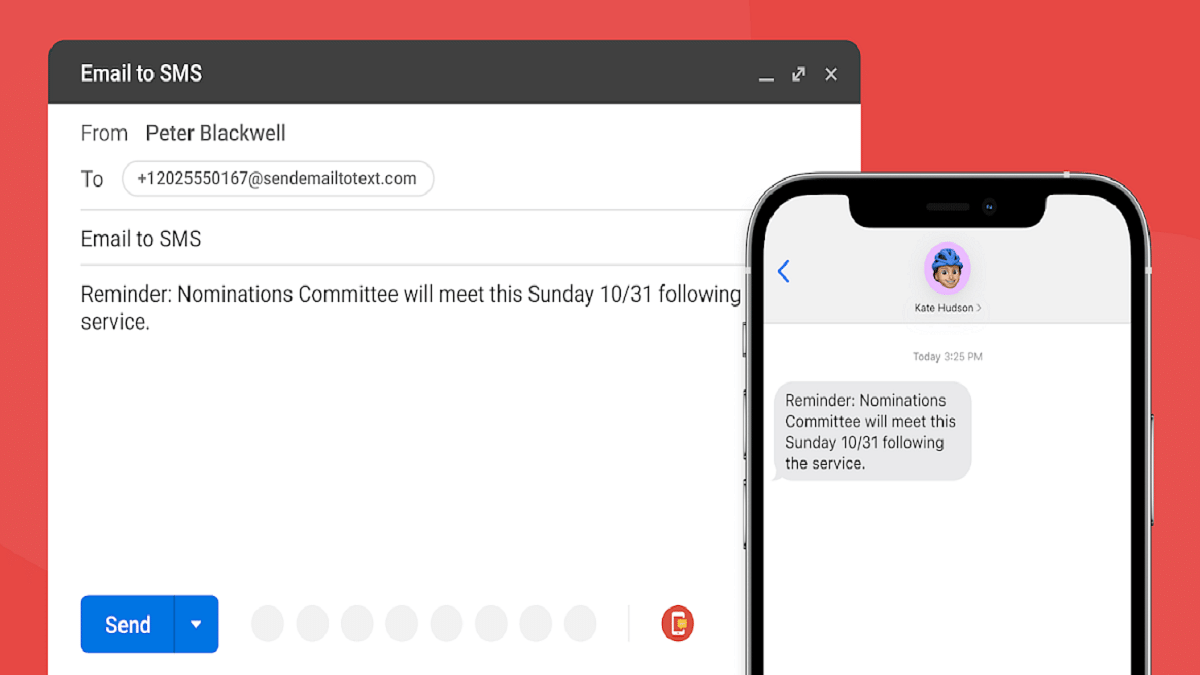
Also Read: Need To Send SMS? Learn How To Do It Through Your Gmail Account

Notably, the calendar schedule feature was previously available exclusively for premium Workspace users but is now being released for personal users as well. Google has started rolling out the calendar schedule feature to all users in a phased manner and is expected to complete the mass rollout by the end of July this year.

For the tech geeks, stay updated with the latest cutting-edge gadgets in the market, exclusive tech updates, gadget reviews, and more right on your phone’s screen. Join Giznext’s WhatsApp channel and receive the industry-first tech updates.

Categories
Apps Featured How To

Got A Traffic Challan? No Worries! Here’s How You Can Pay It Online

Key Highlights

  • The New Motor Vehicles Act of 2019 in India focuses on stricter enforcement and improved road safety
  • E-challan service enables people to conveniently pay traffic fines online
  • You can make online traffic fine payments on the e-challan website and state transport websites

In our country, traffic violations are a fairly common occurrence. If you own a vehicle, chances are high that you have committed at least one traffic offense. In the past, many of these cases went unchecked due to manpower shortages and inadequate technology. However, the Indian government has taken steps to enforce stricter regulations and improve road safety with the implementation of the New Motor Vehicles Act of 2019. One of the key tools aiding this enforcement is the e-challan service, which allows individuals to conveniently pay their traffic fines online.

Also Read | Delhi Metro Goes Digital: How To Use DMRC Travel App To Buy Tickets On Mobile

How To Pay Traffic Challan Online

To pay your challan online, you need to follow a step-by-step process. Here’s how:

Step 1: Go to the official e-challan website at echallan.parivahan.gov.

Step 2: Choose the “Check Challan Status” option from the drop-down menu under the “Check Online Service” section.

Step 3: Enter the required information and captcha code as prompted.

Step 4: Click on “Get Details” to retrieve the relevant information regarding your traffic violation.

Step 5: Select the “Pay Now” option to proceed with the payment.

Step 6: Choose your preferred mode of payment to pay the challan fees.

Step 7: Once the transaction is complete, make sure to note down the provided transaction ID for future reference.

Also Read | Step-by-Step Guide: How To Use Second Screen On Samsung Galaxy Tablets

How To Pay Traffic Challan Via State Transport Website

If you prefer to pay your traffic fines through the state transport website, here’s a step-by-step guide:

Step 1: Visit the official website of your state’s transport department.

Step 2: Look for the specific section dedicated to paying violation fines.

Step 3: Choose the appropriate option based on the type of violation, such as parking charges or spot fines.

Step 4: Click on the relevant link and enter the necessary details related to the specific traffic offense.

Step 5: Provide the vehicle registration number or parking violation tag number.

Step 6: Enter the current outstanding fine amount associated with the violation.

Step 7: Proceed to make the payment using a Mastercard or Visa card.

Step 8: Enter the captcha code and click on “Submit” to initiate the payment process.

With the introduction of online payment portals and e-challan services, paying traffic fines has become a hassle-free task. Whether using the dedicated e-challan website or the state transport website, following the step-by-step process ensures a seamless experience.

For the tech geeks, stay updated with the latest cutting-edge gadgets in the market, exclusive tech updates, gadget reviews, and more right on your phone’s screen. Join Giznext’s WhatsApp channel and receive the industry-first tech updates.

Categories
Apps Featured How To

Want To Report Accidents And Road Closures On Google Maps? Learn How To Do It

Key Highlights

  • During the monsoon, accidents, landslides, and road closures are frequent
  • Users of Google Maps can report accidents, landslides, and road closures
  • Users of Google Maps can access this data while driving

Monsoon season is here! It contributes between 70 and 80 percent of the nation’s yearly rainfall, and many activities, including agriculture, depend on it. The impact of rising global temperatures can also be noticed during the monsoon season. Intense rain for brief periods of time during the monsoon has become a typical occurrence. These kinds of extreme weather occurrences result in waterlogging, crumbling roads, and landslides since the nation’s current infrastructure is not equipped to handle them.

Also Read | Avoid Overspeeding Traffic Challans: How To Enable Speed Limit Warning In Google Maps

These factors have made accidents more frequent during the monsoon, but thanks to modern technology, individuals are now able to report accidents, road closures, waterlogging, and more on a platform like Google Maps, potentially saving lives. Here is a step-by-step guide on how to report accidents, road closures, waterlogging, and more on Google Maps.

How To Report Accidents, Road Closures On Google Maps

Step 1: On your phone, launch Google Maps and enter your destination.

Step 2: Swipe up from the bottom bar that displays your route information after starting the navigation.

Also Read | How To Access Google Maps Without Phone On Wear OS

Step 3: The button labeled “Add a report” will appear below the map. Tap it.

Step 4: From the list of options, pick the incident type you want to report.

Step 5: If you verify your complaint, Google will warn any nearby users who are traveling.

In conclusion, Google Maps provides a comprehensive solution for reporting accidents and road closures. With its user-friendly interface and real-time updates, it allows users to contribute and access vital information on the go. By enabling users to report accidents and road closures, Google Maps not only enhances the overall driving experience but also promotes safety on the roads. The ability to view incidents and plan alternative routes efficiently contributes to minimizing traffic congestion and improving commute times.

Categories
Apps Featured How To

Instagram Threads: What Is It And How To Use Meta’s Twitter Alternative

Key Highlights

  • Meta launches Threads, a microblogging app by the Instagram team
  • Mark Zuckerberg’s Meta aims to challenge Elon Musk’s Twitter with Threads
  • It is designed for sharing text updates and participating in public conversations

Elon Musk and Mark Zuckerberg have recently engaged in a playful discussion about a potential cage fight. However, it seems that their rivalry has taken a more serious turn as Mark Zuckerberg’s company, Meta has introduced a social networking app called Threads. This new app bears a resemblance to Elon Musk’s Twitter, and here’s everything you need to know about Instagram Threads.

Also Read | How Can You Download And Watch Instagram Reels On Android, iOS Without Installing Third-Party Apps?

Introducing Threads: Meta’s Microblogging App

Threads, developed by the Instagram team under Meta’s ownership, is a newly released app designed for sharing text updates and participating in public conversations. The app fills a niche in the market for a microblogging social network, free from some of the challenges faced by Twitter. Interestingly, there was an earlier app named Threads announced in 2021, but its progress had been largely unknown until now where it seems to have undergone significant updates and a relaunch.

How To Join Threads

To access Threads, you need to download the app separately from the Instagram app.

Step 1: Simply visit the App Store or Google Play on your phone and search for “Threads, an Instagram app” in the search bar.

Step 2: Once downloaded, open the app and tap the “Log in with Instagram” button at the bottom of the screen.

Since Threads requires an Instagram account, users have the option to follow the same people they follow on Instagram. After setting up your account, you’ll be directed to your Threads feed, where you can view posts from the accounts you follow and even discover content from random users you don’t follow.

Also Read | From One Link To Many: How To Add Multiple Links To Your Instagram Bio

Threads App: Key Features And Icons

At the bottom of the screen, you’ll find a row of icons that aid in navigating the app. Here’s a breakdown from left to right:

House Icon: Takes you to your feed.

Magnifying Glass Icon: Opens the search page, allowing you to find specific users by entering their usernames.

Pen-and-Paper Icon: This lets you create a new thread.

Heart Icon: Displays your account activity, including followers, thread replies, mentions, and verified users.

Human Figure Icon: This takes you to your Threads profile, where you can access your activity and account details.

In summary, Meta’s Threads app presents a new contender in the microblogging social network space, competing directly with Elon Musk’s Twitter. With its focus on text updates and public conversations, Threads aims to provide users with an alternative platform free from the challenges faced by other social media networks.

Categories
Featured How To Mobile

Various Methods To Power Off iPhone 13 And iPhone 14 Models: Here’s How

Key Highlights

  • Apple has changed the power-off process for the iPhone 13 and iPhone 14 series
  • You can power off your iPhone 13 and iPhone 14 using buttons, the Settings app, Siri, or Assistive Touch
  • Siri can be used to power off the device even if the screen is unresponsive or broken

If you have recently purchased an iPhone 13, 13 Pro, 14, 14 Plus, 14 Pro, or 14 Pro Max, you’re probably getting familiar with its advanced features. However, if you’re wondering how to power off your device when needed, you’re not alone. Apple has made changes to the process for the newer models, and here we will provide you with various methods to turn off your iPhone 13 and iPhone 14 series. Also Read | iPhone Check-In Feature: Learn How To Use It To Notify Loved Ones Of Safe Arrival

Method 1: Power Off Using Buttons

To easily switch off your iPhone from the 13 or 14 series, you can use a combination of buttons. This method is particularly useful if your device is frozen due to malware or other issues.

Step 1: Press and hold the Side button (located on the right side) and either the Volume Up or Down button (on the left side) simultaneously.

Step 2: When the ‘Slide to Power Off’ option appears on the screen, place your finger on the power icon and swipe right to shut down.

Method 2: Power Off Via Settings

Another simple way to turn off your iPhone 13 or newer model is through the Settings menu. This method is ideal when the hardware buttons are not working correctly.

Step 1: From your iPhone’s home screen, open the Settings app.

Step 2: Navigate to General.

Step 3: Scroll down to the bottom and select Shut Down.

Step 4: Drag the Power Off slider to the right to turn off your device.

Also Read | Want To Share Your iPhone Screen On FaceTime? Here’s How You Can Do It

Method 3: Power Off Using Siri

Your Apple voice assistant, Siri, can also assist you in powering off your iPhone (iOS 15 or later).

Step 1: Activate Siri by long pressing the Side button or saying “Hey Siri.”

Step 2: Command Siri by saying “Turn off my iPhone” or a similar instruction.

Step 3: Confirm the action by saying “Yes” or tapping the Power Off button to shut down your device.

Using Siri to power off your iPhone 13 or 14 series is the recommended approach if your phone’s screen is unresponsive or broken. This method even works when your phone is in Airplane Mode.

By following these methods, you can easily power off your iPhone 13 and iPhone 14 series devices. Whether you prefer using buttons, the Settings app, or Siri, you now have a range of options to suit your needs.

Also Read | What’s That Tune? Your iPhone Knows: How To Identify Songs With Just A Tap

Categories
Apps Featured How To

YouTube Music: How To Enable Auto-Add Songs To Your Last Playlist

Key Highlights

  • YouTube Music now automatically adds songs to the most recent playlist used by the user
  • Users have the option to change the default playlist by tapping the ‘Change’ button on the screen
  • YouTube Music app now merges Albums and Singles into a unified “Top releases” section on artist pages

YouTube Music has introduced a convenient new feature that auto-adds songs to the most recent playlist used by the user. Regardless of whether the playlist is new or existing, it will be set as the default destination for subsequent song saves. A notification will appear to inform the user about the playlist to which the song has been added, offering them the option to change it by tapping the ‘Change’ button located at the bottom right of the screen. Also Read | How To Migrate YouTube Channel And Videos To A Different Account

This feature has long been available on the main YouTube app, where it remembers the last playlist to which a video was saved and sets it as the default option for future saves. Now, this feature has been incorporated into the YouTube Music apps for both Android and iOS devices.

How To On/Off Last Used Playlist Feature In YouTube Music

On The Web:

Step 1: Open your web browser and visit music.youtube.com. Sign in to your account.

Step 2: Click on your profile picture in the top right corner, then select Settings from the dropdown menu.

Step 3: On the left side of the settings page, click on General.

Note: On mobile, this setting is located in the Recommendations section, not General.

Step 4: Locate the toggle switch labeled “Remember last used playlist – Automatically save content to the last used playlist” and click on it to enable or disable the feature.

Also Read | Remove Copyright Claim On Your YouTube Video: Here’s How

On Mobile:

Step 1: Launch the YouTube Music app on your smartphone and log in to your account.

Step 2: Tap on your profile picture located at the top right corner of the screen, then select Settings from the menu.

Step 3: On the left side of the settings page, tap on Recommendations.

Step 4: Look for the option labeled “Remember last used playlist – Automatically save content to the last used playlist” and tap on it to enable or disable the feature.

Furthermore, YouTube has made changes to the presentation of artists’ works on its apps. Previously, the YouTube Music app displayed Albums and Singles separately on artist pages. However, these categories have now been merged into a single section called “Top releases.” This section appears after the five most popular songs by the artist.

Also Read | YouTube Tips And Tricks: How To Download YouTube Shorts Videos Offline

Categories
Featured How To Tablet

Step-by-Step Guide: How To Use Second Screen On Samsung Galaxy Tablets

Key Highlights

  • Expand your PC screen to your Samsung Galaxy device and work on two screens
  • Use your Galaxy device as a wireless extra display for your Windows PC
  • Control your PC remotely by copying your PC screen to your Galaxy device

Samsung Galaxy users now have the option to expand their PC screen onto their Galaxy device, allowing them to work with dual screens. This feature, known as Second Screen, also enables users to remotely control their PC screen through their Galaxy device. In this article, we will provide a comprehensive guide on how to use Second Screen on Samsung Galaxy devices. Also Read | Samsung Galaxy Tab A8 Vs Lenovo M10 FHD Tablet: Affordable Tablets Specification Comparison

Requirements For Using Second Screen

Before using the Second Screen feature, ensure that you meet the following requirements:

  • A Galaxy tablet running One UI 3.1 or a later version.
  • A Windows PC with Wireless Display running Windows 10 version 2004 or higher.
  • Both devices must be connected to the same Wi-Fi network.

How To Enable Second Screen On Samsung Galaxy Tablets

To take advantage of the Second Screen feature on Samsung Galaxy tablets, follow these simple steps:

Step 1: Open the Quick Settings panel by swiping down from the top of the screen.

Step 2: Swipe left and tap on the Second Screen option.

Also Read | Samsung Galaxy Tab A8 Vs Nokia T10 Vs Moto Tab G62: Which Tablet Makes The Best Option For Budget Audience

Step 3: On your PC, press the Windows + K keys to open the Connect menu. From the list of available devices, select your Galaxy tablet. Make sure to check the box allowing mouse, keyboard, touch, and pen input from your tablet.

Step 4: Choose your preferred projection mode: Duplicate, Extend, or Second screen only.

With the Second Screen feature, Samsung Galaxy users can expand their PC screen onto their devices and work with dual screens. By following the step-by-step guide provided in this article, users can effortlessly use this convenient functionality. Enjoy the benefits of increased productivity and flexibility by incorporating Second Screen into your Samsung Galaxy tablet workflow.

Also Read | Lost Your Samsung Smartphone? Learn How To Track It Using Find My Mobile And Find My Device

Categories
Apps Featured How To

Delhi Metro Goes Digital: How To Use DMRC Travel App To Buy Tickets On Mobile

Key Highlights

  • DMRC Travel app launched for online metro ticket booking and smart card recharge
  • App generates mobile QR codes for entry and exit at metro stations, eliminating the need for physical tokens
  • Supports various payment methods, including UPI, Credit Cards, Debit Cards, and e-wallets

The Delhi Metro Rail Corporation (DMRC) has unveiled the DMRC Travel app, a dedicated platform for online metro ticket booking. By generating a QR code, this app allows users to bypass long queues for physical tokens and scan the code at the station entrance after undergoing security checks. Additionally, the app enables users to recharge their metro smart cards. Also Read | Recharge Your Delhi Metro Card Using Airtel Thanks App: Here’s How

Various Payment Methods And Passenger-centric Features

In an official release, DMRC announced that the new DMRC Travel app supports a range of payment methods, including UPI, Credit Cards, Debit Cards, and e-wallets. The app provides passenger-focused features like a route planner, fare calculator, station information, and smart card recharging in addition to ticket buying. It also provides route information from origin to destination, including interchange stations. Commuters can view transaction history, rebook tickets, and plan return journeys using the app.

How To Purchase Mobile QR Tickets

To assist users in purchasing Delhi Metro tickets via the DMRC Travel app, here is a step-by-step guide:

Step 1: Find and download the DMRC Travel app from Google Play and install it on your smartphone.

Step 2: Open the app and create an account using your Gmail or Facebook credentials.

Step 3: Log in to the app and select the “Book Ticket” option from the menu bar.

Step 4: Enter your source and destination stations and click on “Book Ticket.” The app will display the price, number of stops, and journey time for the selected stations.

Also Read | How To Recharge Metro Smart Card Online: A Step By Step Guide

Step 5: Choose the number of tickets and tap “Proceed to Booking.”

Step 6: Verify the specifics of your transaction, such as the source and destination stations, the number of tickets, and the total cost.

Step 7: Make the payment using your preferred method.

Upon successful payment, the app will generate a mobile QR ticket. Commuters can use this ticket to enter and exit the Automatic Fare Collection gate at any time while traveling.

DMRC Travel App: Advantages

Previously, booking and recharging metro tokens was possible only through third-party apps. However, DMRC’s new app simplifies the process by allowing users to book and pay for tickets directly. The future of the existing Delhi Metro Rail app remains uncertain, as it primarily served the purpose of checking Delhi Metro routes and commuting times between stations.

Also Read | Delhi Metro Smart Card Not Working? Follow These Steps To Get A New One Instantly

Categories
Apps Featured How To

Need To Send SMS? Learn How To Do It Through Your Gmail Account

Key Highlights

  • Gmail offers a feature to send SMS to mobile phones through a gateway domain
  • Users can send SMS to contacts without regular phone numbers or in different countries
  • Email formatting and emojis cannot be used when sending SMS

Gmail offers a convenient feature that allows users to send SMS to mobile phones through a gateway domain. Here, we will help you learn how to send SMS from Gmail along with important information about SMS gateways and their limitations. Also Read | Running Low On Google Storage? Five Best Techniques To Clear Your Gmail Space

Sending SMS Via Gateway Domain In Gmail

Sending SMS through a gateway domain in Gmail enables users to send text messages to mobile phones associated with a specific email address. This feature proves beneficial for contacting individuals without regular phone numbers or those located in different countries.

SMS gateways serve as mediators between computers and telecommunications networks, allowing computers to send SMS messages. They convert messages from email clients, like Gmail, into a format that mobile networks can understand. The mobile network then forwards the message to the intended recipient.

How To Send SMS From Gmail

To use the SMS gateway feature in Gmail, users must be aware of the recipient’s email address, which typically consists of the phone number followed by the gateway domain of the mobile carrier. Information about gateway domains for various carriers can be found online or obtained by contacting the carriers directly. Here is a step-by-step guide on how to send SMS from Gmail:

Step 1: Open your Gmail account and click on “Compose” to create a new message.

Step 2: Enter the recipient’s phone number, followed by the “@” sign and their SMS gateway address, in the “To” field.

Step 3: Compose your message within the body of the email. Messages longer than 160 characters may be sent as multiple texts.

Step 4: Click “Send” to transmit your message as an SMS to the recipient’s phone.

Also Read | Gmail Help Me Write Feature: What Is It? How To Use?

In addition to SMS messages, Gmail users can also send MMS messages, which include pictures, audio, and other non-text data. To send an MMS message, users need to use the MMS gateway address instead of the SMS gateway address.

Limitations Of SMS/MMS Gateway Usage

While sending texts from Gmail through SMS/MMS gateways is a convenient feature, it comes with certain limitations, including:

  • Prior knowledge of the recipient’s SMS/MMS gateway address is necessary, and some mobile networks may not provide one
  • Email formatting and emojis cannot be used when sending texts through an SMS gateway from Gmail
  • Only plain text can be sent via an SMS gateway, and not all mobile carriers support MMS gateways for sending multimedia content.

By following the step-by-step guide provided in this article, Gmail users can easily send SMS messages to mobile phones using the SMS gateway feature. Despite some limitations, this feature proves valuable for communicating with contacts who do not possess regular phone numbers or are located in different regions.

Also Read | Gmail Vacation Replies: How To Create And Set Replies For Vacations On Gmail?

Categories
Featured How To Mobile

What’s That Tune? Your iPhone Knows: How To Identify Songs With Just A Tap

Key Highlights

  • iPhone’s built-in song recognition feature powered by Shazam allows users to quickly identify songs playing around them
  • It maintains a history of recognized songs, which can be accessed on the device
  • Users can further enhance their music exploration by downloading the Shazam app

Discovering new music and identifying songs playing around you is made effortless with the built-in song recognition feature on iPhone. This article provides a step-by-step guide on how to identify any song on your iPhone, along with additional tips for enhanced music exploration. Also Read | Want To Share Your iPhone Screen On FaceTime? Here’s How You Can Do It

iPhone Song Recognition Feature

The iPhone’s song recognition feature leverages Shazam, a music recognition app acquired by Apple in 2018. This feature allows your iPhone to quickly identify songs playing in your vicinity or within your apps without the need to install any additional applications.

With this feature, your iPhone displays the title and artist of recognized songs on the screen and maintains a history of the identified songs. The song history is conveniently accessible on your device and can be synced with the Shazam app and across your Apple devices using your Apple ID, enabling easy retrieval and playback of previously identified songs.

Step-by-Step Guide: How To Identify Any Song On iPhone

Step 1: Ensure your iPhone is running iOS 14.2 or later. Proceed to Settings, then Control Center, and tap the green ‘+’ button next to Music Recognition.

Step 2: Access Control Center by swiping down from the top-right of the screen and tap the Shazam button.

Step 3: Your iPhone will listen to the song and display a notification with the song’s title and artist. To view your history of recognized songs, tap and hold the button.

Also Read | Magnify Anything, Anywhere: Learn How To Use Your iPhone As A Magnifying Tool

To synchronize your Music Recognition history with the Shazam app, navigate to Settings, then Shazam, and enable Sync Library. This integration provides a seamless experience and facilitates the discovery and playback of previously recognized songs.

Shazam App

For a more comprehensive music experience, consider downloading the Shazam app from the App Store. The app offers features such as song previews, adding songs to playlists, accessing lyrics, watching videos, and discovering similar songs. It complements the iPhone’s built-in song recognition feature, further expanding your music exploration capabilities.

Use Siri For Song Recognition

Siri, Apple’s virtual assistant, can also identify songs for you. Simply activate Siri and say commands like “What’s that song?” or “What’s playing?”. Siri will listen to the song and display the title and artist on the screen.

With the song recognition feature on iPhone, discovering new music and identifying songs playing around you has never been easier. By following the step-by-step guide provided and exploring additional features like the Shazam app and Siri integration, you can enhance your music exploration and enjoy a seamless music experience on your iPhone.

Also Read | iPhone Check-In Feature: Learn How To Use It To Notify Loved Ones Of Safe Arrival