Categories
Apps How To

How To Make Your WhatsApp Status Play Background Music

Key Highlights

  • Easily add music to videos and photos for WhatsApp Status
  • Several video editing tools to enhance videos for WhatsApp Status
  • Audio editing tools including extraction, cutting, reversing, volume control, and more

WhatsApp Status is a great way to express yourself and share moments from your life with your friends and family to see. A great way to enhance WhatsApp status is to add background music to it. Background songs make status more lively and fun. So, now you may be wondering about how to add a song or music to your WhatsApp status.

This is easy. There are different methods that you can use to add background music to your WhatsApp status. And to know how to add a song or music to WhatsApp status, below are the two ways that you can use:

Also Read: Instagram Reels: How To Add Own Audio Recording, Other Creator’s Music To Insta Reels Videos

Use Your Phone’s Speaker Or External Music Source

This is the simplest way to add music to your WhatsApp status. You can do this without the help of any external editing app. To do this, follow the given steps:

Step 1: Play your desired music on any music app on your phone.

Step 2: While the music is playing, go to the status option in your WhatsApp app.

Step 3: Now long press the capture button to shoot a video while the music plays in the background.

Step 4: This will add the current music that is playing on your phone to your WhatsApp status video, which can be easily shared with your friends and family.

Also Read: 5 Best Free 3D Parallax Wallpaper For Android Phones

Use An Editing App To Edit WhatsApp Status

Another way to add music to your WhatsApp status is to use an editing app on your phone. Using an editing app will allow you to not only add music to your WhatsApp status but also make slideshows out of all the videos and photos. Most video editing apps on the Google Play Store and Apple Store are easy to use and can also be used by a beginner in editing. Following is a list of some of the best-rated video editing apps that you can use to add music and your favorite song to your WhatsApp status.

Audio Status Maker

Developer: Naseem Dauda Kajuna

Ratings: 4 Stars

This is one of the simplest apps to use to add music and edit your WhatsApp status. This app provides a lot of features without making it too overwhelming to use. The features of this app include WhatsApp status music download, adding music, texts, background images and videos, and options to edit them.

Also Read | WhatsApp Emoji Meanings: Know What You Are Expressing With These WhatsApp Emojis

Add Audio to Video: Audio Video Mixer

Developer: AndroTechMania

Ratings: 4.4 Stars

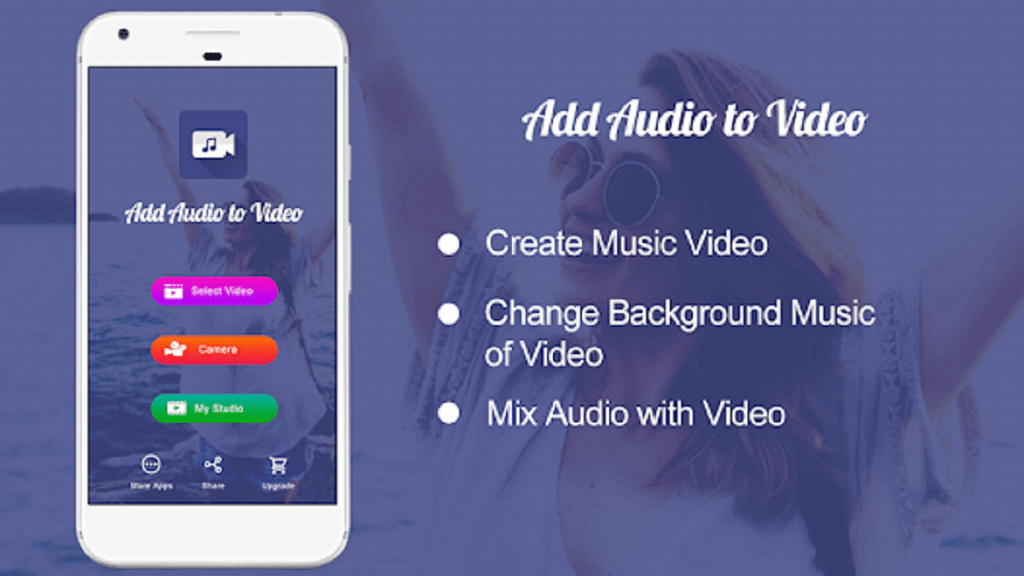
If you are looking for an app that is simple but gets the job done perfectly, then this is the best application that you can use. This app has a simple function that allows you to add music and songs to your chosen videos. Besides this, the app also allows you to trim the WhatsApp status music while editing the video so that you can choose the part of the song that you want in the video and sync it perfectly with it.

Video Sound Editor: Add Audio, Mute, Silent Video

Developer: AndroTechMania

Ratings: 4.3 Stars

This is also a very simple app that you can use to add songs to WhatsApp status. Alongside this, it also has features to mute your video. It is a very simple app that is easy to use for beginners.

Bottom Line

You have the option to share several sorts of media files, including video, images, GIFs, and text, by using the WhatsApp status feature. This status feature’s primary characteristic is that it will only be accessible for 24 hours. Even though it is a public sharing method, WhatsApp uses end-to-end encryption to protect the entire process.

Also Read: Now Hide Your WhatsApp Online Status: Here’s How

Categories
How To Mobile

Samsung Phone Sensors Secret Codes: What Is It And How To Check?

Key Highlights

  • All Android and iOS smartphones are equipped with multiple sensors
  • Samsung phones also pack secret sensors
  • Secret sensors on Samsung phones can easily be checked

Every smartphone comes with a set of sensors that provide you with additional features. These sensors are installed in smartphones that offer you these additional features. After a certain time, these sensors may start malfunctioning or stop functioning and can provide you with wrong information. Hence, you must check the functioning of these sensors regularly, using Secret Codes To Check Samsung Phones Sensors

Also Read | Secret Codes To Check Chinese Smartphone Sensors

If you have a Samsung smartphone, checking your phone sensors is very easy. Samsung users who own a smartphone manufactured after 2017 can check their smartphone sensors using secret codes to check Samsung phones’ sensors.

Several codes allow Samsung users to check smartphone sensors and several other features like IMEI number, battery status, hardware version, etc. To check your smartphone sensors, you must dial *#0*# in the phone’s dialer.

Also Read | Ways To Hard/ Factory Reset OPPO Smartphones: Step By Step Guide

Steps To Check Samsung Phone Sensors

To check if your phone sensors are working fine, follow the steps mentioned below:

Step 1: Open your phone’s dialer and dial the secret code *#0*#, and the diagnostic mode will open automatically.

Step 2: Now, a list of options will appear on the HwModule Test screen. The list contains all the features of your phone that you can test on your own, including sensors.

Step 3: Now, search for the sensors option and open it to see the list of sensors available on your smartphone.

Step 4: Now click on each sensor to test if your phone’s sensors are working fine.

Also read | No SIM Card Error: How To Fix No SIM Card Detected/ SIM Toolkit Issue With Smartphones

Types Of Sensors And Their Function

Different smartphones offer different sensors depending on the price of your smartphone. Expensive smartphones have more sensors as compared to cheaper ones. The common sensor is mentioned below:

Accelerometer sensor

The accelerometer is the most common sensor installed in every smartphone. It detects the orientation and motion of your smartphone from all three different axes. Select the ‘image test’ or ‘graph’ options to check the working status of the accelerometer sensor.

Also Read | List Of Best Budget 5G Phones Driven By MediaTek Dimensity Chipsets In India

Proximity sensor

The proximity sensor turns off the phone screen when placed close to your ear to avoid accidental touches on the screen and also reduces battery consumption when you are not using your smartphone for a certain time. Place your hand near the front camera of your screen, and the screen turns green, then the proximity sensors are working fine.

Magnetic sensor

The magnetic sensor is usually used to locate the direction when you use a compass on your phone. It measures the earth’s magnetic field to provide you with directions. Click on the ‘self-test option to check the magnetic sensor.

Also Read | Download Music From Instagram To Your Phone: Here’s How

Light sensor

The light sensor gives you information on the ambient light levels around your smartphone and controls the auto-brightness feature on your smartphone. To perform this test, click on the ‘light sensor’ option and select the level of brightness of your phone’s screen from dark to bright.

Wrapping Up

Sensors in your phone are very useful, and you must check if the sensors are functioning fine on a regular basis. If it passes all the tests, then it’s working well. There are different other secret codes to find other secret information about your phone.

Categories
How To Mobile

Incoming Call Not Showing On Android Smartphones? Here’s How To Fix It

Key Highlights

  • You can fix your smartphone’s incoming call notification issues with some simple steps
  • Steps to fix call if not showing on your Android Screen
  • Users can open special app access on their smartphones and fix this issue in just a few minutes

Understanding technology can be a little overwhelming. With so many features, you never know when you mistakenly click on some option that can cause you trouble. Sometimes due to several reasons, your phone screen might not show notifications for incoming calls. Here are the reasons and how you can fix incoming calls not showing on the screen Android.

Restart Your Smartphone

Sometimes there might be a problem with your phone’s software or some lag which can be the reason for incoming calls not appearing on your screen. To fix this issue on your android devices, power off your smartphone and switch it on after 5-10 minutes.

Make a call from another phone to check whether the problem is fixed or not. If the problem continues, then use the next method.

Check DND Mode On Your Smartphone

There might be chances you have turned on the DND mode in your smartphone because of which incoming call notification isn’t showing. It silences every sound, including incoming calls and notifications and turns of vibration except for alarms.

To turn off this feature, go to settings – sounds and notification, look for the DND option, and turn it off. You can also turn off DND directly from the notification.

Also Read: Want A Male Google Assistant Voice On Android Phone? Here’s How To Enable

Enable Call Notification

You might have mistakenly disabled call notifications, which can be the reason why incoming call notifications are not showing. Disabling this feature will not show a notification during an incoming call. To enable this feature open your phone settings and follow the steps.

Step 1: Look for the ‘apps’ option in your phone settings and open it.

Step 2: Then open the ‘manage system’ app and look for ‘call settings’.

Step 3: Open ‘call settings’ and select ‘advanced settings.

Step 4: Open ‘advanced settings’ and check if show call notification is enabled. If not, then enable it to fix the problem.

Enable Special App Access

If you are using another application during an incoming call, the incoming call might not show on the screen, but the phone is ringing. This is because you have not enabled special app access. To enable this feature open your phone settings and follow the steps.

Step 1: Open phone settings and search for the ‘apps’ option and open it.

Step 2: Then click on the ‘manage apps’ and search for the ‘phone services’ option.

Step 3: Now open ‘app permission’ and look for ‘special app access’.

Step 4: Open ‘special app access’ and enable the ‘display over other apps’ option. Now incoming calls will be visible on your screen even when you are using another application.

Reset App Preferences

Sometimes the reason why incoming calls are not appearing on your screen is that you have given preference to other applications over phone services. To fix the issue reset app preference to default, and your notification for calls will appear. Open your settings and follow the steps.

Step 1: Search the ‘apps’ option in your phone settings and open it.

Step 2: Look for ‘manage apps’ and open them.

Step 3: Now click on the 3 dots on the top-right side of the screen.

Step 4: Now select reset app preferences and a pop-up will appear with the ‘reset apps’ option.

Step 5: Tap on the ‘reset apps’ option to reset your app preferences.

Also Read: WhatsApp Security Code: What Is It? How To Get WhatsApp Security Code Notification On Android, iPhones, And Laptop/ PC?

Wrapping Up

These are some of the reasons why incoming calls are not showing on your android screen and how to fix it. Even after using these methods, if the problem continues, then go to a service centre and get your phone repaired.

Also Read | List Of Best Android Phones Priced Under Rs. 8,000 In India

Categories
How To Tech News

How to fix Youtube App Not Playing Videos Issue Android

Fix Youtube App Not Playing Videos Issue Android, Youtube is a video streaming app where people can upload videos as well as watch them in preferred languages. This is a known factor for many people as most people in today’s situation started using smartphones, which is a key for using youtube. Youtube is the largest video platform app with more than 2 million visitors every month, and for each minute, 500 hours of content has been uploaded on youtube. but sometimes there are issues Fix Youtube App Not Playing Videos Issue Android

At first, youtube was famous for watching videos on laptops and systems where people can see a lot of content on a large screen, but slowly, youtube became famous for android mobile phones because mobile phones can be carried anywhere so that people can watch videos all the time.

Sometimes people can get a message on youtube showing a playback error or the youtube app not loading, and people can also see some other kinds of errors that may happen because of the network issues. This can be solved by following simple steps. In this article, we have mentioned some issues and resolutions for solving that issue.

Fixing Error In Youtube For Android Mobiles

Most people face two types of complaints where one complaint is “there was a problem with the server 400 youtube android”, and the other is “there was a problem with the server 503 youtube android”. 

Read Also: Best ways to test internet speed on your android smartphone

Solving the problem with server 400 youtube android:

Most people face an error code 400, which often disturbs users while watching videos. This may be due to bad network connection or timing and date issues. To solve network issues, it is necessary to check your data connections and reset all the settings to stock, and for correcting date and time, it is necessary to set your mobile phone to automatic mode of setting date and time. 

If the issues persist, then try clearing all the cache data and make sure that youtube is the only app that is running on your mobile phone. If the problem is resolved, then people can just start using the app, or they can click on the clear data button as well to solve the server 400 problem on their android mobile.

Solving The Problem With Server 503 Youtube Android:

People facing this error 503 issues can prefer reseting the complete application and then clearing the watch history videos from your youtube. The most common messages that are displayed are listed below.

  • Connection timeout
  • Corrupted cached data 
  • Server busy 
  • Maintenance 
  • Playlist Queue is too long 

To solve this kind of issue, people can first verify the status of Google servers. Youtube is a reputed company where people will not get any server issues most of the time, but it doesn’t mean that youtube never has maintenance breaks and timeouts. So before starting the procedure, it is necessary to ensure that the problem is not from the service which is provided. 

Visiting official websites can help people in finding the right answer. After this, if the problem persists, then people can prefer to follow the steps mentioned above to recover their youtube application.

Final words

We have seen some basic resetting procedures to recover your youtube application. Hope this article will help in your recovery process! Thank you for reading this article.

Categories
How To Tech News

WhatsApp Images Not Showing In The Gallery? Here’s How To Fix It

Key Highlights

  • Currently, WhatsApp is among the most widely used services for instant messaging
  • Most often, a settings-related issue is to blame for the WhatsApp photographs and videos not appearing in the gallery
  • There are a number of reasons why WhatsApp on your phone can stop functioning

WhatsApp is one of the most popular messaging applications that is widely used to send text messages and share images, videos, and other documents. The app is currently providing messaging services across the Android and iOS mobile ecosystems. Sometimes WhatsApp images don’t show in the gallery. This can be due to a couple of reasons that can be easily fixed. In this article, we have explained How to fix WhatsApp images not showing in the Gallery.

Also Read: How To Download And Use WhatsApp On Jio Phone? Step By Step Guide

Steps To Fix And See WhatsApp Images In The Gallery For Android Smartphones

Received Images Are Not Saved In The Gallery

You must check the media visibility settings in WhatsApp if the received WhatsApp images not downloading in the gallery. Follow the below steps to activate this setting.

Step 1: Open WhatsApp on your smartphone and click on the 3 dots on the top-right side of your screen. A pop-up will appear. From there, select the “settings” option.

Step 2: Once you have opened the WhatsApp settings screen, now click on the “chats” option and look for the “media visibility” option.

Step 3: Now turn on the media visibility options and reboot your smartphone once. Now the WhatsApp images will appear in your gallery.

You can turn on this feature anytime by following the same steps.

Also Read: 100 Best Instagram Names For Food Bloggers To Get More Followers

Sent Images In WhatsApp Are Not Showing In The Gallery

Sometimes people click photos directly from the WhatsApp camera, and when they look for the photo in your gallery, the images are not there. To fix this issue, first, activate the media visibility option from WhatsApp settings. If still, it doesn’t appear, then follow these alternative steps.

Step 1: Open the file manager app on your smartphone. Then, go to settings and enable the “show hidden files” option.

Step 2: Now go back to the internal storage and search for the WhatsApp folder. Now navigate to “media” and then “WhatsApp images”.

Step 3: Now, search for the .nomedia file and delete the file from your smartphone. Similarly, search the .nomedia file in the “private” and “sent” folders and delete it from there as well.

Now reboot your device, and WhatsApp images will appear in your gallery. Ensure that the .nomedia file is not present in the WhatsApp images folder.

Also Read: Lost Reliance Jio SIM Card? Here’s How To Block And Resume Your Jio Number

Steps To Fix And See WhatsApp Images In The Gallery For iOS Smartphones And iPads

Allow Permission To Photos For WhatsApp Images

iOS smartphones don’t allow WhatsApp to download photos in a gallery until you don’t give permission from privacy settings. To allow permission for WhatsApp images to download in the gallery, follow these easy steps.

Step 1: Open the settings option on your iOS devices and navigate to the privacy option.

Step 2: Open the privacy option, search “photos,” and then click on “WhatsApp”.

Step 3: Now select the “all photos” option, and WhatsApp photos will appear in your gallery.

Also Read: Best WhatsApp Status Apps To Download And Use On Android, iOS

Enable WhatsApp To Automatically Store Images In The Gallery

This option is enabled by default on every device, but you can still check once if images don’t show in the gallery. Follow the steps to enable this option.

Step 1: Open WhatsApp on your iOS devices and click on settings on the bottom-right corner of your screen.

Step 2: Now navigate to chat settings and enable the “save to camera roll” option. Reboot your smartphone once, and WhatsApp images will start appearing in your gallery.

Also Read: 100 Gaming Channel Name Ideas For YouTube You Can Use: Here’s The List

Wrapping Up

Firstly, ensure that your WhatsApp application is updated to the latest version and restart your device. If still nothing happens, then here is the solution to fix your problem for both Android and iOS devices.

Also Read: Best WhatsApp Status Apps To Download And Use On Android, iOS

Categories
Apps How To

Want To Send Stylish WhatsApp Messages? Here’s How To Change Font Style In WhatsApp

Key Highlights

  • Many users are unaware of some of the functions that WhatsApp offers
  • You have the option to alter the text font in WhatsApp to bold, italic, strikethrough, and monospace
  • The application has some built-in options that let you change the font

In the world connected with the internet, WhatsApp has become part and parcel of our lives. It is used to connect with our family and friends, enjoy group chats and even have connections professionally. As simple as WhatApp is to use, it can always be made more fun by the introduction of new, cool and stylish fonts that you can use for your texts to stand out. In this article, we have explained how to change the font style in WhatsApp.

A stylish font can help transform your texts and make them look cute, flowery, vintage, serif/sans serif, bold, italics, or any other way that you like. It can help you personalize your texts and can be very useful in writing digital letters, greetings and invitations addressed to your family and friends. They are a great way to structure your text messages and make them look more aesthetic.

So, if you are looking to add some pizzazz to your WhatsApp texts and want to know how to change fonts in WhatsApp, then you are at the right place. Follow along with the given steps to get to know how to change handwriting in WhatsApp.

Also Read | WhatsApp Web: Here’s How To Use WhatsApp Web On Computer And Laptop

How To Change Font Style In WhatsApp?

Use Some WhatsApp Font Codes To Make The Important Stuff Stand Out

Following are some super easy WhatsApp font codes that you can use to edit and tweak your regular texts while chatting or putting on a status:

  • To Italicize: Place an underscore (_) on both ends of the text you want to Italicize. E.g. – 

Type: _hi world_ 

Output: hi world

  • For bold words: Place an asterisk (*) on both ends of the text you want to embolden. E.g. –

Type: *hi world* 

Output: hi world

  • To put a strikethrough: Place a tilde (~) on both ends of the text you want to strike through the text. E.g. –

Type: ~hi world~ 

Output: hi world

  • For monospace: Place 3 backticks (“`) on both ends of the text. E.g. – 

Type: “`hi world“` 

Output: hi world

Also Read | Want To Write Your Instagram Name In A Stylish Font? Here’s How To Do

Use A Stylish Font App For WhatsApp

Another way to write stylishly in WhatsApp is to opt for an app that allows for WhatsApp font change. Fancy font-changing apps like ‘Stylish Text by Rural Geeks’ on the Google Play store can be easily downloaded and used to change not only the font of your WhatsApp texts but also over other apps like YouTube, Instagram, etc. 

Other font-changing apps that you can use for changing your WhatsApp font in Android are:

  • FontBoard – Font & Emoji Keyboard by Luminar
  • Stylish Text for WhatsApp – Fancy Text Generator by Shreeji Developer Apps
  • Chat Styles
  • Cool Symbols & Characters by RunToFuture
  • Fancy Text Symbols by Hoang Nguyen Van

And many more! Do your research and find out the app that works best with your phone and android version and has the fonts that you like.

Font apps allow you to use Unicode fonts that are able to work on multiple apps, plus most of them are available for free! They provide a variety of font styles and symbols to choose from. Some of these apps also allow you to create cute stickers for WhatsApp.

Categories
How To Info Tech News

How To Log Out Of Your Google Account From Smartphone Remotely

Key Highlights

  • Logging out from one’s account remotely provides data security
  • It is easy to log out directly from your smartphone’s settings
  • However, logging out remotely might seem like a tricky process

There can be times when one wishes to log out of their Google Account from one’s smartphone devices just to ensure privacy and maintain the security of personal data linked with one’s account. Logging out from one’s account remotely provides data security and is thus an intelligent choice to make. It also helps one ensure that one’s data is not used or viewed without one’s consent. 

It is quite easy to log out directly from your smartphone from the smartphone settings but logging out remotely might seem like a tricky process. But you need not worry! This blog will help you know about the simplest ways to log out of your Google Account remotely and the steps that you need to follow. 

How To Log Out Of Your Google Account From Smartphone Remotely

From Another Smartphone: Remotely

If you are looking to log out of your Google account remotely by using another smartphone by following listed steps:

  1. Make sure that your Google Account is logged in on the smartphone.
  2. Open ‘Gmail’ and click on your profile picture in the upper right corner of the screen.
  3. Click on the ‘Manage your Google Account’ option.
  4. Now, on the ‘Google Account’ page, go to the ‘Security’ tab.
  5. Now, go to ‘Your Devices’ and choose the ‘Manage Devices’ option.
  6. In the ‘Manage Devices’ option, you will be able to see a list of devices that your Google account is signed in on.
  7. From here, you can select the device that you want to remotely log out of.
  8. Tap on the three dots beside the chosen device and click on ‘Sign Out’.
  9. Confirm the ‘Sign Out’ option, and your account will successfully be logged out of the device.
Also Read- Realme 8S / Realme 8i India Launch Soon – Check Out Its Leaked Front Panel Images and Details

From The Google Dashboard: Remotely

Logging out of your Google Account can be remotely and easily done by using the Google Dashboard. Following are the steps that you need to follow:

  1. Open up your web browser, preferably Google Chrome.
  2. Type myaccount.google.com in the search bar and visit the webpage.
  3. Here, you will see your Google Dashboard.
  4. Login to Google if you have not done so already.
  5. Click on the ‘Security’ tab in the Dashboard.
  6. Go to the ‘Your Devices’ section of the webpage.
  7. Select the ‘Manage Devices’ option.
  8. Here you will see the devices logged in with your Google Account.
  9. Click on the three dots given alongside the device from which you want to log out from.
  10. Now, select the ‘Sign Out’ option. In the pop-up dialogue box, confirm the ‘Sign Out’.
  11. Your Google Account will be successfully logged out from the given device/smartphone.
Also Read: [GizNext Exclusive] Samsung Galaxy Z Fold 3 5G Revealed In Full Glory: Official Brochure & Features

The above-mentioned steps will help you to log out of your Google Account from any smartphone and even other devices that your Google account might be logged in on, for example, tablets and iPads. It is a quick, easy and simple process and can be followed through by anyone using any phone or computer with internet connectivity.

Categories
Featured How To Info

How To Stop SIM Toolkit Pop-Up Or Flash Messages On Android

Key Highlights

  • Users can use the SIM Toolkit to disable pop-up notifications
  • There are multiple ways to get rid of Toolkit Pop-Ups
  • Users can prevent flash messages on Android when using an Airtel, Jio, VI, and Jio number

Even though flash messages can be a great advertising tool for SIM operators, they can get pretty annoying. These pop-up and flash messages are notorious for interrupting the smooth streaming of videos, video games, and just the normal functioning of a mobile phone.

In this blog, we’ll share with you ways to turn off such flash messages across different SIMs like Airtel, Reliance Jio, Vodafone Idea, and BSNL. So stick around and keep on reading! In this article, we have explained How to Stop SIM Toolkit Pop-Up or Flash Messages in Android.

Also Read: SIM Toolkit In iPhone: How To Access SIM Toolkit/Applications On iPhone

How To Stop SIM Toolkit Pop-Up Or Flash Messages On Android

To disable SIM Toolkit pop-up notifications or flash messages, you can use the SIM Toolkit or operator app on your phone. The normal process is to open the SIM Toolkit, search for flash service, and disable them completely. Below, we have provided the individual procedure to disable Flash message pop-ups for all major carriers including Airtel, Jio, Vodafone Idea, and BSNL.

Also Read: SIM Provisioned Error: Here’s How To Resolve

Turn Off Flash Message Popups In Airtel

Step 1: Launch the ‘Airtel Services’ or ‘Sim Toolkit’ app from the app drawer on your phone.

Step 2: Select the ‘Airtel Now!’ option.

Step 3: Select the Start/Stop menu and click on the ‘Stop’ option.

Step 4: Finally, press the ‘OK button to confirm the selection.

Another way to turn off SIM Toolkit Flash messages in an Airtel SIM is to SMS ‘STOP ANOW’ to the number 58234.

Also Read: Tablet With SIM Card: List Of Top Tablets With SIM Card Slot In India

Turn Off Flash Message Popups In Reliance Jio

Turning off Flash Message Pop-Ups in a Jio SIM can be a complicated process as there is no such option available to do so directly. But, if you are adamant about getting rid of the annoying pop-ups, then you can use the following steps to uninstall the ‘My Jio’ app from your phone, which might help in getting rid of the Toolkit Flash Messages:

Step 1: Go to your phone’s ‘Settings’.

Step 2: Go to the ‘Apps’ tab from the settings and select the ‘My Jio’ app.

Step 3: Tap the ‘Uninstall’ button.

Even though this method might be able to get rid of the Flash pop-ups from Jio, there can be times when the Flash messages still pop up. To permanently get rid of them, you can contact customer care service and convey the same.

Also Read: Lost Reliance Jio SIM Card? Here’s How To Block And Resume Your Jio Number

Turn Off Flash Message Popups In Vodafone Idea

Ways To Get Rid Of Toolkit Pop-Ups On Vodafone:

  1. Firstly, open the ‘SIM Toolkit’ app on your smartphone.
  2. Click on the ‘FLASH!’ option.
  3. Now, select the ‘Activation’ option and tap on the ‘Deactivate’ button.
  4. Finally, confirm the selection by pressing ‘OK.’

Also Read: How To Check Number Of Sim Cards Registered On Your Name And ID: How To Block Unauthorized SIM Cards Issued On Your Name?

Another Method To Disable Pop-Ups In A Vodafone SIM:

  1. For prepaid: CAN FLASH to 144
  2. For postpaid: SMS CAN FLASH to 199

Also Read: Apple iPhone eSIM: How To Convert Physical SIM To eSIM, Transfer eSIM/Physical SIM During And After New iPhone Setup?

Following Are The Ways To Get Rid Of Toolkit Pop-Ups on Idea:

  1. On your smartphone, open the ‘Idea Power’ application.
  2. Select the ‘Idea Flash’ option in the app.
  3. Now, select the ‘Activation’ option and tap on the ‘Deactivate’ button.
  4. Finally, confirm the selection by pressing ‘OK.’

Also Read: eSIM iPhone: How To Setup And Manage eSIM On iPhones, Install Assigned Cellular Plans

Other ways to disable such pop-ups in an Idea SIM are:

  1. SMS NO INFO to 1925
  2. Dial this number: *121*46#

Also Read: Recharge Your Delhi Metro Card Using Airtel Thanks App: Here’s How

Turn Off Flash Message Popups In BSNL

  1. On your smartphone, open the ‘BSNL Mobile app’.
  2. Select the ‘BSNL Buzz Service’ option.
  3. Now, select the ‘Activation’ option and tap on the ‘Deactivate’ button.
  4. Finally, confirm the selection by pressing ‘OK.’

Also Read: How To Access And Enable The SIM Toolkit On An Android Device?

Wrapping Up

In conclusion, this article focused on how to prevent SIM toolkit pop-ups or flash messages on Android when using an Airtel, Jio, BSNL, or Vodafone Idea number. These are the tried and tested methods to get rid of pop-up messages easily and quickly. In case any of the above methods do not work, and you still wish to get rid of the Pop-Ups, it is always advisable to contact customer services with your queries.

Also Read: Lost Or Stolen Airtel SIM: See All Steps To Block Airtel SIM Easily At Home

Categories
How To Info Tech News

How to Remove Profile Picture from Google Account (Gmail, YouTube, Google Meet)

Key Highlights

  • Adding a profile picture to the Google account is an option with Android devices
  • A Google profile pic is visible across all services including Gmail, YouTube, Google Meet
  • Removing Google profile pic is an easy process via desktop, Android, and iOS devices

Profile Pictures are a great way to express oneself, personalize one’s Google account, and make oneself noticeable online. A person’s Google profile picture is viewable throughout all the services provided by Google, whether it be Gmail, YouTube, Google Meet, Google Play Store, Google Hangouts, etc. Thus, it is safe to say that one’s Google profile pic is pretty much public and can be viewed by many people. So, in this article, we tell you How to Remove a Profile picture from your Google Account.

Thus, there can be times when one decides to go incognito and remove one’s Google profile pic. This helps one in maintaining one’s online privacy and safeguard personal information while still being able to access Google and related resources and websites without restrictions. Following are the ways in which one can do the same and remove one’s profile picture on different platforms like Personal Computers (PC), Android, and Apple (iOS).

How to Remove Profile Picture from Google Account:

On Computer (Web)

This is the easiest, fastest, and foolproof method to remove one’s Google profile picture. This method can be used by anyone with a computer and a working internet connection. Following are the steps to remove the profile picture of your Google account:

  1. Open your web browser, preferably Google Chrome.
  2. Login to your Google account by visiting accounts.google.com on your web browser.
  3. Choose the ‘Personal info’ option on the web page.
  4. Now, click on the profile picture, which appears with a small camera icon on top of it.
  5. Here, in the window that pops up, press the ‘Remove’ button.
  6. Confirm the remove option by clicking ‘Remove’ in the final pop-up box that appears.
  7. Voila! The profile picture will be removed.

Also Read: Best Apps To Detect Hidden Camera For Android And iOS

On Android

In an Android device, you can either follow the aforementioned steps by visiting your phone’s browser and choosing the ‘Desktop site’ option or follow through the given steps:

  1. Go to your phone’s ‘Settings’.
  2. Scroll down and select ‘Google’ under the ‘Personal’ tab.
  3. Click on the ‘Manage your Google Account option.
  4. Now, choose ‘Get Started’ and go to the ‘Personal info’ tab.
  5. Scroll down and choose ‘Go To About me’ option.
  6. Tap the profile picture icon and select the ‘No Photo’ option.

Also Read: Best Matrimonial Apps To Download In India: List Inside

On iOS (iPhone/iPad)

Removing one’s Google profile picture using an Apple device can be a bit tricky, and one would recommend using the above options, but if an iOS is the only option available, you can follow the steps given below:

  1. In an Apple device, open any web browser, preferably Safari or Google Chrome.
  2. Type https://myaccount.google.com in the search box and visit the website.
  3. Sign in to your Google account.
  4. Now, under the ‘Personal info & privacy’ header, tap on the ‘Your personal info’ button.
  5. Here, select the ‘About me’ option.
  6. Tap on the ‘Pencil Icon’ beside your profile picture on the top-right corner of the screen.
  7. Here, you can click on the camera icon on top of your profile picture to change/remove it.
  8. Finally, click on the ‘No Photo’ option to remove the profile picture from your Google Account.

One can use any of the following methods given above to remove one’s Google profile picture, and in case of any further confusion, it is always advisable to visit Google’s Help Center.

Also Read: What is ‘App Install Optimization’ in Google Play Store?

Categories
How To Info Tech News

How to Prevent Battery Degradation and Check Your Android Phone’s Battery Health?

Most of the smartphones we are currently using run on lithium batteries. As lithium batteries degrade pretty quickly, the efficiency of the recharge cycle and charge capacity decreases over time. Although Android phones come with a guide that educates the user about battery usage, there is hardly anything mentioned about battery degradation and how to check it. Now, let us explore some easy ways as to How to Prevent Battery Degradation and examine the health of your Android phone’s battery.

  1. Using dial pad codes:

Some Android phones have hidden menus or codes to check your battery health. The common code for all Android phones is believed to be *#*#4636#*#*, and it may be different too. Dial this code, and it returns the battery condition of your phone with a pop-up. If your battery condition is healthy, it shows ”good,” else it shows badly.

The battery’s normal temperature is considered to be 30 to 40 degrees Celsius for a phone kept at room temperature. The same code also displays the battery temperature that helps you analyze your battery temperature.

  1. Using Accubattery:

The dialing code may not be accurate. Even if it is correct, you may not always receive accurate results. Hence, third-party apps that deliver accurate results are considered to be good to check your battery health. Accubattery is one such app that gives accurate results on your battery health.

  • How does Accubattery work?

Accubattery constantly analyzes your phone’s software and hardware usage and battery capacity to assess the health of your battery. 

It also records the charging as well as discharging speeds, battery’s temperature, the wear and tear of your battery, and charging as well as discharging history of your battery.

  • Is it accurate?

Accubattery is just an app, unlike manual testing. It may be correct to some extent, but it is better to consider a 5% margin due to any errors. In that case, Accubattery can be at least 80 – 90% accurate.

  1. Tips to prevent Android phone’s battery degradation:

Battery degradation may not happen in the initial few days, but it is inevitable and will happen eventually no matter how much you try. But you can follow these tips to ensure good battery health:

  • Don’tDon’t charge or discharge to extreme levels.
  • Until and unless you are in a hurry, do not fast charge and avoid it as much as possible.
  • Avoid using your phone while it is charging.
  • Do not expose your phone to extreme temperatures like too hot or too cold. Try to keep it at room temperature.
  • Do not use third-party chargers. Use original and branded ones only.
  • Avoid overnight charging or charging beyond 100%. This may damage the battery’s health.
  • Avoid using your phone when the battery is heated up. 
  • Do not use your phone continuously and clear the background apps after using your phone that unnecessarily consumes energy and discharges the phone.
Also Read: [GizNext Exclusive] Samsung Galaxy Z Fold 3 5G Revealed In Full Glory: Official Brochure & Features

Following these tips and frequent cleaning of your storage can help you in maintaining good battery health and slow battery degradation. However, degradation is inevitable, and it happens. You can only delay it but not stop it.