Categories
Apps Auto Tech Featured How To

Android Auto Quick Tips And Tricks: Steps For Hassle Free Calling Experience

Key Highlights

  • Android Auto’s host of features include calling support too
  • Making or answering calls on-the-go is made hassle free
  • One can give voice commands for calling a contact

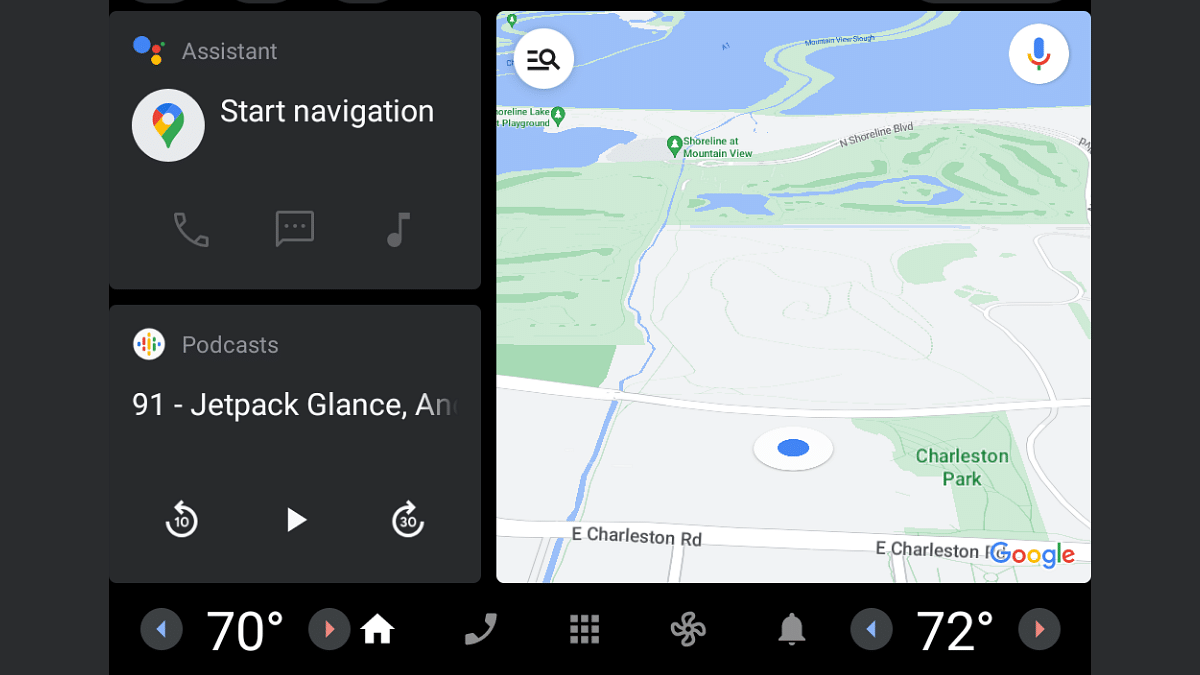
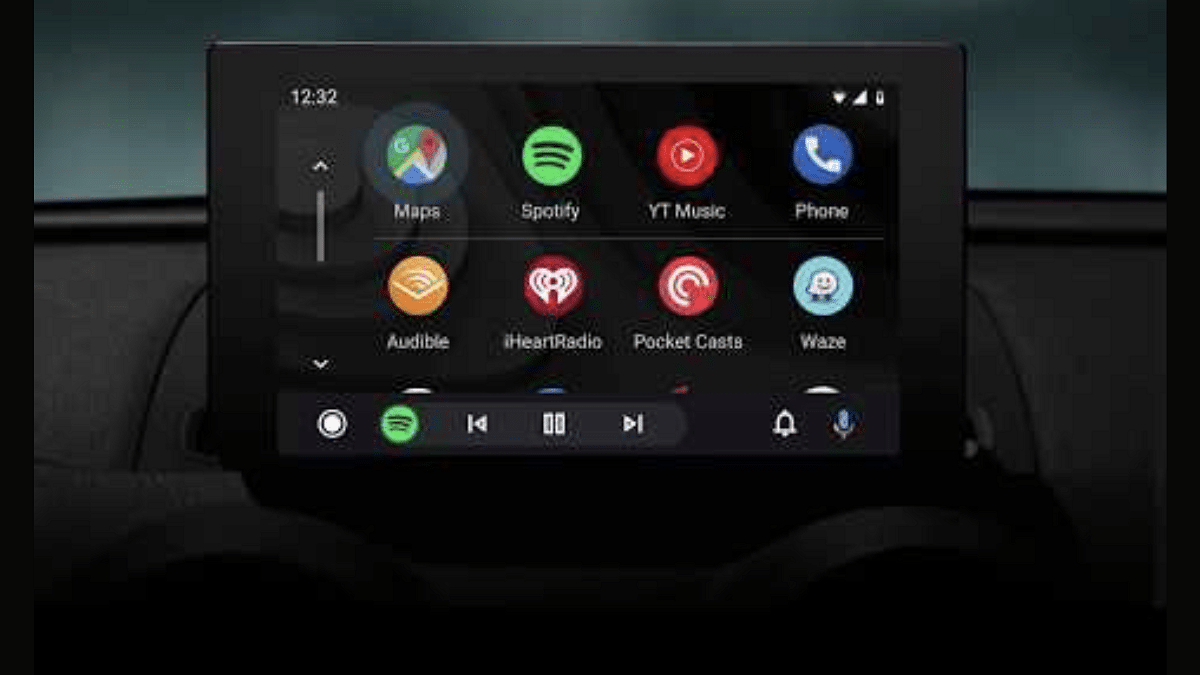
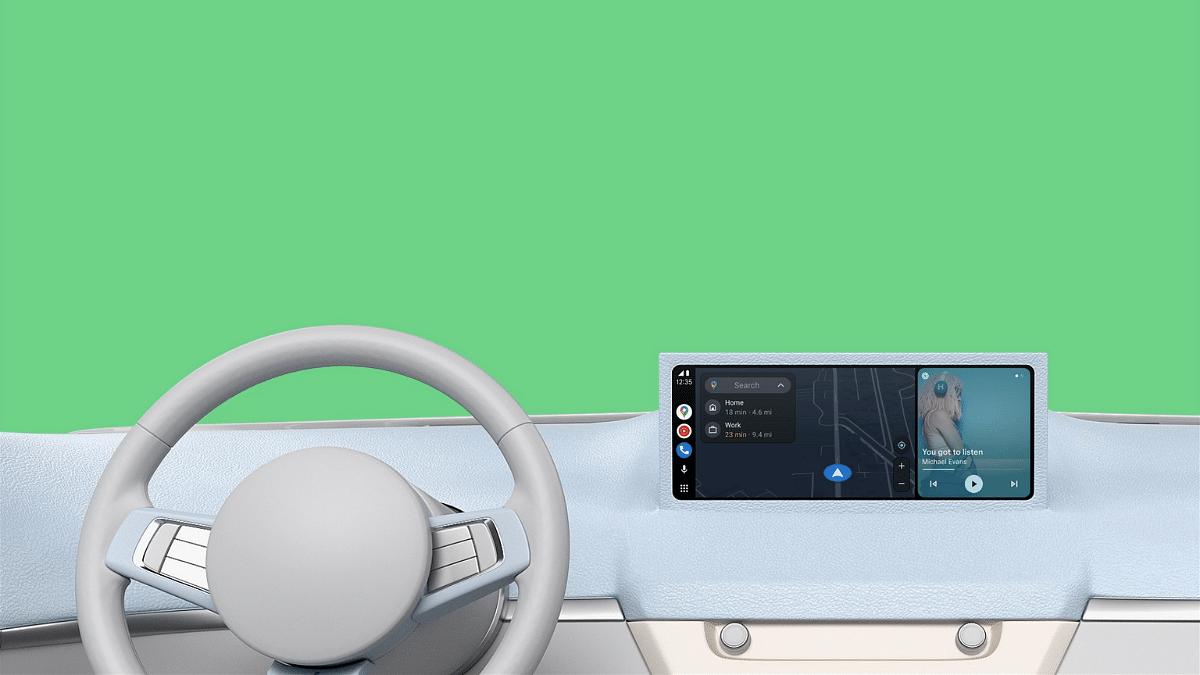
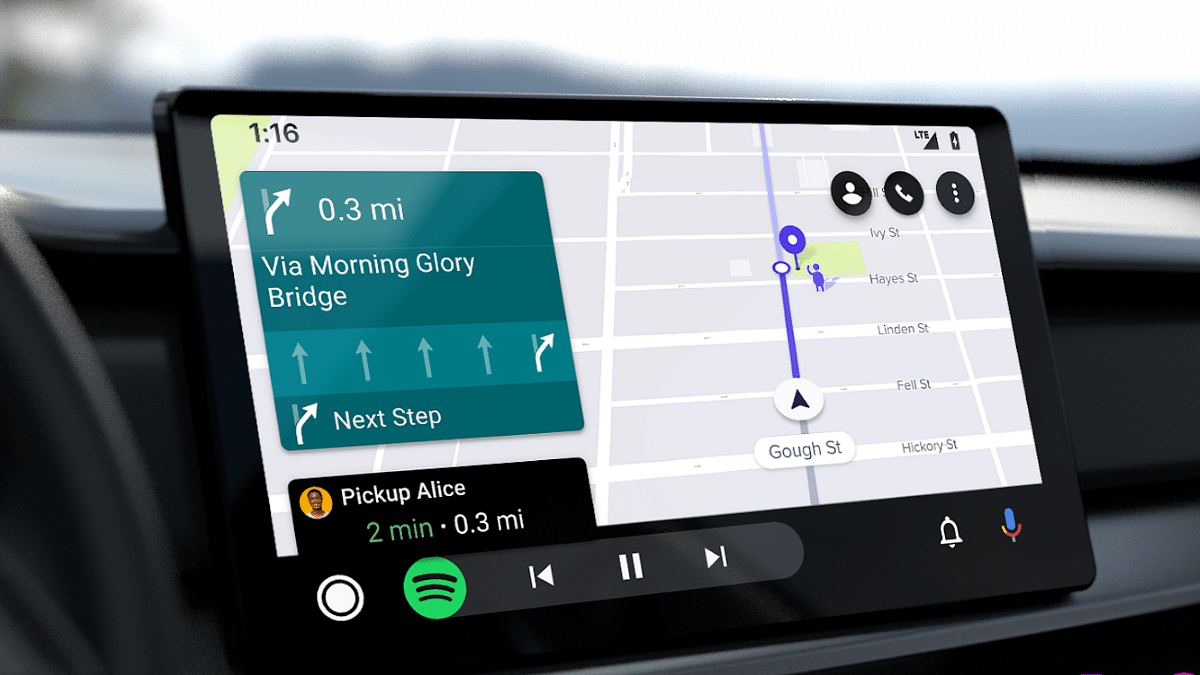
Android Auto and Apple Car Play are amongst those modern tech that are shaping up the future for smart connected car ecosystem. You can access a whole range of advanced mobile features and apps directly on the car’s digital infotainment screen using these services. Navigational and calling support are amongst the most common and essential features one can use with Android Auto. For hassle free calling experience during commutes, you can use Android Auto services inside the cabin while keeping your hands-free. Here’s How:

Also Read: Android For Cars: New AutoTech Announcements From CES 2024

Steps To Make A Call Using Android Auto By Giving Voice Commands

Step 1: Before you proceed, make sure your Android device is connected to the Android Auto in your car

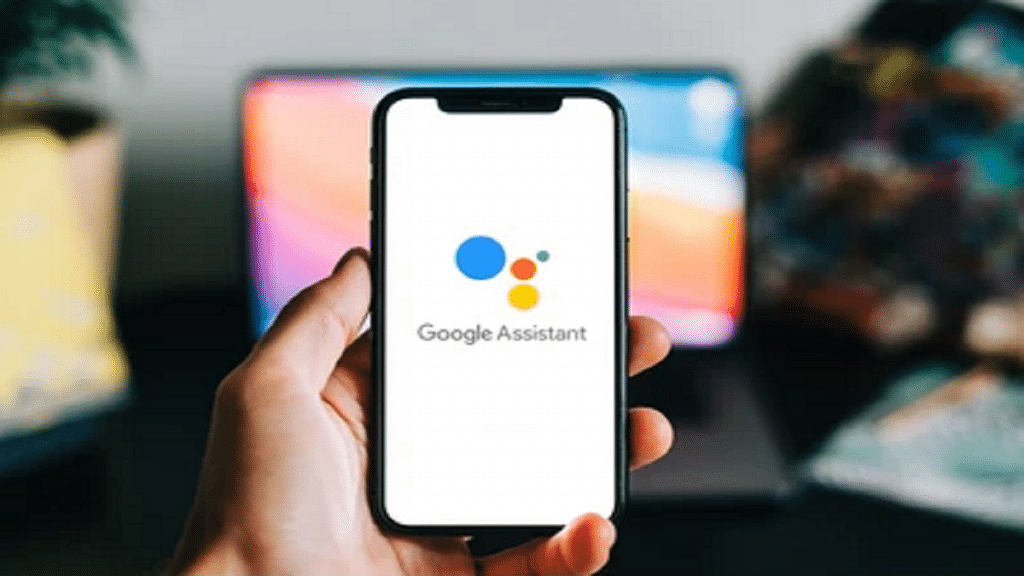
Step 2: Summon the Google Assistant by giving “Hey Google” voice command

Step 3: You can also tap on the microphone icon to initiate the digital assistant

Step 4: Now, give the voice command for making any call. You can use phrases like “call ‘X’ contact” or “Call home”.

Step 5: You can also give a command to call a number which is not saved in your contacts list. You’ll have to speak out the numbers in this case to make the call.

Also Read: Volkswagen Confirms ID.4 Electric SUV India Launch In 2024

How To Make Calls In Android Auto Using Car’s Dashboard Display

Notably, you can also make a call manually using the car’s digital display which is compatible with Android Auto. Look for the steps listed below:

Step 1: Launch the dialer app by tapping on the “phone” icon

Step 2: You need to select from the list of options on screen including ‘Favorites’, ‘Recents’, and ‘Contacts’

Step 3: Now, select the contact whom you wish to call

Step 4: For unsaved contacts, you also have the option to dial a number. Simply tap on the keypad icon and enter the number whom you wish to call.

Categories
Apps Featured How To

Ever Wondered Who’s Calling? Learn How To Check Truecaller For A Number During Calls On iPhone

Key Highlights

  • Truecaller provides quick caller identification and shields against spam calls
  • iPhone users face limitations due to iOS restrictions on certain Truecaller features
  • Despite restrictions, iPhone users can leverage iOS’s “Share Contact” feature to identify callers with Truecaller in real-time

Identifying incoming calls has never been easier, thanks to Truecaller. This app not only quickly reveals the caller’s identity but also acts as a shield against spam calls. However, iPhone users may find themselves navigating through a slightly different experience due to certain limitations within the iOS ecosystem. Here’s all you need to know.

Also Read | Wrong Name Appears On Caller ID? Here’s How To Change Your Name In Truecaller?

Understanding iPhone Restrictions

While Android users enjoy the full range of Truecaller’s capabilities, iPhone users encounter some constraints. The iOS environment restricts certain Truecaller features that require specific permissions, limiting its functionality. For instance, Truecaller cannot provide real-time caller identity prompts during incoming calls by default. But fear not, there’s still a workaround available.

How To Unlock iPhone Caller ID

With the latest iOS 17 update, iPhone users gain access to a handy feature for checking caller IDs. This differs from the Siri-enabled feature included in Truecaller’s paid subscription, offering a free alternative to identify unknown callers. Here’s how to make the most of it:

Step 1: When an unknown number calls, watch for the “i” symbol at the top right corner of your iPhone’s full-screen call alert.

Step 2: Tap the “i” symbol to reveal a brief information window displaying call details and options such as adding the number to your contacts or sharing it.

Step 3: Select the “Share Contact” option to proceed.

Also Read | Truecaller Tips & Tricks: Check Steps To Turn Off Last Seen Feature On Android

Step 4: Next, opt to share the number. Truecaller’s online directory will quickly identify the caller while the call remains active. Ensure your iPhone is connected to the internet for this feature to function seamlessly.

By using the above method, iPhone users can harness the power of Truecaller without the need for a subscription. This enhances their call experience and staying one step ahead of unidentified callers.

For the tech geeks, stay updated with the latest cutting-edge gadgets in the market, exclusive tech updates, gadget reviews, and more right on your phone’s screen. Join Giznext’s WhatsApp channel and receive the industry-first tech updates.

Categories
Apps Auto Tech Featured How To

Android Auto Waze Navigation: What Is It? How To Use?

Key Highlights

  • Android Auto Waze available for compatible vehicles
  • Is a navigational feature allowing easy transits
  • Comes as an alternate to Google Maps

Android Auto is one of those services which has transformed out entire experience while driving any modern car of SUV. This mobile application developed by the search giant Google is allowing masses to pair up their devices with the infotainment screen to access a host of smart features and tech. Navigational support is one of the key features that is offered by Android Auto and besides Maps, Waze Navigation offers a hassle free commuting. Here in this article we are listing down the use of Waze as a step-by-step guide:

Android Auto Waze: What Is It?

Just like Google Maps, Waze is also a navigational app that allows users with easy transit from point A to point B. Users will be able to access the Waze’s navigational services directly on the car’s display via Android Auto. Searching for routes using both voice and manual commands is possible with Waze. The steps for the same are mentioned below:

Also Read: Find And Locate Your Parked Car/Vehicle With This Google Maps Hack

Steps To Use Android Auto Waze Navigation Via Voice Commands

Step 1: Pair your Android smartphone with your car’s Android Auto unit via a USB cable

Step 2: Tap on the menu

Step 3: Click on the Waze icon

Step 4: Now, summon the digital assistant using “Ok Google: voice command

Step 5: Give the desired voice command for navigational directions. You need to use statements such as “Give directions for the nearest fuel station or restaurant”, “Show route for work”, etc.

Step 6: You can select from the multiple options if shown on the screen for the accurate direction delivery.

Also Read: Google Maps Bluetooth Beacon Feature For Tunnel Navigation Released: How To Use?

Steps To Use Android Auto Waze Manually

Step 1: To use the Android Auto manually, you will first need to switch the gear to Park (P) mode

Step 2: Now, pair your smartphone with the Android Auto unit using a USB cable

Step 3: Go to the Menu and launch the Waze app

Step 4: Click on the search option and type in the location you wish to navigate to using the keyboard

Step 5: Now, enter the destination and select from the multiple options if shown on the screen

Categories
Apps Featured How To

Learn How To Convert YouTube Videos Into GIFs In Minutes: Three Simple Methods

Key Highlights

  • Convert YouTube to GIF with Giphy or Ezgif
  • Create GIFs using Adobe Photoshop or GIMP
  • Use “GIFit!” or “GIF Brewery” for quick YouTube to GIF conversion

In today’s digital age, GIFs have become a global form of expression, adding humor, emotion, and creativity to online conversations. With the popularity of platforms like YouTube, where millions of videos are uploaded daily, the demand for turning these videos into GIFs has surged. Whether you want to capture a hilarious moment from your favorite YouTuber or create a GIF for social media, converting YouTube videos into GIFs is easier than you might think. Let’s explore some simple methods to achieve this.

Also Read | YouTube Tips And Tricks: How Can You Watch Age Restricted Videos On YouTube Mobile App, Desktop Version

Method 1: Online GIF Converters

Online GIF converters offer a convenient way to transform YouTube videos into GIFs without the need for software downloads. Here’s how it works:

Step 1: Start by selecting a trustworthy online GIF converter such as Giphy, Imgur, or Ezgif.

Step 2: Go to the YouTube video you wish to convert and copy its URL from the address bar.

Step 3: Paste the YouTube video URL into the designated field on the GIF converter website.

Step 4: Some converters allow you to choose the duration of the GIF and adjust settings like size and quality.

Step 5: Click the “Convert” or “Create GIF” button to initiate the conversion process. Once complete, download the GIF to your device.

Also Read | YouTube Tips And Tricks: Best Features You Must Try On Your Phone

Method 2: Using GIF Creation Software

If you prefer more control over the GIF creation process or need advanced features, using dedicated GIF creation software is the way to go. Here’s a step-by-step guide:

Step 1: Choose a GIF creation software such as Adobe Photoshop, GIMP, or Filmora, and download/install it on your computer.

Step 2: Open the software and import the YouTube video file into the program.

Step 3: Trim the video to the desired duration for your GIF. You can also add text, effects, or overlays to enhance the GIF.

Step 4: Once satisfied with the edits, export the file as a GIF format. Adjust settings like resolution and frame rate if necessary.

Step 5: Choose a location on your computer to save the GIF file and give it a descriptive name.

Method 3: Browser Extensions

For those who prefer a quick and hassle-free method, browser extensions offer a convenient solution. Follow these steps:

Step 1: Search for and install a browser extension designed for converting YouTube videos to GIFs. Popular options include “GIFit!” for Chrome and “GIF Brewery” for Safari.

Step 2: Go to the YouTube video you want to convert.

Step 3: Click on the extension icon in your browser toolbar and follow the prompts to create the GIF.

Step 4: Some extensions may offer customization options like duration and quality. Once satisfied, save the GIF to your device.

Also Read | YouTube Tips And Tricks: How To Download YouTube Shorts Videos Offline

Conclusion

Transforming YouTube videos into GIFs opens up a world of creative possibilities for expressing yourself online. Whether you opt for online converters, dedicated software, or browser extensions, the process is simple and accessible to all. So go ahead, unleash your creativity, and start turning those memorable YouTube moments into shareable GIFs.

For the tech geeks, stay updated with the latest cutting-edge gadgets in the market, exclusive tech updates, gadget reviews, and more right on your phone’s screen. Join Giznext’s WhatsApp channel and receive the industry-first tech updates.

Categories
Apps Featured How To

How to Set Up Google Photos Shared Albums: Guide

Google Photos offers a convenient way to share precious moments with loved ones through “shared albums.” This feature allows you to create an album where anyone you invite can view, and even contribute, their own photos and videos. This eliminates the hassle of sending individual photos and ensures everyone has access to the complete collection.

Also Read: Google’s AI Chatbot, Gemini, Goes Global: Now Available In 150+ Countries

How To Create Your Shared Album:

  1. Gather your photos: Open Google Photos on your smartphone (Android or iPhone) and select the photos you want to include. Use the checkboxes to choose multiple images.
  2. Create the album: Tap the “+” button at the top and choose “Shared Album” from the menu.
  3. Name and share: Give your album a descriptive title and tap “Share” in the top right corner.
  4. Choose your sharing method: You can either generate a link to the album or share it directly with specific contacts by adding their email addresses or choosing them from your list.

Important Note:

  • Anyone with the link can view the album’s contents.
  • Only those you grant access to can add their own photos and videos.

Also Read: How To Create Quick Replies In Google Messages On Android

Additional Features:

  • Control access: You can easily modify who can contribute to the album by adding or removing people from the sharing list.
  • Collaborate: Encourage others to add their photos from the same event or trip, creating a richer collection of memories.
  • Enjoy on any device: Shared albums are accessible on any device with internet access, making it easy for everyone to participate.

With Google Photos shared albums, you can effortlessly share and relive special moments with friends and family, creating a collaborative space for cherished memories.

Also Read: Google Gemini Advanced vs ChatGPT Plus: A Head-to-Head Comparison

Categories
Apps Featured How To

Streamlining Transactions: How To Generate And Share UPI QR Codes For Payments

Key Highlights

  • UPI QR codes simplify payments by eliminating manual entry
  • These codes are easily generated and shared across various platforms
  • UPI QR codes offer robust encryption, ensuring safe transactions

In the digital age, cashless transactions have become increasingly dominant, with the UPI emerging as a popular mode of payment in India. UPI offers convenience, security, and seamless transactions, making it a preferred choice for individuals and businesses. One of the key features of UPI is the QR code-based payment system, which enables quick and hassle-free transactions. In this article, we will explore how to generate and share UPI QR codes for payments, simplifying the process for both consumers and merchants.

Also Read | Paytm Lite: What Is It? How To Setup And Use Paytm Lite On Smartphones?

Understanding UPI QR Codes

UPI QR codes are scannable codes that contain payment information, such as the receiver’s UPI ID or virtual payment address (VPA). This enables users to initiate transactions directly from their bank accounts. These QR codes eliminate the need for manual entry of payment details, making transactions faster and more efficient.

How To Generate UPI QR Codes

Generating a UPI QR code is a simple process that can be done through various payment apps and platforms. Here’s how:

Step 1: Open your preferred UPI-enabled payment app or platform.

Step 2: Navigate to the option to generate a QR code for receiving payments.

Step 3: Enter the relevant details, such as your UPI ID or VPA, and specify the amount (if required).

Step 4: Generate the QR code, which will be displayed on your screen.

Also Read | Use Paytm To Book Your Bus Tickets: A Step-By-Step Guide

How To Share UPI QR Codes

Once you have generated your UPI QR code, sharing it with others is simple and can be done in multiple ways:

Displaying the QR code: If you are a merchant, you can print out the QR code and display it at your place of business, allowing customers to scan it and make payments conveniently.

Sharing via messaging apps: You can share your UPI QR code with individuals or customers through messaging apps such as WhatsApp or email. Simply send them the image of the QR code, and they can scan it to initiate the transaction.

Embedding in invoices or websites: For online transactions, you can embed your UPI QR code in invoices or on your website, making it easy for customers to make payments with just a scan.

Benefits Of UPI QR Codes

The use of UPI QR codes offers several benefits for both consumers and merchants:

  • Convenience: UPI QR codes streamline the payment process, allowing users to make transactions quickly and easily without the need for cash or card details.
  • Security: UPI transactions are highly secure, with multiple layers of encryption and authentication, reducing the risk of fraud or unauthorized access.
  • Cost-effectiveness: UPI transactions typically incur lower fees compared to traditional payment methods, making them a cost-effective solution for businesses.

Also Read | Saying Goodbye To Paytm Payments Bank? Here’s How To Close It Safely

Conclusion

UPI QR codes have revolutionized the way payments are made, offering a fast, secure, and convenient method for conducting transactions. By understanding how to generate and share UPI QR codes, individuals and businesses can leverage this technology to simplify their payment processes and enhance the overall customer experience.

For the tech geeks, stay updated with the latest cutting-edge gadgets in the market, exclusive tech updates, gadget reviews, and more right on your phone’s screen. Join Giznext’s WhatsApp channel and receive the industry-first tech updates.

Categories
Apps Featured How To

YouTube Rolls Out Music Video Integration: Here’s How To Level Up Your Shorts Game

Key Highlights

  • YouTube now enables users to integrate music videos into Shorts
  • Four tools – Sound, Green Screen, Cut, and Collab – offer versatile creative options
  • Users can easily use Remix by selecting a music video and applying desired tools for their Shorts

YouTube has just rolled out an innovative feature aimed at enriching users’ experiences in creating Shorts, the platform’s own rendition of short-form vertical videos. This newly introduced feature, called Remix, empowers users to incorporate music videos from their preferred artists into their own Shorts. Also Read | YouTube Tips And Tricks: Best Features You Must Try On Your Phone

This development holds significant weight, especially following Universal Music Group’s recent decision to withdraw its entire catalog from TikTok, resulting in the removal of songs and videos from notable artists like Taylor Swift and Ariana Grande. In contrast, YouTube has ramped up its efforts with Remix, offering TikTokers a compelling motivation to transition their content creation endeavors to the platform.

Understanding YouTube’s Remix Feature

YouTube, in a blog post announcement, elaborated on the functionalities of Remix, introducing four distinct tools – Sound, Green Screen, Cut, and Collab – tailored for Short creators. Users are granted the flexibility to leverage any combination of these tools to fill music videos into their Shorts, fostering creativity and versatility. Below is a breakdown of the newly introduced tools:

  • Sound: This tool enables users to extract audio directly from the music video for use in their Shorts, enhancing the auditory appeal of their content.
  • Collab: With this feature, users can produce videos alongside the music video, facilitating synchronized performances with friends or collaborators, seamlessly integrated within the Short.
  • Green Screen: Similarly, this tool empowers users to use the music video as a dynamic background for their Shorts, allowing for real-time reactions and interactions layered over the video content.
  • Cut: Offering a streamlined editing capability, this feature enables users to trim a five-second clip from the music video and seamlessly integrate it into their Shorts.

Also Read | YouTube Tips And Tricks: How Can You Watch Age Restricted Videos On YouTube Mobile App, Desktop Version

How To Use YouTube’s Remix Feature In Shorts

For users eager to explore the potential of YouTube’s Remix feature in creating Shorts, here is a step-by-step guide:

Step 1: Select the desired music video and tap the Remix button adjacent to the Share button to start the process.

Step 2: Navigate through the available tools – Sound, Green Screen, Cut, and Collab – and choose the desired option to complement your creative vision.

Step 3: Record your personalized video content, incorporating the selected tools, and proceed to publish your Short, showcasing your unique blend of creativity and musical expression.

Conclusion

YouTube’s Remix feature heralds a new era of innovation and collaboration within the realm of short-form video creation, empowering users to unleash their creativity and forge deeper connections through the universal language of music and visual storytelling.

Also Read | YouTube Tips And Tricks: How To Download YouTube Shorts Videos Offline

Categories
Apps Featured How To

How To Create Quick Replies In Google Messages On Android

In today’s fast-paced world, navigating the constant influx of messages requires efficient tools. Google Messages recognizes this need and offers “Quick Replies,” a feature that fosters swift and personalized communication.

Also Read: Google Gemini Advanced vs ChatGPT Plus: A Head-to-Head Comparison

Why Quick Replies?

Quick Replies are pre-written responses you can send with a single tap, saving you valuable time and effort. Whether you’re responding to a quick question, acknowledging a message, or expressing your thanks, Quick Replies allow for efficient communication without sacrificing personality.

Also Read: How To Create Stickers On Instagram With Cutouts

Setting Up Quick Replies:

  1. Open the Menu: Tap your profile picture in Google Messages and head to “Messages Settings.”
  2. Enable/Disable Suggestions: Toggle “Suggestions” on or off. When enabled, Google Messages will suggest context-based quick replies.
  3. Edit or Remove Existing: Tap existing suggestions to edit or delete them.
  4. Add Your Own: Tap the “+” icon and type your desired response. Hit “Save” to add it to your list.

Also Read: How To Withdraw Amazon Pay Balance To Your Bank Account: A Step-by-Step Guide

Additional Tips:

  • Google Messages might also suggest “smart replies” based on message content. These cannot be edited or saved as custom replies.
  • Specific steps and options may vary slightly depending on your device and Android version.

Also Read: How To Use Google Collections As Your Ultimate Web Archive

Remember:

  • Choose Quick Replies that are relevant to your frequent conversations.
  • Keep them concise and clear for easy understanding.
  • Update your list regularly to reflect your evolving communication needs.

By utilizing Quick Replies, you can effectively manage your message inbox while maintaining a personal touch in your communication. This feature empowers you to streamline your interactions and optimize your time spent messaging.

Categories
Apps Featured How To Info

How to Use Gemini AI as Your New Assistant on Android (Step-by-Step Guide)

Key Highlights

  • Download APK, access advanced AI assistant before official release.
  • “Hey Google” triggers Gemini, enjoy new chat-like interactions.
  • Reminders, media control, routines missing – consider needs before switching.

Google’s Gemini AI has arrived, shaking up the Android assistant scene with its conversational prowess. But before you jump ship, let’s explore how to use it and what to expect.

Also Read: How To Use Google Collections As Your Ultimate Web Archive

Downloading Gemini (a temporary workaround):

Note: As of now, Gemini’s official release is limited to the US. However, don’t worry! You can still access it from other regions, but with an extra step:

  1. Download the Gemini APK file from a trusted third-party site like apkmirror.com.
  2. Grant permission to install apps from unknown sources in your device settings.
  3. Open the downloaded APK, install it, and embark on your Gemini journey.

Also Read: Google’s AI: Bard or Gemini? What You Need To Know About The Rebranding

Trading Google for Gemini:

Once set up, Gemini becomes your default assistant. “Hey Google” now triggers Gemini, taking over power button and gesture shortcuts too. But remember, this workaround is temporary – an official release is just around the corner.

Also Read: Have You Tried Google’s ImageFX Yet? Learn How To Use This New AI Image Generator

A Chatbot, Not a Replacement:

While Gemini shines in conversation, it’s different from your usual voice assistant. Certain beloved features won’t work:

  • Media Integration: Say goodbye to controlling podcasts, news, or third-party music apps for now.
  • Routines: Automated routines remain the domain of Google Assistant.
  • Reminders: Time to find another way to manage your tasks and to-dos.
  • Interpreter Mode: Need multilingual assistance? Google Assistant is still your champion.

Also Read: How To Remove An Image Background On Windows 11

Can You Go Back?

Absolutely! If Gemini doesn’t click, simply uninstall the app, and Google Assistant seamlessly reinstates itself as your digital sidekick.

Also Read: Is Google’s Gemini A Better ChatGPT Alternative? Let’s Find Out!

Final Verdict

Gemini offers a glimpse into the future of conversational AI, but it’s still evolving. Be aware of its limitations before making the switch. Keep an eye out for the official release for wider accessibility and potential feature updates. Remember, the choice is yours – embrace the future with Gemini or stick with the familiar Google Assistant.

Categories
Featured How To Laptop

Pre-Reserve Your Samsung Galaxy Book 4 Series In India: Here’s How

Key Highlights

  • Samsung Galaxy Book 4 series debuted in December last year
  • All models feature a backlit keyboard
  • Galaxy Book 4 Pro offers 14-inch and 16-inch display options

Samsung recently announced its latest-generation Windows laptop: the Galaxy Book4 series globally. Now, the company has initiated pre-reservations for these devices in India. Interested customers can avail themselves of this opportunity by visiting Samsung’s official website or using the Shop app. Also Read | iPhone 15 Pro Max Vs Samsung Galaxy S23 Ultra: Comparison

Details Of Galaxy Book4 Pre-Reserve

Pre-reservations for the Galaxy Book4 series are currently live on Samsung’s official website and Shop app. Those who opt for pre-reservation will gain early access to the devices along with exclusive special offers.

How To Pre-Reserve Galaxy Book4

Step 1: Ensure you have a token payment of Rs. 1,999 ready for the pre-reservation process.

Step 2: Decide on the channel through which you want to make the payment. You can choose from options like Samsung.com, Samsung Exclusive Stores, leading retail outlets, or select online portals.

Step 3: Visit the Samsung website or use the Samsung app to begin the pre-reservation process.

Step 4: Look for the Galaxy Book4 Pre-reserve banner on the website or app interface.

Step 5: Once you locate the banner, tap on it to proceed with the registration process.

Step 6: Fill in the necessary details as prompted. This may include personal information, contact details, and payment information.

Also Read | Samsung Galaxy Book 3 Pro Vs Lenovo Yoga Slim 7i Carbon: Which Should Be Your Bet?

Step 7: Proceed to make the token payment of Rs. 1,999 through your preferred payment method.

Step 8: After completing the payment, confirm your reservation to secure your spot for the Galaxy Book4.

Step 9:  Await confirmation of your pre-reservation from Samsung. You may receive an email or notification confirming your successful pre-reservation.

Upon purchasing your Galaxy Book4 device, you’ll be eligible to receive benefits worth Rs. 5,000 as part of the pre-reservation offer.

Galaxy Book4 Series: Specifications

SpecificationsSamsung Galaxy Book 4 ProSamsung Galaxy Book 4 Pro 360
Display14-inch, 16-inch16-inch
Display TypeAMOLED WQXGA+AMOLED WQXGA+
Resolution1,800 x 2,880 pixels1,800 x 2,880 pixels
Refresh Rate120Hz120Hz
Brightness400 nits400 nits
Processor OptionsIntel Core Ultra 7, Intel Core Ultra 5 (Intel Evo Edition)Intel Core Ultra 7, Intel Core Ultra 5 (Intel Evo Edition)
GraphicsIntel ArcIntel Arc
RAMUp to 32GBUp to 32GB
StorageUp to 1TB Up to 1TB
Battery Capacity63Wh (14-inch), 76Wh (16-inch)76Wh
Charging Support65W wired65W wired
ConnectivityThunderbolt 4 ports, USB Type-A port, HDMI 2.1 port, MicroSD slot, headphone microphone combo portThunderbolt 4 ports, USB Type-A port, HDMI 2.1 port, MicroSD slot, headphone microphone combo port
Additional Features360-degree hinge, S Pen bundled

The Galaxy Book4 series boasts a new intelligent processor, delivering a more vibrant and interactive display alongside a robust security system. These advancements mark the beginning of a new era of AI PCs, promising ultimate productivity, mobility, and connectivity. Notably, these enhancements not only elevate the device itself but also enhance the entire Samsung Galaxy ecosystem, driving forward the PC category and aligning with Samsung’s vision of AI innovation for present and future needs.

Also Read | Lost Your Samsung Smartphone? Learn How To Track It Using Find My Mobile And Find My Device