Categories
Apps Featured How To

Want A Blue Tick On Facebook? Here’s How To Get Verified Today

Key Highlights

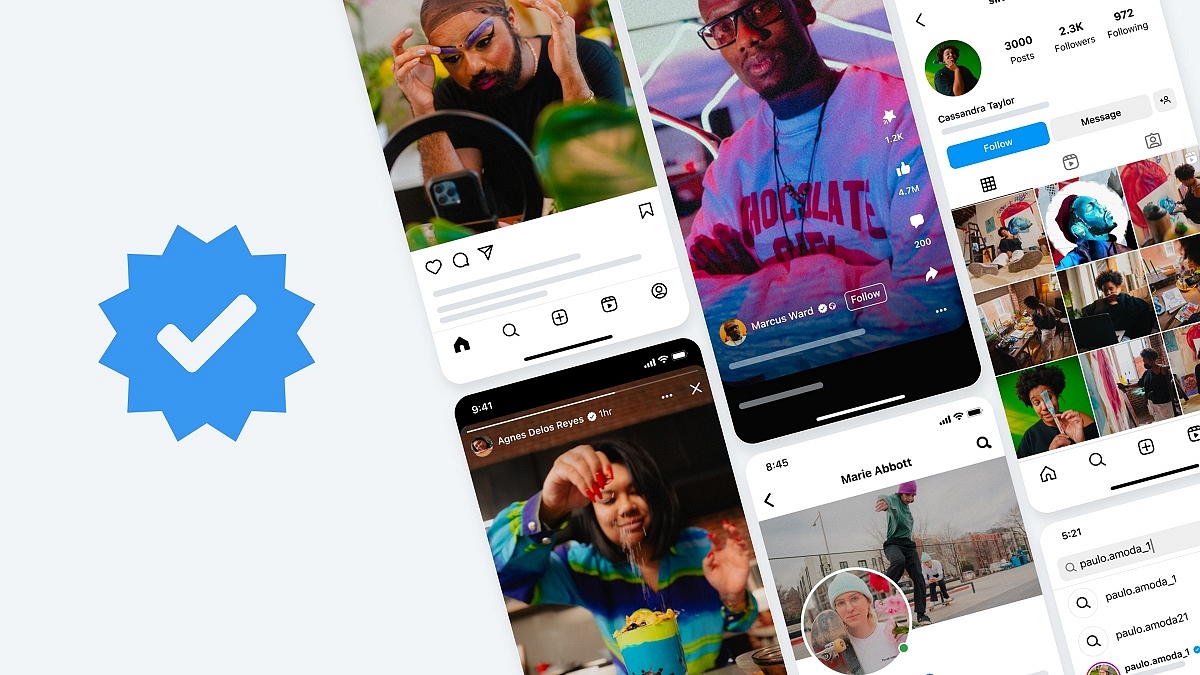
  • Meta Verified now available in India
  • It is a subscription bundle for creators on Instagram and Facebook
  • On Android and iOS, Meta Verified is priced at Rs. 699

Meta has made a significant announcement regarding the expansion of Meta Verified availability to several countries, including India. This service allows Instagram and Facebook users in India to obtain the blue tick verification badge by subscribing to a monthly plan priced at Rs. 699 for iOS and Android.

Additionally, Meta plans to introduce a web purchase option in the coming months, offering a monthly subscription price of Rs. 599. As Meta Verified becomes accessible in India, users can follow these steps to opt for the service on Facebook. Also Read | How To Get Verified On Instagram: Here’s A Step-By-Step Guide

How To Opt For Meta Verified And Obtain Blue Tick On Facebook

Step 1: Access the Facebook app and go to your main profile. Tap the menu icon located at the top right corner.

Step 2: After selecting “Settings and privacy,” scroll down and touch “Settings.”

Step 3: Within the settings menu, tap on “Accounts Center” and then choose “Meta Verified” under the Account Settings section.

Step 4: You will see the phrase “Meta Verified available” displayed beneath your name and profile picture if it is available for your account.

Step 5: Review the list of benefits provided and tap “Continue” to proceed.

Step 6: Confirm your payment details and tap “Pay now” to complete the transaction.

Step 7: You will be prompted to undergo the verification process and upload your identification document.

Also Read | How To Edit Facebook Photos Via Mobile, Desktop App Directly

Step 8: Select the profile you wish to verify and tap “Confirm your identity.”

Step 9: Update your name if necessary, and then save the changes by tapping “Save.”

Step 10: Select the next step in the process and tap “Next” to continue.

Step 11: Choose the type of identification you will be using and tap “Next.”

Step 12: Read the recommendations for ID confirmation and tap “Take photo.”

Step 13: Verify that the information on your ID is clearly visible and tap “Next.” If the information is unclear, retake the photo by tapping “Retake.”

Step 14: Capture a photo of the back of your ID and tap “Take photo.”

Step 15: Ensure that the information on the back of your ID is clearly visible, and then tap “Submit.” If needed, retake the photo by selecting “Retake.”

Step 16: Wait for your ID to upload, which may take some time, and then tap “Finish.”

By following these steps, Facebook users in India can now obtain the highly sought-after blue tick verification badge through Meta Verified. Stay connected and enjoy the benefits of verified status on the platform.

Also Read | How To Get Blue Tick/Verified on Twitter – Step By Step Process and Eligibility Criteria Explained

Categories
Apps Featured How To

WhatsApp Channels Message Broadcast Tool Launched: What Is It? How To Use?

Key Highlights

  • WhatsApp Channels message broadcast feature released
  • Similar to Telegram broadcast feature
  • Channels isn’t end-to-end encrypted

WhatsApp is consistently working on providing a superior messaging experience to the masses. After launching multiple chat-centric features, the brand has now released a new broadcast feature that will definitely elevate the messaging experience on Android and iOS devices. What is the new broadcast feature introduced by WhatsApp and how does it work? Below are the details:

Also Read: WhatsApp Chat Lock Privacy Feature Released For Android, iOS: How To Lock WhatsApp Chats Using This New Feature?

WhatsApp Channels Message Broadcast Feature: What Is It? How To Use?

WhatsApp Channels is a one-way broadcast tool that will allow users to get important updates from organizations, groups, or users. The latest message broadcast feature introduced by WhatsApp has been already available with Telegram and is quite popular amongst the masses.

With the WhatsApp Channels, group admins will be able to share different types of content easily. Admins will be allowed to broadcast media files including images and videos. Also, Channels will allow users to broadcast or share stickers and polls.

WhatsApp is creating a new tab called Updates where this Channels tool can be accessed. A searchable directory is also in the works where users will be able to find channels based on their interests including sports and others.

Channel admins can send invite links via e-mails or chats so that interested users can join the Channel. Also, the Status updates of the channels will be shown separately from the contacts status window.  Additionally, WhatsApp has revealed that the channel’s history will be stored on the brand’s servers for up to 30 days. Going forward, WhatsApp plans to make the Channel updates disappear faster for the users.

Also Read: WhatsApp Edit Message Feature Is Now Available For Android And iOS: How To Correct WhatsApp Message Spelling Errors And More

Who All Can Use WhatsApp Channels?

The WhatsApp Channels message broadcast feature is currently released in limited markets only. WhatsApp users in Colombia and Singapore can use the Channels features. The company is expected to roll out Channels messaging services to the remaining regions including India in the coming months.

Also Read: WhatsApp Screen Sharing Feature For Video Calls In Works: How To Share WhatSApp Screen on Android?

Categories
Apps Featured How To

How To Sign In To Your Google Workspace Accounts Without Passwords: A Step-by-Step Guide

Key Highlights

  • Google began rolling out passkeys for personal Google Accounts
  • Users of Google Workspace can now permit users to log in using passkeys
  • Passkeys are two times faster than passwords, according to Google data

Google has recently extended its passkey feature from personal Google Accounts to include Google Workspace and Google Cloud accounts. Given the increasing vulnerability of passwords to theft and phishing attacks, passkeys offer a secure and simpler alternative for users. Passkeys can be authenticated using fingerprints, face recognition, or other screen locks, ensuring convenient access across various devices such as phones, laptops, and desktops. Also Read | Struggling With Message Composition? Let Google Magic Compose’s AI Assist You! Here’s How

Passkeys adhere to a common standard and are compatible with numerous browsers and operating systems, including Android, MacOS, iOS, and Windows. By eliminating the need to memorize passwords, passkeys significantly reduce the risk of theft. According to Google’s data, compared to traditional passwords, passkeys prove to be twice as fast and four times less error-prone. Recognizing their benefits, Google has expanded the availability of passkeys to businesses, schools, and governments.

Passkeys For Google Workspace Users

Google has commenced the rollout of passkeys for Google Workspace users, along with providing controls for Workspace administrators. This deployment will be completed over the coming weeks, ensuring all users gain access to this new feature. Once enabled, Workspace admins can authorize users within their organization to sign in using passkeys.

How To Enable Passkey For Workspace Account Users

By default, the passkey feature is not activated for Workspace users, requiring them to continue using passwords. However, Workspace admins have the option to enable passkeys as a two-step verification method. To allow users in your organization to skip passwords and adopt passkeys for sign-in, follow the step-by-step guide outlined below:

Step 1: Sign in to your Google Admin console.

Step 2: Navigate to the Menu in the Admin console and select Security.

Step 3: Choose Authentication and then Passwordless.

Step 4: Opt for Skip passwords.

Step 5: To enable users to bypass password challenges, select the “Allow users to skip passwords at sign-in by using passkeys” checkbox.

Step 6: Save your changes. That’s all!

Also Read | Running Low On Google Storage? Five Best Techniques To Clear Your Gmail Space

Categories
Featured How To Smart Watch

iOS Hacks: How To Activate And Use Mobile/Cellular Services On Apple Watch For Calling And Messaging

Key Highlights

  • Cellular and mobile services can be used on Apple Watch
  • One can make calls, reply to messages using Apple Watch
  • Both Apple Watch and iPhone should have the latest firmware version

Apple has been improving the user experience with all its products including iPhones, iPads, Apple Watch, and others. With the Apple Watch series, the company has introduced a myriad of health-centric features which allow users to keep track of their health and also get access to medical services. Using the integrated features with all Apple Watch models is an easy process. One can also access cellular services on Apple Watch smartwatches.

Once the mobile or cellular services are activated on Apple Watch, it becomes easy to make calls, reply to messages, and receive incoming calls/messages notifications. It doesn’t require the users to have the iPhone handy to use these services if the mobile networks have been activated on the smartwatch. If you have purchased a new Apple Watch model and are planning to set up cellular services then this article will guide you with the steps.

Also Read: Use ChatGPT On Apple Watch? Here’s The Step-By-Step Guide

Steps To Activate Mobile/ Cellular Services On Apple Watch (Compatible Models)

Step 1: Unlock your iPhones and go to the app drawer

Step 2: Launch the Apple Watch application on your respective iPhones

Step 3: Click on the My Watch option

Step 4: Select the Cellular option

Step 5: You will now need to tap on the Set Up Cellular tab

Step 6: Now, follow the on screen instructions. In some cases, users might need to get in touch with the carrier providers for additional help

Notably, there are a bunch of pointers that you need to keep in mind before proceeding with the mobile network/ cellular services activation on the Apple Watch.

The most important factor that one needs to check before cellular services activation on the Apple Watch is the firmware version. Both Apple Watch and iPhone being paired need to run on the latest iOS version for a seamless experience with mobile services.

Users also need to check if they have an eligible cellular service plan with any supported carrier. Notably, the iPhone and Apple Watch being paired should have the same carrier network during the setup process. Also, carrier services for Apple Watch might not be accessible in all regions so crosschecking this information is important.

Also Read: Google Maps On Apple Watch: How To Setup And Use Google Maps For Navigation On Apple Watch

Categories
Featured How To Mobile

Want To Share Your iPhone Screen On FaceTime? Here’s How You Can Do It

Key Highlights

  • FaceTime’s screen-sharing feature provides users with the ability to share important content with others during video calls on Apple devices
  • Knowing how to share your screen and manage screen sharing on FaceTime is crucial
  • Users can also take over someone else’s screen sharing

FaceTime, the default video calling app on Apple devices such as iPhones, iPads, and Macs, continues to evolve and enhance its features to compete with popular platforms like Zoom and Teams. One of its recent updates includes the addition of screen-sharing capabilities, allowing users to share presentations, sheets, or documents during work or personal calls. This article provides a detailed guide on how to share your screen on FaceTime using an iPhone. Additionally, it explains how to stop screen sharing and take over someone else’s screen sharing. Also Read | Magnify Anything, Anywhere: Learn How To Use Your iPhone As A Magnifying Tool

How To Share Your Screen On FaceTime On iPhone

To share your screen during a FaceTime call on your iPhone, follow these simple steps:

Step 1: Initiate a FaceTime call with the person you wish to share your screen with.

Step 2: While on the call, locate the Share Content icon next to the Video option on the FaceTime screen, and tap on it.

Step 3: Select the “Share My Screen” option.

Step 4: A 3-second timer will appear to notify you that the screen sharing will begin shortly.

Step 5: Carry out your desired actions on the device. The recipient will be able to see your screen.

How To Take Over Screen Sharing From Someone Else

If someone else is sharing their screen during a FaceTime call and you wish to take over, follow these steps:

Step 1: Join the call in progress that you want to take control of.

Step 2: Locate and tap on the Share Content button within the FaceTime call interface.

Also Read | Incoming Call Not Showing On iPhone? How To Fix Caller ID Incoming Call Issue On iPhone?

Step 3: Choose the “Share My Screen” option.

Step 4: Select the “Replace Existing” option.

Step 5: You will now have control over the screen sharing.

Steps To Stop Sharing Screen On FaceTime

To stop sharing your screen on an iPhone or iPad during a FaceTime call, follow these steps:

Step 1: While on the call, locate and click on the Share Content button at the top of the screen.

Step 2: By doing so, the other participants in the call will no longer be able to see your screen. That’s all!

Also Read | Apple New ‘NameDrop’ Feature for iPhones: What Is It? Steps To Use

Categories
Apps Featured How To

Google Play Country Settings Modification: How To Change Country Settings In Google Play Using Android For Payments And Other Apps

Key Highlights

  • Google Play country settings are must for payment and other services
  • Correct country settings are required to view apps of the same region
  • Changing country settings is required if your relocate to a new location

If you own a smartphone that is powered by Android OS, you get access to a wide range of Google services and tools. One of the primary reasons for the Android phone’s popularity amongst consumers is the option to download a variety of third-party apps from the Play Store. Be it games, OTT apps, health, and lifestyle, Google Play Store is the hub to download and install such required apps.

When you set up any Android smartphone, you get the option to set the country and language. Once you setup the designated country and language settings, the apps will be shown depending on the region on the Play Store. Just for reference, Google Play country settings remain the same even if you move to a new country.

Google always advises its users to change the Google Play country settings if they are relocating to a new country. This will keep any issues related to payment apps at bay. Only after the country settings have been changed, one will be able to use the apps including payment and others. If you wish to change the country settings of your location then the following are the steps you need to follow:

Also Read: Google Pay Expands Payment Options In India With UPI Payments Using RuPay Credit Cards

How To Change Google Play Country Settings Manually

Step 1: Launch Google Play Store application on your Android handsets

Step 2: Tap the profile option that is located on the top right corner

Step 3: Click on the Settings menu

Step 4: Select the “General” option

Step 5: Now, tap on the Account and device preferences

Also Read: Gmail Tips And Tricks: How To Secure Your Google Account With Two-Factor Authentication

Step 6: Click on the Country and profiles menu

Step 7: You will now need to select the country settings that you wish to add to your Google account

Step 8: Complete the on-screen instructions. This will let you add a payment method for the required country.

Step 9: It could take up to 48 hours for the country settings to update on your Google Play account

It is worth mentioning that once the country has been added to your Google Play settings, you can easily toggle between the options when you revisit the countries. Also, only once in a year, a country can be added to the Google Play Settings.

Also Read: Running Low On Google Storage? Five Best Techniques To Clear Your Gmail Space

Categories
How To Telecom

Keep Spam At Bay: Here’s How To Activate DND On Airtel

Key Highlights

  • Activate DND on your Airtel connection to effectively reduce spam voice calls and text messages
  • You can choose from multiple convenient methods to activate DND on Airtel, including SMS, IVR, and more
  • Activating DND is completely free of charge, and you won’t incur any fees from your telecom service provider

Receiving unwanted calls and messages from unknown senders can be a nuisance. Many people waste valuable time dealing with these unsolicited messages. If you’ve had enough of spam and want to stop it, activating the Do Not Disturb (DND) feature on your Airtel smartphone is the solution. In this article, we will explain what DND is, how it works, and provide step-by-step instructions for activating it on Airtel. Also Read | How To Use Airtel Xstream To Watch Live TV And On-Demand Content

Steps To Activate DND On Airtel Through SMS

To activate DND on Airtel via SMS, follow these steps:

Step 1: Type “START 0” and send it to 1909.

Step 2: You will receive an SMS confirming your request for DND activation.

Step 3: To finish the activation process, adhere to the directions in the SMS.

How To Activate DND On Airtel Via IVR

To activate DND on Airtel using Interactive Voice Response (IVR), do the following:

Step 1: Dial 1909 from your Airtel number.

Step 2: Follow the instructions provided to activate DND on your number.

Also Read | How To Stop/ Deactivate Airtel, Vodafone, BSNL, JIO SIM Flash Messages On Android, iOS?

How To Activate DND On Airtel Online

To activate DND on Airtel online, follow these steps:

Step 1: Visit the Airtel website and log in to your account using your registered mobile number.

Step 2: Click on the “Do Not Disturb” tab.

Step 3: Select “Full DND” if you want to block all spam calls and text messages.

Step 4: Follow the guidance given to turn on DND for your number.

After activating DND, it may take up to seven working days for it to become fully effective. During this period, you may still receive some promotional calls and messages.

Calls and messages from people you know or from vital services like your bank or healthcare providers are not blocked by DND.  You need to manually register separately with each of them to continue receiving their communications. You won’t be charged anything by your telecom service provider if you choose to activate DND.

By following these steps and activating DND on your Airtel smartphone, you can enjoy a spam-free communication experience while saving time and avoiding unnecessary disruptions.

Also Read | Want To Block Unwanted Calls? Here’s How To Activate DND On Jio

Categories
Apps Featured How To

Gmail Vacation Replies: How To Create And Set Replies For Vacations On Gmail?

Key Highlights

  • Gmail is one of the widely used emailing services
  • One can set up Vacation replies on Gmail
  • Vacation reply messages can be set using Gmail on PC and laptops

Gmail is offering several user-friendly features that is enhancing the emailing experience for both professional as well as general users. For users going offline or a vacation, Gmail has one dedicated feature that allows them to reply to emails even without accessing the internet. With the Gmail vacation feature, one can easily set replies that will notify the sender that the user is unreachable and will be able to send a response once back in the network zone.

How To Setup Vacation Reply On Gmail

Step 1: Launch the Gmail application on your laptop or PC

Step 2: Select the Settings (gear icon) which you can locate on the top right corner

Step 3: From the list of options select the “Vacation responder” tab

Step 4: Click on the “Vacation responder on” option

Step 5: Now, select the date range for which you are going on vacation and won’t be available for replies

Step 6: You will also need to add the subject along with the message that the sender will receive as a respond

Step 7: You can select the checkbox if you wish only your contacts to see the vacation reply

Step 8: Tap on Save Changes option at the bottom of the homepage

It is worth mentioning that once a vacation reply is set, the receiver will also get the Gmail signature at the bottom of the message. Also, once the vacation mode is on a banner will float across the top of the inbox which will show the subject of the response set for vacation. Additionally, the vacation replies will be active once the timer is set. The responses will be sent starting at 12:00 AM on the beginning date and the last reply will be sent at 11:59 PM on the end date.

Steps To End Vacation Response On Gmail

In order to turn off the vacation response feature, all you need to do is select the End now option. You will need to visit the Gmail settings and head to the Vacation mode option similar to the setup up process.

Categories
Apps Featured How To

Google Unveils New Feature In Meet: Here’s How To Use Viewer Mode

Key Highlights

  • Google rolling out Viewer Mode in Meet
  • Meet users will benefit from having an easier time organizing lengthy meetings
  • To watch their video, hosts, and co-hosts can convert viewers into contributors

Google Meet is set to launch an exciting new feature called Viewer Mode. This recent announcement by Google aims to create a more focused environment during large meetings by minimizing distractions. In the upcoming update, participants can be designated as “viewers” when creating Calendar invites. Viewers are meeting participants who are unable to share their audio or video throughout the session, according to a blog post on Google Workspace Updates. Also Read | Google Meet Hacks: How To Change/ Update Google Meet Name Using A Laptop Or PC?

Maintaining Focus In Large Meetings

One of the primary goals of introducing the viewer mode in Google Meet is to reduce disruptive audio interruptions and help participants concentrate on the speaker and the meeting’s content. By designating participants as viewers, Google hopes to create a more engaging and distraction-free meeting experience.

Transitioning Viewers To Contributors

Google understands the need for collaboration, even in larger group settings. To accommodate this, hosts have the flexibility to transition viewers into contributors when it’s time for them to actively participate. Once designated as contributors, viewers gain access to Meet features like Q&As and polls. However, it’s important to note that support for in-meeting chat and emoji reactions for viewers will be added in the future.

Also Read | How To Download Google Meet On Laptop: Here’s The Step-By-Step Guide

Step-by-Step Guide To Set Up Viewer Mode

To use the viewer mode feature in Google Meet, follow these simple steps during the setup of your video call:

Step 1: Access the video call options while setting up a Google Meet session.

Step 2: Locate the ‘Guests’ section and select the ‘Everyone is a viewer by default’ option.

Step 3: Once chosen, Google Meet automatically turns viewers into contributors, enabling them to actively engage in the meeting.

Step 4: From the same section, you can also assign co-hosts and contributors by selecting them accordingly.

With the upcoming launch of viewer mode, Google Meet aims to enhance focus, reduce distractions, and promote collaboration during video meetings. By utilizing the simple setup process and taking advantage of the viewer and contributor roles, users can create engaging and productive virtual gatherings. Whether it’s a large team meeting, a training session, or a conference, Google Meet’s viewer mode empowers hosts to control the meeting environment while ensuring everyone can actively participate.

Also Read | Want To Create A New Group For Google Meet Calls? Here’s How To Do It

Categories
Featured Gaming How To

Tired Of Audio Warnings In BGMI Simulation Game? Here’s How To Get Rid Of Them

Key Highlights

  • BGMI is now available for both Android and iPhone users in India
  • The audio simulation warning in BGMI can become annoying, especially during consecutive matches
  • Players can hide the accompanying warning message that appears at the start of each match

Battlegrounds Mobile India (BGMI) has made its successful return to Android mobile phones and iPhones in India, offering the same exciting features and gameplay as before. However, for some players, the audio simulation warning that leads to each match can become bothersome, particularly during consecutive gameplay sessions. If you’re looking to remove this simulation game warning, follow our step-by-step guide below. Also Read | Best Game Settings For BGMI, PUBG For A Premium Gaming Experience On Android, iOS

How To Disable Voice Simulation Warning

To disable the voice simulation warning system in BGMI, follow these simple steps:

Step 1: Launch Battlegrounds Mobile India on your Android mobile phone or iPhone.

Step 2: On the home page, locate and tap the arrow icon situated at the bottom right corner to access the menu.

Step 3: In the menu, select “Settings.”

Also Read | 100+ Stylish BGMI Names For Boys And Girls: Here’s How To Change Clan Name

Step 4: Navigate to the “Privacy & Social” section.

Step 5: Look for the “Spawn Island Broadcast” option and choose the “Disable” button.

Step 6: Congratulations! You’ve successfully disabled the voice simulation warning.

How To Manage Warning Message

It’s important to note that disabling the voice simulation warning will not eliminate the accompanying message that appears at the start of each match. The message reads, “Battlegrounds Mobile India is not a real-world based game, but a survival simulation game set in a virtual world.” However, you can easily hide this message by pressing the “Ok” button to hide the warning message promptly.

By following these simple instructions, you can eliminate the audio simulation warning in Battlegrounds Mobile India and enjoy uninterrupted gameplay. Remember that while the warning message may still appear at the beginning of each match, you can quickly dismiss it by pressing “Ok.”

Also Read | BGMI Strikes Back: What’s New In The Game? A Closer Look At The Changes