Categories
Featured How To Telecom

Want To Block Unwanted Calls? Here’s How To Activate DND On Jio

Key Highlights

  • Activate DND on your Jio connection to effectively reduce spam voice calls and text messages
  • You can choose from multiple convenient methods to activate DND on Jio, including SMS, IVR, and more
  • Activating DND is completely free of charge, and you won’t incur any fees from your telecom service provider

Do Not Disturb or DND is a service offered by telecom service providers in India, including Jio, to help customers block unwanted calls and messages from telemarketers and advertisers. This free service is designed to reduce spam and safeguard privacy. In this article, we will guide you through the process of activating DND on your Jio connection. Also Read | Want To Install Jio TV On Your Smartphone? Here’s The Step-By-Step Guide

Methods To Activate DND On Jio

Three convenient ways to activate DND on Jio are via SMS, IVR, or online. Follow the steps below:

Activating DND via SMS

Step 1: Open the text messaging app on your phone and compose a new message.

Step 2: Type “START 0” in the text box and send it to 1909.

Step 3: You will receive an instant SMS confirming your request for DND activation.

Step 4: Follow the instructions provided in the SMS to complete the activation process.

Also Read | Want To Port Your Vodafone Number To Jio? Here’s How To Do It

Activating DND via IVR

Step 1: Dial 1909 from your registered Jio number.

Step 2: Follow the instructions given through the interactive voice response (IVR) system to activate DND on your number.

Activating DND via Jio Website

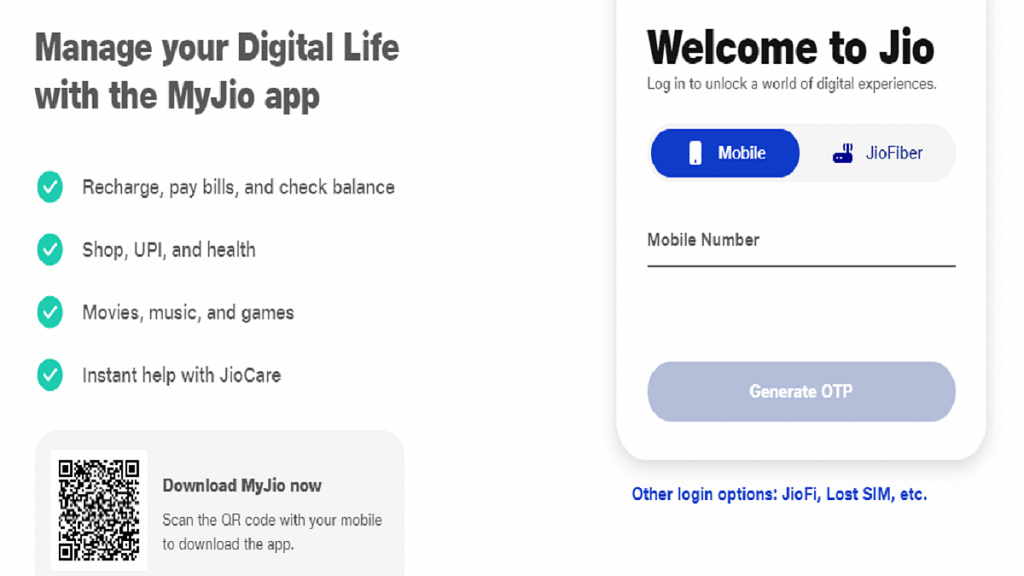
Step 1: Visit the Jio website or open the My Jio app and log in using your mobile number.

Step 2: Navigate to the Settings tab and select the “Do Not Disturb” option.

Step 3: Follow the instructions provided to activate DND on your number.

Activating DND Using MyJio App

Step 1: Launch the MyJio app on your device and log in using your registered Jio mobile number.

Step 2: Tap on the Menu icon and go to “Profile & other Settings.”

Step 3: Select “Do not Disturb” from the options.

Step 4: Tap on “Set Preference.”

Step 5: Customize your preferences for call and SMS blocking and submit the request.

Important Points To Consider When Activating DND

When activating DND on your Jio mobile number, remember the following:

  • DND may take up to seven working days to become fully effective. During this period, you might still receive some promotional calls and messages.
  • DND does not block calls and messages from your contacts or essential services such as banks or healthcare providers. You will need to register separately with each of them to continue receiving their communications.
  • Activating DND is free of charge, and your telecom service provider will not impose any fees for this service.

Also Read | JioCinema Brings In HBO And WB Shows With The Launch Of Premium Subscription Plan: See Price

Categories
Featured How To Mobile

Lost Your Samsung Smartphone? Learn How To Track It Using Find My Mobile And Find My Device

Key Highlights

  • With the help of Find My Mobile and Find My Device, you have the tools to track and recover your lost Samsung phone
  • Find My Mobile is specifically designed to locate and track lost or misplaced Samsung smartphones
  • Enable these features in advance to be prepared in case of any unfortunate incidents

Losing or misplacing your Samsung smartphone can be a worrisome experience, but don’t worry, we’ve got you covered. In this article, we will explore different methods to help you locate your lost Samsung phone. By following the steps outlined below, you can trace its last location using Google Maps, activate ringing even if the phone is on silent mode, and remotely lock it. Let’s dive in and find out how you can retrieve your lost Samsung smartphone. Also Read | Here’s How You Can Recover Lost Or Deleted Data In Windows 11 Laptops, PCs

How To Find Your Lost Samsung Smartphone Through Find My Mobile

Samsung’s proprietary tool, Find My Mobile, is specifically designed to locate and track lost or misplaced Samsung smartphones. This tool can track your device, even if it is not connected to the internet, by using your Samsung account. Here’s how you can use it:

Step 1: Visit Samsung’s official SmartThings website on a phone or laptop.

Step 2: Sign in to the website using the same Samsung account associated with your lost phone.

Step 3: From the left menu, select your lost device.

Step 4: Wait for the website to display your Samsung phone’s last known location.

Step 5: If the device is online, you can track it in real-time; otherwise, you’ll only see its last location.

Step 6: When the battery reaches 20 percent and the “Send last location” feature is enabled, the device will automatically send its location to the Find My Mobile server to alert you.

Step 7: The “Track location” feature, when enabled, provides location alerts every 15 minutes, and the tracking history is stored for seven days.

Step 8: Even if the lost or stolen Samsung phone is offline and lacks internet access, Find My Mobile can still show its location if the Offline finding feature is enabled. This feature uses other Samsung devices via Bluetooth to create a chain and notify you of the phone’s location.

Also Read | How To Find Or Track Lost Apple AirPods Easily: Step By Step Guide

How To Find Your Lost Samsung Smartphone Using Find My Device

If you didn’t enable the Find My Mobile feature on your Samsung phone, you can use Google’s Find My Device service. Follow these steps to begin the search for your lost Samsung smartphone:

Step 1: Visit Google’s official Find My Device website or download the app on another Android phone.

Step 2: Sign in using the same Google account associated with your lost phone.

Step 3: Once signed in, you will be able to view its location as the tool automatically activates location access and mobile data.

Note that Find My Device does not offer an offline tracking feature at present. However, it provides several options to safeguard your data. These include resetting the data, signing out of the Google account, and playing a loud sound to help locate the phone when it is nearby.

Also Read | Tecno Phantom V Fold Vs Samsung Galaxy Z Fold 4: Price, Full Specs Comparison

Categories
Featured How To Mobile

Here’s How To Change Icon Colors On MIUI Launcher With Material You

Key Highlights

  • MIUI 14 features a covertly added function that lets users change the colors of the icons on the MIUI Launcher
  • Users can choose from Blue, Green, Purple, and Brown colors
  • For some reason, the option is included under the Icon size settings

With the introduction of Google’s Material You design guidelines, Android received a much-needed visual revamp, refreshing its appearance from the previous Android 11 version. Various OEMs swiftly incorporated the bold UI design into their own Android skins, adding unique customizations.

While Material You has gained widespread support across almost every Android skin, one exception is MIUI. Xiaomi’s custom skin has yet to offer a complete system-level integration of Material You, with most of its apps still retaining their appearance from a couple of years ago. However, this is gradually changing. Also Read | Magnify Anything, Anywhere: Learn How To Use Your iPhone As A Magnifying Tool

MIUI 14 Unveils Icon Color Customization

The Android 13-based MIUI 14 features a covertly added function that lets users change the colors of the icons on the MIUI Launcher. Users can choose from Blue, Green, Purple, and Brown, and once a color is selected, supported app icons on the home screen and app drawer immediately adopt a more cohesive look, similar to Google Pixels and other Android skins.

The Limitations: Unsupported Icons And Wallpaper Palette

It’s worth noting that not all app icons are currently supported, so those seeking a true Material You experience may prefer to exclude unsupported icons from the home screen.

However, one particular aspect of Xiaomi‘s implementation is that the icon colors do not respond to the wallpaper palette. Instead, users are limited to selecting preset colors, meaning manual wallpaper changes are necessary to align icon colors with the current wallpaper.

Also Read | Gmail Help Me Write Feature: What Is It? How To Use?

How To Change Icon Colors On MIUI Launcher: Step-by-Step Guide

Despite these quirks, changing the color of home screen icons on MIUI Launcher is possible by following these steps:

Step 1: Long press on the home screen.

Step 2: Tap the settings icon.

Step 3: Select “More.”

Step 4: Adjust the “Background color” setting under “Icon size” by navigating there.

Keep in mind that this option is only available on MIUI 14 based on Android 13, as older versions do not include this feature.

Also Read | How To Upload And Use Animated Emojis As Telegram Profile Picture On Android, iOS

Categories
Apps Featured How To

WhatsApp Screen Sharing Feature For Video Calls In Works: How To Share WhatSApp Screen on Android?

Key Highlights

  • WhatsApp Screen sharing feature in works
  • Available with Android 2.23.11.19 beta build
  • Will allow sharing different content types during video calls

WhatsApp has been developing its ecosystem to offer a premium messaging experience to the masses. The brand recently released two of the most awaited chat features including the Chat Lock and Edit and is now working on another highly demanded feature. WhatsApp is now reportedly bringing the screen sharing feature which will cater to the online conferencing requirements.

Also Read: WhatsApp Edit Message Feature Is Now Available For Android And iOS: How To Correct WhatsApp Message Spelling Errors And More

WhatsApp Screen Sharing Feature Launching Soon?

WhatsApp’s upcoming feature will allow users to share their screens during video calling. This new feature has been spotted in the testing phase by WABetaInfo. The publication has revealed that the latest screen-sharing feature for WhatsApp has already made it to the beta build of its Android app. The WhatsApp beta build 2.23.11.19 comes with this new screen-sharing feature and can be installed via Google Play Store.

The new screen-sharing feature is a great tool for video conferencing on WhatsApp and users will now be able to share different types of content with just a few taps. With this new messaging feature, WhatsApp apparently plans to simplify the process of sharing content live during an ongoing video call.

As mentioned, WhatsApp has currently released this feature for the Android beta build 2.23.11.19. Going forward, it could be available for the iOS beta users as well. The brand is yet to roll out the stable version of this screen-sharing feature which we expect would be done in a phased manner. However, it would be difficult to confirm the exact timeline for the availability of the stable WhatsApp screen-sharing feature.

Also Read: WhatsApp Chat Lock Privacy Feature Released For Android, iOS: How To Lock WhatsApp Chats Using This New Feature?

WhatsApp Screen Sharing Feature: How To Use?

Going by the screenshot shared by WABetaInfo, a dedicated icon will be added at the bottom of the video call page alongside the remaining calling tools. Once a user clicks on the screen sharing icon a quick permission menu will pop up on the screen that will allow users to share the screen.

One can control what all content will be shared or is visible to the contact/group where the screen is being shared. Also, one would need a single tap to stop screen sharing during ongoing WhatsApp video calls.

Also Read: WhatsApp Sticker Maker Tool Launching Soon: How To Create Stickers Directly Using WhatsApp App

Categories
Apps Featured How To

Struggling With Message Composition? Let Google Magic Compose’s AI Assist You! Here’s How

Key Highlights

  • Magic Compose was introduced by Google during Google I/O 2023
  • Only RCS conversations can presently use Google Magic Compose
  • Google Magic Compose has seven different methods for rewriting messages

Google unveiled the Magic Compose beta at the Google I/O 2023 event, and it has now commenced the rollout of this feature. Powered by generative AI, Magic Compose assists users in composing text messages. The initial rollout is prioritized for premium Google One subscribers in the United States who are also part of the Messages beta program on the Play Store. Also Read | Gmail Tips And Tricks: How To Secure Your Google Account With Two-Factor Authentication

Accessing Magic Compose And Its Features

Magic Compose is currently available for RCS conversations in the Messages app. Beta users who have received the feature can enable it from the app’s settings menu. Once enabled, users can use Magic Compose to engage in conversations and rephrase their messages in various tones and styles.

Using Magic Compose Styles

To access Magic Compose, users can tap the pencil icon located next to the typed message. They will then be able to rewrite their message using any of the seven available styles, including Remix, Excited, Chill, Shakespeare, Lyrical, Formal, and Short.

Privacy Considerations

Before using this feature, users should be aware that Google sends up to 20 of their most recent messages, including emojis, reactions, and URLs, to its servers for generating responses. As a result, end-to-end encryption may be compromised. However, Google clarifies that it does not store messages or employ them for training its machine-learning models. Messages with attachments, voice messages, and images are not sent to Google servers, although image captions and voice transcriptions might be transmitted.

Also Read | Google Photos Hacks: How To Edit Videos And Adding Effects Such As Filters On Google Photos

How To Enable And Use Magic Compose

To enable Magic Compose, follow these steps:

Step 1: Open the Google Messages app.

Step 2: Open or start an RCS conversation.

Step 3: Click on “Message suggestions.”

Step 4: To opt in, click “Try it.” To keep Magic Compose turned off, tap “No thanks.”

Step 5: Click on the rewrite suggestions icon to access style options.

Step 6: Choose a style to view rewrite suggestions.

Step 7: Select the desired suggestion, optionally editing the message.

Step 8: Click “Send.”

Google Introduces Search Labs For Early Experiment Access

In addition, Google has announced the introduction of Search Labs, an initiative allowing users to participate in early testing of experiments prior to widespread availability. Users who have joined the waitlist at Google Search Labs will receive email notifications when they can try out Labs experiments, which include the Search Generative Experience, Code Tips, and Add to Sheets.

Also Read | Google Pay Expands Payment Options In India With UPI Payments Using RuPay Credit Cards

Categories
Apps Featured How To

WhatsApp Edit Message Feature Is Now Available For Android And iOS: How To Correct WhatsApp Message Spelling Errors And More

Key Highlights

  • WhatsApp Edit message for chat released
  • Stable version vailable for Android and iOS
  • Edited messages are also end-to-end encrypted
  • Time limit to edit messages is 15 minutes

WhatsApp has been working proactively to offer the most secure messaging platform for smartphone and desktop users. Meta has released several such privacy-centered features in the last couple of months and has been working on the highly demanded chat edit feature. The WhatsApp chat editing feature was available with the beta build all this while, now, the company has released the stable version for both Android and iOS ecosystems.

Also Read: How To Upload WhatsApp Status In High Quality (Images, Videos) On Android, iOS?

WhatsApp Chat Edit Feature Available

WhatsApp has confirmed the arrival of the Edit feature for chats via its official blog. This new messaging feature is designed to allow the users to correct spelling errors and also add any extra text to a message if required. The WhatsApp Edit message stable version is now available for Android and iOS users. This option will be rolled out in a phased manner to all the users and could take a while before the mass rollout is complete.

It is worth mentioning one needs to have the latest version of the WhatsApp app downloaded on their respective Android and iOS smartphones in order to use the Edit chat message feature. Another key catch here is that the Edit option for chat has a limited time frame.

One would only be able to make changes or do any corrections with the sent messages for up to 15 minutes. Post that, users won’t be able to change the errors or make any further modifications to the sent messages. WhatsApp has also confirmed that the corrected statements will have “edited” written alongside it. Therefore, the receiver will know that the text has been edited. The edited messages will have the same end-to-end encryption as for calls, media, and other texts and documents.

Also Read: WhatsApp Sticker Maker Tool Launching Soon: How To Create Stickers Directly Using WhatsApp App

Steps To Use WhatsApp Edit Message Feature On Android and iOS

Step 1: First check if the WhatsApp app installed on your phone is updated to the latest version

Step 2: Launch the WhatsApp application on your respective phones

Step 3: Go to the Chat window or the conversation tab where you wish to make changes to the text

Step 4: Now, scroll to the message that requires editing

Step 5: Press and hold the message and wait for the options to pop up

Step 6: Select the Edit option

Step 7: Make the required changes to the text including correcting spelling errors and adding info

Also Read: WhatsApp Chat Lock Privacy Feature Released For Android, iOS: How To Lock WhatsApp Chats Using This New Feature?

Categories
Apps Featured How To Mobile

Use UPI On Your Feature Phone With Ease: Here’s How

Key Highlights

  • One of the most widely used digital payment systems in India is UPI
  • Users of smartphones can make UPI payments using a variety of apps
  • Users using feature phones can also send money using UPI

In today’s digital age, UPI has become a crucial mode of payment. While UPI is widely known among smartphone users, it’s crucial to understand that even feature phone users can now leverage this convenient payment method. To cater to the needs of feature phone users, the National Payments Corporation of India (NPCI) introduced 123PAY, a UPI facility designed specifically for them. With the use of this service, users of feature phones can create a UPI ID and carry out UPI transactions without a smartphone. This development holds great significance as there are approximately 400 million feature phone subscribers in the country, promoting financial inclusivity.

Also Read | PhonePe UPI Lite: What Is It? How To Send Up To Rs. 200 Without UPI Pin On PhonePe?

How To Create A UPI ID On A Feature Phone

To enable feature phone users to have UPI functionality, the process of setting up a UPI ID is straightforward. Here are the steps:

Step 1: Dial *99# on your feature phone.

Step 2: Select your bank’s name and provide the necessary information, such as the last six digits of your debit card and the expiry date.

Step 3: Set up a secure UPI PIN.

Step 4: Once completed, your UPI ID will be activated.

How To Make UPI Payments On Feature Phones

If you want to make payments using your UPI ID on a feature phone, follow these steps:

Step 1: Dial the IVR number 080451 63666.

Step 2: Select your preferred language.

Step 3: Choose the bank linked with UPI.

Also Read | Need Help With Zomato UPI Payments? Here’s A Step-by-Step Tutorial

Step 4: Press ‘1’ to confirm the details.

Step 5: Press ‘1’ again to send money using your mobile number.

Step 6: Enter the recipient’s mobile number.

Step 7: Confirm the details and enter the amount.

Step 8: Enter your UPI PIN and authorize the money transfer.

Transaction Limits For Feature Phones Using UPI

To ensure security and manage risk, certain transaction limits apply to UPI payments on feature phones:

Per day transactions limit: Rs 1,00,000

Per transaction limit: Rs 5,000

Also Read | UPI Money Transaction Limit In India: Here’s The Limit Of Transactions You Can Do Via GPay, PhonePe, Paytm Daily

Users of feature phones can now take advantage of UPI payments without a smartphone thanks to NPCI’s introduction of 123PAY. By following a few simple steps, feature phone users can create a UPI ID and seamlessly carry out transactions.

Categories
Apps Featured How To

How To Book Your Uber Ride 90 Days In Advance: A Step-by-Step Guide

Key Highlights

  • Riders will now be able to book Uber rides 90 days in advance
  • Riders can cancel for free up to 60 minutes prior to the pickup, according to Uber
  • Prior to booking, riders who are scheduling the ride can view the cost

Uber has launched a new feature called Uber Reserve, allowing users to book cab rides up to 90 days in advance. Similar to the process of booking flights and hotels, riders can now plan their trips and secure Uber rides well ahead of time. This feature is currently available in the United States and Canada.

Also Read | Book An Uber Ride Using WhatsApp: Follow These Steps

Booking Rides In Advance With Uber Reserve

To facilitate advanced bookings, Uber Reserve provides users with the upfront price and advanced details about their assigned driver. According to an official blog post, Uber has begun rolling out this feature, enabling riders to schedule rides up to 90 days in advance. This allows for better trip planning and eliminates last-minute transportation concerns.

Steps To Book Uber Rides In Advance

Here’s a step-by-step process for booking Uber rides 90 days in advance:

Step 1: Open the Uber app on your device.

Step 2: Look for the “Uber Reserve” option and tap on it.

Step 3: Select the desired date and time for your pickup.

Also Read | From Ola To Rapido: Top Five Ride-Hailing Apps In India

Step 4: Review the details and price of the ride before confirming the booking.

Step 5: Keep in mind that you have the option to cancel the reservation for free up to 60 minutes before the scheduled pickup time.

Additionally, Uber offers some new features for users, such as Directions to Pickup and Walking ETAs. With the Directions to Pickup feature, the app provides step-by-step in-app directions to guide you to the designated Uber pickup area. This feature is currently available at over 30 airports worldwide, with plans for expansion. The Walking ETA feature helps you estimate the time it will take to walk from the gate to the baggage claim area. It will soon be available in more than 400 airports globally.

Also Read | From The Road To The Air: Uber Now Offers Flight Booking From Its App

Uber’s Advanced Booking And Features

By following these steps, users can take full advantage of Uber’s new features and easily book rides up to 90 days in advance. With Uber Reserve, riders can secure their transportation well ahead of time, gaining peace of mind and eliminating last-minute worries.

For the tech geeks, stay updated with the latest cutting-edge gadgets in the market, exclusive tech updates, gadget reviews, and more right on your phone’s screen. Join Giznext’s WhatsApp channel and receive the industry-first tech updates.

Categories
Apps Featured How To

Simplify Your Sharing Experience: How To Use Nearby Share On Windows

Key Highlights

  • Google makes Nearby Share available for Windows desktops and laptops
  • Nearby Share for Windows is still in beta, but anyone can download and use it
  • Files can be wirelessly and quickly transferred from an Android device to a Windows PCs using Nearby Share for Windows

Google’s Nearby Share on Android offers fast and simple file transfers between Android devices. As for Apple users, AirDrop enables quick file sharing between iPhone, iPad, and Mac devices. However, when it comes to Windows PCs, users often rely on third-party alternatives or use P2P file-sharing websites, as well as the traditional wired transfer method. Thankfully, there’s no longer a need to resort to such inconvenient approaches, as Google has recently introduced Nearby Share for Windows, which functions flawlessly on Windows 11 machines. In this article, we will guide you through the process of wirelessly sharing files in a matter of seconds between an Android phone and a Windows PC.

Also Read | Want To Create A New Folder In Windows 11? Here Are Simple Ways To Do It

Steps To Share Files Between Android And Windows Via Nearby Share

It is important to mention that Nearby Share for Windows is currently in beta but accessible to everyone. Google anticipates receiving direct feedback on the feature from the general public. Here are the steps to follow:

Step 1: Launch a web browser on your Windows PC.

Step 2: Visit the Nearby Share Beta for Windows website.

(Please note that the app is compatible with Windows 10 64-bit and higher versions and does not support ARM devices.)

Step 3: Click on ‘Get Started with Beta’ to initiate the app download.

Step 4: After downloading, install and open the app.

Also Read | Worried About Laptop Privacy: Best Windows Laptop With Fingerprint Reader Biometrics

Step 5: Sign in with your Google account and grant the app all necessary permissions. Choose between ‘Everyone’ or ‘Contact’ from the dropdown menu, based on your preference. Selecting ‘Everyone’ allows anyone near your PC to share files with it.

Step 6: Open the gallery on your Android phone, select the desired media (photos, videos, or other files), and tap the Share button.

Step 7: Choose ‘Nearby Share’ from the available options and wait for your PC to appear on the screen.

Step 8: Tap on your PC, and the selected media will be swiftly transmitted to it. You can also utilize this process in reverse by sending files from your Windows PC to your Android phone. Be aware that as the Windows app is in beta, you may encounter certain issues. However, Google aims to address these problems as it prepares the stable version.

For the tech geeks, stay updated with the latest cutting-edge gadgets in the market, exclusive tech updates, gadget reviews, and more right on your phone’s screen. Join Giznext’s WhatsApp channel and receive the industry-first tech updates.

Categories
Apps Featured How To

Need Help With Zomato UPI Payments? Here’s A Step-by-Step Tutorial

Key Highlights

  • Zomato has launched Zomato UPI in India
  • Selected users can access Zomato UPI as part of a pilot program
  • This new feature has been introduced via a collaboration with ICICI Bank

Zomato has introduced its own unified payments interface (UPI) services in India to enhance customer payment convenience. In collaboration with ICICI Bank, Zomato now enables users to make UPI payments directly on their platform, offering a secure transaction experience. To add an extra security layer, users can set a security PIN for UPI transactions. This move comes at a time when merchant payments on UPI in India are projected to reach $1 trillion by FY26.

By launching Zomato UPI, the online food delivery platform aims to streamline the payment process for users, eliminating the need to switch between different payment apps like Google Pay, PhonePe, and Paytm.

Also Read | Hungry But Low On Budget? Here Are The Top Four Cheapest Food Delivery Apps In India

Zomato has provided instructions for users to apply for Zomato UPI via the iMobilePay app, as stated on their support page. The company also allows users to link their existing bank accounts to Zomato UPI, offering flexibility for those who prefer not to create a new UPI ID.

Currently, Zomato UPI is in its pilot stage and is accessible only to a limited number of users. However, Zomato plans to gradually expand this service to all its users in the future. If you happen to be one of the fortunate users with access to Zomato UPI, here’s a guide on how to use this feature.

How To Use Zomato UPI?

Follow these steps to use Zomato UPI and experience hassle-free transactions:

Step 1: Launch the Zomato app on your device.

Step 2: Navigate to the profile section within your Zomato account.

Also Read | Want To Make Paytm UPI Payments To Non-Paytm Users? Here’s The Trick

Step 3: Scroll down until you find the Zomato UPI feature.

Step 4: Tap on the ‘Activate Zomato UPI’ option.

Step 5: Choose your preferred Zomato UPI ID, which will serve as your unique identifier.

Step 6: Select the mobile number associated with your Zomato account.

Also Read | Everything You Should Know About Airtel And Axis Bank Credit Card: Here’s How To Use

Step 7: Connect your bank account to securely link it with Zomato UPI.

By following these simple steps, you can unlock the convenience of Zomato UPI, enabling seamless payments directly within the app. Enjoy a safe and streamlined payment experience with Zomato UPI, eliminating the need for external payment apps.

For the tech geeks, stay updated with the latest cutting-edge gadgets in the market, exclusive tech updates, gadget reviews, and more right on your phone’s screen. Join Giznext’s WhatsApp channel and receive the industry-first tech updates.