Categories
Accessories Featured How To

OnePlus Buds Pro 2 Zen Mode Air Feature: What Is It? How To Use?

Key Highlights

  • OnePlus Buds Pro 2 was released earlier this month in India
  • Offers ANC and other premium audio features
  • Zen Mode Air allows White Noise audio playback with simple swipe gestures

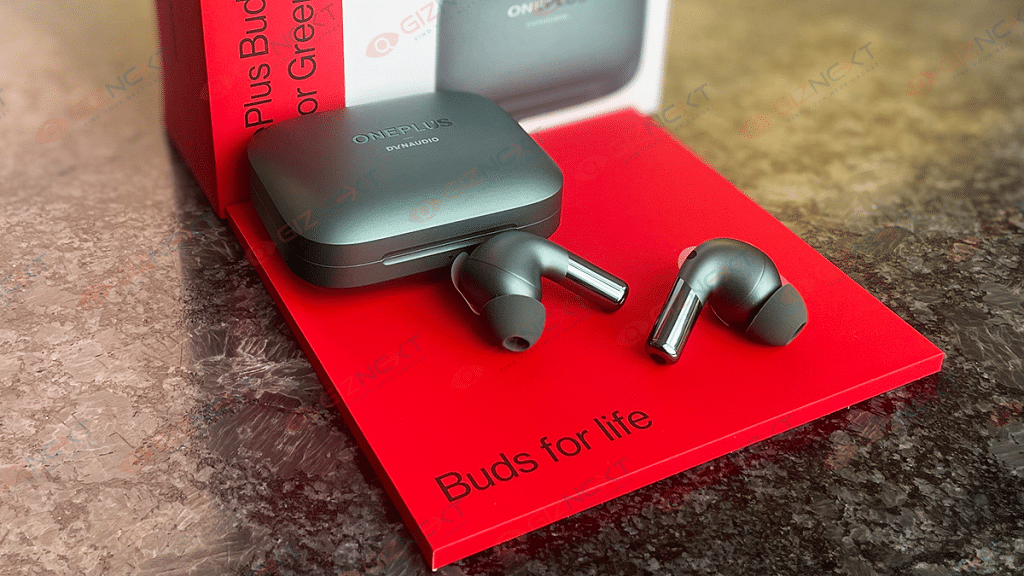
OnePlus launched its most premium audio product for the Indian and global audience at the Cloud 11 launch event held earlier this month. Called OnePlus Buds 2 Pro, the latest TWS earbuds from the company offers ANC, an improved dual-driver module, and more. The Buds 2 Pro is by far the most advanced truly wireless earbuds from OnePlus that comes as a treat for audiophiles.

One of the coolest features offered by the OnePlus Buds 2 Pro is the Zen Mode Air. This nifty feature allows users to enable white noise using a simple gesture. With this one can keep all distractions and noise at bay while doing any specific task.

Also Read: How To Connect OnePlus Buds True Wireless Earbuds With Smart TVs and Laptops?

Using the Zen Air Mode can benefit students or even professionals trying to concentrate and complete tasks without any distractions with surrounding or background noise. The option to activate this nifty feature with a simple swipe gesture is what makes it unique. However, in order to use the Zen Mode Air feature on OnePlus Buds Pro 2, you would need to follow a specific set of steps that we have listed in this article:

Also Read: OnePlus Buds Pro 2 Review: Hitting The Right Notes?

How To Activate And Use OnePlus Buds 2 Pro Zen Mode Air Feature

To use the Zen Mode Air feature on your OnePlus Buds Pro 2 TWS, you must first activate it using the Hey Melody app. You can also enable this feature using the Earbud function setting when paired with a OnePlus phone.

Step 1: On your OnePlus or any other Android smartphone that is paired with the OnePlus Buds 2 Pro earbuds, open Bluetooth settings

Step 2: Select the Earbud function option

Step 3: Once you are on the Earbud function page, select the Zen Mode Air option

Step 4: Toggle on the Zen Mode Air setting to activate this feature

Step 5: Now, tap on the White Noise option to customize the white noise audio

Also Read: How Can You Pair OnePlus Buds, Nord Buds TWS With Apple Macbook Laptops (All Models)

How To Activate Zen Mode Air Feature On OnePlus Buds 2 Pro Using Hey Melody App

Step 1: Launch Hey Melody App on your respective smartphones

Step 2: Select Zen Mode Air option

Step 3: Enable the Zen Mode Air option

Step 4: Now, customize the White Noise audio as per your requirements.

Also Read: OnePlus Nord Buds Review: Fairs The Competitions?

Categories
Apps How To

How To Download Or Transfer All Facebook Videos And Images Directly To Google Photos

Key Highlights

  • Facebook Photos and videos can be transferred to Google Photos
  • Transfer process is possible only with the desktop version of the app
  • Documents can also be moved to Google Docs

Facebook is a widely popular social media platform used by thousands of users globally. Multiple new features and tools have been added to the platform that enhances the experience for general users and professional. Stories, videos, and other media playback options are some of the most useful features offered by Facebook.  Photo and video sharing is also an option that is proactively being used by the audiences.

Often users have tried downloading photos and videos shared or uploaded on Facebook from their own profile or other uploads. But do you know, that there is an in-built feature with which you can directly transfer or download Facebook videos or photos to Google Photos? Not just photos and videos, one can also transfer posts and notes to Google Docs.  In this article, we have listed the steps with which you can migrate or download all your Facebook photos and videos to Google Photos. Take a look:

Also Read: Instagram Allows Cross-Posting Reels Videos On Facebook: Here’s How To Do It

Steps To Move And Download Facebook Videos Directly To Google Photos

In order to move the Facebook videos and downloads, you need to use the desktop version.

Step 1: Open Facebook on Google Chrome or any other web browser on your laptop or PC.

Step 2: From the top right corner, click on your profile picture

Step 3: Tap on the Settings menu

Step 4: Select the Facebook Information option placed on the left side

Also Read: Facebook Tips And Tricks: How To Create And Upload Facebook Reel Videos

Step 5: Locate the “Transfer a copy of your information” option

Step 6: Tap on the View button

Step 7: Select the Google Photos option to initiate the transfer

Step 8: You will be able to select all the Facebook images and photos that you wish to download or transfer to Google  Photos.

Also Read: Social Media App Hacks: How To Mute Annoying/Unwanted Messages On Instagram, WhatsApp, Facebook Messenger

Step 9: After completing all the aforementioned steps, you would need to tap on Connect option

Step 10: Login to the Google Account

Step 11: After the linking process is completed, the Facebook photos and videos that you have selected will be transferred to Google Phots.

Also Read: OnePlus TV HDMI Issue: How To Quickly Fix HDMI Picture Quality And Interface Issue With All OnePlus Smart TVs

Categories
Apps How To

IPL 2023 4K Streaming For Free On Reliance JioCinema: Here’s How

Key Highlights

  • IPL 2023 kickstarts March 31, 2023
  • Over 74 matches to be played
  • 4K Live streaming on Jiocinema approved

Indian Premier League (IPL) is confirmed to kickstart on March 31, 2023, in India. The annual cricket tournament is quite popular amongst the Indian audience. This year as well, there will be approx. 74 matches all of which will be live-streamed online. Reliance is in for a treat for all cricket fans in the country by offering 4K live streaming of IPL matches on its Jio Cinema platform. Let’s dive into the details below:

Also Read: Want To Port Your Vodafone Number To Jio? Here’s How To Do It

How To Stream IPL 2023 Matches In 4K For Free On JioCinema

BCCI (Board of Control For Cricket in India) has given approval to Reliance to stream all IPL 2023 matches in the country. Following the approval, Jio has announced the streaming of IPL 2023 matches. Users will be able to watch the IPL matches in 4K resolution via the Jio Cinema app for free.

The IPL 2023 is the 16th season which will be live-streamed online. It is the first time any OTT player is streaming the IPL matches in such a high resolution. This is one of the major developments in the last few years. As of now, the IPL matches can be streamed in HD resolution. The option to stream the match online in 4K is definitely a treat for consumers.

Also Read: No Disney+ Hotstar Access With Reliance Jio Affordable Plans: Here’s Why

In order to stream the IPL 2023 in 4K for free on JioCinema, you need to download and install the app on your respective devices.

Step 1: Open the JioCinema app on your smartphone/TV

Step 2: Log in to your account. If you don’t have an account, register first.

Step 3: Tap on the IPL 2023 show once the event is live

You don’t have to perform any additional step to watch IPL 2023 matches in 4K for free via JioCinema app. The app will also show the scoreboard of the IPL 2023 matches. Furthermore, the match could be live-streamed in different native languages including Hindi, Marathi, Odia, Bangla, and more. Just like standard cricket on-air matches, Reliance could include 10-second ads during the IPL 2023 live stream.

Also Read: Want To Install Jio TV On Your Smartphone? Here’s The Step-By-Step Guide

Categories
Apps How To

Now Reply To Instagram Posts Using GIFs In Comments: Here’s How

Key Highlights

  • Instagram now allows users to post GIFs in comments
  • GIFs can convey a wide variety of emotions, reactions, and feelings
  • Currently, this feature is rolling out to select users around the world

GIFs can convey more than words which is probably why they are so popular in today’s conversations. They are available for every situation and mood. Instagram, the popular photo and video-sharing app, has added a ton of new features. One of them allows users to annotate posts and stories with GIFs.

According to the latest sources, the GIFs are taken from the online GIF database GIPHY. Instagram users have been able to share GIF stickers in stories, but not in replies. The feature is reportedly being implemented gradually and can be rolled out more widely in the coming weeks. Here are the steps to help you add GIFs for stories and posts. Also Read | Want To View Instagram Story Secretly Without Notifying Contacts Or Followers: Here’s How

How To Post GIFs In Instagram Comments?

Step 1: Open Instagram on your device and tap the “add comment” button on an Instagram post.

Step 2: Tap the GIF button to search for and select a GIF from the app’s extensive library.

Step 3: GIFs from the GIPHY library will be visible.

Step 4: Now click on your chosen GIF and hit enter.

Also Read | Instagram Dynamic Profile Photo Feature: What Is It? How To Use?

Users can search for a specific GIF that relates to their comment or browse and choose from popular GIFs. You might have to wait a little while before using the feature since it is currently being rolled out to select users worldwide.

With this feature, Instagram’s comments section gains a new level of engagement that enables users to connect with posts and other users in a more playful, imaginative manner. Users can now use GIFs to, for instance, bring humor to a chat, express their reactions to an article, or just make their comments stand out.

In addition to enabling GIFs in comments, Instagram has also launched a brand-new feature called Instagram Channels which is modeled after Telegram’s channel concept. This feature allows users to create, participate in, and share content with large audiences. This feature is also on a slow rollout and will soon be available to all creators.

Also Read | Instagram Privacy: How To Hide Online/ Active Status, Last Seen On Instagram

Categories
Apps How To Laptop

WhatsApp Web Video Calling On MacBook Laptops: Step By Step Guide

Key Highlights

  • WhatsApp web supports video and audio call feature
  • Making WhatsApp video calls on a Mac is a simple and easy process
  • Users must allow WhatsApp to access the camera and microphone

WhatsApp is a widely popular messaging app used by millions of people worldwide. It offers a range of features, including audio and video calls, file sharing, and instant messaging. If you’re a Mac user and want to make video calls on WhatsApp, you’ll be happy to know that the process is straightforward. In this article, we’ll walk you through the steps to make WhatsApp video calls on your Mac.

Also Read | Now Send Up To 100 Images And Videos At Once On WhatsApp: Here’s How

How To Make WhatsApp Video Calls On Mac

Step 1: You need to download and install the WhatsApp desktop app for Mac.

Step 2: After installing the WhatsApp desktop app, open it and log in to your account by scanning the QR code on the screen using your phone’s WhatsApp app. Once you’re logged in, you’ll see the familiar WhatsApp interface on your Mac.

Step 3: To make a video call, select the contact you want to call from your chat list. You can do this by clicking on the chat icon located in the top-left corner of the screen.

Step 4: Once you’re in the chat, click on the video camera icon located in the top-right corner of the screen to start the call.

Note: Users must allow WhatsApp to access the camera and microphone when they see a popup.

Also Read | WhatsApp Web Video Calling: How To Make/ Answer WhatsApp Video Calls On Windows Laptops/ PCs

During the video call, you can adjust the audio and video settings by clicking on the gear icon located in the top-right corner of the screen. Here, you can choose the camera and microphone you want to use, as well as adjust the video quality and bandwidth settings.

Overall, making WhatsApp video calls on a Mac is a simple and straightforward process. By downloading the WhatsApp desktop app and logging in to your account, you can easily make video calls to your friends and family from your Mac. Whether you’re using it for work or personal use, WhatsApp offers a convenient way to stay connected with others.

Also Read | WhatsApp Privacy: How To Setup And Use WhatsApp With Landline Number

Categories
Apps How To

WhatsApp Privacy: How To Setup And Use WhatsApp With Landline Number

Key Highlights

  • WhatsApp registration using landline number is a possibility
  • Setup process can be completed on any smartphone, tablet, or desktop version
  • Landline number will be displayed instead of mobile number

WhatsApp’s immense popularity can be credited to the secure end-to-end encryption for privacy with messaging and video calling. One can use WhatsApp services even on low-end or entry-level smartphones and even on some of the popular features of phones available in the market. For Android and iOS users, WhatsApp has become a go-to application for instant texting or calling (voice/ video) using the internet.

WhatsApp has been one of those platforms to entirely shape the multimedia mobile messaging experiences for the masses. With the rollout of several user-oriented features, WhatsApp has remained at the top of the ladder when it comes to instant messaging applications available on Google Play Store and Apple App Store.

Also Read: How To Upload WhatsApp Status In High Quality (Images, Videos) On Android, iOS?

However, WhatsApp’s services aren’t solely limited to smartphones. One can download and use WhatsApp on other compatible gadgets such as laptops, PCs, and even on smart TVs (for reading messages). You just need an active mobile number and an internet connection to register on WhatsApp and start messaging or making voice or video calls.

Also Read: WhatsApp Web Video Calling: How To Make/ Answer WhatsApp Video Calls On Windows Laptops/ PCs

What if we tell you that you can also use a landline number to register on WhatsApp? Well, this might help the folks who wish their official or landline number to flash to other contacts on WhatsApp instead of their personal mobile number. But how can you complete WhatsApp registration process using a landline number? The steps are listed below:

Also Read: Want To Read Full WhatsApp Messages Without Seen Or Blue Tick: Here’s The Hidden Hack

How To Setup And Use Landline Number On WhatsApp

Step 1: Download and install the WhatsApp application on your smartphone, laptop, or PC.

Step 2: On the setup page, you will get the option to select the language. Once done, tap on Agree and continue.

Step 3: You will need to enter the country could followed by the phone number. Here, you need to type the country code along with the landline number instead of a mobile phone number.

Step 4: Click on Ok after confirming the number.

Step 5: You will see a pop-up message stating WhatsApp is sending an SMS code to the mobile number. Since the number entered is landline, you won’t be receiving any SMS. Follow the next step.

Step 6: Now, click on Did bit receive code option.

Step 7: You will again receive two different options including Resend SMS or Receive a call for verification.

Step 8: Wait approximately 90 seconds before tapping on the Receive a call for verification option.

Step 9: Make sure, you are nearby the landline phone to receive the verification call from WhatsApp.

Step 10: Enter the setup code read out by the WhatsApp bot. That’s it, you have successfully registered your landline number in WhatsApp.

Also Read: WhatsApp Avatar DP: How To Create Cool WhatsApp Personalized Avatars For Profile Picture, Sticker Pack

Categories
Apps How To

Send Up To 100 Images And Videos At Once On WhatsApp: Here’s How

Key Highlights

  • WhatsApp users can now send up to 100 images and videos in a single message
  • Earlier, WhatsApp had a limit of up to 30 photos and videos
  • Sending documents over WhatsApp now allows for the addition of subtitles

Are you sick of WhatsApp only allowing you to transmit 30 images at a time? The Meta-owned messaging app now lets its users send more than 100 images and videos in a single message. Formerly, a total of 30 images and videos could be sent simultaneously. WhatsApp has recently made the feature available to Android users, though. The limit has been increased to 100 as of the most recent update, WhatsApp for Android version 2.22.24.73, allowing users to share more media at once.

Also Read | WhatsApp Web Video Calling: How To Make/ Answer WhatsApp Video Calls On Windows Laptops/ PCs

How To Send 100 Images In WhatsApp In One Go?

Here’s how to share 100 images and videos on WhatsApp in one go:

Step 1: Open WhatsApp and select the chat you want to send the photos to.

Step 2: Tap on the attachment icon (the paper clip) located at the bottom of the screen.

Step 3: Select “Gallery” from the list of options.

Step 4: Choose the folder where your photos are stored.

Step 5: Select the first photo you want to share by tapping on it.

Step 6: Press and hold the first photo until it is highlighted.

Step 7: Tap on the other photos you want to share. You can select up to 100 images and videos.

Also Read | WhatsApp Transcript Feature Will Save You From Hearing Lengthy Voice Messages: How To Use?

Step 8: Once you have selected all the photos you want to share, tap on the “Send” button.

Step 9: Wait for the photos to upload and send them to your chosen recipient.

That’s it! You have successfully shared 100 images in WhatsApp in one go. It’s worth noting that the process may differ slightly depending on the version of WhatsApp you are using and the type of device you have.

Additionally, if you are sending a large number of photos or if the recipient has a slow internet connection, the upload and send process may take some time. However, in general, sharing photos and images on WhatsApp is a quick and easy way to stay in touch with friends and family, no matter where they are in the world.

For the tech geeks, stay updated with the latest cutting-edge gadgets in the market, exclusive tech updates, gadget reviews, and more right on your phone’s screen. Join Giznext’s WhatsApp channel and receive the industry-first tech updates.

Categories
Apps How To

WhatsApp Avatar DP: How To Create Cool WhatsApp Personalized Avatars For Profile Picture, Sticker Pack

WhatsApp has seen immense popularity in the last decade for providing one of the best ecosystems for instant messaging. The brand has evolved the entire messaging experience for mobile users and made voice and video calling using the internet a possibility. It wouldn’t be worn to say that WhatsApp is one of the coolest messaging apps out there in the market.

With WhatsApp mobile and desktop app, you can create your own profile and update your own picture as a display/ profile pic. This feature has been available for the Android and iOS versions of the app right from the beginning and also the desktop version. But WhatsApp has been working on ways to enhance the user experience with the profile picture option in addition to privacy.

Also Read: Here’s How to Set Long Videos as WhatsApp Status

The brand had released the profile Avatars feature for DP’s or the profile picture where users get the option to create a customized avatar of their own. These animated avatars can not only be used as a WhatsApp profile pic but also as personalized stickers that can be shared with contacts. WhatsApp Avatar is quite a fun way to portray yourself to your friends and family members. But how can you create your personalized avatar on WhatsApp? The steps for the same are mentioned below:

Also Read: How To Upload WhatsApp Status In High Quality (Images, Videos) On Android, iOS?

How To Create Customized Animated WhatsApp Profile Picture Avatar

Step 1: Open WhatsApp mobile application on your smartphone

Step 2: Tap on the Settings menu from the app’s homepage

Step 3: Scroll down to the Avatar option

Step 4: Click on Create Your Avatar

Step 5: Make the required cosmetic modifications to your avatar. You will get the option to change your skin tone, body outfit and type, eyes, and more.

Step 6: Once the custom avatar is created tap on the Save button

You can now go ahead and start using this animated avatar as a WhatsApp profile picture or sticker pack. You just need to click on the Emoji menu and select the Avatar after tapping on the “+” add button.

Also Read: WhatsApp Web Video Calling: How To Make/ Answer WhatsApp Video Calls On Windows Laptops/ PCs

Categories
Accessories How To

Forgot Your Amazon Alexa Password? Here’s How To Change And Reset It

Key Highlights

  • Alexa devices are protected by Amazon passwords
  • If someone knows your Amazon password, they can access your Alexa recordings
  • Alexa users can change and reset their passwords

Amazon Alexa is a smart virtual assistant that allows you to manage your daily tasks and routines with just your voice. However, like any other online account, it is important to ensure that your Amazon Alexa account is secure. Changing and resetting your Amazon Alexa password regularly is one way to ensure your account’s security.

Also Read | Want To Download A Product Invoice From Amazon India? Here’s How

How To Change Amazon Alexa Password

To change your Amazon Alexa password, you need to follow these steps:

Step 1: Open the Amazon Alexa app on your mobile device.

Step 2: Click on the “More” button in the lower-right corner of the screen.

Step 3: Choose “Settings” and then select “Account Settings”.

Step 4: Tap on “Login with Amazon” and enter your Amazon login credentials if prompted.

Step 5: Tap on “Change password” and enter your current password followed by your new password.

Step 6: Confirm your new password and tap on “Save Changes”.

Your Amazon Alexa password will now be updated, and you will need to use the new password the next time you log in to your account.

Also Read | Don’t Remember Password For WhatsApp Encrypted Backup? Here’s What You Can Do

How To Reset Amazon Alexa Password

If you have forgotten your Amazon Alexa password, you can reset it by following these steps:

Step 1: Go to Password assistance.

Step 2: Enter the email address or mobile number linked to your Amazon account when required, then click Continue. To authenticate your request, it will send you an email or SMS containing a One Time Password (OTP). This depends on the verification option you’ve selected.

Step 3: Enter the received OTP and choose Continue.

Step 4: Create a new password.

Step 5: A new password is activated as soon as you generate it. All Amazon-related accounts linked to the same email address must use your new password.

Once you have completed these steps, your Amazon Alexa password will be reset, and you will be able to access your account with your new password. This will also change the password for your Amazon account.

For the tech geeks, stay updated with the latest cutting-edge gadgets in the market, exclusive tech updates, gadget reviews, and more right on your phone’s screen. Join Giznext’s WhatsApp channel and receive the industry-first tech updates.

Categories
Apps How To

WhatsApp Web Video Calling: How To Make/ Answer WhatsApp Video Calls On Windows Laptops/ PCs

Key Highlights

  • WhatsApp web supports video and voice call feature
  • Group video calling isn’t supported yet
  • External audio output source, webcam required for video calling

WhatsApp is a great tool for instant messaging, specifically if we speak of a private messenger with the ability to make and receive voice and video calls. WhatsApp’s services are available across Android and iOS devices including smartphones and tablets. The Meta-owned instant messaging app’s desktop version is also widely popular amongst laptop and PC users.

WhatsApp Web offers the same level of privacy with texting and sharing media files like the Android and iOS versions. The company has consistently added the same set of features to the desktop version as the mobile app. While sending texts is primarily what the WhatsApp web was designed for, the constant demand for voice and video calling support finally was addressed in 2020.

Also Read: WhatsApp Web Tips And Tricks: How To Use Multiple WhatsApp Accounts On Laptops/PCs?

Now, WhatsApp Web users can also make video and voice calls using the application on their laptops and PCs. Similar to the WhatsApp mobile app, the video and voice call feature on the desktop version is end-to-end encrypted. This makes virtual conversations secure and private. This article is centred around the steps with which you can easily make or receive video and voice calls on WhatsApp web.

Also Read: Best WhatsApp Status Apps To Download And Use On Android, iOS

Steps To Make Or Receive Video Calls Using WhatsApp Web Desktop Version On Windows Laptops, PCs

In order to make or receive WhatsApp web video calls, you would need a PC or laptop running on Windows 10 64-bit version 1903 and above OS. Also, a webcam (integrated or external) would be required. Do note that WhatsApp Web only supports video calling to a single user. Group video calling feature is yet to be released.

Step 1: Launch the WhatsApp web application in any web browser on your laptop or PC.

Step 2: Make sure the laptop/PC is connected to the internet

Step 3: Allow access to the computer’s microphone and camera

Step 4: Ensure the audio output device, microphone, and camera connected to the PC/laptop is working fine.

Step 5: Open the individual chat

Step 6: Tap on the video call icon

Also Read: Accidentally Deleted WhatsApp Message: Here’s How To Retrieve WhatsApp Deleted For Everyone Messages

How To Answer Video Calls In WhatsApp Web

Step 1: You’ll receive a notification for incoming video call

Step 2: To answer, click on Accept

Step 3: If you wish to reject the incoming video call, tap on Reject

Also Read: How To Upload WhatsApp Status In High Quality (Images, Videos) On Android, iOS?