Categories
Apps Featured How To

Lost Your Email Address? Don’t Panic! Follow These Steps To Recover It

Key Highlights

  • Remembering multiple email addresses can be challenging
  • If you forget your email address, there are methods to recover it, even without logging into a device
  • Microsoft and Gmail offer email recovery services where you can provide the necessary information to retrieve your email address

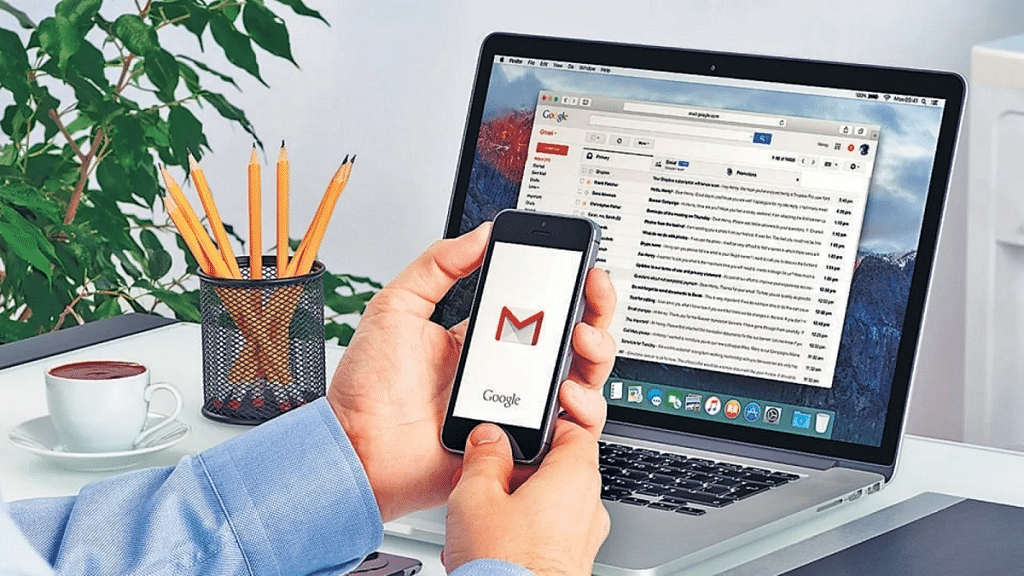
In today’s digital era, it is common for individuals to have multiple email addresses. While this offers convenience in managing personal and work emails, remembering all these addresses can be challenging. If you find yourself in a situation where you have forgotten your email ID or address, there are several methods you can employ to retrieve it. This article provides an easy-to-follow guide on how to find your email ID or address across popular email services such as Gmail and Outlook, whether you are using a PC, laptop, or mobile phone. Also Read | How To Archive Emails In Microsoft Outlook: Here’s The Step-By-Step Guide

How To Find Your Email Address Without Logging In

If you haven’t logged in to any device and need to retrieve your email address, there are a couple of approaches you can take. The first method requires access to the device you last used to log in. If you have such access, follow these steps:

Access The History Section

On the device you last logged in from, navigate to the History section. By doing so, you might be able to locate your email address within the browsing history.

If you do not have access to the device you last logged in from, you can still find your email address by using the email recovery services provided by Microsoft and Gmail. Here’s how to proceed with each service:

How To Recover Your Email Address Via Microsoft

To recover your email address associated with a Microsoft account, follow these steps:

Step 1: Visit the Microsoft email recovery page using any web browser.

Step 2: Provide the phone number associated with your Microsoft account or an alternate email address. Click Next to proceed.

Step 3: Enter the OTP you receive and initiate the account recovery process.

Also Read | Running Low On Google Storage? Five Best Techniques To Clear Your Gmail Space

How To Recover Your Email Address Via Google

If you are using a Gmail account and need to retrieve your email address, follow these steps:

Step 1: Open the “Find Your Email” Page using a web browser.

Step 2: Enter the phone number linked to your Gmail account or your recovery email address. Click Next to continue.

Step 3: On the subsequent page, fill in your First and Last name as requested, then click Next.

Step 4: Click Next on the “Get a verification code” page.

Step 5: Enter the 6-digit code you receive, initiating the account recovery process.

Forgetting your email address can happen to anyone, but fortunately, there are effective ways to retrieve it. By following the step-by-step guide provided above, you can easily find your email ID or address on various leading email services such as Gmail and Outlook, regardless of whether you are using a PC, laptop, or mobile phone.

Also Read | Gmail Vacation Replies: How To Create And Set Replies For Vacations On Gmail?

Categories
Apps Featured How To

Never Miss A Payment Again: Learn How To Set Up Payment Reminders On Google Pay

Key Highlights

  • Google Pay offers a range of features for convenient digital payments
  • Users can set up recurring payment reminders to avoid missing important payments
  • Currently, Google Pay requires users to manually make payments even with reminders

Google Pay is a versatile digital payment platform that offers a wide range of features and functionalities. In addition to sending money and making online payments, Google Pay includes a useful payment reminder feature to prevent missed payments. Also Read | How Can You Delete Google Pay Transaction History: A Step-By-Step Guide

How To Set Up Payment Reminders

To ensure you never forget important payments, Google Pay provides a recurring payment reminder feature. Follow these steps to set up recurring payment reminders:

Step 1: Open the Google Pay app on your iOS or Android smartphone.

Step 2: Navigate to the bottom and select “Regular payments.”

Step 3: Choose the appropriate category under “Payment categories.”

Step 4: Tap “View all” to see available categories and select the one that suits your requirement.

Step 5: Enter the necessary details for recurring payments: choose the payee from your contact list, select a start date, determine the frequency of payment, set the amount, and give the payment a name for easy reference.

Step 6: To view the payment reminder in your checklist, tap “Set reminder.”

Also Read | How To Pay Utility Bills Using Google Pay? Here Are The Steps

Benefits And Limitations

Google Pay’s recurring payment reminder feature is currently limited to peer payments. It does not include autopay settings, meaning payments are not automatically debited from your account at a set frequency. Instead, you will receive a reminder to make the payment manually. The payer is notified to make the payment, but the amount does not get debited automatically.

Conclusion

Google Pay offers a convenient solution for managing digital payments. By utilizing the payment reminder feature, users can set up recurring payment reminders and avoid missing important payments. Although autopay settings are not available, the reminder system ensures that users are prompted to make payments on time.

Also Read | UPI Tips And Tricks: Here’s How You Can Set UPI PIN Without Using Debit Card Details

Categories
Apps Featured How To

WhatsApp Silence Unknown Caller, Privacy Checkup Security Features Released: How To Use?

Key Highlights

  • WhatsApp Silence Unknown caller feature released
  • Will mute spam calls
  • Privacy Checkup feature also released

WhatsApp has emphasized user privacy right from the beginning. The company has released various privacy-centered features for its mobile and desktop app and is rapidly evolving its platform to make it more secure for personal and professional messaging. The two new features released by WhatsApp aim to further enhance user security by silencing spam calls from unknown numbers and allowing users to check the security layers. What is the new security feature released by WhatsApp and how does it work? Below are the details:

WhatsApp Silence Unknown Calls Security Feature: How Does It Work?

The latest security features released by WhatsApp are called Silence Unknown Callers and Privacy Check. With the former WhatsApp has now allowed expanded possibilities for better control over incoming calls; specifically the ones coming from an unknown number. The Silence Unknown caller feature as the name suggests will be muting notification from an incoming call from an unknown number.

WhatsApp has designed this feature to filter out calls that are either from spam or scam callers. The app will automatically silence calls from such numbers so that users can verify if the call is important or spam and respond accordingly. Once this feature is active, the calls from unknown spam numbers won’t show up on the app’s home screen. However, users will be able to see missed/ silenced calls from the unknown number on the call list page. The steps to activate the Silence Unknown Caller feature are below:

Step 1: Open WhatsApp on your respective devices

Step 2: Go to the Settings Menu

Step 3: Select the Privacy option

Step 4: Tap on Calls option

Step 5: Toggle on the Silence Unknown caller option

Also Read: WhatsApp Screen Sharing Feature For Video Calls In Works: How To Share WhatSApp Screen on Android?

WhatsApp Privacy Check Feature Explained

In addition to the Unknown Silence call feature, WhatsApp has also introduced the Privacy Checkup feature. This security feature will allow users to check all the security layers under a single tab. This feature is also designed to enhance user privacy and will help them make apt modifications with the added security layers. Users will be able to navigate through multiple privacy layers using the Privacy Checkup feature.

Also Read: WhatsApp Channels Message Broadcast Tool Launched: What Is It? How To Use?

Categories
Apps Featured Info

Amazon Pay’s New Rs. 2,000 Note Collection Service: Here How It Works

Key Highlights

  • Amazon Pay introduces a doorstep cash collection service for Rs. 2,000 banknotes
  • Customers can hand over Rs. 2,000 notes to delivery agents during Cash-on-Delivery orders
  • The collected amount is deposited as an Amazon Pay balance for digital transactions

Amazon Pay has launched a new service that allows customers to have their Rs. 2,000 banknotes collected from their doorstep. This initiative provides an alternative for individuals who wish to hand over these notes that will be phased out of circulation later this year. The Reserve Bank of India recently advised holders to turn in their eligible notes at banks as the bank would be withdrawing all Rs. 2,000 notes. Also Read | Want To Make Paytm UPI Payments To Non-Paytm Users? Here’s The Trick

Relief For Concerned Individuals

Following the announcement, many people rushed to banks to submit their Rs. 2,000 notes. However, some individuals resorted to using these notes for transactions, such as at petrol pumps and for online food orders. Unfortunately, due to the unprecedented influx of these banknotes, many stores refused to accept them. In response, Amazon Pay has introduced its new service to alleviate concerns regarding the disposal of Rs. 2,000 banknotes.

Cash Load At Doorstep Service

The new service, called ‘cash load at doorstep,’ allows customers to provide additional cash in the form of Rs. 2,000 banknotes to delivery agents during Cash-on-Delivery orders. The customer’s Amazon Pay balance will be credited with the amount collected, allowing them to use their notes for online purchases. The balance can be used for mobile and DTH recharges, bill payments, and shopping on the Amazon platform.

Also Read | UPI Tips And Tricks: Here’s How You Can Set UPI PIN Without Using Debit Card Details

KYC Compliance And Increased Convenience

To access this service, Amazon requires customers to comply with the KYC guidelines. In other words, customers must have a verified Amazon Pay account through the KYC system. Achieving KYC compliance involves requesting video KYC, which Amazon states can be completed in just 5 to 10 minutes. Additionally, Amazon Pay allows users to top up their account balance up to Rs. 50,000 per month, which surpasses the maximum limit that banks can accept at one time. According to RBI guidelines, individuals can submit a maximum of Rs. 20,000 in Rs. 2,000 notes during a single transaction.

Also Read | Amazon Prime Lite Annual Membership Launched In India: Costs Just Rs.999

Categories
Apps Featured How To

Want To Hide Your Online Status From Friends On Facebook? Here’s How

Key Highlights

  • Facebook users have the option to hide their active status
  • It provides them privacy and control over their online presence
  • This feature ensures flexibility and discretion for individuals using Facebook

The online status indicators on Facebook, such as the green dot, grey crescent moon, and empty grey circle, can attract unnecessary messages from friends. If you’re tired of receiving such messages every time you go online, this article will provide you with simple steps to hide your ‘Active’ status on Facebook across Android, iOS, and the web. Also Read | How To Edit Facebook Photos Via Mobile, Desktop App Directly

How To Hide Your Facebook Active Status On Web

Step 1: Visit the Facebook website and navigate to the Messenger tab located on the left side of the main page.

Step 2: Click on the three dots in the upper-right corner of the Messenger window, and then select Preferences.

Step 3: A pop-up menu will appear. Click on “Active Status: On” and disable the toggle. You can also choose your preferred method of hiding the online status from the available options.

Step 4: Once you’ve made the desired changes, click Save.

How To Hide Your Facebook Active Status On Android

Step 1: Open the Facebook app on your Android phone or tablet. In the upper-right corner, click on the Messenger button. Make sure that you have the Messenger app installed on your device.

Step 2: Inside the Messenger app, go to Chats, and then access your Messenger settings. Locate the Active Status option.

Also Read | Facebook Tips And Tricks: How To Create And Upload Facebook Reel Videos

Step 3: Disable the “Show when you’re active” toggle. This will remove the green dot displayed next to your name on Facebook. When prompted, tap on Turn Off to confirm the action.

How To Hide Your Facebook Active Status On iPhone, iPad

Step 1: Open the Facebook app on your iOS device and tap on the three-line menu icon at the bottom-right of the screen.

Step 2: Navigate to the Settings and Privacy section and select Settings.

Step 3: Within the Privacy section, choose Active Status, and on the following page, toggle off the “Show when you’re active” option. Click Agree when prompted.

By following this guide, you can hide your Active status on Facebook and avoid the influx of unwanted messages from friends on the platform. If you wish to take further steps to enhance your online privacy and reduce tracking, you may even consider deleting your Facebook account.

Also Read | Want A Blue Tick On Facebook? Here’s How To Get Verified Today

Categories
Apps Featured Info

Netflix’s TUDUM 2023 Event: Squid Game 2, Emily in Paris 4, And More Announced

Key Highlights

  • Extraction Season 3 and the new series Heart of Stone announced
  • Chris Hemsworth’s popular action thriller “Extraction” is set to return for a third season
  • Spinoff for Berlin from “Money Heist” revealed at Netflix’s TUDUM 2023 Event

Netflix’s TUDUM event showcased an array of exciting announcements, from new shows to highly anticipated seasons. Chris Hemsworth’s Extraction will return for Season 3, while Alia Bhatt, Jamie Dornan, and Gal Gadot’s Heart of Stone will captivate audiences. Additionally, Berlin from Money Heist is receiving his own spinoff, as revealed in a teaser featuring a fresh cast. The upcoming Indian teen musical drama, The Archies, offers a desi twist to Riverdale’s youthful characters. Fans were treated to a glimpse of 3 Body Problem, a new series by the Game of Thrones showrunners. Lastly, a brief teaser for Netflix’s live-action series based on Avatar: The Last Airbender was unveiled. Also Read | Netflix For Fitness Enthusiast: Collaborates With Nike To Stream Workout Videos On Its OTT App

Squid Game Season 2

Following its global success, Squid Game is returning for a second season with actors Lee Jung-jae, Lee Byung-Hun, Wi Ha-jun, and Gong Yoo reprising their roles. New cast members Yim Si-Wan, Kang Ha-Neul, Park Sung-Hoon, and Yang Dong-Geun will join them. While Netflix did not release a trailer, the announcement of the cast has heightened anticipation for the upcoming season.

Squid Game: The Challenge

Netflix is not only bringing back Squid Game for a second season but is also introducing the first reality show based on the series. The show will feature 456 participants competing in schoolyard games over 10 episodes for a prize of $4.56 million. The format will resemble the games played in Squid Game, except without the risk of elimination by death.

Extraction 3

Chris Hemsworth’s successful Extraction franchise will continue with a third movie. The announcement was made by Hemsworth and director Sam Hargrave at the TUDUM event.

Also Read | What Are Netflix Secret Codes: How To Watch Hidden TV Shows And Movies On Netflix Using Secret Codes

The Archies

Set in 1960s India, this upcoming musical drama presents a different take on the story of Archie and his friends from Riverdale. The Indian cast, including Suhana Khan, Agastya Nanda, Khushi Kapoor, Mihir Ahuja, Dot, and Vedang Raina, will bring a Desi Riverdale to life. A teaser for The Archies was released alongside a sizzle reel, offering a glimpse into the show’s vibe.

Emily In Paris Season 4

Lily Collins will reprise her role in the fourth season of the popular Netflix original series, Emily in Paris. In a teaser for the show, Emily is seen embarking on a Roman holiday. Fans are left wondering about the fates of other characters, such as Alfie’s heartbreak, Gabriel’s Michelin star aspirations, Mandy and the band’s Eurovision journey, and the longevity of Sylvie’s rekindled love. The burning question remains whether Emily and Gabriel will finally end up together.

Berlin

Berlin, a character from Money Heist/ La casa de papel, will be the focus of a new series exploring his backstory before becoming part of the Professor’s master plan. Pedro Alonso will reprise his role as Berlin, joined by a fresh cast. The series revolves around Berlin’s ambitious goal to steal €44 million in a single afternoon, as announced by Netflix.

Also Read | How To Create And Manage Multiple Netflix Profiles: Step-By-Step Guide

Categories
Apps Featured How To

Google Lens New Skin Feature Allows Searching Skin Conditions: How To Know It’s a Pimple, Lump, Or Mole Using Google Lens?

Key Highlights

  • Google Lens gets Skin feature
  • Allows getting information on different skin conditions
  • Will also help with detecting lump and bumps on skin

Google’s wide range of mobile services has simplified our fast-paced lifestyle. The company is not only bringing in new features but also refining existing services. Google is diving deep into the AI world and has been grabbing headlines with its own ChatGPT alternative called Bard. But with apps and features like Google Lens, Google already has been showing its expertise in developing AI tech. Recently, Google has made it possible for users to get an insight into their skin condition. What is this new Google Lens Skin feature and how you can use it to check skin conditions? Read below:

Google Lens Skin Feature Use Explained

The latest Google lens feature will use AI technology to determine the skin conditions of any user. The app will now be able to describe any mole or skin condition that would be difficult for any general user to identify. With this new skin feature, the Google Lens will search for skin condition that the user will upload in the form of a picture. This new AI medical feature will be describing if the bump on the skin is a pimple or any odd mole.

How To Check Skin Condition Using Google Lens

Step 1: Unlock your Android smartphones

Step 2: Open the camera app on your phone and click the picture of the mole/ pimple or skin patch that you want to check.

Step 3: Launch the Google Lens mobile application. You can download the app if it isn’t pre-installed.

Step 4: Now, upload the image that you have captured to check the skin condition

Step 5: You will be shown the list of visual matches that will describe your skin condition

What Else The Google Lens Skin Feature Helps With? Who Can Use?

In addition to describing the skin condition, the Google Lens skin feature will also help users find additional information about nails and hair. This feature will help users to search or describe any unwanted lump or bump on the lip or lines on the nails. It will also help users detect hair loss on the head. Currently, only the users in the US will get an access to the Google Lens Skin feature. Remaining markets including India will possibly get this new Lens feature in the coming months.

Also Read: Google Maps Launches Three Features To Simplify Your Travel Planning! What Are They?

Categories
Apps Featured How To

Need To Save Moj Videos For Later? Learn How To Download For Free

Key Highlights

  • Moj is a highly popular short video app
  • It offers a built-in feature to download videos
  • Downloading videos from the app is easy

Moj, a highly popular short video app, is used by millions of users nationwide with its user-friendly interface and an abundance of great content. Unlike other short-video apps, Moj offers a convenient built-in feature that allows users to download videos directly from the app without relying on third-party websites or applications. In this guide, we will walk you through the step-by-step process of downloading Moj videos on your mobile phone. Also Read | Instagram Reels: How To Add Own Audio Recording, Other Creator’s Music To Insta Reels Videos

However, it’s important to note that downloading videos for commercial use without permission may lead to legal complications. It is recommended to seek permission from the original content creator before downloading Moj app videos onto your device. With that clarification, let’s proceed to the instructions for downloading Moj videos for free.

How To Download Videos From Moj

Step 1: To begin the video download process, locate and open the Moj app on your smartphone.

Step 2: Choose the video you wish to download from the Moj app’s extensive collection.

Step 3: Tap the share button, typically represented by an arrow icon, to trigger the download process.

Step 4: A ‘Share’ tab will appear, presenting various social media platforms like Instagram, WhatsApp, and Facebook. This tab also provides additional download options.

Step 5: Select the download option from the available choices in the ‘Share’ tab.

Also Read | YouTube Shorts: How To Create And Upload YouTube Short Videos On Android, iOS

Step 6: Upon selecting the download option, the app may require permission to access photos, media, and files on your device. Allow the necessary permissions to proceed.

Step 7: Once permissions are granted, the selected video will start downloading onto your smartphone.

Step 8: When the download is complete, you will receive a notification. Open your gallery app to access and enjoy the downloaded video at any time, even without an internet connection.

With Moj’s built-in functionality, downloading videos from the app is a simple process that enables you to enjoy your favorite content offline. By following these simple steps, you can easily download Moj videos and watch them repeatedly without consuming data. Remember to respect the rights of content creators and seek permission when using downloaded videos for commercial purposes. Now you can enhance your Moj experience by downloading and enjoying videos hassle-free.

Also Read | How Can You Download And Watch Instagram Reels On Android, iOS Without Installing Third-Party Apps?

Categories
Apps Featured Info

Truecaller Re-Launches Call Recording For Android, iOS: What’s The Catch?

Key Highlights

  • Truecaller re-introduces call recording feature for both Android and iOS
  • Available for both Android and iOS users
  • Only premium users can access the call recording feature on Truecaller

Call recording is one of the features that has been most demanded by smartphone users. While most of the smartphone OEMs integrated this feature with their respective UI’s, third-party app developers also offered call recording apps for both Android and iOS users. However, Google had restricted some Accessibility API‘s post and all call recording apps were removed from the Play Store. Truecaller which is best known as the caller ID app also offered a call recording feature but discontinued it back in May 2022. Now, the brand has brought back the call recording feature for Android and iOS users. But how has the brand made it possible to record calls despite restrictions from Google? Let’s find out the details below:

Also Read: Truecaller Tips & Tricks: Check Steps To Turn Off Last Seen Feature On Android

Truecaller Call Recording Feature For Android, iOS Available Again

Truecaller has brought back the much-demanded call recording feature for its Android and iOS mobile applications. With this option, users will be able to record all the voice calls using Truecaller native app. This feature will help the users to record the important calls without redirecting to any third-party application. Speaking of the functionality, Truecaller has come up with a workaround with which it will allow users to record any voice call. The brand has used AI to come up with the solution.

Both Android and iOS users will need to make a call using the Truecaller app and merge the calls in order to initiate the call recording process. It is worth mentioning that the caller will get notified about the ongoing call recording. A beep sound will be played once the call recording begins.

Also Read: WhatsApp Call Recording: Here’s How You Can Easily Record Call On Android And iOS

Truecaller Call Recording For Android And iOS: What’s The Catch?

Unfortunately, not all the users on Truecaller can record the calls. The company is currently offering this feature only for premium users. As for the subscription plans, Truecaller has announced both monthly as well as annual subscription plans. The cheapest Truecaller Premium Connect subscription is priced at Rs. 75 per month and Rs. 529 annually.

On the other hand, the Truecaller Premium Assistant subscription is priced at Rs. 99 per month and Rs. 999 per annum. There is also a Truecaller Premium Family plan which is priced at Rs. 132 per month and Rs. 925 per annum.

Also Read: Stop Call Recording Announcement On Realme Smartphones: Here’s How

Categories
Apps Featured Info

Google Maps Launches Three Features To Simplify Your Travel Planning! What Are They?

Key Highlights

  • Google has introduced new Google Maps functionality
  • With the upgrade, Google Maps now has glanceable directions
  • More cities are included in Immersive View

Google has made significant announcements regarding its navigational platform, Google Maps, introducing a range of new features aimed at improving user experience. These additions, including glanceable directions and an immersive view, are designed to simplify trip planning and facilitate the exploration of unfamiliar places. Here’s a comprehensive breakdown of what you need to know about these new Google Maps features. Also Read | Find Nearest Grocery Store: Here’s How To Locate Closest Grocery Store Using Google Maps

Glanceable Directions: Making Navigation Convenient

One of the notable features Google is introducing is “glanceable directions” in Google Maps. With this functionality, users can conveniently track their trip progress directly from their lock screen or the route overview. By opting in and requesting directions to their destination, users will receive updated estimated arrival times (ETAs) and upcoming turn notifications. This data was previously only available in full navigation mode. Additionally, if users decide to take an alternative route, Google will automatically update the directions accordingly.

Updates To Recents: Saving Progress And Collaborating

Users can now store locations in their Recent highlights even after closing the Google Maps window. This feature provides users with the flexibility to take breaks from trip planning and return to it later without losing their progress. Users can remove places they have already viewed, plan multiple trips simultaneously, and share selected places, such as attractions or hotels, with their travel companions to gather input. Once users have finalized their chosen destinations, they can select three or more places, click on “directions,” and Google Maps will generate a customized route that includes all the selected stops. This route will be saved in the user’s Recents section.

Also Read | Google Maps Privacy: How To Blur Or Delete House Or Any Other Image In Google Maps Street View

Immersive View: A Multidimensional Exploration Experience

Four more cities have been added to Google’s Immersive View list: Amsterdam, Dublin, Florence, and Venice. Furthermore, the company is now including over 500 renowned landmarks worldwide in this feature. Leveraging advanced AI technology, Immersive View provides a multidimensional perspective of various locations by combining a vast collection of images. Accompanied by layers of reliable information, users can delve into the immersive experience and gain insights into the landmarks they are virtually visiting.

Also Read | Google Maps Immersive View For Routes Shows Live Route Traffic, Weather, And More: How To Use?