Categories
Featured How To Mobile

Android Tricks: Here’s How To Enable Earthquake Alerts On Your Phone In India

Key Highlights

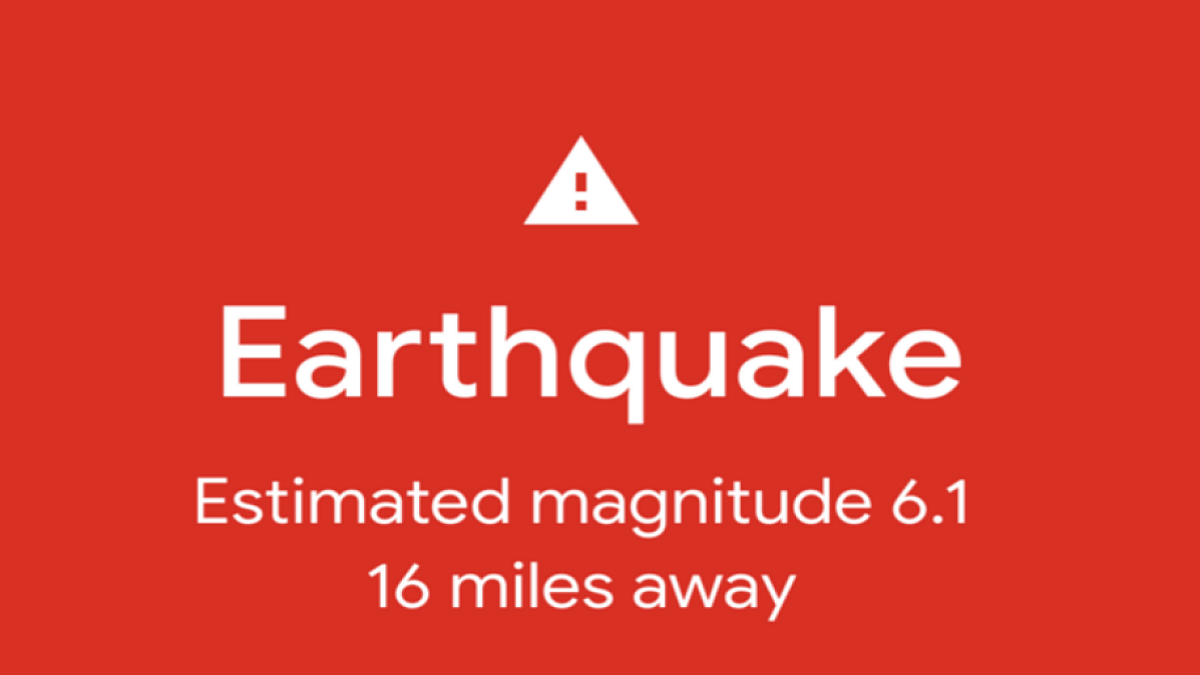
  • Google is introducing Earthquake Alerts for Android in India
  • Users who use this function will receive earthquake alerts in their area
  • It will be compatible with Android OS 5 and newer OSes

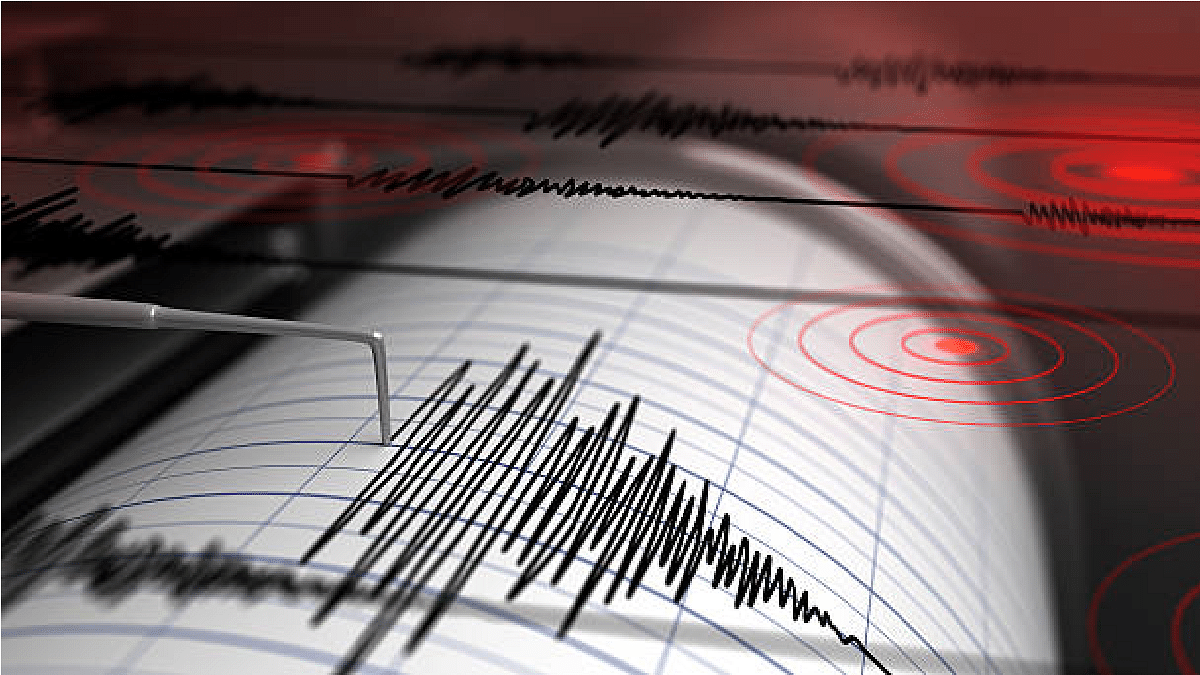
Google has introduced Earthquake Alerts on Android smartphones in India through a partnership with the National Disaster Management Authority (NDMA) and the National Seismology Center (NSC). This system harnesses smartphone data to detect early signs of earthquakes and notify users in affected areas.

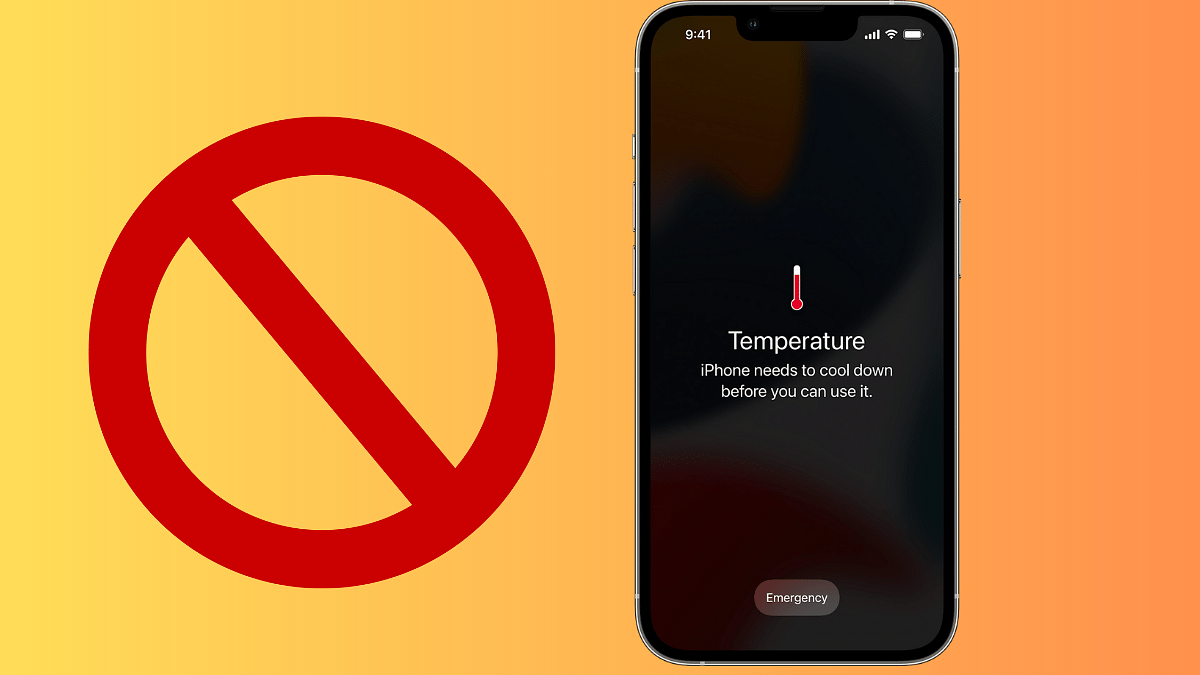
Also Read | Want To Get Weather Alerts On Your iPhone? Here’s How To Do It

How It Works: Smartphone Seismometers

In a blog post, Google explained that Android smartphones are equipped with accelerometers that act as mini seismometers. When a charging phone detects initial earthquake tremors, this data is relayed to Google’s servers. If multiple phones detect similar shaking simultaneously, the system estimates the earthquake’s occurrence, epicenter, and magnitude. Subsequently, alerts are sent to nearby phones.

Two Types Of Alerts For Android Users

Android users will receive two types of alerts based on smartphone data:

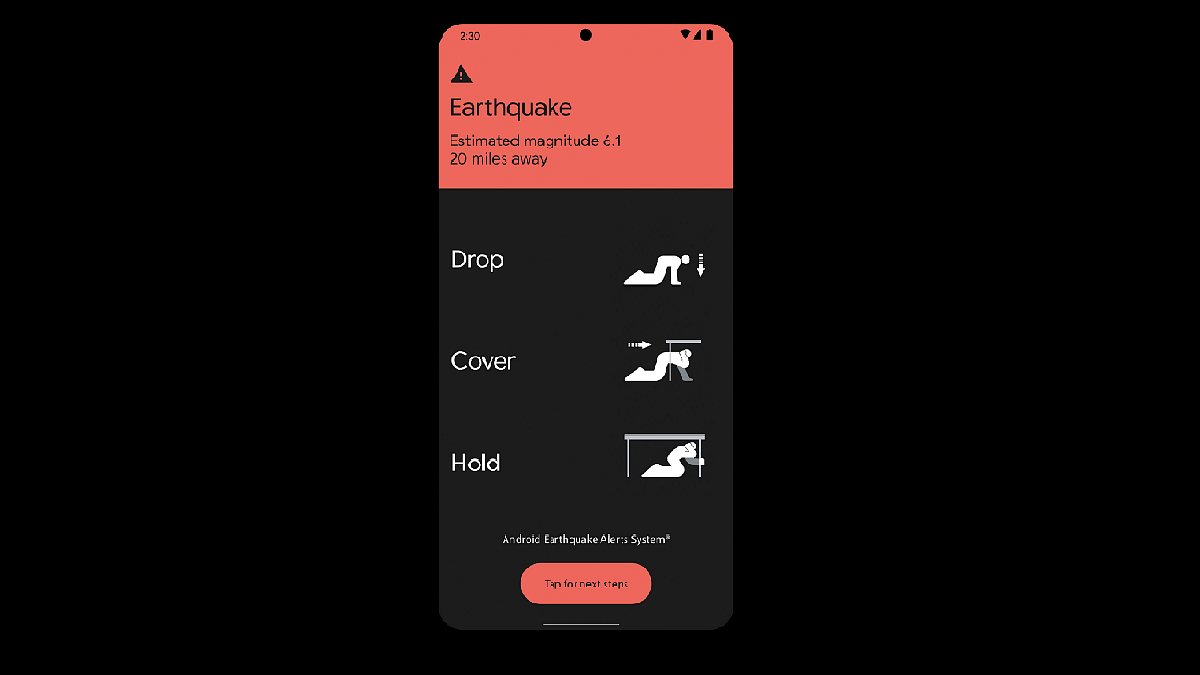
Be Aware Alert: This alert is designed to inform users about light shaking, providing additional information upon tapping the notification. It respects the user’s volume, Do Not Disturb, and notification settings.

Take Action Alert: Geared toward warning users before they experience moderate to heavy shaking, this alert interrupts Do Not Disturb settings, activates the screen, and emits a loud sound to prompt users to take protective measures.

Also Read | How To Use Missed Call Alert Feature: Check All Steps Here

How To Enable Earthquake Alerts On Android Phones

While Google is rolling out this feature to Android devices running Android 5 and newer OS versions, users must manually enable it. Here are the steps to activate Earthquake Alerts on Android smartphones in India:

Step 1: Turn on mobile data or Wi-Fi on your Android phone.

Step 2: Open the Settings app.

Step 3: Access Safety & emergency settings.

Step 4: Choose the Earthquake Alerts option.

Step 5: If you can’t find Safety & emergency, navigate to Location, then Advanced, and finally Earthquake alerts.

Step 6: Toggle the Earthquake Alerts option to enable it.

Google’s Earthquake Alerts aim to enhance safety and preparedness for seismic events among Android users in India.

Also Read | Google Maps Location Sharing Alert Notification: How To Notify Your Contacts Of Your Arrival And Departure Using Maps

Categories
How To Info Laptop

5 MacBook Keyboard Shortcuts You Probably Didn’t Know

Do you own a MacBook? If so, you might be surprised to learn that there are some handy keyboard shortcuts that can make your life easier and more efficient. In this article, we’ll introduce you to five MacBook keyboard shortcuts that you probably didn’t know about.

These shortcuts will help you navigate your MacBook with ease and speed up your daily tasks.

Also Read: macOS Sonoma Now Available: Here’s Everything You Should Know Before Updating

1. Take a Screenshot in Different Ways

Capturing your screen is a breeze with these shortcuts:

  • Shift + Command + 3: Takes a screenshot of your entire screen.
  • Shift + Command + 4: Let you select a specific area to capture.
  • Shift + Command + 4, then Spacebar: Captures a specific window or application.

Your screenshots will be saved on your desktop for easy access.

2. Quickly Access Spotlight Search

Spotlight Search is a powerful tool for finding files, apps, and more on your MacBook. To access it instantly:

  • Command + Spacebar: Opens Spotlight Search, allowing you to start typing your search query right away.

3. Navigate Between Applications

Switching between open applications is a breeze with this shortcut:

  • Command + Tab: Hold down the Command key and tap Tab to cycle through your open apps. Release the Command to switch to the selected app.

This is a faster way to multitask and switch between apps without using your mouse.

4. Minimize Windows in a Snap

Clear your cluttered screen quickly:

  • Command + M: Minimizes the active window, reducing it to the Dock.

Use this shortcut to tidy up your workspace without closing applications.

5. Zoom In and Out with Ease

If you’re struggling to read small text or want to see the big picture:

  • Option + Command + Plus (+): Zooms in on your screen.
  • Option + Command + Minus (-): Zooms out.

This can be handy when browsing websites or reading documents.

Also Read: How To Maximize iPhone Battery Health: Tips & Tricks

Categories
Apps Featured How To

Moj Filters Unleashed: Here’s How To Transform Ordinary Videos In Five Simple Steps

Key Highlights

  • Moj offers a diverse content universe
  • It adds four fresh filters each month
  • It empowers users to craft, edit, and share videos

Moj isn’t your run-of-the-mill platform; it’s an immersive experience that keeps you captivated from start to finish. Whether you’re into lip-syncs, creative skincare tips, trending challenges, or delectable culinary concoctions, Moj has it all. It offers a diverse content universe that leaves its audience enthralled.

Moj stands out with its extensive collection of over 700 transformative filters. These filters effortlessly elevate your content, turning ordinary videos into mesmerizing creations. What’s even more exciting is the regular addition of four fresh filters each month, opening up limitless possibilities for enhancing your visuals. Moj’s filters are also incredibly timely, perfectly capturing occasions like Diwali, Independence Day, and Teacher’s Day, ensuring your content is always in sync with current trends. Also Read | Need To Save Moj Videos For Later? Learn How To Download For Free

A Community Of Creativity

Moj seamlessly brings creators together in a vibrant community. It empowers users to craft, edit, and share videos like never before. The innovative Snap Camera AR Kit takes creativity to the next level with cutting-edge lenses and filters, pushing the boundaries of what you can achieve.

How To Add Filters To Your Videos

Ready to make your content pop? Moj provides a user-friendly guide on how to add filters to your videos, transforming every upload into a visual masterpiece that’s sure to grab attention. Become the star of your own show with Moj!

Step 1: Launch the Moj app on your device and locate the “+” sign at the bottom of the screen.

Step 2: When the Moj camera opens, tap on the Moj logo at the bottom left. Inside, you’ll discover a delightful array of captivating filters like DSLR Shot, Savage, Party Time, CuteLife, and Charged Up, among others.

Also Read | How To Upload And Use Animated Emojis As Telegram Profile Picture On Android, iOS

Step 3: Choose your preferred filter and tap the record button to start capturing your video.

Step 4: Once you’ve finished recording, tap the next button. Feel free to enhance your video further by adding text, music, or a voice-over during the editing process.

Step 5: Now that your video is ready, easily share it with your friends and family on Moj, spreading joy and creativity within the vibrant community.

Unleash Your Creativity With Moj

Discover boundless creative possibilities with Moj’s captivating filters and become a part of a dynamic community where your videos come to life in extraordinary ways. It’s time to let your creativity shine on Moj!

Also Read | Master Moj’s 90-Second Guide: How To Edit Captivating Videos In No Time

Categories
Apps Featured How To

Maximizing Savings: Here’s How To Use Blinkit Promotional Codes

Key Highlights

  • Blinkit promotional codes are a great way to save on your grocery and household shopping
  • You can make the most of the promo codes
  • You need to find valid Blinkit promotional codes

In today’s fast-paced world, convenience is key. That’s where Blinkit comes in. Blinkit, formerly known as Grofers, is an on-demand grocery delivery platform that offers a wide range of products, from fresh produce to household essentials, all delivered right to your doorstep. What’s even more exciting is the opportunity to save big through promotional codes. In this article, we’ll walk you through how to make the most of Blinkit promotional codes to enhance your shopping experience.

Also Read | Blinkit To Deliver iPhone 15, iPhone 15 Plus At Your Doorsteps In Minutes

Downloading Blinkit App

If you haven’t already, download the Blinkit app on your smartphone. It’s available for both Android and iOS devices. Having the app handy ensures a seamless shopping experience.

Create An Account

To use promotional codes on Blinkit, you’ll need to create an account. This process is simple and requires only basic information.

Add Items To Your Cart

Browse through the vast selection of products available on Blinkit. Put the things you want to buy in your cart. Make sure your order meets any specific requirements for the promotional code you intend to use.

Find The Right Promo Codes

You need to find valid Blinkit promotional codes. These codes can be discovered on the Blinkit app or website and through promotional emails, social media, and coupon websites. Be sure to check the expiration dates and terms and conditions associated with each code.

Also Read | Unlock Exclusive Deals: Five Best Coupon Apps For Online Shopping In India

Apply The Promo Code

Go to your cart when you are ready to check out. Here, you’ll find a section labeled “Promo Code.” Enter the code you’ve found into the designated field. Once entered, click “Apply.” The discount associated with the code will be subtracted from your order total.

Review Your Order

Take a moment to review your order before proceeding with the payment. Ensure that the discount has been correctly applied and that your order meets any other conditions set by the promotional code.

Payment And Delivery

Once you’re satisfied with your order, proceed to payment. Blinkit offers multiple payment options, including credit/debit cards, digital wallets, and more. After completing your payment, you’ll receive a confirmation of your order, and your items will be on their way to your doorstep.

Also Read | Flipkart SuperCoins (2023): Learn How To Earn, Use And Enjoy Exciting Rewards

Stay Updated

Stay tuned for future Blinkit promotions and codes by subscribing to their newsletter and following them on social media. This way, you’ll never miss out on great deals.

For the tech geeks, stay updated with the latest cutting-edge gadgets in the market, exclusive tech updates, gadget reviews, and more right on your phone’s screen. Join Giznext’s WhatsApp channel and receive the industry-first tech updates.

Categories
Apps Featured How To Tech Gadgets

Facebook Multiple User Account: How To Create Multiple Facebook Profile For Single User

Key Highlights

  • Facebook new feature allows users to create multiple profiles
  • Update released globally
  • Currently up to four user accounts can be created

Facebook is amongst the most popular social media platforms for a while now. Facebook is updating its platform with the rising competition and has released several features to boost the user experience. The latest such feature being added to this popular social media app is the option to create multiple user profiles for a single. What is this new feature and how can one create multiple profile on Facebook? Know the details below:

Facebook Multiple Profile Feature Released: What Is It?

It has been almost a year since Meta has been testing the option with which users will be able to create multiple profiles on Facebook. Now the final update is being seeded to the users globally. With this new option, Facebook users will be able to create as many as four different account for self. The personal profiles will be of a single user which can be accessed without logging in separately to the accounts.

Meta is releasing this multiple profile feature option to the masses including India in a phased manner. It is expected that the new profile feature will be made available to all the users globally in the few months. You can always check for a manual update if in case the update isn’t added automatically. If you wish to know the steps with which you can crate up to four personal accounts on Facebook, read the step by step guide below:

Also Read: Four Amazing Facts About Facebook

Steps To Create Multiple Facebook Profile (Personal Account)

Step 1: Launch the Facebook mobile or desktop app on your respective devices

Step 2: Enter your valid credentials and log into the profile

Step 3: Now, tap on your Facebook profile icon

Step 4: A new option will be on the top visible stating create a new profile. Tap on it

Step 5: Once you select the create a new profile option, you will get the option to add a new name of the profile

Also Read: Want To Hide Your Online Status From Friends On Facebook? Here’s How

Step 6: After you’ve added the profile name, you will be able to add friends to the newly created profile

Step 7: You can easily switch between the newly created and the existing accounts from the same profile tab

Step 8: Similar to you current Facebook profile, you will also be able to follow different pages and perform other activities

Also Read: How To Edit Facebook Photos Via Mobile, Desktop App Directly

Categories
Apps Featured How To

National Cinema Day 2023: Here’s How You Can Book Movie Tickets At Just Rs. 99

Key Highlights

  • This year’s National Cinema Day will be celebrated on October 13
  • The Multiplex Association of India shared the news on their official social media account
  • All movie tickets on October 13 will cost you Rs. 99

If you’ve been delaying your plans to catch a movie with friends or family due to high ticket prices, there’s great news! National Cinema Day is making a comeback this year, allowing movie enthusiasts to enjoy their favorite films at partner chain theaters for just Rs 99. The Multiplex Association of India is set to host National Cinema Day on October 13, making this deal available in over 4,000 cinema halls across the country, including popular chains like PVR Inox, Cinepolis, and Movie Time. Also Read | Last-Minute Travel Plans? Here’s How To Book Tatkal Train Tickets Online

The Spirit Of National Cinema Day

The purpose of National Cinema Day is to celebrate the passion of moviegoers and the crucial role they play in making certain movie blockbuster hits. It also aims to reignite the culture of watching movies in theaters, which had seen a decline post-pandemic due to the rise of streaming platforms.

Ticket Pricing Update

While the movie ticket price for this year’s National Cinema Day has seen a slight increase, it remains an affordable option for movie lovers. Last year, eligible tickets were priced at just Rs. 75 per admission, making movies like Brahmastra even more popular. According to the statement, this offer will be available through partner booking platforms and at all participating cinemas.

Also Read | ICC Men’s Cricket World Cup 2023 Timeline, Match Schedule, Ticket Booking, Online Streaming And More

How To Book Your Tickets At Rs. 99

To make the most of this offer, follow these simple steps:

Step 1: Visit any partner booking platform, such as BookMyShow or Paytm.

Step 2: Choose October 13 as your preferred date for the movie and select your desired showtime.

Step 3: During the checkout process, you’ll be charged Rs. 99 per ticket, along with any applicable convenience fees and taxes.

In-Person Savings

If you prefer to avoid convenience fees and taxes, you can purchase your tickets directly from the theater’s box office. Don’t miss out on this opportunity to enjoy a cinematic experience at an unbeatable price!

Also Read | Use Paytm To Book Your Bus Tickets: A Step-By-Step Guide

Categories
Apps Featured How To

iOS 17 Hits iPhones In India: Here’s Compatible Devices And How To Download

Key Highlights

  • iOS 17 released for all eligible iPhone users in India
  • Apple first announced the iOS 17 in June 2023 at WWDC
  • iOS 17 operating system will bring a host of new features

Apple has introduced its highly-anticipated iOS 17, bringing a wave of new features and improvements to iPhone users. Here, we explore the release of iOS 17, compatible devices, and a step-by-step guide on how to update your iPhone to this cutting-edge operating system. Also Read | iOS 17 Live Voicemail: How To Use It On Your iPhone

iOS 17 And Its Beta Testing Phase

Apple revealed iOS 17 during the WWDC in June 2023, alongside iPadOS, tvOS, and watchOS updates. Following its official announcement, iOS 17 underwent rigorous beta testing to ensure a smooth user experience. Now, iPhone, iPad, and Apple Watch users worldwide can access these exciting updates.

Which iPhones Support iOS 17?

iOS 17 is exclusive to iPhones equipped with the A12 Bionic chip or newer models. Unfortunately, this means that older devices, such as the iPhone X, iPhone 8, and iPhone 8 Plus (released in 2017), will not receive the update. Instead, iOS 17 is available for the iPhone SE (2nd generation or later), iPhone XR, and their successors. Devices older than five years will not meet the hardware requirements for iOS 17.

How To Update Your iPhone To iOS 17: A Step-by-Step Guide

Before embarking on the iOS 17 update journey, it’s crucial to safeguard your data. To do so, create a backup of your iPhone on iCloud or your computer using iTunes or Finder. Here’s how you can update your iPhone to iOS 17:

Step 1: Connect your iPhone to a Wi-Fi network.

Step 2: Navigate to Settings > General > Software Update.

Step 3: If iOS 17 is available, tap “Download and Install.”

Step 4: Enter your passcode if prompted.

Step 5: Agree to the terms and conditions.

Step 6: The update will commence, downloading and installing. Be patient, as this process may take several minutes.

Step 7: Once the update is installed, your iPhone will automatically restart.

With iOS 17 now at your fingertips, you can explore the exciting new features and enhancements that Apple has brought to your iPhone.

Also Read | iOS Tips And Tricks: How To Setup And Use AutoFill For Contact Cards And Credit Cards In Safari On iPhones And iPads

Categories
How To Mobile

How To Maximize iPhone Battery Health: Tips & Tricks

Key Highlights

  • iOS Battery Optimization Tips
  • Temperature’s Impact on iPhone Battery
  • Long-Term Battery Storage Guidelines

From staying connected with loved ones to managing our daily schedules, our iPhones are always at our side. But the one thing that often holds us back is the constant low battery warning.

Here are some tips and tricks to maximize iPhone battery health.

Also Read: How To Cut, Copy, and Paste Between iPhone And Other Devices: Step-By-Step Guide

Turn On Battery Optimisation

To reduce battery ageing, your iPhone learns your charging patterns, charging to 80% initially, preserving battery for when you need it most.

Also Read: Apple Fixes Zero-Day Security Vulnerability Affecting iPhones, iPads With iOS 16.5.1 Update

Update to the Latest Software

Apple regularly releases software updates that fix bugs and include energy-saving improvements. These updates can help optimize your device’s battery life. To ensure you’re benefiting from these improvements, Apple advises keeping your device up to date by installing the latest iOS, macOS, or watchOS updates.

To see if you need an update, open the Apple Watch app on your iPhone and go to My Watch > General > Software Update.

Also Read: Apple iPhone 15 USB-C Advantages: How It Benefits Users

Avoid Extreme Temperatures

According to Apple, your Apple device operates optimally at temperatures between 16°C to 22°C (62°F to 72°F). Extremes, especially temperatures exceeding 35°C (95°F), can harm your battery’s capacity. Charging in high temperatures is also discouraged, as it can further damage your device.

Even storing your device in a hot environment, Apple warns, can lead to irreversible battery damage. Conversely, very cold temperatures may temporarily reduce battery life, but it’ll bounce back once it warms up.

Also Read: What’s Next For iPhone? Apple’s iOS 17 Unveils Some Features For Later Release

Avoid Using Cheap iPhone Cases

According to Apple, certain types of cases can trap heat during charging, impacting your battery’s capacity. If you notice your device getting hot during charging, Apple recommends removing it from the case before charging it up.

Also Read: Various Methods To Power Off iPhone 13 And iPhone 14 Models: Here’s How

Store It Half-Charged for Long-Term Storage

According to Apple, if you plan to store your device for an extended period, maintaining its battery health involves the following steps:

  • Don’t fully charge or discharge the battery before storing it. Aim for around 50% charge. Fully discharging can lead to a deep discharge state, rendering the battery unusable.
  • Power down the device to prevent unnecessary battery use.
  • Store it in a cool, moisture-free environment below 32°C (90°F).

Also Read: Need To Transfer iPhone Data To Your Laptop? A Step-by-Step Guide On How To Do It

Categories
Featured How To

Need To Download Your e-PAN Card Online? Here’s A Step-by-Step Guide

Key Highlights

  • You can now carry your PAN card digitally as an e-PAN on your smartphone
  • Download it easily from the Income Tax or UTIITSL official websites
  • Just follow a few simple steps to get your e-PAN on your device

The advent of technology has made it possible to carry your PAN card digitally on your smartphone, conveniently referred to as the e-PAN. This electronic version can be effortlessly downloaded from the official websites of the Income Tax Department and UTIITSL. Let’s take you through the simple steps to effortlessly download your ePAN onto your device.

Also Read | Lost PAN Card? Here’s How To Apply For A Duplicate PAN Card Online

How To Download e-PAN Card via Income Tax e-Filing Website

If your mobile number is linked with your Aadhaar card, the Income Tax e-Filing website is your go-to platform to download your PAN card.

Step 1: Visit the official website for income tax e-filing.

Step 2: Go to the left menu and choose “Instant E-PAN.”

Step 3: To continue, select “Continue” under “Check Status/Download PAN.”

Step 4: Enter your 12-digit Aadhaar number and check the provided box. Click “Continue.”

Step 5: An OTP will be sent to your Aadhaar card-linked mobile number.

Step 6: Enter the received OTP in the designated field and click “Continue.”

Step 7: Select “Download E-PAN” on the following screen.

Step 8: Save the PDF file to your device, and you’re all set.

If you don’t see the option to download the e-PAN, you may need to select the ‘Get New E-PAN’ option and follow the procedure to generate the file. If the PDF is password-protected, simply enter your date of birth in the DDMMYYYY format.

Also Read | UPI Tips And Tricks: Here’s How You Can Set UPI PIN Without Using Debit Card Details

How To Download e-PAN via UTIITSL Website

If you’ve obtained your physical PAN card from UTI Infrastructure Technology and Services Limited (UTIITSL), you can generate and obtain your e-PAN from their website.

Step 1: Go to UTIITSL’s e-PAN portal on your PC, laptop, or mobile device.

Step 2: Enter the captcha along with your PAN number and birthdate.

Step 3: Click “Continue” when finished.

Step 4: An email or link will be delivered to your registered mobile number or email address as you already have a valid PAN card.

Also Read | Need To Lock And Unlock Your Aadhaar Card Biometrics? Here’s How To Do It

Step 5: Open the link and verify by entering the OTP received via SMS.

Step 6: After validation, download the e-PAN to your device.

With these simple steps, you can have your PAN card readily accessible on your smartphone, simplifying various financial transactions and verifications.

For the tech geeks, stay updated with the latest cutting-edge gadgets in the market, exclusive tech updates, gadget reviews, and more right on your phone’s screen. Join Giznext’s WhatsApp channel and receive the industry-first tech updates.

Categories
Featured How To Laptop Mobile

Need To Transfer iPhone Data To Your Laptop? A Step-by-Step Guide On How To Do It

Key Highlights

  • There are various methods for transferring photos from your iPhone to your laptop
  • Transferring files to your laptop can enhance your iPhone’s performance
  • iCloud serves as a versatile tool to synchronize data across all your Apple devices

If you own an iPhone and are thinking about how to transfer your cherished photos to your laptop, fret not. This article delves into the various methods available for both Windows PC and Mac users to facilitate the secure and simple transfer of your precious data. This process is not only convenient but can also free up valuable space on your iPhone, potentially enhancing its performance and expanding storage for apps or backup data.

Also Read | What’s That Tune? Your iPhone Knows: How To Identify Songs With Just A Tap

Method 1: Using iCloud

iCloud, Apple’s cloud service, serves as a versatile tool to synchronize data across all your Apple devices seamlessly. By harnessing iCloud, you can automatically transfer data from your iPhone to your Mac, provided you have sufficient iCloud storage and a stable internet connection. However, it’s worth noting that iCloud transfers, especially for extensive photo libraries, can consume significant time due to the upload and download processes.

How To Transfer iPhone Data To Your Laptop via iCloud

Step 1: Launch the Files app on your iPhone and locate the files you wish to transfer.

Step 2: For a single file, press and hold it and then tap “Copy.” To copy multiple files, tap the three-dot menu and select “Select.” Pick the desired files and tap “Copy X items.”

Step 3: Head over to iCloud Drive within the Files app and select an empty space or a specific folder where you intend to paste the files.

Step 4: Tap “Paste” to initiate the upload of the copied files to iCloud Drive. You can subsequently access these files from your PC using iCloud.com or the iCloud Drive for Windows application.

Also Read | iPhone Check-In Feature: Learn How To Use It To Notify Loved Ones Of Safe Arrival

Method 2: Traditional Cable Connection

For those who prefer a more traditional approach, using a Lightning to USB cable to transfer data from your iPhone to your computer remains an effective and easy solution. This method is compatible with both Windows PC and Mac, eliminating the need for an internet or wireless connection. Here’s how you can do this.

Transfer iPhone Data To Your Laptop via USB Cable

Step 1: Start by connecting your iPhone to your PC using a USB cable.

Step 2: Launch iTunes, which you can download from either the Microsoft Store or the Apple App Store. Then, click on the iPhone icon located near the top-left corner of the iTunes window.

Step 3: Navigate to the left sidebar and click on “File Sharing.” You’ll find a list of apps and their associated files on your device.

Also Read | Apple Hacks: Here’s How To Hide And Unhide Your Photos On iPhone

Step 4: To save a file from your iPhone to your PC, simply click on the file and then select “Save.” Choose a location on your PC to store the file, and confirm by clicking “OK.”

With these simple methods at your disposal, you can effortlessly transfer your iPhone photos to your computer, ensuring their safekeeping and freeing up valuable storage space on your device.

For the tech geeks, stay updated with the latest cutting-edge gadgets in the market, exclusive tech updates, gadget reviews, and more right on your phone’s screen. Join Giznext’s WhatsApp channel and receive the industry-first tech updates.