An avid tech enthusiast, Jatin a.k.a JJ interest revolves around covering smartphone and all other gadgets. He is a tech enthusiast who finds it difficult to hold his excitement when it comes to latest gadgets. Currently, a Correspondent who is learning photography along with practicing doughnuts. Believes that work is worship and in YODO - You Only Drive Once! So push it hard
You may be asked for your IMEI number when registering your phone or trying to sell an old one online. Don’t worry if you’re stumped and urgently attempting to figure out what this number is.
What is the IMEI number?
Every mobile phone sold through legitimate channels is granted a unique number known as the IMEI (International Mobile Station Equipment Identity). This number will come in handy if you misplace your phone or it is stolen. When reporting your phone as stolen, the police usually ask for the IMEI number, and depending on local legislation, your phone’s IMEI can be blacklisted, preventing it from connecting to networks or making calls.
Due to the fact that an IMEI is linked to a specific SIM slot, dual SIM phones will have two IMEI numbers. Tablets with cellular connectivity will have an IMEI number as well.
This makes the number crucial in an emergency. If the device is found, the IMEI number can be used to verify that it is genuinely your phone.
Checking your Phone’s IMEI Number Using USSD Code
This is the most straightforward technique of determining your phone’s IMEI number. The advantage of this strategy is that it is almost universal. It works on practically all feature phones and smartphones, so give it a shot before looking for your phone’s bill.
On your phone, dial *#06#.
On the screen, the IMEI number will now appear. You should either write it down somewhere secure or snap a screenshot.
Checking IMEI Number on your Phone
For iPhones
The IMEI is also inscribed on the back panel of an iPhone 5 or any other subsequent iPhone. Simply flip the phone over to record it. The IMEI is printed on the SIM tray on iPhone 4s and any other previous iPhones.
For Android
Use the Google account associated with the Android phone to access Google Dashboard.
Next to the green robot logo, select Android.
This will provide a list of all devices associated with the account and their IMEI numbers.
Checking IMEI number through Settings
To see the IMEI number on Android, navigate to Settings > About > IMEI. Scroll down to get the IMEI information by tapping Status and scrolling down.
Tap Settings > General > About and scroll down to IMEI on an iPhone.
The IMEI is printed on a sticker inside the phone, under the battery, on most other phones with a replaceable battery. To check, remove the battery.
Checking the IMEI Number on Retail Box or Bill
The IMEI number is stated on both the retail box and the bill, which is an excellent incentive to save both instead of tossing them away. At the very least, keep the box because it will come in handy if you need to check the IMEI or if you decide to resell the phone later. The IMEI number will be printed on a sticker on the box’s side.
Conclusion
An IMEI number can come in handy if your phone goes missing or you want to sell your smartphone. If you are having trouble determining your phone’s IMEI number, you can use one of these effective remedies mentioned in this article.
Fast page loading rates, lightweight applications, and a unique tailored experience are just a few of the reasons why UC Browser is so popular among mobile users around the world. Despite this, the browser has been criticized in a number of nations. India, for example, has outlawed the app due to various issues about data protection. We’ve put up a list of the most acceptable UC Browser alternatives for Indian and international users.
Samsung Internet Browser
Samsung Internet Browser is a user-friendly and trustworthy application. It provides an uncluttered browsing experience, and it is probably the closest thing to UC Browser in terms of interface and capabilities. You can choose between search engines (Bing, DuckDuckGo, Google), sync bookmarks between devices, and use Samsung Cloud with ease.
Moreover, it is equipped with Protected browsing, which alerts you about harmful sites stealing data and blocks undesirable web pages that redirect you to other sites, as well as content filters and anti-tracking.
DuckDuckGo Browser
DuckDuckGo is one of the most secure and private web search engines available. When it comes to privacy, its Android browser will not disappoint you. It blocks trackers and only uses secure HTTPS connections everywhere.
Each site you visit is assigned a Privacy Grade (A-F), so you can quickly see how safe you are. We understand how dangerous it is when your personal information accumulates on your browser. DuckDuckGo has a convenient “fire” option that clears all of your tabs and browser history in an instant.
Brave Browser
Brave is a browser that prioritizes security and privacy, making it a viable alternative to UC Browser. Additionally, the Brave browser can use HTTPS everywhere to automatically switch unprotected URLs to HTTPS while simultaneously blocking advertisements and other trackers.
Brave also features data optimization mechanisms that are built-in to reduce data usage. Private browsing, customizable personal search, script blocking, third-party cookie blocking, private bookmarking, and data and battery-saving are just a few of Brave’s other features. Brave is also a member of the Global Privacy Control (GPC) technical committee.
Puffin Web Browser
Puffin is the way to go if all you need is super-fast web browsing. Puffin appears to load online pages faster than the other browsers on this list, thanks to its in-house compression methods. The workload is moved away from the user’s device and onto cloud servers. This allows resource-intensive web pages to load quickly on your phone.
Keep in mind that this thorough compression comes at a cost: Puffin uses a lot of memory when there are numerous tabs open.
Puffin’s internet speeds can be relatively quick, and it claims to save up to 90% of your bandwidth when you’re browsing. While we may not agree with such estimates, we do agree that the browser is extremely fast. Puffin offers an incognito tab that cleans your browser history for security and privacy purposes.
Maxthon
Maxthon browser is more than just a browser that speeds up web page loading and also has a number of other essential features. A password manager, note-taking tool, email manager, web clipper, and night mode are just a few of its valuable tools or functions. While Maxthon compresses web pages to save data and the Smart Image
Display option allows you to save even more data. When Maxthon is enabled, images are loaded in reduced quality or just when they are needed.
Moreover, your favorite websites can be added to a customizable speed dial and can be viewed any time. You can regulate your mobile data consumption and save money with a smart picture display.
Conclusion
A good browser can considerably ramp up your browsing experience. If you are looking for an alternative to the UC browser, make sure to check out these web browsers mentioned in this article and improve the quality of your web surfing.
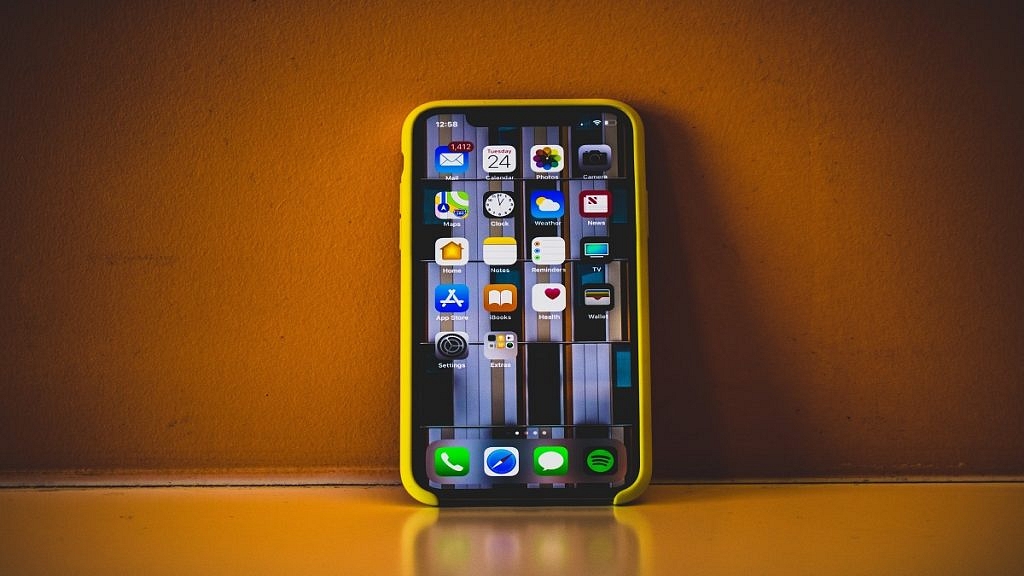
Most of the modern days smartphones offer a large touchscreen display
You can check the performance of touchscreen of any smartphone
Third party apps can be used for the same
Why not put your Android‘s touchscreen to the test with a touch test app if you think it’s not working correctly? Each of these apps takes a different approach to identify and diagnose any problems with your touchscreen.
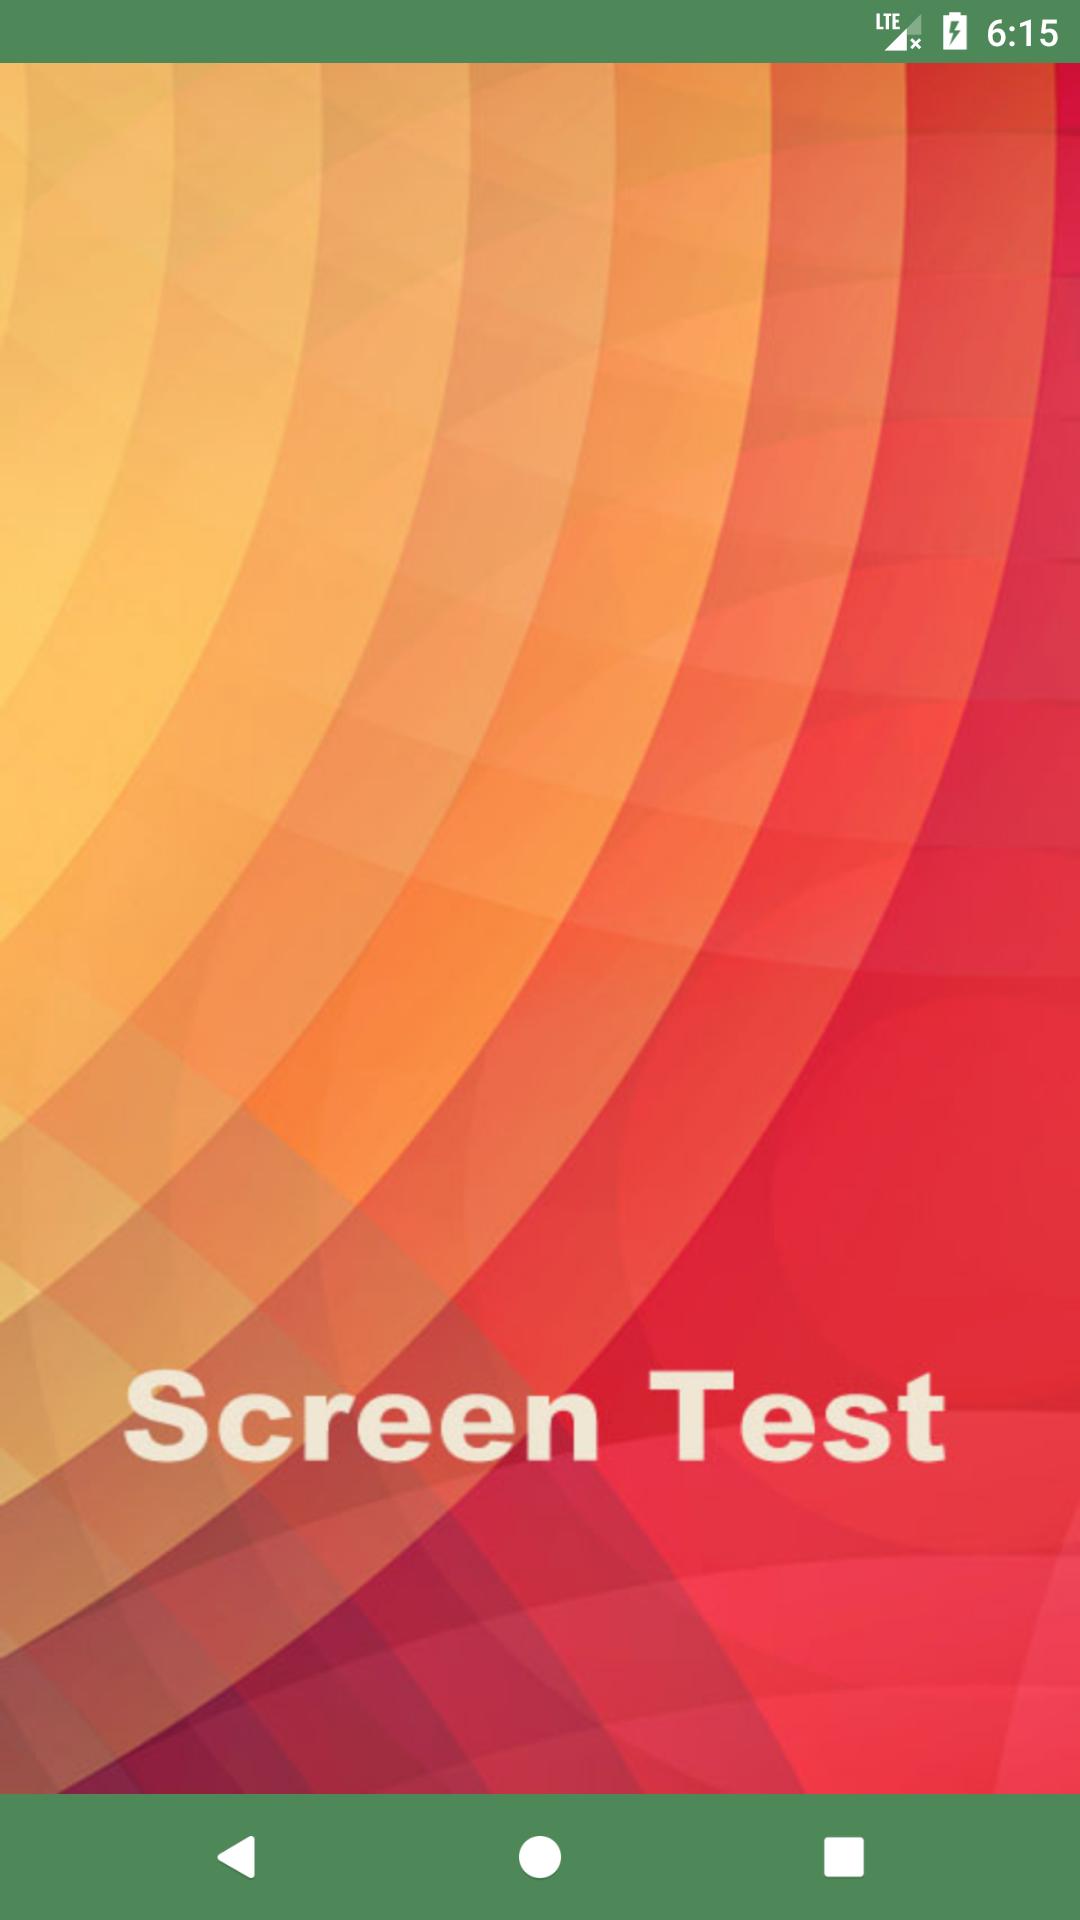
Let’s start with a touch test Android app that teaches you how to locate “dead zones” on your screen. Touch Screen Test is a blank canvas on which you can draw a line with your finger. It has no flashy features or banner ads.
If you can’t draw in a specific location, it means the touch capabilities in that area have been compromised. If you don’t require a feature-rich testing suite, the app’s simplicity makes it an excellent choice.
You can’t use your finger to navigate the in-app menu because the app is solely dedicated to touchscreen testing. To make it appear, you must hit the Volume Up button on your phone. Once it appears on the screen, use Volume Down to cycle through the menu, then hit Volume Up to select an option. It’s not really intuitive, but it’s required to allow you to test the screen while the menu is active.
You’ll discover a good range of toggle and modify choices on the menu. To help diagnose a dead spot, you can alternate between sketching dots and lines. You can enlarge or reduce the line, as well as see additional information such as how many fingers the touch screen can detect.
You can try the MultiTouch Tester if you want to see how many fingers your screen can register. With no sketching tools or extra features, this app is one of the most basic Android multi-touch screen test apps available on the Play Store. It shows you how many fingers your phone can manage at the same time.
MultiTouch Tester will number and assign a unique color to each of your fingers as you place them on the screen simultaneously. It will also keep track of how many fingers are on the screen in total. When you let go of your fingers, the app will track the highest number of fingers that touched the screen.
Do you want something with a few additional features? Then you should definitely try Screen Test Pro. It has many valuable features that make it a one-stop shop for all of your screen testing requirements.
To begin, Screen Test Pro combines the two touch checkers discussed above into a single program. It has a line-drawing feature as well as a multiple-finger tester feature, both of which are handy.
It also includes a pressure tester to see if your phone recognizes whether you’re pressing softly or not. If your phone doesn’t have this feature, no matter how hard you try, your taps will only result in a 1 when you touch the screen. More complex devices, on the other hand, will display values ranging from 0 to 10 depending on how hard you press down. The greater the number, the more pressure is detected by your phone.
Touchscreen Test is also a helpful app that is worth mentioning because of how it evaluates your screen. Other tests allow you to create a pattern to discover the dead spots, but Touchscreen Test has a unique way that shows you exactly where the problematic areas are.
You’ll see a blank grid when you first open the program. If you touch a grid point, it turns green and stays that way. You can continue to fill up the dots on the grid by connecting them. You’ll know if you’ve found a dead spot because the dot won’t light up. You can now work your way around the area to check how far the dead zone extends.
You’ll be left with a grid after running your finger across the entire screen, with green dots indicating regular functionality and blank dots indicating a dead zone. This grid may then be used as a map of your phone’s dead zones, which you can either plan to work around or send to an expert if you take it in for repairs.
If you suspect your touchscreen isn’t operating properly, perform a screen touch test to determine if it’s still functional. Fortunately, there are a slew of apps you can download and utilize to see if your phone is indeed broken or if it’s simply your imagination. If you find that your phone’s touch controls aren’t working properly, try these Android touchscreen remedies to see if they help.
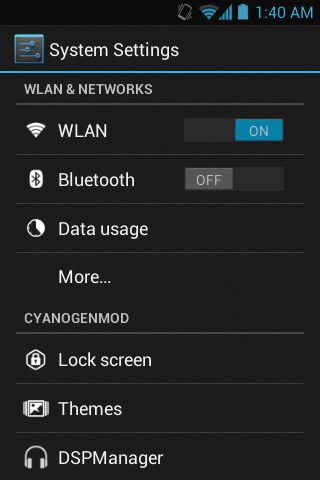
Android phones from companies like Samsung, Xiaomi, and Realme come with a slew of system apps that you may or may not want to use. Nonetheless, they’re sapping your device’s resources unnecessarily. Don’t worry if you wish to remove these pre-installed programs; we’ve got you covered. Here are several simple ways to get rid of pre-installed apps that your phone won’t allow you to erase.
The simplest way to remove pre-installed programs or bloatware is to turn them off completely, as seen below.
Step 1: Access the Settings option
Step 2: Go to Apps or Manage Applications and locate All Apps (this may vary based on the brand and model of your phone).
Step 3: Next, look for the apps you wish to get rid of. You can find it by typing its name into the top search box.
Step 4: Disable the app by tapping its name. When prompted, select confirm.
.That is all there is to it. The app will be removed from your home screen and app drawer once disabled. It will also no longer run in the background or consume unneeded disc space by gathering cache. Some bloatware can be deleted like regular apps, while others must be disabled using the methods outlined above.
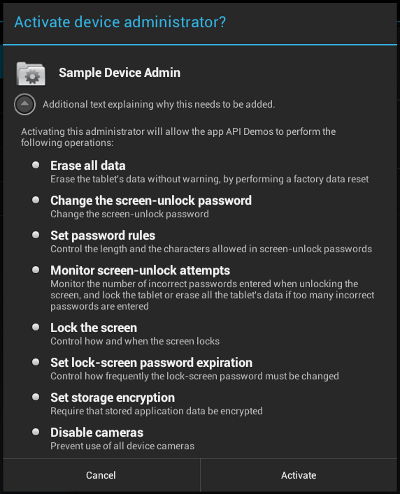
Uninstalling App Without Having Admin Authorization
Some apps require device admin authorization and hence are difficult to uninstall. This is typically the case with antivirus, app lock, and other apps for which you have granted device administrator authority.
To get rid of such apps, follow the procedures below to revoke administrator privilege.
Step 1: On your Android, go to Settings.
Step 2: Go to the section on security. Look for the Device administrators tab on this page.
Step 3: Press the Deactivate button next to the app’s name. The software can now be uninstalled whenever you want.
Removing Apps Without Rooting Your Phone
Another alternative is to connect your phone to your computer and uninstall each program one by one. It’s worth noting that it’s a little tedious and necessitates a basic understanding of computers. However, the procedure can be used to delete programs that cannot be disabled on Android.
To establish an ADB connection between your phone and PC, you must first activate USB debugging on your phone.
Go to your phone’s Settings and scroll down to the About Phone section.
Tap on Build Number or Version seven times in a row till the toast message “You are now in Developer Mode” appears.
Return to the Settings page. Select Developer Options from the System menu. This feature is available in the ‘Additional Settings’ section of some phones.
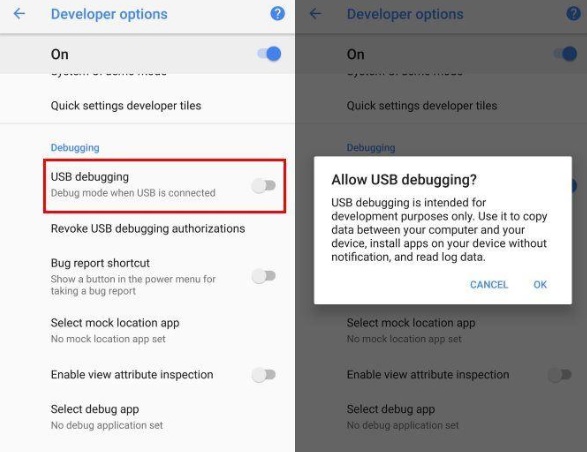
Turn on Developer Options by clicking the toggle. Now go to the bottom of the page and enable USB Debugging.
Step 2: Connecting Phone to PC
You can connect your phone to a PC or laptop using a compatible USB cable after you’ve enabled USB debugging.
Make sure the notification pane is set to ‘Transfer Files’ mode. When prompted to “Allow USB Debugging,” select “Always allow from this computer” from the drop-down menu and tap OK.
Step 3: Instal ADB drivers
Install ADB drivers on your computer if you haven’t already. These links will allow you to get the package for Windows, Mac, and Linux.
Open the ADB directory once it has been installed.
Select Open PowerShell Window here by pressing Shift + Right Click.
Check whether your device’s code name appears in the following line, along with its serial number. To use the commands to uninstall apps on your Android, enter the same code again.
Step 4: Use ADB commands
You may now remove unwanted bloatware from your phone with precise ADB commands. “pm uninstall –k ––user 0 names of package>” without quotes is the general command.
Simply download and install the App Inspector app from the Play Store to learn the package names of the apps on your phone. The package name of the targeted application can then be found and used in the command line to delete the app.
Conclusion
Apps are an essential part of what makes your Android smartphone unique, but what if you need to remove them but can’t? Apps might be obstinate at times, but they don’t have to stay with you indefinitely. You can use one of these remedies if you want to uninstall any app from your device.
Smartphones have become an essential commodity for modern users
Slow speed issue is commonly reported by smartphone users after prolonged usage
Speeding up smartphones is an easy process
Getting in-depth knowledge about your phone is something most of us want to do. Having an android phone makes it far easier. If you are curious about your phone’s RAM type, RAM speed, and its operating frequency, you have come to the right place. Checking these details will let you know about your RAM’s capabilities and will also help you compare the performance of your phone with other models in the market. Here is how you do it:
1. Check the RAM Stats
Beginning with the RAM’s total capacity, you can check the space that is available for use at any given time to the user. This can be done in two ways:
Use Developer Options
Follow the steps mentioned below to check the RAM stats through Developer Options.
You can check the RAM stats by going to your phone settings and then into the ‘About Device’ section.
Type your build number seven times.
Once you have done that, you will have to go back to the phone settings and look for the Developer Options menu.
Go to the Running Services option.
Once you are here, you can see the current status of the RAM of your Android phone. This will include the space used by the system and the downloaded apps, and the space left for the user to use.
To see the RAM occupied by cache, you can tap the top-right button in the Running Services option.
Use Third-party Apps
There are apps available for everything on Android platforms. If you are looking for an app to see the RAM stats, you can find such on Google Play Store. These apps will provide you a detailed overview of how your RAM is occupied at any given moment. Following is an Android app that will let you know the RAM stats of your phone:
RAM Truth: This is a third-party app that will let you know the current RSM capacity of your phone and will also let you know about any space allocations in the RAM. This includes:
‘Reserved’ for kernel functions and is a hidden area.
‘User’ is the RAM space that is available for the user to use.
‘Active’ includes the RAM space, which is currently active use by the system.
‘Hibernating’ is the RAM space that is currently being used to house the cache memory, which is not using power resources.
‘Idle’ is the RAM space that is unused by the system currently.
2. Find RAM Type and Operating Frequency
A third-party app like DevCheck will let you know all the details about the RAM type and the operating frequency. After you have installed the app, you can begin exploring. Follow the steps mentioned below:
Go to the ‘Hardware’ tab in the app.
Go to the ‘Memory’ section. This will show you the RAM type of your phone, along with the bandwidth and the channels.
Before checking the RAM type, you need to know that if the RAM type is given as “LPDDR,” it is to define the generation of DRAM technology. When it comes to RAM type, speed, and efficiency, the newer the generation of low power DRAM technology, the better. Different smartphones use different RAM types, from LPDDR4 and LPDDR4X standard to LPDDR5 certain flagships like Samsung Galaxy S20 and OnePlus 8. The RAM bandwidth of the different types of RAMs is given below:
LPDDR3 has a bandwidth of up to 1,066 Mbps
LPDDR4 provides performance up to 3,200 Mbps
LPDDR4x has a RAM bandwidth of 4,266 Mbps
LPDDR5 can give the fastest RAM bandwidth of up to 6,400 Mbps
Many phones will show the operating frequency of the RAM in MHz along with the RAM type. The RAM bandwidth can be distinguished from other data by its unit of measurement as GB/s. The bandwidth of the RAM will let one know the maximum rate at which the RAM can read data and store it into memory by the phone’s processor.
3. Checking your Android phone’s RAM Speed
Checking the RAM speed of your Android phone can also be done in a different way. You can check the RAM speed via the A1 SD Bench. This is a third-party app that you can easily find on the Google Play Store. After installing it, follow the steps mentioned below to check the RAM speed of your phone:
Open the app.
Tap on RAM. This will start the benchmark.
Once the process has begun, wait for a few seconds, and the app will tell you the memory’s R/W (or copy) speed.
If you are interested in comparing performances with other phones from the same company or different phones from different companies, you can do so by installing this app on those models as well. Another way on which this can be done is to see the results of other benchmarked phones within the app.
The Takeaway
Whether you are tech-savvy or not, checking your Android phone’s RAM Type, Speed, and Operating Frequency will acquaint you with the details of how your phone works which is always interesting to learn.
It’s a great convenience to be able to capture audio on your phone
Android phones are incredibly practical and already have a microphone and audio recorder pre-installed
You must choose the type of editing features you require before you can find the best software for editing audio on your phone
Being able to record audio on your mobile phone is a wonderful convenience. Knowing how to record audio on an Android phone can be incredibly helpful, whether you’re using it to record an important story or your newest song.
Now, editing audio recordings on your Android phone requires the use of a third-party app. This is so because not all Android phones have the option of cropping audio recordings yet. Renaming the audio recording is possible on your phone, and you can also change the playback speed of the audio recording via the audio recorder app on your phone. In this article, we will look at the various ways to edit the audio recording on your Android mobile phone.
There is a simple way to check if your phone allows you to crop the length of the audio recording or not. If it has no such feature, you will have to download a third-party app.
If you have a Pixel phone, you can easily crop the length of your audio recording. The Pixel 4 model allows the users to transcribe the audio content even without an internet connection. The user can search for important parts in a recording through the transcribed text. Google takes this a step further with the Pixel 5, which includes the crop audio recording feature on the phone.
This is better than other Android phones, and you do not have to listen to the audio to crop it. You can simply select the transcribed contact you want to remove, and the respective audio part will be deleted. Follow the following steps to cut audio recording on Pixel phones:
Step 1: Open the audio recorder app.
Step 2: Choose the recording you want to cut.
Step 3: Open the transcript and select the sentence you want to crop out.
Step 4: Tap on Remove, and it is done!
You can also crop a certain sentence out of the recording so that it becomes a separate audio clip feasible for sharing. The app also helps the user mark important parts and phrases in the transcript generated in longer audio.
The best part about having an Android phone is that anything is possible if you have the right apps installed on your phone. There are multiple apps to choose from that work similarly but offer different services. You can choose any such audio editing app from the Google Play Store based on reviews and specifications. Here is how you can take advantage of third-party apps for cropping audio recordings:
Step 1: Go to the Google Play Store and select the app you want to download.
Step 2: Install it and open it.
Step 3: It will ask for access to your storage. Grant permission.
Step 4: Upload the respective audio recording that you want to crop.
Step 5: Select the crop option in the app. Crop the duration of the audio you want to keep.
Step 6: Save the audio recording to your device.
Step 7: You can also rename the audio recording to make finding it easier.
Renaming the audio recording can be done in two different ways. The best part about renaming an audio recording is that you do not need to download a separate app on your phone for it. You can either rename the recording on the voice recorder app itself or via the file manager.
Renaming Via The Voice Recorder
This is something you do not even need a guide for. But if you want to know the steps, here is how you do it:
Step 1: Open the voice recording app on your phone.
Step 2: Select the audio recording you want to rename.
Step 3: Tap the button on the top right corner of the phone screen.
Step 4: From the drop-down menu which will appear, choose the Rename option.
Step 5: Name the audio clip and click OK or Done.
Step 6: The app will automatically save the new name of that audio recording.
Whether you use the phone’s default app or third-party app, there are many ways in which you can successfully edit an audio recording on your Android phone. The recorder app also works offline without an internet connection.
Selfies are a terrific way to demonstrate self-love, as well as a convenient way to take a picture with someone else if you wish to be in it. The greatest Android smartphones now include capabilities that enable you to capture high-quality selfies even in low-light situations, check Best Selfie Camera Apps For Android.
If you don’t have a phone with a great selfie camera, you can utilize one of these applications that specialize in increasing your selfie picture quality. Here are some of the top Android selfie apps we have discovered.
Snapchat
Price: Free
Pros: Best for Adding masks and filters
People often consider Snapchat to be nothing more than an Instagram-like software for sharing photos and videos with their peers. But, Snapchat can be much more than that. It is a fantastic tool for snapping selfies and customizing them with various lenses, emoticons, filters, masks, and fonts. If you can’t find what you’re looking for on Snapchat, you can even make your own.
If you don’t already have it, you can get Snapchat for free from the Google Play Store.
Taking selfies using Snapchat is simple: Open the app and take a photo as usual, and add a mask or filter if desired. Moreover, you can also add texts or effects according to your requirements. You will have the option to save your Snapchat selfies to Memories or Camera Roll, after which you can access them from the gallery on your phone.
Best Selfie Camera Apps For Android
Front Flash
Price: Free
Pros: Taking Selfies in Dark
Taking good selfies necessitates proper lighting. Front Flash is a must-have if your phone lacks the necessary hardware for snapping selfies in low light.
Front Flash is an app that enhances the lighting in your images by using a front-facing flash. This is useful if you need to shoot a selfie in the dark or simply want to capture your skin’s natural hue and require a little extra light. The software is completely free to use, with non-intrusive advertisements on the main screen.
Afterlight
Price: Free
Pros: Best for taking Selfies for Instagram
Every Instagram user will love the Afterlight photo-editing tool. The app’s editing tools and overall design are comparable to that of Instagram’s, but Afterlight has a lot more editing choices.
There are thousands of distinct filters accessible on the app, in case you want to improve your selfies by adding a filter or texture. You won’t have to trim your selfie to suit the Instagram square because Afterlight features frames of the same format as the ones on Instagram.
YouCam Perfect is undoubtedly one of the most popular selfie applications available. When it comes to capturing great selfies, there’s not much this software can’t do. YouCam Perfect is a real-time beauty camera that adds amazing effects to your selfies. This program allows you to capture both a photo and a video selfie.
The option to use the beauty camera to shoot group selfies is one of the nicest features this software has to offer. It recognizes all of the faces on the screen and applies enhanced filters to all of them at the same time. If you want to edit someone out of a photo, you can utilize the app to do so.
Candy Camera
Price: Free
Pros: Best for taking aesthetic selfies
Candy Camera is an excellent selfie app for when you need to capture a selfie without drawing attention to yourself. Even if your phone isn’t in silent mode, the app offers a quiet camera option that allows you to capture images without making any noise.
Candy Camera also contains a lot of beauty functions, such as face slim, whitening, smoothing, cosmetics, and much more. You may even use this software to enhance your photos by adding tan or abs.
Conclusion
Who didn’t want to post an aesthetic-looking selfie on their social media and gain likes. Try using these selfie applications in order to capture the best version of yourself.
Making an Instagram profile requires you to either put your phone number or your email ID to be verified. Email ID is a better way to monitor the activity of your account rather than your phone number. While many people are comfortable with syncing their contacts with their Instagram account, some might want to switch to an alternate method.
Typically, you do not want people to find your account if they decide to sync their contacts with the app. In case that is the issue, you will have to have an alternate phone number or an email ID which is not affiliated with any other Instagram account. This will allow you to transition from a phone number to an email address.
The phone number you used while making your account can be unlinked in a few easy steps.
How to remove your phone number from Instagram?
If you have only one Instagram account, then you can link your email address to the account instead of the phone number. Having one medium of contact is essential in case there is a hacking attempt, and you need to change the password remotely. If your email address is linked to another Instagram account, then removing your phone number would not be possible.
Adding an email account will require you to first verify it before you go ahead with the removal of the phone number linked with your account. Once that is done, you can go ahead and follow these steps to unlink your phone number from Instagram:
Log into your account if you are not logged in before.
Go to your profile by clicking on the top right corner where the profile picture appears.
Click on the Edit Profile option on your profile.
Find the phone number box and remove it when it appears in the text box.
After the number is removed, click on Submit.
Disconnecting Contacts from Instagram
Disconnecting the synced contacts on Instagram by following these simple steps:
Open the app.
Login to your account.
Go to your profile.
Tap the three-line icon at the top right corner.
Go to Discover People.
When the pop-up appears, tap Not Now.
Go to Connect Contacts
Turn the toggle from on to off.
Once you are done with the disconnection, the contacts that were previously synced to your account will be automatically deleted from your account.
Conclusion
Instagram makes connecting with people around the world easier for all of its users. If you want to stay connected to your contacts, then it will be best if your phone number remains connected to your account. Otherwise, if you are looking for some privacy in this app, then you can always switch to your email address and enjoy the experience in private. Disconnecting the contact details and desyncing your contacts is easy if you know the proper steps to follow.
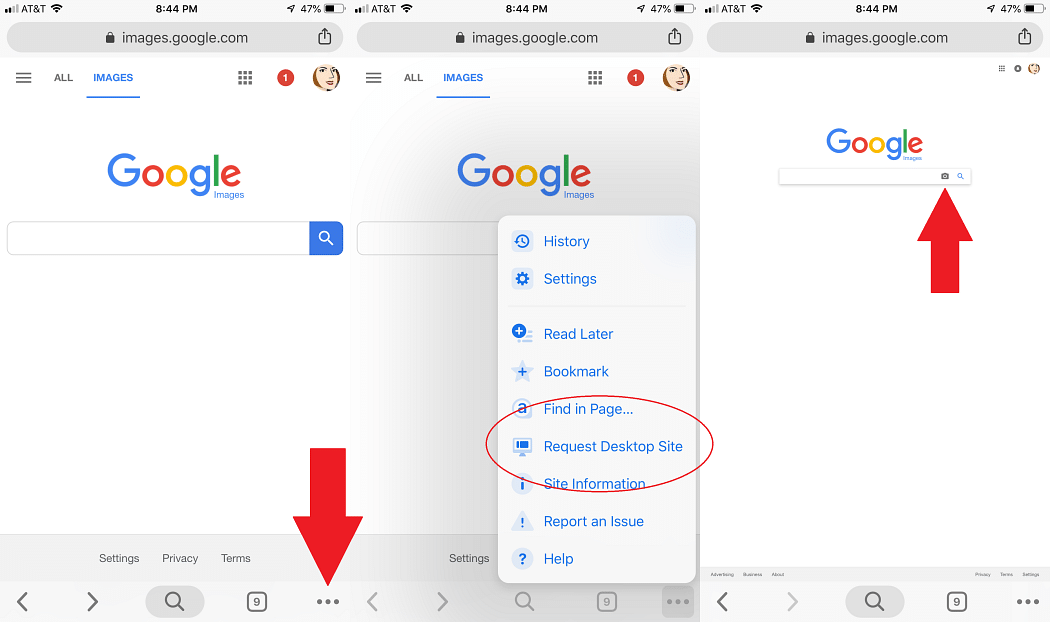
Whether you’re a blogger, a product researcher, or simply someone who wants to search for specific photographs using reverse search (which is very handy for checking the backgrounds of people you meet online), we’ve got you covered with Best Ways to Search By Image Online.
We have gathered some of the best image search engine tools of 2021, which you can use to search any image you want.
Google Search Engine
Google is not only the best search engine for finding information, but it is also the most popular and largest picture search engine on the internet.
Given Google’s market share, it has a massive image database. Whether you’re looking for a picture of your favorite actor or a picture of a place you want to visit, Google has you covered. For faster access, Google’s image search engine offers larger image thumbnails and unlimited scroll, which displays up to 1000 image search results.
Pinterest is frequently misunderstood as a social network, while in fact, it is one of the largest visual search engines, with thousands of photos covering every niche and demand.
Pinterest’s picture search engine can perfectly detect the users’ intent and display exactly what they want to see. You can use a Pinterest lens to take a picture of anything, such as groceries, a garment, shoes, or even nails, and then search for related information on those photos online.
Pinterest recently disclosed its top categories for lens searches, claiming that users mostly use it to see images related to fashion, home decor, art, and product categories.
Bing Image Search Engine
After Google, Bing’s image search engine is the second most popular picture search engine, and it can provide you with a wide range of image results for your desired queries.
Bing makes it simple to browse and download a wide range of photos, including all-time trending photographs.
Another element of Bing’s photo search is that it learns from your interactions with images on the platform and develops an AI-powered photo feed (named Bing’s image feed) for you.
Best Ways to Search By Image Online
Yahoo Image Search Engine
Yahoo’s image search engine offers an immaculate layout, with all of the advanced picture search options available right on the image search result page.
When you use Yahoo Photos’ advanced features, you may further narrow down your picture search results by filtering and finding images based on their usage rights by using the safe search option.
CamFind
CamFind is a mobile search engine that lets you use your smartphone to look for any image or other object by simply clicking its picture. It provides the most relevant search results, photos, and videos that are related or comparable to the picture. It also provides shopping links and pricing comparisons, which you can directly share on various social media platforms like Facebook and Twitter.
Yandex
Yandex is a search engine founded in Russia that also allows you to search by image. Yandex is quite similar to Google Lens, which has a large picture library. As a result, it provides the best possible results for your image searches.
You can upload an image or paste a link to an image in the search field, and its UI is pretty clean and basic. Yandex does not require you to register in order to use it, and it is also a completely free online tool.
Conclusion
Sometimes we find an image online but have no idea about its source, or we want to utilize it in a project but aren’t sure where it came from; in these cases, the search by image tools can become very helpful. You can use one of the image search engine tools mentioned in this article, giving you the required information about any image you are searching for.
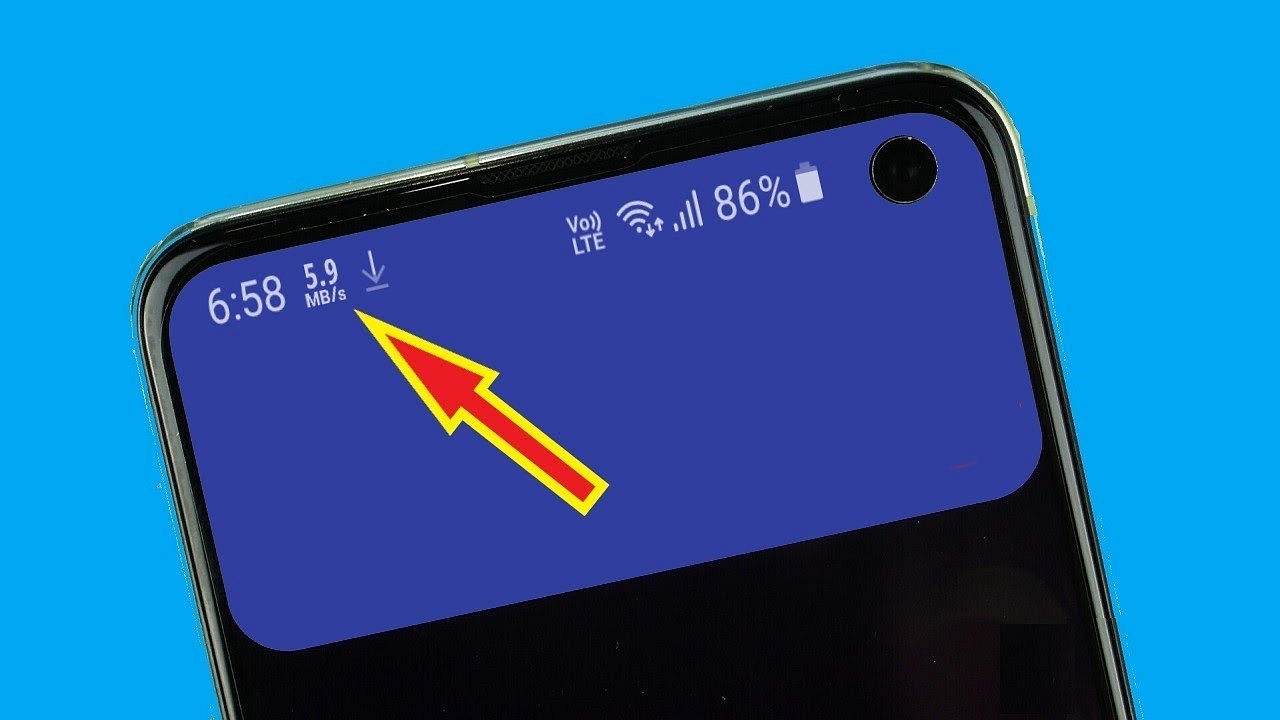
Improved Internet speeds are now a reality all around the world. Connectivity has vastly improved because of the advancement of fiber optics and the deployment of next-generation communication networks during the previous decade, so most users want to know How to See Internet Speed On Status Bar on Android
Simultaneously, smartphones have evolved in recent years, with more powerful hardware and better software. Overall, the Internet has become such an essential part of our lives that we can no longer envision our existence without it. Android as a platform has greatly aided the advancement of smart telephony. It has become the world’s most popular smartphone platform.
The Play Store has a plethora of apps to help us get through our daily routines. In today’s highly connected world, users may need to see real-time internet speeds in the status bar. So, we have gathered some applications that you can use to view your internet usage on your status bar.
Internet Speed Metre app is an excellent speed and internet consumption tracking application. Internet Speed Meter Lite shows extra metrics in the notification panel and the internet speed in the status bar.
Real-time speed updates in the status bar, daily data usage, and distinct status for mobile and WiFi networks are among the app’s main features. It tracks the internet traffic for the previous 30 days and has a very little influence on battery life. From the settings menu, the user can change the UI color and status bar icon. The internet speed tracker is also displayed on the device’s lock screen.
There’s also a version of Internet Speed Meter Pro with more extensive functions. The user will be able to see a graph about the current internet session time and internet consumption of various apps from the mobile network or Wifi.
Net Speed Indicator
Net Speed Indicator is the perfect choice if you want a more intuitive User Interface and compatibility with today’s notch screens. It’s a very useful monitoring application that lets you check your internet speed in real-time from the status bar. The network speed can also be checked in the notification or in the app itself.
It keeps track of every single byte sent and received from the smartphone and organizes it by week and month. WiFi and carrier data, on the other hand, are monitored in distinct ways.
How to See Internet Speed On Status Bar on Android
Internet Speed Monitor
Internet Speed Monitor is another small app that “smartly, safely, and correctly” monitors your internet Speed. On a daily and monthly basis, it keeps track of your data transit. The app’s user interface is quite elegant and intuitive, making it simple to use. It also displays information such as WiFi frequency, IP address, Link Speed, and SSID, among other things.
The settings window has a plethora of customizing choices. The application, notification, and floating widget settings can all be easily customized by the user. The floating widget on the status bar can have its position, color, and size customized.
Net Speed Indicator
The NetSpeed Indicator is another network speed meter tool that you can use. The app can be used in the status bar as well as on the notification panel. It displays the overall download speed. It also provides you with various options, where you can choose whether to show only download or upload speed.
This software, which is under 700Kb in size, has a lot of other features as well. If you don’t want to track your speed, you can turn off the app. You can also modify the speed units in the app, but it does not keep track of your data usage. It simply displays data use on a daily basis.
Conclusion
Third-party apps always come to the rescue, no matter what the circumstance is. While they function very well, having a built-in feature rather than downloading apps is still more preferable. Until then, you can use these applications to display the current network speed on your smartphone’s status bar.