Categories
Apps Featured How To

WhatsApp Tips & Tricks: How To Unblock Yourself And Regain Access

Key Highlights

  • When someone blocks you on WhatsApp, you lose access to several features
  • You cannot send messages to the person who has blocked you and see their status updates or profile picture
  • However, there is a quick hack to unblock yourself on WhatsApp

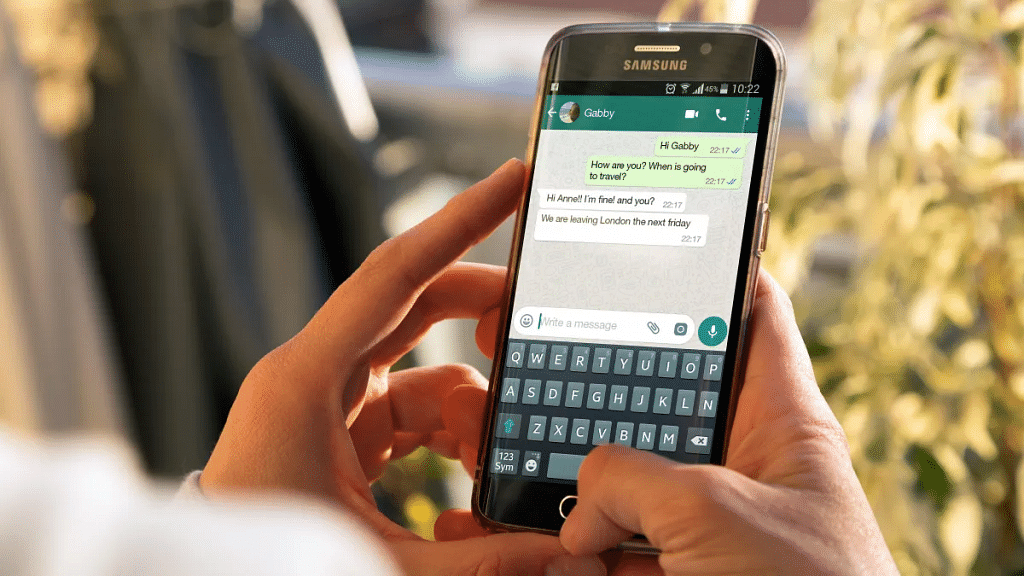
If you are looking for a solution to unblock yourself on WhatsApp after being blocked by someone you care about, then this article is for you. It is common for many of us to be blocked from contacting a friend on WhatsApp at least once. Therefore, it is essential to know how to unblock yourself on WhatsApp. When communicating with someone on WhatsApp, they may choose to ban you for any reason, which prevents you from sending messages to them.

Getting blocked by someone on social media can be hurtful, but there is no shame in it. Fortunately, there is a quick hack to unblock yourself on WhatsApp. Also Read | WhatsApp Hacks: How To Permanently Delete, Turn Off Chat Backups On WhatsApp?

Unblock Yourself On WhatsApp By Deleting Your Account

The simplest way to unblock yourself on WhatsApp is to deactivate your account, uninstall the application, and then reinstall it to create a new account. This method is effective for most blocked users who need to contact someone. Here’s how you can unblock yourself on WhatsApp:

Step 1: Open WhatsApp on your smartphone and locate the Settings section in the top-right corner.

Step 2: Tap on Settings and navigate to the Account section located next to the key icon below your profile.

Step 3: To unblock yourself on WhatsApp, select the “delete my account” option.

Step 4: A pop-up will appear, informing you that you will be removed from all WhatsApp groups and your messaging history will be erased.

Also Read | WhatsApp Hacks: How To Forward Images With Caption To Contacts On Android, iOS

Step 5: Choose the country associated with your phone number and tap on the “Delete my account” button at the bottom of your screen.

Step 6: This action will receive confirmation on the next page of the application.

Step 7: After deleting your account, remove the WhatsApp messenger app and restart your device.

While not a mandatory step, it is a good practice to ensure that the trick works without any issues by deleting all temporary cache files from your device. Once you have completed the above steps, you can proceed to open the Google Play Store and search for the WhatsApp messenger app. Navigate to the app’s listing and click on the “Install” button to begin the installation process.

After the download is complete, click on the “Open” button, and the WhatsApp messenger app will launch on the setup screen. To set up a new account, you will need to accept the Terms and Conditions of WhatsApp and input the necessary fields. Then, verify your phone number by entering the OTP sent as a text message. This will unblock your new account from all the contacts who previously blocked you on WhatsApp.

Unblock Yourself Via Dual WhatsApp

To unblock yourself on WhatsApp, there is an even easier solution which involves creating a new account. Follow the below steps:

Step 1: Enable dual apps on your smartphone. This feature is available on most Android smartphones.

Step 2: Open the second app and set up a new account using a different mobile number.

Step 3: Once the new account is set up, you will be able to contact the person who has previously blocked you on WhatsApp.

Other Option

One way to communicate with a user who has blocked you on WhatsApp is by asking a mutual friend to create a group with you and the blocked user. Once the group is created, your friend can leave the group and act as a mediator. This will enable you and the blocked user to have a conversation through the group, even though you are still unable to make calls to them. While this solution is not ideal, it at least provides a medium of communication.

Also Read | WhatsApp Hacks: How To Send WhatsApp Images In High Resolution As Document On iPhones?

Categories
Apps Featured How To

WhatsApp Chat Transfer Without Google Drive Backup: What Is This Feature And How To Use?

Key Highlights

  • WhatsApp new chat migration feature spotted in Beta build
  • No more Google Drive backup required for chat transfers in WhatsApp going forward
  • Feature still in testing phase
  • Stable version release unknown

WhatsApp has maintained its consistency by rolling out new features via OTA updates to its instant messaging platform. The frequency of adding a new user-oriented feature or update is only increasing with each passing day and almost every other week we come across a new WhatsApp feature being tested with the beta builds.

WhatsApp’s popularity amongst users is also due to the platform’s end-to-end encryption that keeps privacy intact with private and personal messaging. WhatsApp has been also working on making migration to new devices easier for users.

As of now, WhatsApp allows users to create a chat backup using Google Drive which helps with easy chat and media files restoration during setup on a new device. But with the latest feature, the company is further simplifying the process of chat migration and data transfer on WhatsApp while setting up on a new device. Read the details below:

Also Read: No More Switching Between Devices: WhatsApp Now Allows Account Use On Up To Four Phones

WhatsApp Chat And Media Transfer Without Using Google Drive: Here’s How

WhatsApp is now working on a new feature that will be making it hassle-free to transfer chats from one to device to another. The company is essentially removing the Google Drive backup option before the chat migration between two different devices.

A report via Wabetainfo confirms this development related to the upcoming Chat migration feature without the Google Drive backup. The new chat transfer feature is under the testing phase and has been spotted with the WhatsApp Android beta build 2.23.9.19. We might also see this feature’s development with the iOS beta build in the coming days.

Also Read: The Ultimate Guide To Use ChatGPT On WhatsApp

How To Transfer WhatsApp Chat And Data Without Google Drive Backup On A New Phone

As far as the functionality is concerned, the new feature as mentioned will allow users to transfer all the chats to a new device without performing a Google Drive backup on the existing device. Instead, users will have to toggle on the required chat transfer settings and then continue with the chat migration.

Step 1: Launch WhatsApp application and head to the Settings menu

Step 2: Tap on the Chats option and select Chat Transfer option

Step 3: Click on the Start option to initiate the Chat transfer process

Step 4: A QR code will be shown that needs to be scanned via the old device to complete the chat transfer

Also Read: WhatsApp Web Tips And Tricks: How To Use Multiple WhatsApp Accounts On Laptops/PCs?

Categories
Accessories Featured How To

Set Up Smoke Alarm Sound Recognition On HomePod: Here’s How

Key Highlights

  • Users can now turn their Apple smart speaker into a smoke alarm listener
  • The feature works on all HomePods
  • When you hear an alarm, you’ll see critical alert notifications on your iPad, iPhone, or Apple Watch connected to that Apple Home

The effectiveness of a smoke alarm that goes off when no one is present to hear it is questionable. However, the newly launched Sound Recognition feature on Apple HomePod smart speakers can address this issue. This feature can detect the sound of a smoke or carbon monoxide alarm and alert the user via their phone. The user can then use the Home app to check on the situation remotely. Here’s how you can enable this wonderful safety feature on your Apple smart speakers. Also Read | Best Apps To Detect Hidden Camera For Android And iOS

Requirements For Alarm Sound Recognition

To use the alarm sound recognition feature, you need the following:

  • HomePod or HomePod mini
  • Latest Apple Home architecture upgrade
  • Updated software on all your Apple devices

To upgrade your Apple Home architecture:

Step 1: Update all your Apple devices to the latest software version.

Step 2: Update your HomePod or HomePod mini software.

Step 3: Open the Home app and select the More button.

Step 4: Choose Home Settings, then Software Update.

Step 5: Select Learn More under Home Upgrade Available.

Step 6: Follow the prompts to upgrade.

Also Read | How Can You Pair OnePlus Buds, Nord Buds TWS With Apple Macbook Laptops (All Models)

Steps To Set Up Alarm Sound Recognition

To set up the alarm sound recognition feature:

Step 1: Open the Home app after completing the Apple Home architecture upgrade.

Step 2: If you see a Safety & Security pop-up, choose Turn On and follow the prompts.

Step 3: If you don’t see the prompt, select the More button, then choose Home Settings > Safety & Security.

Step 4: Toggle the feature on and off for a specific HomePod or for your entire home.

Step 5: In Notifications, choose to receive alarm notifications from a specific HomePod.

Step 6: Allow other members of your home to listen for certain alarm sounds and communicate with others via the HomePod.

Step 7: With the feature turned on, the HomePod listens for an alarm using on-device intelligence, and no data is sent to Apple.

Aside from the alarm sound recognition feature, you can also create your own security alarm using a HomePod and HomeKit.

Also Read | Best Smart Speakers Under Rs. 5,000: Check The List Here

Categories
Apps Featured How To

Microsoft Teams Tips & Tricks: How To Set Urgent Messages For Maximum Visibility

Key Highlights

  • Microsoft Teams lets users get their messages noticed among others
  • They have the choice of delivery options for Urgent and Important
  • Urgent messages get highlighted every two minutes and 20 seconds

Microsoft Teams is a powerful communication tool that allows users to collaborate and communicate effectively. One of the features of this app is the ability to set a message as urgent, which helps to draw the attention of the recipient to the message. In this article, we will discuss how to set a message as urgent on Microsoft Teams.

Also Read | Google Meet Hacks: How To Change/ Update Google Meet Name Using A Laptop Or PC?

How To Highlight A Message In Microsoft Teams?

Step 1: Open Microsoft Teams

The first step to set a message as urgent on Microsoft Teams is to open the app on your mobile or laptop. You can do this by clicking on the icon on your desktop or by navigating to the website and logging in.

Step 2: Select the chat or channel

Once you have opened the app, you need to select the chat or channel where you want to send the message. You can do this by clicking on the chat or channel from the left-hand panel.

Step 3: Type your message

After selecting the chat or channel, you can type your message in the text box at the bottom of the screen. It is important to ensure that your message is clear and concise.

Also Read | How To Archive Emails In Microsoft Outlook: Here’s The Step-By-Step Guide

Step 4: Set the message as urgent

To set the message as urgent, you need to click on the exclamation mark icon next to the text box. This will open a menu where you can select the level of urgency for your message.

Step 5: Choose the level of urgency

In the menu that appears, you will see three levels of urgency: standard, important, and urgent. Standard is the default level, while important and urgent are used to draw the attention of the recipient to the message. To set your message as urgent, you need to click on the urgent option.

Step 6: Send the message

After choosing the level of urgency, you can click on the send button to send your message. The recipient will receive a notification that the message is urgent, and the message will be highlighted in red in the chat or channel.

Overall, setting a message as urgent on Microsoft Teams is a simple process that can help to draw the attention of the recipient to the message. By following the steps outlined in this article, you can ensure that your message is seen and acted upon quickly. Remember to use this feature only when it is necessary, as overuse can lead to a decrease in its effectiveness.

Also Read | Want To Create A New Group For Google Meet Calls? Here’s How To Do It

Categories
Apps Featured How To

No More Switching Between Devices: WhatsApp Now Allows Account Use On Up To Four Phones

Key Highlights

  • WhatsApp finally introduces support for multi-device sign-in on multiple phones
  • Meta CEO Mark Zuckerberg announced the launch of the feature on Facebook and Instagram
  • Linking phones as companion devices can make messaging much easier for users

In an effort to improve its multi-device offering, WhatsApp has announced that users will now be able to run the same account on multiple phones. This means that users can link their account on up to four additional devices, just like they can on web browsers, tablets, and desktops. The update has started rolling out globally and will be available to all users in the coming weeks. Also Read | WhatsApp Emoji Meanings: Know What You Are Expressing With These WhatsApp Emojis

Benefits Of Multi-Device Support

Linking phones as companion devices can make messaging much easier for users. With this new feature, users can switch between phones without having to sign out and can pick up their chats right where they left off. This can be especially useful for small business owners who want their employees to be able to respond directly to customers from their phones under the same WhatsApp Business account. By linking the account on their devices simultaneously, there is no need for employees to sign in every time they need to use the app.

Alternative And Accessible Way To Link Devices

WhatsApp also announced that it will roll out alternative, more accessible ways to link companion devices in the coming weeks. Instead of having to scan a QR code, users will be able to enter their phone number on WhatsApp web to receive a one-time code. This code can then be used on their phone to enable device linking.

Also Read | Best Websites For Perfect WhatsApp DP For Girls

How To Link Your Account On Multiple Devices

To link your WhatsApp account on multiple devices, follow these simple steps:

Step 1: Ensure you have the latest version of WhatsApp installed on your mobile.

Step 2: Open WhatsApp and go to Settings.

Step 3: Tap on Linked Devices.

Step 4: Select Link a Device.

Step 5: Follow the on-screen instructions to link your account on additional devices.

It’s important to note that your phone must be connected to the internet in order to use WhatsApp on linked devices. Also, if you choose to unlink a device, all of your messages and media from that device will be removed from your phone.

Conclusion

WhatsApp’s new multi-device support feature is a major relief for users who need to use several devices at once for personal or professional use. With this new feature, users can link their accounts on up to four additional devices and switch between them seamlessly without having to sign out. The upcoming alternative, more accessible way to link companion devices is also a welcome change.

Also Read | WhatsApp Group Name Ideas: Best Names For WhatsApp Friends Group

Categories
Apps Featured How To

From One Link To Many: How To Add Multiple Links To Your Instagram Bio

Key Highlights

  • Adding multiple links to Instagram can have several benefits for businesses, content creators, and influencers
  • This helps you promote your brand, drive traffic to your website, and engage with your followers more effectively
  • It helps users increase the visibility of their brand across different platforms

Meta-owned social media platform Instagram has recently introduced a new feature that enables users to add up to five links to their profile. This provides an opportunity for users to share additional information about their interests, pastimes, preferred brands, charitable activities, entrepreneurial projects, or any other pertinent information they wish to publish.

Meta has also confirmed that there will be no restrictions on links to LinkTree or any other comparable services. This latest feature will be accessible to business accounts and content creators, but users must update their app to use it. Also Read | Download Music From Instagram To Your Phone: Here’s How

How To Add Multiple Links To Instagram Bio?

Follow these steps to add links to your Instagram bio:

Step 1: Open the Instagram app on your mobile and go to your profile page.

Step 2: Click on the ‘Edit profile’ icon located beneath your bio.

Step 3: Scroll down to find the ‘Links’ area.

Step 4: Select the ‘Add external link’ button.

Also Read | Instagram Bio Tips: Best Instagram Captions For Fashion Influencers

Step 5: Add the links you want to include in your bio and rearrange them by dragging and dropping them as desired.

And there you have it, your Instagram bio now has multiple links to help promote your brand and make it easier for your followers to access your content.

When adding multiple links to your Instagram bio, it’s important to choose links that are relevant to your brand and audience. Some ideas for links to include might be links to your website, blog, YouTube channel, or other social media profiles. You could also include links to your online store, a recent blog post, or a new product launch.

Overall, adding multiple links to your Instagram bio can be a great way to drive traffic to your website, increase engagement, and grow your following on Instagram. By following the steps outlined above, you can easily add multiple links to your Instagram profile and start reaping the benefits of this new feature.

Also Read | Want To Recover Your Instagram Account? Here’s How You Can Do It

Categories
Apps Featured How To

How To Create And Manage Multiple Netflix Profiles: Step-By-Step Guide

Key Highlights

  • Netflix allows you to create multiple profiles within a single account
  • Each profile will have its own personalized recommendations, watchlist, and viewing history
  • You can manage your profiles by changing their names, icons, and parental controls

Netflix allows you to create multiple profiles under a single account so that different users can have their own personalized experiences. This is especially useful if you share your Netflix account with family members or friends, as it allows everyone to have their own viewing history, recommendations, and watchlist. In this article, we will walk you through the steps to create and manage multiple profiles on Netflix. Also Read | Netflix For Fitness Enthusiast: Collaborates With Nike To Stream Workout Videos On Its OTT App

How To Create And Manage Netflix Multiple Profiles?

Step 1: Go to the Netflix website or open the Netflix app on your device and log in using your email and password.

Step 2: Once you are logged in, click on your profile icon in the top right corner of the screen. A dropdown menu will appear, and from there click on “Manage Profiles.”

Step 3: To add a new profile, click on “Add Profile.” You can then enter the name of the person who will be using this profile. You can also select a profile picture or choose to leave it blank. Repeat this step for as many profiles as you need.

Also Read | Netflix Introduces ‘Kids Mystery Box’ Feature To Android Users: All Details

Step 4: Once you have created a new profile, you can customize it to your liking. You can choose to enable or disable the following options: “Autoplay next episode in a series on all devices,” “Include in ‘Continue Watching’ row,” and “Maturity level.”

The maturity level option is particularly important if you have kids or younger viewers who will be using this profile. You can choose from different maturity levels such as Little Kids, Older Kids, Teens, and Adults. Depending on the maturity level you select, certain titles may be restricted.

Step 5: To manage profiles, click on “Manage Profiles” and then click on the profile you want to edit. You can then customize the profile as described in Step 4. You can also choose to delete a profile or change its name or picture.

Step 6: To switch profiles, click on your profile icon in the top right corner of the screen and then click on the profile you want to switch to. The interface will then change to reflect the preferences and viewing history of that particular profile.

Overall, creating and managing multiple profiles on Netflix is a simple process that can greatly enhance your viewing experience. It allows each user to have their own personalized account, making it easier to keep track of individual preferences and viewing history. With these easy steps, you can create and manage profiles on Netflix in no time.

Also Read | Netflix Games: Up To 40 New Game Titles To Be Released In 2023

Categories
Apps Featured How To

Tired Of Getting Lost Or Stuck In Traffic? Here’s How To Use Waze App

Key Highlights

  • Waze provides you with a suggested route to your destination based on real-time traffic data
  • The app also suggests alternate routes if there’s heavy traffic or road closures
  • Waze allows users to report incidents such as accidents, hazards, and police presence in real-time

Waze is a popular navigation app that provides real-time traffic updates and directions to help you reach your destination quickly and easily. With Waze, you can avoid traffic jams, road closures, and accidents, and find the fastest route to your destination. The app uses information from its community of users to provide real-time updates on traffic, accidents, and other incidents. This means that the more people use Waze, the better it becomes at providing accurate and up-to-date information. In this way, Waze is not just a navigation app, but a community-driven tool for smarter and safer driving. Here’s a step-by-step guide to using Waze. Also Read | Find Nearest Grocery Store: Here’s How To Locate Closest Grocery Store Using Google Maps

How To Use Waze?

Step 1: Download and install Waze. This app is available for both iOS and Android devices. Simply go to the App Store or Google Play Store, search for Waze, and download and install it.

Step 2: Once you have downloaded and installed Waze, open the app and create an account by entering your email and setting a password. You can also use your Facebook or Google account to log in.

Step 3: Before you start driving, enter your destination in Waze. You can do this by tapping the magnifying glass icon at the bottom left of the screen and typing in your destination. Waze will then provide you with directions.

Step 4: Once you have set your destination, Waze will provide you with turn-by-turn directions. You can see the route on the map, and Waze will give you audio and visual prompts before each turn.

Also Read | Google Maps Privacy: How To Blur Or Delete House Or Any Other Image In Google Maps Street View

Step 5: Waze relies on its community to provide real-time updates on traffic, accidents, and other incidents. If you see something on the street, for example, an accident or obstruction, you can report it to Waze by tapping the Report button at the bottom right of the screen and selecting the appropriate category.

Step 6: Waze allows you to customize various settings to suit your preferences. You can change the voice prompts, choose your preferred route, and even change the app’s color scheme.

Step 7: Waze has a gamification feature that rewards users for contributing to the community. You can earn points for reporting incidents, driving on new roads, and completing challenges. As you earn more points, you will rank up and unlock new features.

Undoubtedly, Waze is a powerful navigation app that can help you avoid traffic and get to your destination faster. By following these steps, you can make the most of this app and never get lost again.

Also Read | Never Get Lost Again: Four Best Navigation Apps For Travelers

Categories
Apps Featured How To

Want To Recover Your Instagram Account? Here’s How You Can Do It

Key Highlights

  • To recover an Instagram account, try resetting the password, using a phone number or email
  • Users can also contact Instagram support and wait patiently for a response
  • To prevent future issues, keep your password secure and link your phone number and email to your account

Losing access to your Instagram account can be a frustrating experience, especially if you have a large following or use it for business purposes. However, you can take steps to recover your account and regain access to your photos and followers. Also Read | Instagram Privacy: How To Hide Online/ Active Status, Last Seen On Instagram

Here’s How To Recover Your Instagram Account

Step 1: Try to log in using your usual credentials. If you’ve forgotten your password, tap on the “Forgot password?” link on the login page and follow the prompts to reset it. Make sure to use a strong password that you can remember.

Step 2: If you can’t remember your password or username, you can use the “Find Your Account” feature to locate your account. Enter your email address, phone number, or Instagram username associated with your account, and follow the prompts to reset your password.

Step 3: If you still can’t log in, it’s possible that your account has been hacked. In this case, contact Instagram’s help center by tapping “Get help logging in” on the login page, or go directly to the help center at help.instagram.com. Explain the situation and provide as much information as possible to help Instagram verify that you are the account owner.

Step 4: Once you’ve submitted a request to Instagram, you’ll receive an email with instructions on how to regain access to your account. Follow the steps in the email carefully, and provide any additional information requested to prove your identity.

Also Read | Want To View Instagram Story Secretly Without Notifying Contacts Or Followers: Here’s How

Step 5: If your account has been disabled or banned by Instagram for violating its terms of service, you can submit an appeal to have it reinstated. To do this, go to the help center and click on “Report a hacked account or impersonation account” and follow the prompts. You’ll need to prove that you are the account owner and did not violate any of Instagram’s terms of service.

Step 6: Be patient. Instagram’s support team receives a large volume of requests, so it may take some time for them to get back to you. Keep checking your email and be prepared to provide additional information if requested.

In conclusion, recovering your Instagram account is possible if you follow the right steps. Make sure to keep your login credentials safe and secure, and take steps to protect your account from hacking attempts. If you do lose access to your account, don’t panic – follow the steps above and you’ll be back online in no time.

Also Read | Instagram Bio Tips: Best Instagram Captions For Fashion Influencers

Categories
Featured How To TV

How To Set Up Parental Controls On Dish TV: A Step-by-Step Instructions

Key Highlights

  • Dish TV’s parental control options enable parents to monitor and restrict the content their children access
  • They can block specific channels, shows, and movies by ratings, set up viewing time limits, and more
  • Parents can ensure their children are only watching appropriate content with Dish TV’s parental control options

As a parent, it’s important to ensure that your children are watching age-appropriate content on TV. With Dish TV, you can set up parental controls to restrict access to certain channels or programs. Here are step-by-step instructions to set up parental controls on Dish TV:

Also Read | How To Remove Channels From Tata Sky: Tips To Save Extra Bucks

Step 1: Press the Menu button on your Dish TV remote and select “Settings.” Then, choose “Parental Controls” from the menu.

Step 2: You will be prompted to create a 4-digit PIN that will be required to access the Parental Controls menu. Choose a PIN that is easy for you to remember but difficult for your children to guess.

Step 3: Next, choose the lock type that you want to use. You can choose to lock specific channels, movie ratings, or TV ratings. You can also choose to lock programs based on the content rating, such as violence, language, or sexual content.

Step 4: Once you have chosen the lock type, you can set specific locks. For example, if you chose to lock specific channels, you can select the channels that you want to restrict. If you chose to lock movie ratings, you can choose the rating level that you want to restrict.

Also Read | Want To Ditch Your TV Remote? Here’s How To Setup Google Assistant On Smart TVs For Voice Controls

Step 5: After you have set your locks, be sure to save your settings. You may also want to test your settings by trying to access a locked channel or program to ensure that the parental controls are working properly.

Step 6: If you find that your parental control settings are too restrictive or not restrictive enough, you can always adjust them. Simply access the Parental Controls menu and make any necessary changes.

Setting up parental controls on Dish TV is an easy and effective way to ensure that your children are only watching age-appropriate content. By following these simple steps, you can set up your parental controls in no time and have peace of mind knowing that your children are safe while watching TV.

Also Read | Want To Reset Your Dish TV HD Set Top Box? Here’s How To Do It